By
By 
Integrating AI tools into your product photography workflow takes about two to four hours to set up properly, but once configured, these tools can cut your post-processing time by 60 to 80 percent while delivering consistently professional results. You’ll need your existing camera setup, a handful of well-chosen AI platforms for background removal and enhancement, and a clear understanding of where automation helps versus where your creative eye still matters most.
The promise of AI in product photography isn’t just speed. It’s about reclaiming the hours you’d normally spend on repetitive edits, cutting out backgrounds, adjusting lighting inconsistencies, or creating dozens of variations for A/B testing. For e-commerce sellers juggling hundreds of SKUs, that efficiency translates directly into faster time-to-market. For photographers managing client projects, it means more billable creative work and less time hunched over sliders in Lightroom.
But integration isn’t plug-and-play. You’ll face decisions about which tasks to automate, how to maintain brand consistency across AI-generated outputs, and when the tool’s interpretation needs your manual override. The photographers and e-commerce pros getting the best results in 2026 aren’t using AI as a replacement. They’re using it as a highly capable assistant that handles the grunt work while they focus on composition, styling, and the creative choices that actually differentiate their product imagery from the competition.
This guide gives you a practical roadmap from initial setup through quality verification, with real troubleshooting advice for the friction points most people hit during their first month of implementation.
What You’ll Need to Get Started
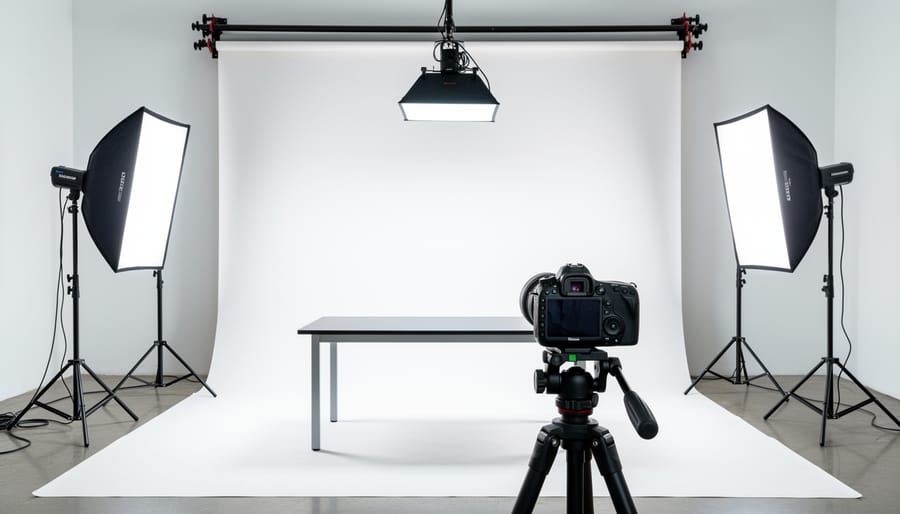
Before integrating AI into your product photography workflow, you’ll need a solid foundation of both traditional photography equipment and modern software tools. The good news is that you can start with equipment you likely already own, successful AI integration doesn’t require a complete overhaul of your setup.
Your existing photography gear forms the backbone of this process. You’ll need a camera capable of shooting in RAW format (most DSLRs and mirrorless cameras from the past decade qualify), a tripod for consistency across product shots, and basic lighting equipment. Quality source images are crucial because AI tools enhance what you capture, they don’t fix fundamentally poor photography. Consider upgrading essential camera accessories if your current setup struggles with sharp, well-lit product images.
On the software side, you’ll need both an AI product photography tool and your existing editing software. Popular AI options in 2026 include dedicated product photography platforms as well as AI-powered plugins for Photoshop and Lightroom. Most operate on subscription models ranging from $30 to $200 monthly depending on processing volume. For initial testing, many providers offer free trials with limited monthly processing credits.
Here’s a practical checklist of what you should have ready before starting:
- Camera capable of RAW format capture with minimum 16-megapixel resolution
- Tripod or copy stand for consistent product positioning
- Basic lighting setup (minimum two light sources or one softbox)
- Computer with at least 16GB RAM for handling large image files
- Current photo editing software (Lightroom, Photoshop, or similar)
- Cloud storage or external drive with minimum 500GB free space
- Active subscription to at least one AI product photography platform
- Stable internet connection for uploading and processing images
Your computer’s processing power matters more than you might expect. While the AI processing happens in the cloud for most tools, you’ll still handle large RAW files locally, create backups, and manage your image library. A machine that struggles with your current editing workflow will become a bottleneck when you add AI processing to the mix.
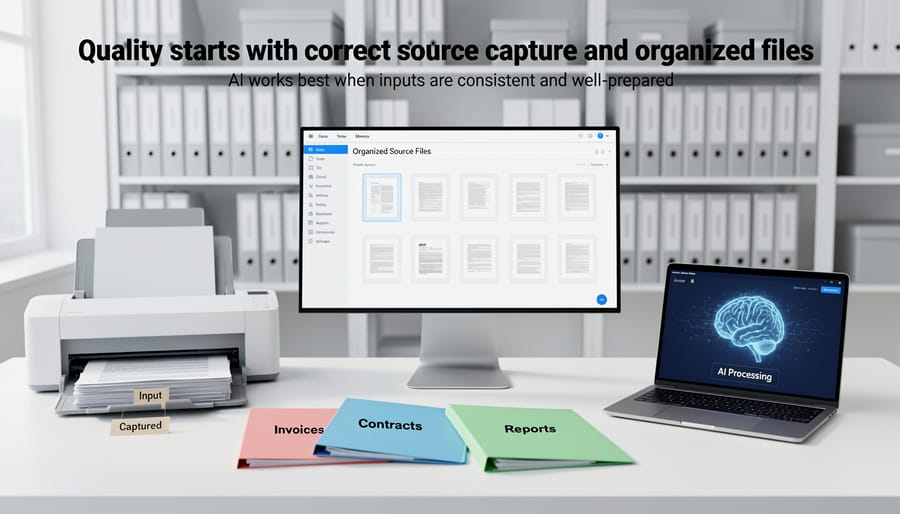
File organization becomes critical with AI integration. Establish a clear folder structure now, separate folders for RAW originals, AI-processed outputs, and final edited versions. This prevents confusion when you’re processing dozens or hundreds of products and need to track which images have been through which stages of your workflow.
Understanding AI Product Photography Tools in 2026
Key Capabilities to Look For
When evaluating AI product photography tools, prioritize features that directly solve real workflow bottlenecks rather than chasing the longest feature list. Understanding what is AI photography fundamentally capable of helps you separate genuinely useful capabilities from marketing hype.
Automated background removal is the most immediately valuable feature for product photographers. Look for tools that can cleanly extract products with complex edges, think jewelry chains, glass bottles, or fabric textures, without leaving halos or ragged cutouts. The best tools let you quickly refine edges rather than starting over manually.
Intelligent lighting correction matters more than you might expect. Quality AI tools can match lighting direction and intensity across products photographed on different days, maintaining visual consistency in your catalog. This capability saves hours when you’re adding new items to existing product lines.
Batch processing separates professional-grade tools from consumer apps. You need the ability to apply consistent settings across hundreds of images while preserving individual product variations. Look for tools that remember your preferences and let you process entire folders with a few clicks.
Shadow generation and perspective adjustment round out essential capabilities. Realistic shadow placement gives products visual weight on white backgrounds, while perspective correction fixes minor angle inconsistencies without re-shooting. These features transform good product shots into polished, professional images that drive conversions.
How AI Tools Differ from Traditional Editing
Traditional editing requires you to manually select objects, paint masks, adjust curves, and fine-tune every detail, skills that take years to master. AI tools handle these tasks through pattern recognition: you click once, and the software automatically identifies the product, removes the background, and balances the lighting based on thousands of similar images it’s analyzed.
The practical difference shows up in speed and consistency. Where you might spend five minutes selecting a complex product with intricate edges, AI completes the same selection in seconds. Background removal that once required careful layer work happens instantly. Shadow generation that demanded understanding light physics gets automated based on the product’s shape and your specified light direction.
However, AI tools work within boundaries. They excel at repetitive tasks, processing 500 product images with consistent backgrounds, but struggle with creative decisions. You still need to capture the original photo properly: correct exposure, sharp focus, and appropriate composition. AI can’t fix a poorly lit source image or add detail that wasn’t captured. Understanding AI photo editing basics helps clarify these limitations.
Think of AI as an accelerated assistant for technical tasks, not a replacement for photography judgment. You determine the creative direction and quality standards; AI executes the repetitive work faster. The photographer who understands lighting, composition, and product presentation will get dramatically better AI results than someone expecting the software to compensate for poor capture technique.
Important Considerations Before You Begin
Before you integrate AI tools into your product photography workflow, you need to understand their limitations and where they might hurt rather than help your business. AI tools can transform product shots efficiently, but they work best as part of a thoughtful strategy, not as a replacement for proper photography.
Resolution and quality limitations matter more than most photographers initially realize. Many AI tools compress images during processing or struggle with fine details like fabric texture, jewelry facets, or product text. If your e-commerce platform requires specific dimensions or your print catalog needs high-resolution files, test whether your chosen tool maintains the necessary quality standards before committing to a full workflow change.
Legal considerations deserve serious attention. AI-generated backgrounds, props, or composite elements might create intellectual property questions, especially if you’re producing images for clients who need full commercial rights. Some AI tools train on copyrighted images, which could expose you or your clients to legal risk. Read the terms of service carefully and understand what rights you’re granting and receiving.
Know when NOT to use AI tools. High-end luxury products often require the imperfections and subtle variations that prove authenticity. Fashion and beauty photography depends on specific styling choices that AI cannot replicate reliably. Food photography needs the appetizing imperfections of real preparation. Client contracts sometimes explicitly require original, unaltered photography. If your work involves any of these scenarios, AI tools might violate industry standards or client expectations. When authenticity, tactile quality, or brand positioning matters more than efficiency, stick with traditional methods.
Step-by-Step Integration Process
Step 1: Assess Your Current Workflow
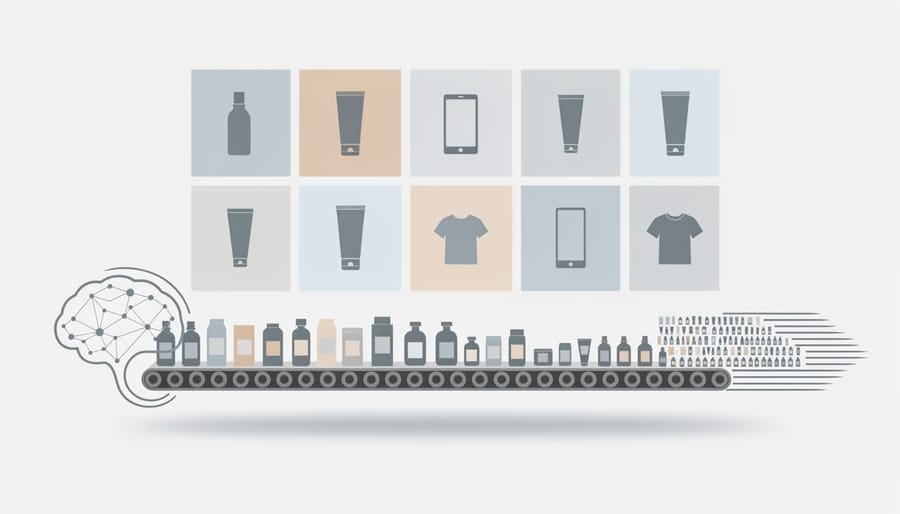
Start by mapping out every step of your current product photography process, from initial setup to final delivery. Grab a notebook or open a spreadsheet and track yourself through a typical shoot. Note how long you spend on each task: setting up lighting, capturing images, transferring files, culling bad shots, editing backgrounds, adjusting exposure, retouching, and exporting for different platforms.
Pay special attention to repetitive tasks that eat up hours. If you’re manually removing backgrounds from 50 products, that’s a prime candidate for AI automation. Same goes for consistent lighting adjustments across similar items or resizing images for multiple channels.
Be honest about what takes the most time versus what requires your creative judgment. You’ll likely find that 60-70% of your post-shoot work is repetitive processing, while maybe 20% demands your artistic eye. That repetitive portion is where AI tools shine.
Document everything for at least three typical shoots before making changes. You need accurate baseline data to measure improvement later. Include notes about pain points: where you get stuck, what feels tedious, and which tasks you’d gladly hand off to automation.
Step 2: Choose and Set Up Your AI Tool
Choose the AI tool that matches your product photography volume and complexity. If you’re processing 20-50 images weekly, a mid-tier subscription service like Clipping Magic or will handle your needs without overwhelming you with enterprise features. For higher volumes, hundreds of products monthly, look at tools like Pixelcut or PhotoRoom that offer batch processing and API access.
Start with your most time-consuming task. Background removal typically eats up the most editing hours, so prioritize tools with strong automated masking. If you’re shooting jewelry or reflective products, seek out AI engines trained specifically on challenging surfaces and transparent materials.
Create your account and immediately configure your workspace settings. Upload three sample images from different product categories you shoot regularly, this reveals how the tool handles your specific lighting conditions and product types before you commit to a paid plan. Most platforms offer 10-20 free credits for exactly this purpose.
Connect the tool to your existing software during setup, not later. If you edit in Lightroom or Photoshop, install available plugins now. For e-commerce workflows, link your Shopify or WooCommerce account through the integrations tab so processed images flow directly where they’re needed.
Set your default output preferences: resolution (match your e-commerce platform requirements, typically 2000-3000 pixels on the longest side), file format (PNG for transparent backgrounds, JPEG for white), and color profile (sRGB for web). Save these as your baseline template.
Step 3: Prepare Your Images for AI Processing
Start with properly lit, sharp images, AI tools enhance what’s there, they can’t create good detail from a poor source. Shoot at your camera’s native ISO in well-controlled lighting to minimize noise and maximize detail capture. Save files in RAW format when possible, or at minimum, high-quality JPEGs (90%+ compression). This gives AI algorithms the most information to work with during processing.
Resolution matters more than you might think. Aim for at least 3000 pixels on the longest edge for product images, even if your final output is smaller, AI tools work best with abundant pixel data. Resist the urge to crop tightly before AI processing; you can always crop afterward, but you can’t add back cut-off edges if the AI needs surrounding context for intelligent background removal.
Establish a consistent file naming system before you begin batch processing. Use descriptive, sequential names like “SKU-ProductName-001.jpg” rather than camera-generated filenames. Most AI tools process files alphabetically, so logical naming prevents having to manually reorder processed images later. This becomes critical when you’re handling dozens or hundreds of products.
Organize images into clearly labeled folders by product category, shoot date, or processing status. Create separate folders for “Ready to Process,” “In Progress,” and “Completed” to track your AI enhancement workflow. This structure prevents accidentally reprocessing the same images and helps you quickly locate files when issues arise.
Step 4: Run Your First Test Batch
Start with 5-10 similar products for your first test run. This small batch lets you spot patterns and problems without wasting time or credits on hundreds of images.
Begin with your AI tool’s default or “recommended” settings. Most platforms offer preset configurations for product photography that balance quality and processing speed. Upload your prepared images and let the tool process them completely before making any adjustments.
Download the processed images to a separate folder, then compare them side-by-side with your originals at 100% zoom. Check three critical areas: edge quality around the product (especially fine details like fabric textures or transparent materials), color accuracy (particularly in whites, metallics, and skin tones), and shadow consistency.
You’ll likely encounter a few common issues. If backgrounds aren’t cleanly removed, it usually means your source images lack sufficient contrast between product and background. Unnatural-looking shadows often indicate the AI is guessing lighting direction, you may need to adjust the light angle parameter or provide reference images. Color shifts typically happen when the AI misinterprets white balance; lock your color profile settings before reprocessing.
Take notes on what works and what doesn’t. Screenshot problematic results with annotations. This documentation becomes invaluable when you’re tweaking settings in the next step. If more than half your batch needs significant corrections, stop and revisit your image preparation process before moving forward.
Step 5: Refine Settings and Create Templates
After running your test batch, you’ve identified what works and what needs adjustment. Now it’s time to turn those insights into repeatable processes.
Start by documenting what settings produced your best results. Most AI tools let you save these as presets or templates. Create separate templates for distinct product categories, jewelry needs different shadow density than furniture, and clothing requires different edge detection sensitivity than electronics.
For each template, note the specific parameters: background removal tolerance, shadow opacity, highlight recovery strength, and color temperature adjustments. Name them descriptively (like “Jewelry_White_Background” or “Apparel_Lifestyle_Edit”) so you’ll instantly know which to use.
Build quality control checkpoints into each template. Set your AI tool to flag images that fall outside acceptable parameters, unusual color shifts, incomplete background removal, or resolution drops below your minimum threshold. Many tools offer confidence scores or quality metrics that help you quickly identify which processed images need manual review.
Test each template with at least ten varied products from that category before trusting it for bulk processing. Adjust settings incrementally, changing shadow intensity by 5% rather than 20%, and document what each adjustment accomplishes. This systematic approach saves you from repeatedly troubleshooting the same issues across different product batches.
Step 6: Integrate with Your Existing Tools
With your settings refined and templates ready, it’s time to connect your AI tool to the software you already use daily. Most modern AI product photography tools offer multiple integration options, and the right choice depends on your existing setup.
For photographers using Adobe Lightroom or Capture One, look for native plugins that let you send images directly to the AI tool without leaving your editing environment. These plugins typically appear in your export menu, adding an AI processing step before final delivery. Shopify, WooCommerce, and similar platforms often feature official app integrations that automatically process uploaded product images, ideal if you’re managing an e-commerce store.
If you’re working with a digital asset management system like Dropbox, Google Drive, or dedicated DAM software, many AI tools support folder-watching functionality. Drop your raw images into a designated folder, and the system processes them automatically, saving results to your output folder. This hands-off approach works brilliantly for workflow automation when you’re handling high volumes.
For advanced users, API connections offer maximum flexibility. You can build custom scripts that trigger processing based on specific conditions, perhaps automatically processing new product photos at 2 AM when your team isn’t working. Most AI tools provide API documentation and example code to get you started, though this route requires basic programming knowledge or developer support.
Testing Your Results and Quality Control
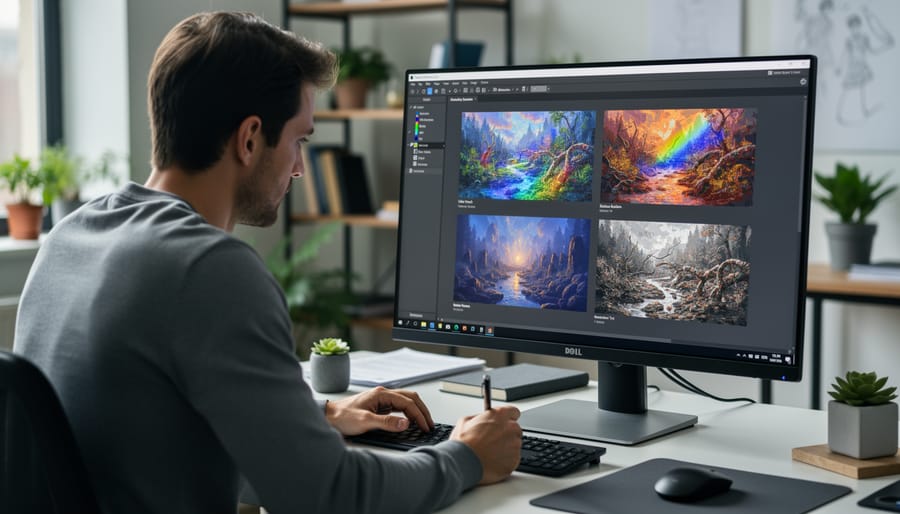
Quality control separates professional product photography from amateur work, and AI processing doesn’t change that standard. After integrating AI tools into your workflow, you need systematic verification methods to ensure every image meets your established benchmarks before it reaches clients or goes live on product pages.
Start with a side-by-side comparison. Pull up your original edited images alongside AI-processed versions at 100% zoom. Check edges first, AI tools sometimes create soft halos around products or lose fine detail in intricate areas like jewelry clasps or fabric textures. Look at reflective surfaces and transparent materials closely. These areas often reveal processing artifacts that aren’t visible at thumbnail size but become obvious on product pages.
Color accuracy requires particular attention. Open both versions in your editing software and check the histogram. AI adjustments can shift color temperature subtly, which matters enormously for products where exact color matching drives purchase decisions (think paint samples, clothing, or cosmetics). Compare skin tones if your products involve models, and verify that whites remain neutral rather than drifting warm or cool.
Before finalizing your integration approach, run through these critical verification points:
- Resolution matches your output requirements (minimum 2000px on the longest edge for most e-commerce platforms)
- File format and color space align with platform specifications (typically sRGB for web)
- Background removal is clean with no fringing or transparency issues
- Shadow generation looks natural and matches your brand’s photography style
- Consistent lighting and exposure across an entire product line or catalog section
- Sharpness is preserved in product details without over-sharpening artifacts
Test your images in their actual context. Upload processed photos to your staging site or mockup them in catalog layouts. What looks perfect in Photoshop might reveal problems when sized for a grid view or mobile display. Check load times too, sometimes AI tools output unnecessarily large files that need compression.
Create a feedback loop with your team or clients early in the integration process. Show them comparison sets and gather specific input on whether the AI-processed results match expectations. This catches style mismatches before you’ve processed hundreds of products. If clients consistently request the same manual adjustments after AI processing, that signals you need to refine your tool settings or templates rather than treating corrections as one-off fixes.
Common Integration Challenges and Solutions
Even after careful planning and testing, you’ll likely encounter some bumps when integrating AI tools into your established workflow. The good news is that most challenges follow predictable patterns with straightforward solutions.
Inconsistent Output Quality Across Different Product Types
If your AI tool produces stellar results on jewelry but struggles with fabric textures, you’re dealing with one of the most common integration issues. AI models often train heavily on certain product categories, creating performance gaps.
The solution isn’t to abandon the tool entirely. Instead, create separate processing templates for different product materials. Hard goods like electronics and glassware typically need different parameter settings than soft goods like clothing or plush items. Test each product category individually and save those settings as named presets. Many photographers find success running problematic products through AI processing at lower intensity levels, then finishing with targeted manual adjustments for texture details.
Workflow Bottlenecks and Processing Delays
You might discover that batch processing 500 product images overnight seemed like a time-saver until you realize the morning review and corrections now take three hours. This happens when AI processing creates a review bottleneck rather than eliminating manual work.
Build quality checkpoints into the automated process rather than reviewing everything at the end. Set your AI tool to process smaller batches of 50-100 images, then review those before moving forward. This catches systematic issues early. If your tool offers confidence scoring, use it to flag uncertain results for immediate review while auto-approving high-confidence outputs.
File Organization Chaos
Integrating new tools often means juggling multiple file versions: originals, AI-processed outputs, manually corrected versions, and final exports. Without a clear system, you’ll waste time hunting for the right file.
Establish a strict naming convention before processing your first image. A simple structure like “ProductID_Original.jpg”, “ProductID_AI.jpg”, and “ProductID_Final.jpg” prevents confusion. Create separate folders for each processing stage, and never overwrite your originals. Consider using digital asset management software that tracks version history automatically if you’re processing high volumes.
Loss of Creative Control and Style Consistency
Perhaps the trickiest challenge is maintaining your photographic style when AI tools apply their own interpretation. Your carefully crafted lighting might get “corrected” into something technically perfect but visually generic.
How do I prevent AI tools from over-processing my intentional creative choices?
Start with the lowest intensity settings and gradually increase them while comparing against your original vision. Most tools offer strength or intensity sliders that let you blend AI enhancements with your original work. Save these conservative settings as your default template.
What should I do when AI processing introduces artifacts or unnatural elements?
First, check your input image resolution, AI tools struggle with images below their optimal input size. If the source quality is good, reduce the processing strength or disable specific features like aggressive noise reduction that often cause artifacts.
Can I use AI tools for only part of my workflow instead of full automation?
Absolutely, and this often works best. Many photographers use AI exclusively for time-consuming tasks like background removal while handling color grading and final touches manually. Selective integration lets you keep creative control where it matters most.
The key to overcoming these challenges is treating AI tools as assistants rather than replacements. When something doesn’t work as expected, scale back the automation and identify exactly which step is causing problems. Most integration issues resolve once you’ve fine-tuned settings for your specific products and established clear quality thresholds for when human review is necessary.
Integrating AI tools into your product photography workflow isn’t about replacing your skills, it’s about reclaiming time for the creative work that matters. The photographers seeing the best results are those who use AI to handle repetitive tasks like background removal and batch adjustments, then apply their expertise where it counts: styling, composition, and capturing images that genuinely connect with customers.
Start with one small part of your workflow. Maybe it’s automating background removal for your next ten products, or testing AI lighting corrections on a single category. Run those tests, evaluate the results honestly, and refine your approach before scaling up. This gradual integration lets you maintain quality standards while discovering which tasks benefit most from automation.
Your photography fundamentals, understanding light, composition, and your products, remain essential. AI tools work best when you feed them well-captured source images and guide them with informed decisions. Think of these tools as skilled assistants that execute your vision faster, not as replacements for the vision itself.
The workflow you build today will evolve as both your needs and AI capabilities grow. Stay flexible, keep learning, and focus on what these tools were designed to do: free you up to shoot better images and serve your clients more effectively.



 By
By