Transform harsh environmental conditions into stunning photographic opportunities by mastering extreme weather photography techniques. Scout locations during different weather conditions to identify unique compositional elements that emerge only in challenging environments. Pack specialized protective gear – from waterproof camera covers to silica gel packets – ensuring your equipment survives while you capture nature’s most dramatic moments. Document environmental changes through systematic repeat photography at precise locations, revealing compelling visual stories about climate change, urban development, or seasonal transitions. Create powerful environmental narratives by combining wide-angle landscape shots with intimate macro details of weather’s impact on flora and fauna. Environmental photography demands technical precision, creative vision, and careful preparation – but rewards photographers with uniquely powerful images that document our changing world.
Essential Gear Protection Strategies
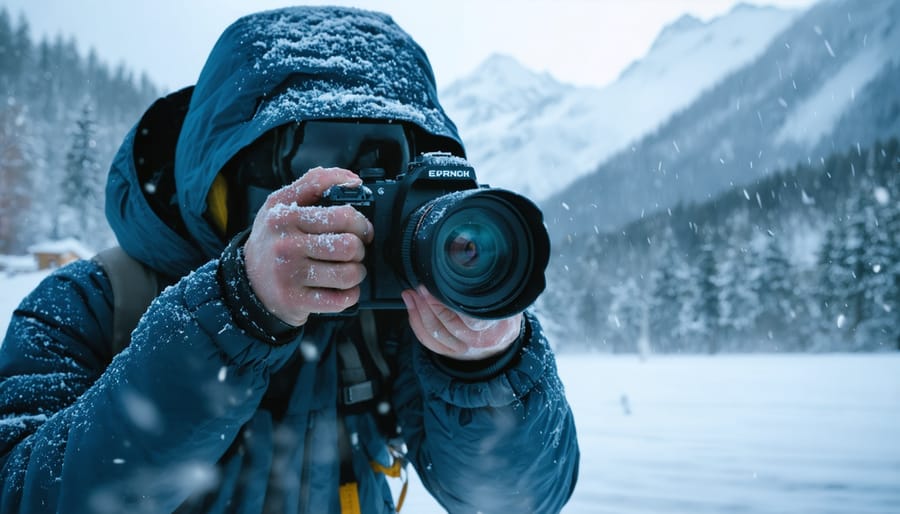
Cold Weather Safeguards
Shooting in sub-zero conditions requires careful preparation to protect both you and your gear. Start by keeping spare batteries close to your body, as cold temperatures dramatically reduce battery life. Use silica gel packets in your camera bag to combat condensation, and always carry your gear in an insulated camera bag.
When transitioning between temperatures, seal your equipment in airtight plastic bags before entering warm spaces. This prevents moisture from forming on cold surfaces as they warm up. Consider using hand warmers near (but not directly on) your camera body to maintain optimal operating temperature.
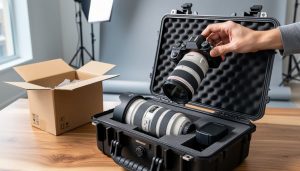
For extended shoots, invest in weather-sealed gear and neoprene lens covers. A rain cover modified for snow can provide additional protection against moisture and wind. Keep lens changes minimal and quick to prevent internal condensation, and use a microfiber cloth to wipe away any snow or ice immediately.
Remember to protect your LCD screen, as it can become sluggish or unresponsive in extreme cold. Using a clear protective cover can help maintain functionality while keeping your screen safe from moisture damage.
Desert and Heat Protection
Desert photography can be incredibly rewarding, but it demands extra care to protect your gear from sand and intense heat. Always carry your equipment in a sealed camera bag, and consider using a clear UV filter to protect your lens from sand scratches. Silica gel packets in your bag help absorb moisture and prevent condensation when temperatures fluctuate.
During shoots, keep your camera in the shade whenever possible, and avoid changing lenses in windy conditions. A weather-sealed camera offers additional protection, but it’s wise to use a protective cover regardless. Consider scheduling your shoots during golden hour to avoid the harshest midday heat while capturing more dramatic lighting.
Heat can drain batteries quickly and potentially damage electronic components. Store spare batteries in an insulated pouch, and never leave equipment in a parked car where temperatures can soar. If your camera feels hot to the touch, give it time to cool down in a temperature-controlled environment.
For longer desert expeditions, pack microfiber cloths for gentle cleaning and bring twice the memory cards you think you’ll need – sand can make card changes more challenging in the field.
Moisture and Humidity Defense
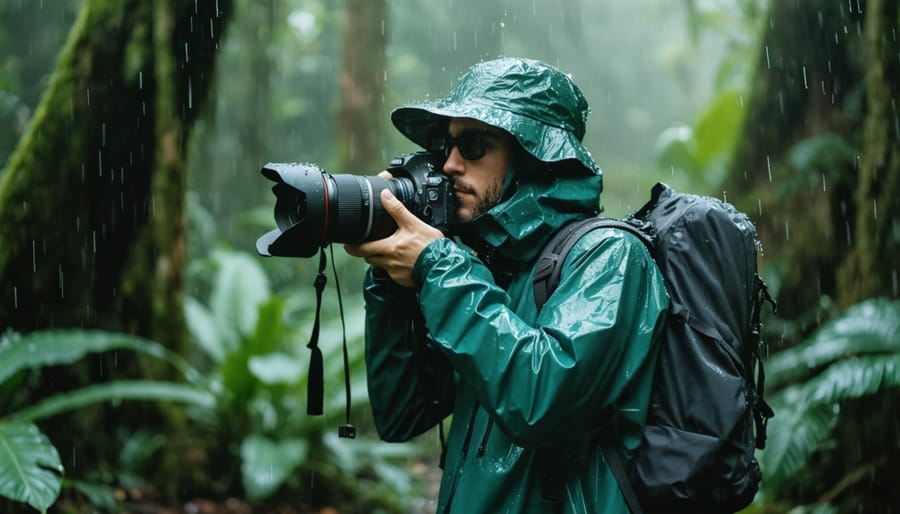
Moisture and humidity pose significant challenges for photographers, but with proper preparation, you can capture stunning images while protecting your gear. Always carry silica gel packets in your camera bag and store them with your equipment when not in use. A weather-sealed camera offers the best protection, but if you’re using non-weather-sealed gear, consider investing in a quality rain cover or underwater housing.
When shooting in humid conditions, allow your equipment to acclimate gradually to prevent condensation. Keep your camera in a sealed plastic bag when moving from air-conditioned spaces to humid environments, letting it adjust slowly to the temperature change. Consider using a lens hood to protect against water droplets, and always carry microfiber cloths to wipe away moisture quickly.
For extended shoots in wet conditions, portable dehumidifiers or dry boxes can protect your gear during breaks. Remember to check weather forecasts and plan accordingly – sometimes the most dramatic shots come just before or after rain, when you can capture atmospheric mist and dramatic clouds safely.
Capturing Arctic and Antarctic Scenes

Working with Snow and Ice
Capturing pristine winter landscapes requires a solid understanding of exposure in challenging conditions, particularly when dealing with snow’s highly reflective nature. Your camera’s meter typically underexposes snow scenes, rendering that pristine white as a muddy gray. To counter this, try overexposing by 1 to 2 stops from what your meter suggests – this helps maintain the snow’s natural brightness while preserving detail.
White balance becomes crucial in snow photography, as the ambient light can cast subtle blue tints across your scene. While Auto White Balance often performs admirably, consider using the “Cloudy” or “Shade” presets to add warmth to your images. For the most accurate results, take a test shot with a gray card in the frame, then use this as a custom white balance reference.
Morning and evening golden hours work wonderfully with snow scenes, creating opportunities for dramatic shadows and warm highlights across untouched surfaces. Look for compositional elements like isolated trees, animal tracks, or ice formations to add visual interest. When photographing falling snow, use faster shutter speeds (1/250 or higher) to freeze individual snowflakes, or slower speeds to create ethereal streaking effects.
Remember to protect your gear from moisture and sudden temperature changes. Allow your equipment to acclimate gradually when moving between warm and cold environments to prevent condensation from forming on your lens and internal components.
Wildlife Photography in the Cold
Capturing wildlife in cold environments presents unique challenges that require specific wildlife photography techniques and careful preparation. When photographing polar bears, arctic foxes, or other cold-climate species, timing is crucial. Dawn and dusk often provide the best lighting conditions, with the low sun creating dramatic shadows and warm tones against the snow.
Keep your camera warm by storing it inside your jacket between shots, and carry spare batteries close to your body – cold temperatures can drain them quickly. Use a lens hood to prevent snowfall from landing directly on your lens, and pack silica gel packets to combat condensation when moving between temperature extremes.
For sharp images in snowy conditions, slightly overexpose your shots by +1 to +1.5 stops to prevent the snow from appearing gray. Switch to manual focus when possible, as autofocus can struggle with uniformly white backgrounds. Consider using burst mode to capture fleeting moments of animal behavior, particularly during hunting or social interactions.
Remember to maintain a safe distance from wildlife – use longer focal lengths (400mm or greater) to get close-up shots without disturbing the animals. Pack your gear in weatherproof bags and use hand warmers near your camera body to prevent freezing. Most importantly, dress in layers and protect yourself first – great shots aren’t worth risking your safety in extreme conditions.
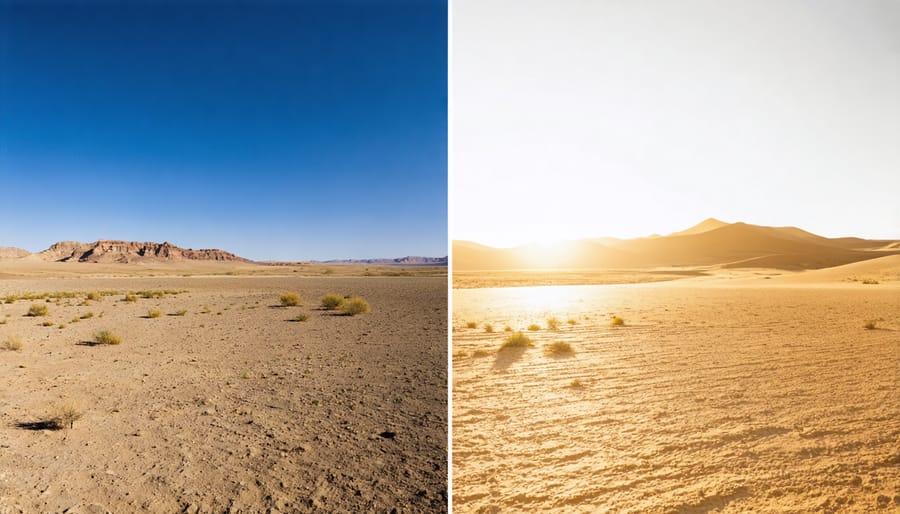
Desert Photography Mastery
Managing Harsh Light
Bright sunlight can be both a blessing and a challenge for environmental photographers. Successfully managing harsh lighting conditions requires a combination of technical knowledge and creative problem-solving.
Start by timing your shoots strategically. The golden hours (just after sunrise and before sunset) offer naturally softer light, but when you must shoot during bright daylight, there are several effective techniques to try. Use a polarizing filter to reduce glare and enhance color saturation, particularly useful when photographing water or foliage. A neutral density filter can help you maintain control over exposure in extremely bright conditions.
Position yourself to use natural shade whenever possible. Large trees, buildings, or rock formations can create perfect pockets of diffused light. When working in open areas, consider using a diffusion panel or a collapsible reflector to soften harsh shadows. These tools are lightweight and can make a dramatic difference in your final images.
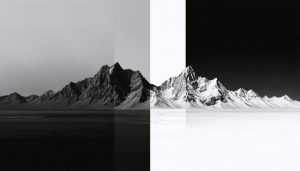
For close-up nature shots, create your own shade using a small portable umbrella or even your body’s shadow. This technique works particularly well for macro photography of flowers or small wildlife. In situations where you can’t avoid harsh light, try converting your images to black and white – strong contrast can actually enhance the drama and impact of monochrome photographs.
Remember to protect your gear and yourself from intense sun exposure. Use a lens hood to prevent unwanted flare, and keep your equipment cool between shots.
Sand and Wind Challenges
Shooting in sandy, windy environments presents unique challenges that can test both photographer and equipment alike. The key to success lies in preparation and technique. Always carry your gear in a weather-sealed camera bag, and keep a supply of microfiber cloths handy for quick cleaning during shoots.
When working in these conditions, position yourself with the wind at your back whenever possible to minimize sand hitting your lens. A UV filter adds an extra layer of protection for your expensive glass, and it’s much cheaper to replace if it gets scratched. Consider using a lens hood not just for controlling flare, but also as a physical barrier against windblown sand.
To protect your camera during lens changes, turn your back to the wind and use your body as a shield. Work quickly but carefully – rushing often leads to mistakes. Keep spare memory cards and batteries in sealed plastic bags, and consider using a rain cover or specialized desert photography sleeve for additional protection.
For sharper images in windy conditions, increase your shutter speed to at least 1/250th of a second, and use image stabilization if your equipment has it. Lower angles often work better, as they reduce your exposure to wind and can create more dramatic compositions with sand patterns in the foreground.
Remember to clean your gear thoroughly after each session. Use a rocket blower first to remove loose sand before wiping, as rubbing sand particles can scratch your equipment.
Rainforest and Tropical Environment Techniques
Working with Limited Light
Working in dense forest canopy presents unique challenges, but with the right techniques, you can capture stunning images even in limited light conditions. The key is understanding how to work with what nature provides while maximizing your camera’s capabilities.
Start by stabilizing your camera. A sturdy tripod is essential when shooting in low light, as you’ll often need slower shutter speeds to capture enough detail. Consider using a remote shutter release to minimize camera shake further.
Understanding your camera’s ISO capabilities becomes crucial in these conditions. While higher ISO settings can help brighten your shots, be mindful of the noise they introduce. Modern cameras handle high ISO better than ever, but finding the sweet spot between brightness and acceptable noise levels is essential.
Take advantage of natural light shafts penetrating the canopy. These beams create dramatic effects and can serve as natural spotlights for your subjects. Position yourself to capture these light rays early morning or late afternoon when they’re most visible through the trees.
Consider using reflectors to bounce available light onto your subject. A small, collapsible reflector can make a significant difference in filling shadows without looking artificial. For close-up shots, a ring light or small LED panel can provide just enough fill light while maintaining the natural ambiance.
When composing your shots, look for areas where the canopy creates natural frames or where gaps in the foliage allow more light through. These spots often make perfect natural studios for wildlife or macro photography.
Dealing with High Humidity
High humidity can be a photographer’s nemesis, threatening both your equipment and image quality. To protect your gear, always carry silica gel packets in your camera bag and store equipment in airtight containers when not in use. Consider investing in a quality dry cabinet for long-term storage, especially if you live in a tropical climate.
Before heading out to shoot in humid conditions, acclimate your equipment gradually to prevent condensation. Take your gear out of air-conditioned spaces at least 30 minutes before shooting. A simple trick is to place your camera and lenses in a sealed plastic bag while they adjust to the outside temperature.
When shooting, keep a microfiber cloth handy to wipe away moisture from your lens and viewfinder. Anti-fog solutions designed for camera equipment can be helpful, but test them on a filter first rather than directly on your lens. Consider using a lens hood not just for light control, but also to shield your glass from water droplets.
For particularly challenging conditions, weather-sealed cameras and lenses are worth the investment. If you’re working with non-weather-sealed equipment, a rain cover or plastic bag with a hole cut for the lens can provide adequate protection. Remember to check your equipment thoroughly after each shoot and dry everything completely before storing it away.
Combat hazy images by using a polarizing filter to cut through atmospheric moisture and enhance contrast. In extreme cases, shoot during the early morning or late afternoon when humidity levels are typically lower.
High-Altitude Photography
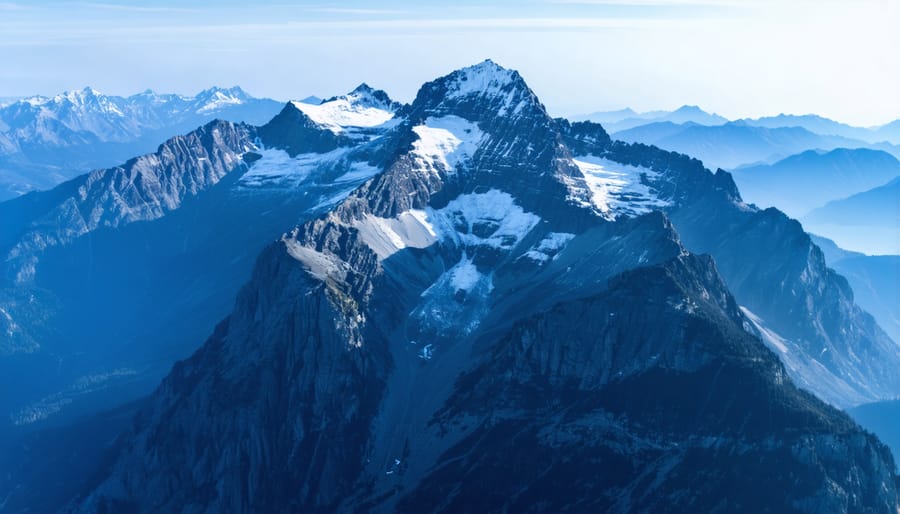
Mountain Photography Techniques
Mountain photography presents unique challenges and rewards, offering opportunities to capture nature’s grandeur at its finest. The key to successful mountain photography lies in understanding both the technical aspects and safety considerations of shooting in elevated terrain.
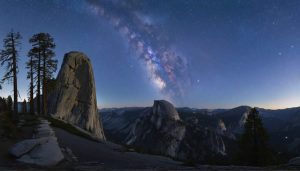
Timing is crucial when photographing mountains. The golden hours – just after sunrise and before sunset – create dramatic lighting conditions that emphasize the rugged textures and sweeping lines of mountain landscapes. During these periods, the low-angle light casts long shadows and bathes the peaks in warm, golden tones.
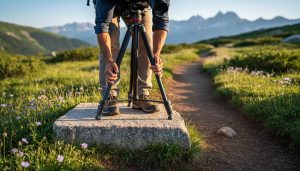
For sharp mountain images, always use a sturdy tripod to combat high-altitude winds and maintain stability during longer exposures. Consider using a circular polarizing filter to manage glare and enhance the deep blues of the sky while bringing out detail in clouds. When composing your shot, look for natural leading lines like ridges or streams to guide the viewer’s eye through the frame.
Weather plays a vital role in mountain photography. While clear days offer crisp views, some atmospheric conditions can create compelling images. Partial cloud cover can add drama, while early morning mist can create ethereal effects. However, always check weather forecasts and bring appropriate gear to protect both yourself and your equipment.
For the best results, scout locations in advance and plan your compositions. Include foreground elements like alpine flowers or rock formations to add depth and scale to your images. Remember to pack essential safety gear, including proper clothing, navigation tools, and emergency supplies. Never compromise safety for a shot – mountains demand respect, and the best photographs come when you’re properly prepared and positioned.
Aerial Photography Tips
Aerial photography offers a unique perspective on environmental subjects, revealing patterns, textures, and relationships that remain hidden from ground level. Whether you’re shooting from a helicopter, small aircraft, or using modern drone technology, mastering aerial techniques requires specific skills and considerations.
For traditional aerial photography from aircraft, stability is crucial. Use fast shutter speeds (1/1000 sec or faster) to combat vibration and movement. When possible, request that your pilot flies in a circular pattern around your subject, allowing you to capture multiple angles while maintaining a consistent distance and height. Early morning or late afternoon flights often provide the best lighting conditions, with long shadows emphasizing landscape features.
For those interested in drone photography tips, modern UAVs offer unprecedented creative control. Start by mastering your drone’s manual settings and understanding local aviation regulations. The “rule of thirds” becomes particularly powerful from above – use it to compose shots that highlight environmental patterns or contrasts.
Weather conditions significantly impact aerial shoots. Clear days offer better visibility, but some haze can add atmosphere to landscape shots. Wind is your biggest challenge, especially with drones – aim to shoot when wind speeds are below 15mph for optimal control.
Consider your altitude carefully. Lower heights (200-400 feet) work well for detailed environmental studies, while higher altitudes (400-1000 feet) reveal broader patterns and relationships. Remember that different perspectives can tell different stories – experiment with various angles to find the most compelling narrative for your environmental subject.
Environmental photography offers endless opportunities to capture the beauty, challenges, and stories of our natural world. Throughout this guide, we’ve explored various techniques and approaches to help you create compelling environmental images while protecting both yourself and your equipment.
Remember that successful environmental photography requires a delicate balance of technical skill, creative vision, and respect for nature. Whether you’re documenting climate change, capturing wildlife in their natural habitats, or showcasing the raw power of extreme weather, always prioritize safety and environmental preservation.
Don’t be afraid to push your creative boundaries, but do so thoughtfully and responsibly. Start with familiar environments and gradually work your way up to more challenging conditions as your skills and confidence grow. Invest in appropriate protective gear for your equipment, and never compromise your safety for a shot.
Most importantly, let your environmental photography tell meaningful stories. Your images can raise awareness about conservation issues, celebrate the beauty of our planet, or document important environmental changes. Each photograph you take has the potential to inspire action and create positive change.
Take time to research your locations, understand the environmental conditions you’ll face, and prepare accordingly. With proper planning, the right equipment, and a creative mindset, you’ll be well-equipped to capture extraordinary environmental photographs that resonate with viewers and stand the test of time.