Protect your camera’s delicate sensor with professional-grade cleaning tools that prevent costly repairs and maintain pristine image quality. Dust, oils, and debris inevitably find their way onto your sensor, manifesting as dark spots in photos that no amount of post-processing can fix. Following a proper camera maintenance checklist and investing in a quality sensor cleaning kit saves thousands in professional cleaning services while preserving your gear’s longevity. Modern sensor cleaning kits combine specialized swabs, solutions, and tools designed specifically for your camera’s sensor type, ensuring safe and effective maintenance. Whether you’re a professional photographer who can’t afford downtime or an enthusiast seeking to protect your investment, understanding proper sensor cleaning techniques and selecting the right kit is essential for consistent, professional-quality results.
Understanding Sensor Cleaning Kits
Essential Components
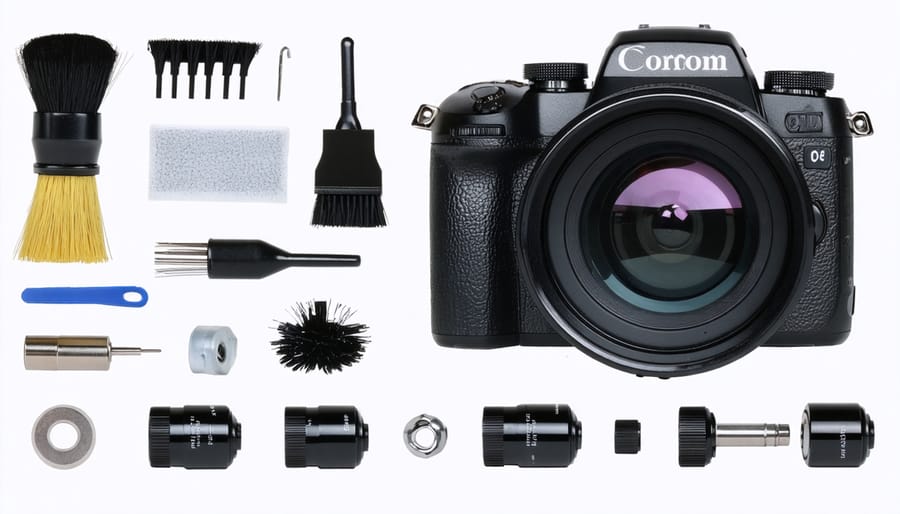
A well-equipped sensor cleaning kit contains several essential components, each serving a specific purpose in maintaining your camera’s sensor. At the heart of every kit is a selection of sensor swabs, specifically sized to match your camera’s sensor dimensions. These lint-free swabs are designed for one-time use to prevent cross-contamination.
An effective cleaning solution, typically containing high-purity alcohol or specialized cleaning compounds, works in tandem with the swabs to dissolve and remove stubborn particles. Always choose solutions specifically formulated for sensor cleaning to avoid damage to delicate sensor coatings.
A rocket blower is your first line of defense, using focused air streams to dislodge loose dust without making contact with the sensor. Many photographers consider this the safest initial cleaning step. For thorough inspections, most kits include a sensor loupe or magnifying tool with built-in LED lights, helping you spot dust particles and verify cleaning results.
Additional components often include cleaning cloths for external camera surfaces, storage cases to keep supplies dust-free, and detailed instructions for safe cleaning procedures. Some premium kits also feature static-free brushes for gentle dust removal and protective covers for storing cleaning tools.
Optional but Useful Additions
While a basic sensor cleaning kit covers the essentials, several additional tools can make your cleaning process more effective and convenient. A powerful LED loupe or magnifying glass with built-in illumination helps you spot stubborn dust particles that might be missed with the naked eye. Consider adding a sensor gel stick, which works like a lint roller for your sensor, particularly effective for removing sticky residue that air blowers can’t handle.
A cleaning station or dedicated workspace light provides optimal visibility during the cleaning process. Some photographers also keep a small battery-powered fan nearby to maintain dust-free air in their cleaning environment. Microfiber cloths specifically designed for optical equipment are worth having as backup, and latex or nitrile gloves protect both your hands and equipment from oils and contamination.
For those who frequently clean their sensors, investing in a sensor scope that attaches to your camera can help monitor dust accumulation between cleanings. A small cleaning log notebook or digital app to track maintenance dates and methods used can help establish effective cleaning routines.
Choosing the Right Cleaning Kit

Budget vs. Professional Kits
When it comes to sensor cleaning kits, the price range can vary significantly, from budget-friendly options around $30 to professional-grade kits exceeding $200. While it’s tempting to opt for the cheapest solution to protect your camera investment, understanding what you get at different price points is crucial.
Budget kits ($30-$60) typically include basic cleaning swabs, solution, and a blower. While these can handle routine maintenance, the materials may be less refined. The swabs might shed more particles, and the cleaning solution could leave residue if not properly formulated.
Mid-range kits ($60-$120) offer better quality materials and often include additional tools like sensor loupes and LED inspection lights. The swabs are usually more consistent in quality, and the solutions are specifically formulated for modern sensor coatings.
Professional kits ($120+) provide premium components, including multiple swab sizes, high-grade cleaning solutions, and sophisticated inspection tools. They often come with detailed instructions and sometimes even training materials. The higher-quality materials reduce the risk of damage and provide more consistent results.
For occasional users, a mid-range kit usually offers the best balance of quality and value. However, if you frequently change lenses in dusty environments or clean sensors professionally, investing in a premium kit could save money and hassle in the long run.
Camera-Specific Considerations
When selecting a sensor cleaning kit, it’s crucial to consider your specific camera model and sensor size. Digital camera sensors come in various sizes, from the smaller APS-C sensors to full-frame and medium format, each requiring different approaches to cleaning.
Full-frame cameras typically need larger cleaning swabs to cover the sensor area effectively in a single pass, while APS-C sensors can be cleaned with smaller tools. Mirrorless cameras often collect more dust than DSLRs due to their exposed sensors when changing lenses, so owners might need to clean more frequently and should consider more comprehensive kits.
The sensor’s accessibility also matters. Some cameras have built-in cleaning mechanisms that should be considered before manual cleaning. Others might have harder-to-reach sensors that require specialized tools or techniques. For instance, Canon’s EOS R series mirrorless cameras have a different sensor placement than their DSLR counterparts, which might influence your choice of cleaning tools.
Remember to check your camera manufacturer’s recommendations before purchasing a cleaning kit. Some brands provide specific guidelines about compatible cleaning solutions and tools. This consideration is particularly important for cameras with special sensor coatings or unique construction that might require gentle handling or specific cleaning products.
Safe Cleaning Practices
Preparation Steps
Before diving into sensor cleaning, proper preparation is crucial to ensure both your safety and your camera’s well-being. Start by choosing a clean, well-lit workspace away from dust and wind. A desk near a window provides ideal natural lighting, though a good desk lamp can work just as well.
Gather all your materials beforehand, including your cleaning kit, a fully charged camera battery, and a white piece of paper for testing. Put on lint-free gloves if they came with your kit – this prevents oils from your fingers from causing additional contamination.
Remove the lens from your camera and position it face-down to minimize dust falling into the chamber. Take a moment to ensure your camera’s battery is sufficiently charged, as you’ll need the mirror to stay up during the cleaning process. If possible, use AC power to prevent any unexpected shutdowns.
Enable your camera’s sensor cleaning mode or mirror lock-up function (consult your camera’s manual for specific instructions). This exposes the sensor and keeps it accessible throughout the cleaning process. Before proceeding, take a test shot of the white paper at f/16 or smaller to document existing dust spots – this will help you verify your cleaning results later.
Remember to work methodically and without rushing. If you’re feeling uncertain or tired, it’s better to postpone the cleaning session until you’re ready to proceed with full concentration.

Cleaning Techniques
When cleaning your camera sensor, always start with the least invasive method and progress only if necessary. Begin with a rocket blower, holding your camera face-down to let gravity assist in removing loose particles. Use short, controlled bursts of air, keeping the blower’s tip outside the camera body to prevent accidental contact.
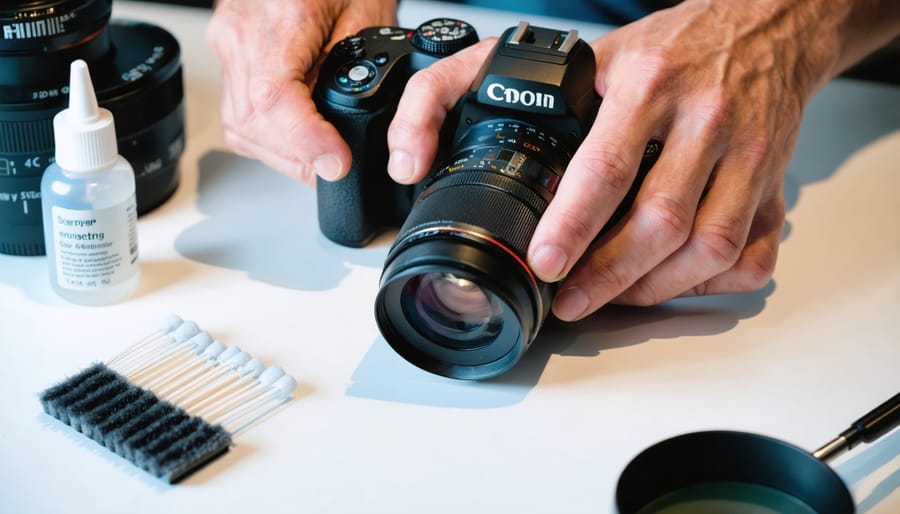
For stubborn spots, wet cleaning methods become necessary. Before using sensor swabs, ensure you’re in a clean, well-lit environment. Power off your camera and lock the mirror up in cleaning mode. Select the appropriate swab size for your sensor format – full-frame cameras require larger swabs than crop sensors.
Apply 1-2 drops of cleaning solution to the swab’s edge, being careful not to oversaturate. Gently sweep across the sensor in one continuous motion, using minimal pressure. Start from one end and move to the other, ensuring you achieve optimal image quality through thorough cleaning. Never reuse swabs, as this can transfer contaminants back onto the sensor.
For sensor gel sticks, ensure the sticky surface is clean before each use. Press gently against the sensor, then lift straight up to capture particles. Clean the gel stick’s surface with the supplied adhesive sheets between dabs.
After cleaning, take a test shot of a plain white surface at f/16 to check for remaining spots. If spots persist, repeat the process, but remember that some particularly stubborn marks may require professional cleaning. Always err on the side of caution – if you’re unsure about any step, consult a professional rather than risk damaging your sensor.
Common Mistakes to Avoid
When cleaning your camera’s sensor, avoiding these critical mistakes can prevent costly damage. Never use compressed air canisters, as they can spray liquid propellant onto your sensor. Similarly, avoid using regular cleaning supplies or household materials, which can scratch or leave residue on the delicate sensor surface.
Don’t rush the cleaning process or attempt it in dusty environments. Always work in a clean, well-lit area and take your time. Another common mistake is applying too much pressure while cleaning – gentle touches are all you need. Using too much cleaning solution can lead to streaks and potential electrical damage.
Never attempt sensor cleaning with a low camera battery. If your camera powers off mid-cleaning, the mirror could drop and cause serious damage. Also, avoid touching the sensor directly with your fingers or any non-specialized tools, as this can leave oils and scratches.
If you’re unsure about the cleaning process or encounter stubborn debris, don’t force it. Sometimes it’s better to seek professional cleaning services rather than risk damaging your expensive equipment. Remember, prevention is always better than cure – regularly maintaining your camera and careful lens changes can minimize the need for sensor cleaning.
Maintenance and Storage
Kit Care and Storage
Proper care of your sensor cleaning kit is essential for maintaining its effectiveness and preventing cross-contamination. Store your cleaning tools in a sealed, dust-free container or the original packaging when not in use. Keep the kit in a cool, dry place away from direct sunlight and extreme temperatures, which can degrade cleaning solutions and compromise the integrity of swabs and brushes.
Always clean your hands thoroughly before handling any cleaning tools, and never touch the business end of swabs or brushes with your fingers. After using cleaning solutions, ensure the caps are tightly sealed to prevent evaporation. Replace the protective covers on your cleaning tools immediately after use.
Monitor the condition of your cleaning supplies regularly. Discard any swabs that show signs of damage or contamination, and replace cleaning solutions that have expired or show signs of discoloration. If you notice any unusual residue or debris on your tools, it’s safer to replace them than risk damaging your sensor.
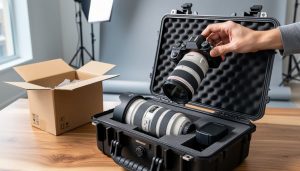
For longer trips, consider using dedicated protective cases for your cleaning kit to prevent damage during transport. Keep your kit organized and separate from other photography gear to maintain its cleanliness and effectiveness.
Cleaning Schedule Guidelines
Establishing a regular sensor cleaning schedule is crucial for maintaining optimal image quality. As a general rule, inspect your sensor every 2-3 months if you frequently change lenses or shoot in dusty environments. For occasional photographers who rarely swap lenses, checking every 6 months may suffice.
Pay attention to warning signs that indicate it’s time for cleaning: persistent dark spots in your images (especially visible in photos of clear skies or white walls), decreased image quality, or visible debris when inspecting the sensor. If you’re planning an important shoot, always check your sensor a few days beforehand to ensure it’s clean.
The frequency of cleaning also depends on your shooting environment. Beach photographers may need more frequent cleanings due to salt spray and sand, while studio photographers might go longer between cleanings. After shooting in challenging conditions like dusty deserts or misty waterfalls, it’s wise to inspect your sensor as soon as possible.
Remember that over-cleaning can potentially increase the risk of damage, so always balance the need for cleanliness with the risk of unnecessary maintenance.
Maintaining a clean camera sensor is crucial for achieving the best possible image quality and protecting your valuable photography equipment. Throughout this guide, we’ve explored the essential components of sensor cleaning kits, from blowers and brushes to specialized cleaning solutions and swabs. Remember that while sensor cleaning might seem daunting at first, having the right tools and knowledge makes the process much more manageable and safer.
Regular sensor maintenance should become part of your photography routine, especially if you frequently change lenses or shoot in challenging environments. By investing in a quality sensor cleaning kit and learning proper cleaning techniques, you can save money on professional cleaning services while ensuring your camera continues to perform at its best.
However, it’s essential to approach sensor cleaning with patience and care. Start with the least invasive methods first, such as using a blower, before moving on to wet cleaning techniques. Always test your camera after cleaning by taking test shots against a plain white surface to verify the sensor is truly clean.
If you’re ever unsure about cleaning your sensor yourself, don’t hesitate to seek professional help. The most important thing is maintaining your camera’s functionality while avoiding any potential damage. With proper care and regular maintenance using appropriate cleaning tools, your camera’s sensor will continue delivering crisp, spot-free images for years to come.