Lens adapters fundamentally change the optical pathway between your camera and lens, making their impact on lens quality impact on image performance a critical consideration for photographers. While adapters enable creative lens combinations and breathe new life into vintage glass, they introduce physical elements that can affect everything from focus accuracy to light transmission. High-quality adapters maintain most of your lens’s original performance, typically resulting in minimal image degradation—often less than 1% light loss and negligible sharpness reduction. However, budget adapters can introduce flaring, reduce contrast, and compromise autofocus reliability. Understanding these trade-offs becomes essential when adapting lenses across different camera systems, especially when precision and image quality are paramount for professional work.
This technical reality doesn’t mean you should avoid adapters altogether. Rather, it emphasizes the importance of selecting precision-engineered adapters that maintain proper flange distances and feature high-quality anti-reflective coatings. The key lies in balancing the creative possibilities adapters offer against their potential impact on your final image quality.
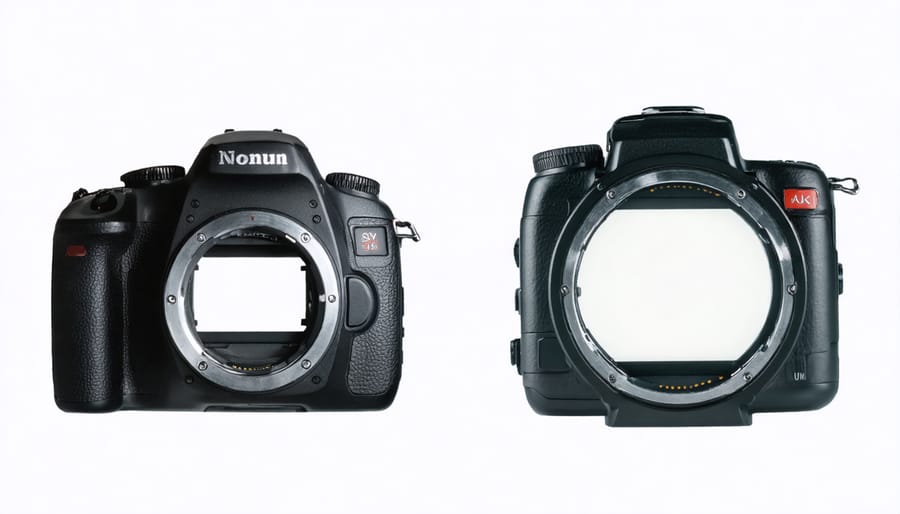
How Lens Adapters Actually Work
Simple vs. Electronic Adapters
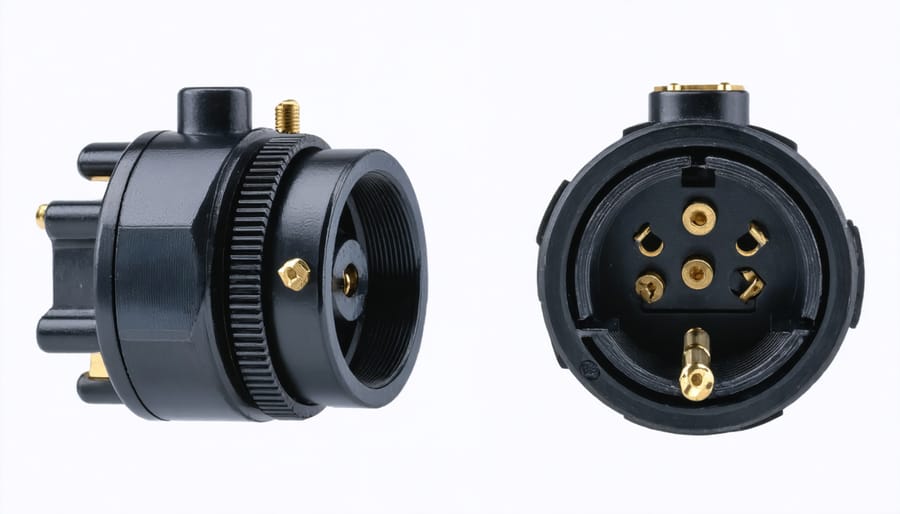
Lens adapters generally come in two varieties: simple mechanical adapters and more sophisticated electronic versions. Simple mechanical adapters are essentially just metal rings that provide a physical connection between your lens and camera body. They’re lightweight, reliable, and typically more affordable, but they sacrifice functionality like autofocus and aperture control.
Electronic adapters, on the other hand, include electrical contacts that maintain communication between your camera and lens. These “smart” adapters enable features like autofocus, image stabilization, and aperture control, making them particularly valuable for modern photography workflows. However, the additional electronics can introduce potential points of failure and typically come with a higher price tag.
When it comes to pure optical quality, both types perform similarly as long as they’re well-manufactured. The key difference lies in functionality rather than image quality. Simple adapters might require more manual work, but they can deliver equally sharp images. Electronic adapters offer convenience and maintain lens features, but they need proper maintenance to ensure reliable electronic connections.
For most photographers, the choice between simple and electronic adapters comes down to shooting style and specific lens requirements rather than image quality concerns.
Optical Elements in Adapters
Lens adapters come in two main varieties: those with optical elements and those without. Simple mechanical adapters just provide a physical connection between your lens and camera, while adapters with glass elements actually contain additional optical components. These glass elements can affect your images in various ways, and understanding these optical element effects is crucial for making informed decisions.
Glass-element adapters are typically necessary when the adapter needs to alter the focal length or correct for differences in flange distance. While they can make otherwise incompatible lens combinations work, they may introduce slight image quality compromises, such as minor light loss or subtle sharpness reduction. Think of them as adding another piece of glass to your optical formula – even high-quality elements will have some impact.
In contrast, purely mechanical adapters won’t affect image quality if properly manufactured, as they’re essentially just spacers. When possible, opt for mechanical adapters over those with glass elements to maintain optimal image quality. However, if you need specific focal length corrections or want to use lenses with significantly different mount specifications, glass-element adapters can be a worthwhile compromise.
Direct Impact on Image Quality
Basic Adapters: Minimal Quality Loss
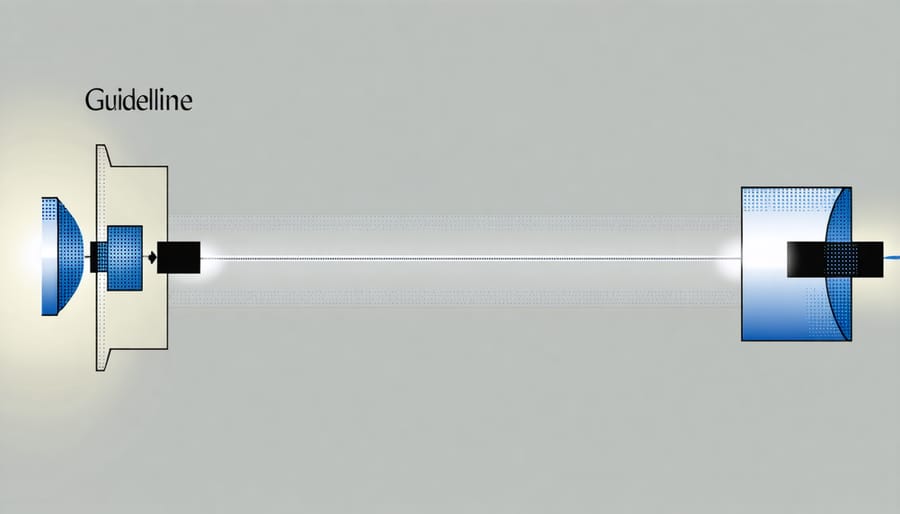
Basic mechanical adapters, which simply connect your lens to a different camera mount without any optical elements, typically cause minimal to no image quality loss. These adapters are essentially hollow tubes with the appropriate mounting hardware on each end, acting as a spacer between your lens and camera body.
When using a quality mechanical adapter, light travels directly from your lens to the sensor without passing through any additional glass elements. This means the optical performance of your lens remains virtually unchanged. The only potential impact on image quality comes from mechanical precision – or lack thereof.
A well-manufactured adapter maintains proper alignment and spacing between the lens and sensor. This is crucial because even slight misalignment can affect focus accuracy and overall sharpness, particularly when shooting at wide apertures. Premium adapters from reputable manufacturers typically offer tighter tolerances and better build quality, ensuring optimal lens-to-sensor alignment.
However, there are a few considerations to keep in mind. Some extremely cheap adapters might have loose tolerances or poor quality control, which could lead to slight focusing issues or inconsistent results. Additionally, if an adapter doesn’t maintain the correct flange distance (the space between the lens mount and sensor), it might affect infinity focus or close-focusing capabilities.
For best results, invest in a well-made adapter from a respected manufacturer, and ensure all mounting surfaces are clean and properly seated when attaching your equipment.
Speed Boosters and Focal Reducers
Speed boosters and focal reducers are specialized adapters containing optical elements that do more than just connect your lens to the camera. These adapters can actually enhance your lens’s capabilities, particularly when adapting full-frame lenses to cameras with different sensor formats.
Unlike simple mechanical adapters, speed boosters concentrate light from the larger image circle onto the smaller sensor. This clever optical design achieves two significant effects: it increases the effective maximum aperture (typically by about one stop) and reduces the crop factor, giving you a wider field of view. For instance, a typical 50mm f/1.8 lens might effectively become a 35mm f/1.2 lens when used with a 0.71x speed booster.
However, these benefits come with important quality considerations. High-quality speed boosters like those from Metabones can maintain or even improve image sharpness in the center, though corner sharpness might suffer slightly. Lower-quality options often introduce noticeable softness, chromatic aberration, or vignetting.
For best results, invest in premium speed boosters from reputable manufacturers and pair them with high-quality lenses. The optical elements in these adapters are complex, and any imperfections in design or construction will directly impact your images. While they can be fantastic tools for maximizing lens versatility, careful research and testing are essential before making them a permanent part of your kit.
Common Image Quality Issues
When using lens adapters, several common image quality issues can emerge that photographers should be aware of. The most frequent concern is a slight loss of infinity focus, where the adapter’s thickness prevents the lens from achieving true infinity focus. This can be particularly problematic for landscape and astrophotography.
Light leakage is another potential issue, especially with cheaper or poorly manufactured adapters. Small gaps between the adapter and either the lens or camera mount can allow stray light to enter, reducing contrast and creating unwanted flare effects in your images.
Some adapters can introduce a slight tilt in the lens plane, resulting in uneven focus across the frame. While this might be barely noticeable in most situations, it becomes apparent in architectural photography or when shooting flat subjects where precise focus is crucial.
Electronic communication problems can affect autofocus accuracy and aperture control. Even with high-quality electronic adapters, there might be occasional hunting or slower focus acquisition compared to native lenses. This can impact the overall shooting experience and potentially affect image sharpness if focus isn’t achieved correctly.
Additionally, cheaper adapters might have inconsistent internal coating quality, potentially causing internal reflections that reduce contrast and create ghosting effects. When using telephoto lenses, even minimal play in the adapter mount can amplify camera shake, affecting image sharpness at longer focal lengths.
Maximizing Image Quality with Adapters
Choosing Quality Adapters
When investing in a lens adapter, quality should be your top priority. High-end adapters from reputable manufacturers like Metabones, Novoflex, or Fotodiox Pro are engineered with precision and better materials, ensuring optimal alignment between your lens and camera body. These premium adapters maintain proper sensor size compatibility and flange distance, which is crucial for preserving image quality.
Look for adapters with solid build quality and tight tolerances. They should feel substantial in hand with no wiggle or play when mounted. Quality adapters typically feature brass or chrome-plated brass mounts, which provide better durability and smoother mounting than aluminum alternatives.
Consider adapters with electronic contacts if you’re using modern lenses. While more expensive, they maintain autofocus, aperture control, and image stabilization functions. For manual vintage lenses, simpler mechanical adapters might suffice, but don’t compromise on build quality.
Read user reviews from working photographers and avoid suspiciously cheap options. A quality adapter might cost more initially but protects your valuable equipment and ensures consistent results. Remember, you’re creating a crucial link between two precision instruments – your camera and lens deserve a proper connection.
When shopping, verify the adapter’s exact compatibility with your specific camera mount and lens system. Some manufacturers offer multiple versions of similar adapters, so double-check before purchasing.
Best Practices for Adapter Use
To get the best performance from your lens adapters, follow these essential practices that help maintain image quality. First, always invest in high-quality adapters from reputable manufacturers. While premium adapters may cost more initially, they’re manufactured to tighter tolerances and often feature better materials that ensure proper lens alignment.
Keep both the adapter and lens mount surfaces meticulously clean. Even tiny dust particles or debris can affect the adapter’s fit and potentially impact image quality. Use a microfiber cloth and cleaning solution specifically designed for camera equipment to regularly clean the contact points.
When mounting the adapter, ensure it’s properly seated and locked. A loose or improperly mounted adapter can cause focus issues and potentially damage your equipment. Listen for the clicking sound that indicates proper attachment, and always test the connection by gently pulling on the lens before shooting.
Consider using adapters with electronic contacts for lenses that support autofocus and aperture control. While manual adapters can work well, electronic communication between the camera and lens often provides better overall performance and maintains more of your lens’s original functionality.
Store your adapters properly when not in use. Keep them in a dry environment and use front and rear caps to protect the mounting surfaces. This prevents wear and tear that could affect the adapter’s precision fit over time.
Finally, test your adapter thoroughly in controlled conditions before using it for important shoots. This helps you understand any limitations and ensure optimal performance when it matters most.
Lens adapters can indeed affect image quality, but their impact varies greatly depending on several factors we’ve discussed. When using high-quality adapters from reputable manufacturers and following proper mounting techniques, any degradation in image quality is typically minimal and often unnoticeable in real-world shooting situations.
For the best results, remember these key takeaways: Always invest in quality adapters that match your specific lens-to-camera combination. Pay attention to adapter thickness and precision, as these factors directly influence infinity focus and overall image quality. Consider electronic adapters for modern lenses to maintain autofocus and aperture control capabilities.
While adapters with additional optical elements may introduce some image quality compromises, simple mechanical adapters generally maintain excellent image quality when properly manufactured. The slight loss in light transmission (usually less than 1%) with quality adapters is negligible for most photography situations.
For professional work where image quality is paramount, testing your specific adapter setup before critical shoots is always recommended. However, don’t let concerns about image quality deter you from exploring adapter options – they remain an excellent tool for expanding your lens collection and creative possibilities.
When used thoughtfully, lens adapters offer photographers tremendous versatility while maintaining professional-level image quality. The key lies in choosing the right adapter for your needs and understanding its limitations and strengths.