Master film exposure in challenging conditions by understanding the delicate interplay between shutter speed, aperture, and ISO – three elements that become even more critical during extreme weather photography. Start by metering for the shadows in high-contrast scenes, giving yourself an extra 1/2 stop of exposure to preserve detail in darker areas while maintaining highlight control. Complex lighting situations demand precise zone system application – place your primary subject in Zone V (middle gray) and mentally map surrounding tones across the exposure scale. When shooting in rapidly changing conditions, bracket your exposures in 1/2 stop increments and maintain detailed exposure notes for each frame, creating a reliable reference for future shoots in similar situations. This methodical approach to exposure, combined with film’s natural latitude, produces negatives with rich tonality and exceptional dynamic range that digital sensors simply cannot match.
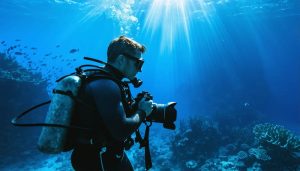
Why Extreme Environments Challenge Film Exposure
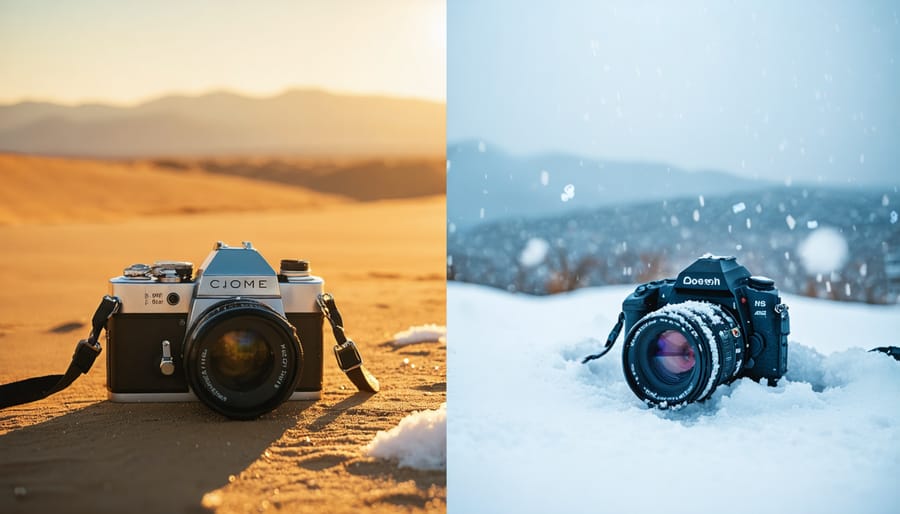
Temperature’s Impact on Film Sensitivity
Temperature plays a fascinating and often overlooked role in how film responds to light. When shooting in extreme conditions, your film’s sensitivity can shift significantly, requiring adjustments to your exposure settings to maintain optimal results.
In hot conditions above 85°F (29°C), film becomes more sensitive to light, effectively increasing its ISO rating. For every 10-degree increase in temperature above normal room temperature, you might need to decrease exposure by approximately 1/3 stop. This means if you’re shooting ISO 400 film in 95°F heat, you should treat it closer to ISO 500 or 600.
Conversely, cold temperatures make film less sensitive to light. When shooting in temperatures below 40°F (4°C), you’ll typically need to increase exposure by about 1/3 stop for every 10-degree decrease. For instance, that same ISO 400 film might behave more like ISO 320 or even 250 in cold conditions.
These temperature effects are particularly noticeable with color negative films, though black and white films are also affected. To maintain consistency, try to store your film at room temperature until just before shooting, and if possible, keep spare rolls in an insulated container. When shooting in extreme conditions, it’s wise to bracket your exposures – taking additional shots at slightly different exposure settings – to ensure at least one optimal result.
Remember that these adjustments are guidelines rather than strict rules, as different film stocks react differently to temperature changes.
Light Intensity Variations
Film photographers often face the challenge of managing challenging lighting conditions, particularly in extreme situations. In bright conditions, such as shooting on a sunny beach or in snow, the intense light can lead to overexposed images. To combat this, consider using slower film speeds (ISO 100 or lower) or neutral density filters to reduce the amount of light entering the camera.
For exceptionally bright scenes, the Sunny 16 rule becomes invaluable: set your aperture to f/16 and your shutter speed to the reciprocal of your film’s ISO. For instance, with ISO 400 film, use a shutter speed of 1/400 second (or the closest available setting).
Conversely, low-light situations require different strategies. Push processing your film can effectively increase its sensitivity, though this introduces more grain. For example, shooting ISO 400 film at ISO 800 or 1600 can help capture details in dimmer conditions. Remember to inform your lab about push processing when developing.
Another effective approach is using fast prime lenses with wide apertures (f/1.8 or wider) and a sturdy tripod for longer exposures. In urban nightscapes, consider reciprocity failure – the need to increase exposure times beyond what your meter suggests when shooting long exposures. Each film stock handles this differently, so consult your film’s data sheet for specific adjustments.
Essential Exposure Techniques for Harsh Conditions
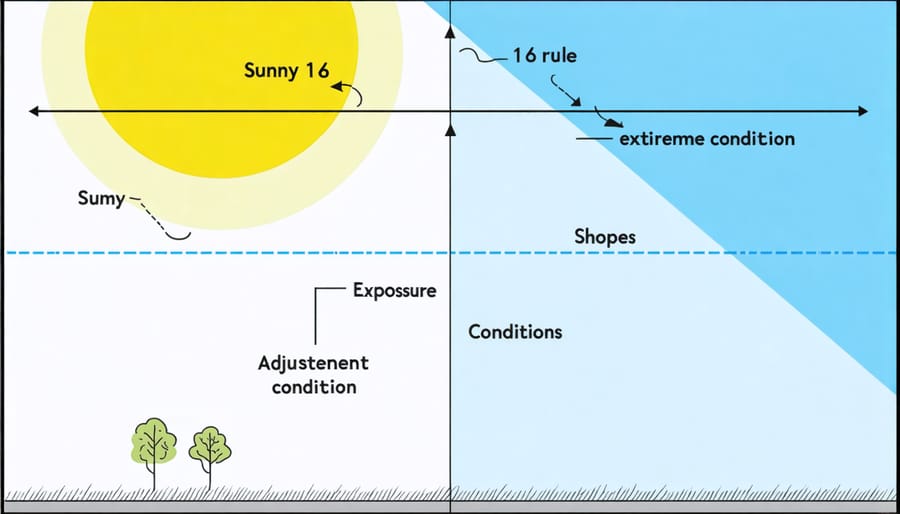
The Sunny 16 Rule in Extreme Light
While the Sunny 16 rule serves as a reliable baseline for daylight exposure, extreme lighting conditions require thoughtful adaptation. In exceptionally bright situations, such as shooting on snow-covered landscapes or at high altitudes, light meters can be overwhelmed and the standard rule may lead to overexposure.
For snow and beach scenes, consider stopping down an additional 1-2 stops from your Sunny 16 calculation. For instance, if you’re shooting ISO 400 film in bright snow, you might want to use f/22 instead of f/16 to compensate for the intense reflected light. High-altitude photography presents similar challenges, as the thinner atmosphere filters less sunlight, resulting in more intense exposure conditions.
Desert environments during midday can also exceed typical Sunny 16 parameters. In these situations, you might need to combine a smaller aperture with faster shutter speeds. For example, at ISO 100, instead of the standard f/16 at 1/100s, you might opt for f/22 at 1/125s to maintain proper exposure.
Remember that these adjustments are starting points rather than absolute rules. It’s always wise to bracket your shots in extreme conditions, taking additional exposures at one stop over and under your calculated exposure. This practice provides insurance against tricky lighting and helps you develop an intuitive understanding of how your film responds in challenging situations.
Bracketing Strategies
Bracketing is a time-tested technique that proves invaluable when shooting film in challenging lighting conditions. Instead of relying on a single exposure, you’ll take multiple shots of the same scene at different exposure settings, increasing your chances of capturing the perfect image.
The standard bracketing approach involves taking three exposures: one at the meter’s suggested setting, one overexposed by one stop, and one underexposed by one stop. However, in particularly tricky situations, you might want to expand this to five shots, adding ±2 stops to your sequence.
For landscape photography during sunrise or sunset, consider bracketing in 1/2-stop increments, as these subtle variations can make a significant difference in capturing delicate sky colors and shadow details. When photographing high-contrast scenes, such as a subject backlit by bright sunlight, you might want to bias your bracketing toward overexposure to retain shadow detail.
Remember to note your bracketing sequence in your shooting log – this will help you understand which exposures worked best when reviewing your developed film. Some photographers mark their bracketed sequences by taking a frame of their hand showing the number of fingers corresponding to the sequence number before starting each series.
For scenes with rapidly changing light, work quickly through your bracket sequence to maintain consistent lighting across all frames. This is particularly important when shooting sunset landscapes or street scenes with moving subjects.
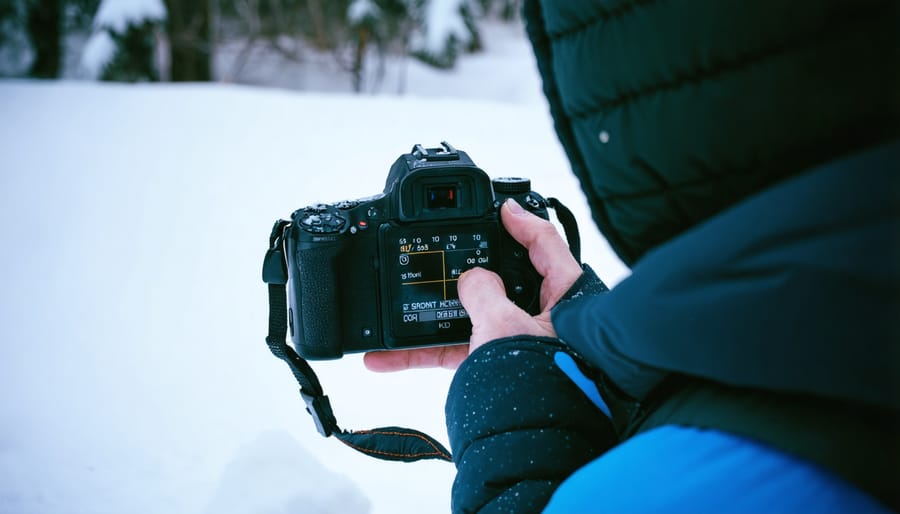
Using Light Meters in Extreme Weather
Light meters can be temperamental when faced with extreme weather conditions, making metering in challenging conditions particularly tricky. Cold weather can slow down battery performance and affect LCD displays, while high humidity might fog up viewfinders and impact electrical components.
In freezing temperatures, keep your meter close to your body when not in use to maintain battery warmth. Consider carrying spare batteries, as cold conditions can drain them quickly. For snow scenes, add 1.5 to 2 stops of exposure compensation to prevent underexposure, as your meter will try to render bright snow as middle gray.
In hot, humid environments, store your meter in a sealed plastic bag with silica gel packets when not in use. Allow your equipment to acclimate gradually when moving between temperature extremes to prevent condensation. If shooting in rain, use weather-sealed meters or protect your equipment with a rain cover.
Desert conditions present unique challenges with intense sunlight and reflective sand. Use spot metering for more precise readings, and consider taking multiple readings from different areas of your scene. Remember that extreme brightness can cause flare, affecting meter accuracy.
For reliable readings in any extreme condition, cross-reference your meter’s reading with the sunny 16 rule or bracket your exposures when in doubt. Trust your experience and always carry a backup mechanical meter for those situations when electronics might fail.
Environment-Specific Exposure Solutions
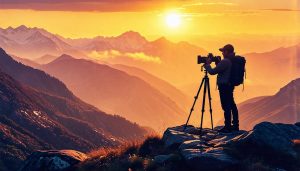
Desert and High-Altitude Photography
Photographing in desert and high-altitude environments presents unique challenges for film photographers due to the intense sunlight and atmospheric conditions. These environments often push your light meter and film to their limits, requiring careful consideration of exposure settings and film choice.
In desert locations, the intense reflectivity of sand and rocks can fool your camera’s light meter, typically leading to underexposure. To counter this, consider overexposing by 1/2 to 1 stop from your meter reading. The bright, direct sunlight also creates extreme contrast, making it crucial to understand harsh daylight exposure techniques to preserve both highlight and shadow detail.
High-altitude photography presents its own set of challenges. The thinner atmosphere means less light filtration, resulting in more intense UV radiation reaching your film. This can create a slight blue cast and increased contrast in your images. Using a UV filter becomes essential, not just for protecting your lens but for maintaining natural color rendition.
When shooting in these conditions, consider using lower-speed films (ISO 100 or 50) to handle the bright light more effectively. These films typically offer better highlight retention and finer grain, which is particularly beneficial in the clear, sharp light of high altitudes. However, keep in mind that you’ll need faster shutter speeds to prevent overexposure.
A few practical tips for desert and high-altitude shooting:
– Bracket your exposures when in doubt
– Use a spot meter for more accurate readings
– Consider shooting during golden hours when possible
– Pack neutral density filters for greater exposure control
– Store film in insulated containers to protect from heat
Remember that different film stocks react differently to extreme conditions. Slide film, for instance, has less exposure latitude than negative film and requires more precise metering in these challenging environments. Testing your chosen film stock in similar conditions before important shoots can help you anticipate its behavior and adjust accordingly.
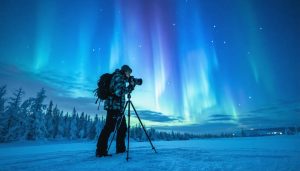
Arctic and Snow Photography
Photographing in arctic conditions and snowy environments presents unique challenges for film photographers, particularly when it comes to exposure. The high reflectivity of snow can easily fool your camera’s light meter, typically leading to underexposed images that appear gray rather than bright white.
Snow can reflect up to 90% of the light that hits it, making it significantly more reflective than the middle gray your camera’s meter is calibrated for. To compensate for this, you’ll generally need to overexpose by 1.5 to 2 stops from what your meter suggests. When shooting slide film, you might want to be more conservative with this adjustment, perhaps overexposing by just 1 stop to avoid losing highlight detail.
Cold temperatures introduce additional complications for film photography. Film becomes more brittle in extreme cold, making it prone to breaking during advance or rewind. Keep your spare rolls close to your body to maintain their flexibility. Your camera’s mechanical parts may also become sluggish, so it’s wise to use fresh batteries and keep them warm as well.
When shooting in bright, snowy conditions, consider using a circular polarizing filter to manage reflections and enhance the contrast between the snow and sky. This can help prevent the washed-out look that often plagues winter photography. However, remember that polarizing filters typically reduce light by about 1.5 stops, so factor this into your exposure calculations.
For metering, spot metering can be particularly helpful in snowy conditions. Take a reading from a gray card or from an area of snow that’s in open shade, then adjust upward as needed. If you’re using an incident light meter, you’ll generally get more accurate readings straight away since it measures the light falling on the subject rather than being fooled by the snow’s reflectivity.
Bracket your exposures when possible, especially in challenging lighting conditions like sunset over a snowy landscape. This provides insurance against metering errors and helps you understand how your specific film stock responds to these extreme conditions.
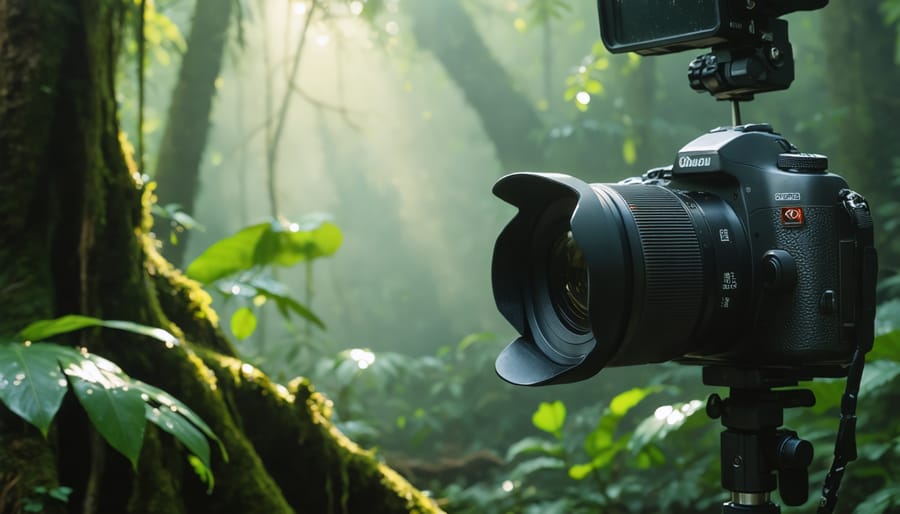
Rainforest and High-Humidity Conditions
Photographing in rainforest and high-humidity environments presents unique challenges for film photographers. The combination of dim lighting conditions and moisture-heavy air can significantly impact both your exposure settings and film preservation.
In these environments, light levels are typically reduced by 2-3 stops due to dense canopy coverage, requiring careful metering considerations. A good starting point is to meter for the shadows and open up your aperture by one stop to account for the reduced light. Using faster films (ISO 400 or higher) can help maintain reasonable shutter speeds without compromising image quality.
Humidity poses another significant challenge. Film emulsion becomes more sensitive to moisture above 65% relative humidity, which can affect its light sensitivity. To compensate, it’s generally recommended to rate your film about 1/3 stop slower than box speed in extremely humid conditions. For instance, if you’re shooting ISO 400 film, treat it as ISO 320.
Keep your equipment protected with silica gel packets in your camera bag, and consider using weather-sealed cameras when possible. Fungus growth on lenses can affect light transmission, so regular cleaning and maintenance are essential. Store unexposed film in sealed containers with desiccants until ready to use.
When shooting in these conditions, bracket your exposures more generously than usual. A three-shot bracket with one stop difference between each exposure can help ensure at least one properly exposed image. Pay particular attention to scenes with high contrast, as the moisture in the air can create additional diffusion and affect your meter readings.
Remember that condensation can form on your lens when moving between air-conditioned spaces and humid outdoor environments. Allow your equipment to acclimate for 15-20 minutes before shooting, and carry a microfiber cloth to wipe any condensation that forms on your lens or viewfinder.
Equipment Protection and Maintenance
Proper care of your light meter and camera equipment is essential for maintaining accurate exposure readings and ensuring consistent results in your film photography. Start by keeping your equipment clean – dust and dirt can interfere with meter readings and affect your camera’s mechanical operation. Use a soft brush and microfiber cloth to regularly clean external surfaces, paying special attention to the light meter window and viewfinder.
Store your gear in a dry environment with silica gel packets to prevent moisture damage, which can affect electrical components and lead to erratic meter readings. When shooting in humid conditions, allow your equipment to acclimate gradually to prevent condensation, which can fog up internal components and compromise accuracy.
Protect your light meter from extreme temperatures, as these can affect its electronic components and battery life. In cold weather, keep spare batteries close to your body for warmth, and avoid sudden temperature changes that could cause condensation.
Regular calibration of your light meter is crucial. Consider having it professionally serviced every few years, especially if you notice inconsistent readings. When not in use, keep the meter covered and store batteries separately to prevent corrosion.
For mechanical cameras, ensure smooth operation of the shutter speed dial and aperture ring, as sticky mechanisms can lead to exposure errors. If you hear unusual sounds or feel resistance, have your camera serviced by a qualified technician to maintain precise exposure control.
Mastering film photography exposure requires both technical understanding and practical experience. Throughout this guide, we’ve explored the fundamental principles of exposure, from understanding the exposure triangle to managing challenging lighting conditions. Remember that successful film exposure hinges on careful consideration of your film’s characteristics, proper light metering, and understanding how different environmental factors affect your results.
While digital photography offers immediate feedback, film photography teaches us patience and precision. The skills you develop in reading light, understanding exposure values, and anticipating results will benefit your overall photography journey, regardless of medium.
For beginners, start with consumer-grade films in well-lit conditions, keeping detailed notes of your exposure settings. As you gain confidence, experiment with different films and lighting situations. Advanced photographers should focus on pushing their boundaries with more challenging scenarios while maintaining consistent results.
Remember, there’s no substitute for hands-on experience. Each roll of film you shoot will teach you something new about exposure. Embrace the learning process, learn from your mistakes, and celebrate your successes. The unique characteristics of film photography make the journey of mastering exposure both challenging and deeply rewarding.