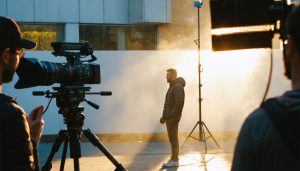
Transform your cinematography instantly with carefully selected lens filters – the secret weapon behind Hollywood’s most captivating visuals. Pro-level ND filters soften harsh lighting and control exposure, while polarizers eliminate unwanted reflections and deepen colors for that signature film look. Combined with professional lighting techniques, premium diffusion filters create that sought-after halation effect around bright sources, mimicking the organic glow of motion picture film.
Beyond mere accessories, lens filters serve as essential tools for crafting deliberate visual narratives. They bridge the gap between digital precision and analog character, offering cinematographers precise control over mood, atmosphere, and emotional resonance. Whether shooting music videos, short films, or commercial content, mastering the strategic use of filters elevates ordinary footage into compelling cinematic storytelling that captivates audiences and commands attention.
Think of lens filters as your camera’s equivalent of a colorist’s palette – each type adding distinct characteristics that shape your final image. The right combination of filters doesn’t just modify light; it fundamentally transforms how your audience experiences your visual story.
Essential Lens Filters for Cinematic Photography
ND Filters: Controlling Light Like Hollywood DPs
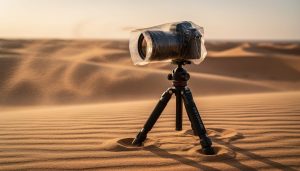
Neutral Density (ND) filters are the secret weapon of cinematographers for achieving that coveted Hollywood look, especially in bright conditions. Think of them as sunglasses for your lens – they reduce the amount of light entering your camera without affecting color.
But why are they so crucial? Imagine shooting a scene on a sunny day while wanting to maintain that beautiful shallow depth of field that screams ‘cinematic.’ Without an ND filter, you’d need to use a faster shutter speed or smaller aperture, potentially losing that dreamy background blur. By adding an ND filter, you can keep your aperture wide open (like f/1.8 or f/2.8) even in bright sunlight.
ND filters come in various strengths, typically marked in stops of light reduction (ND2, ND4, ND8, etc.) or optical density (0.3, 0.6, 0.9). For maximum flexibility, consider a variable ND filter, which allows you to adjust the strength by rotating the filter – perfect for changing lighting conditions during a shoot.
Pro tip: Quality matters with ND filters. Cheaper options can introduce color casts and reduce image sharpness, while premium filters maintain neutral colors and clarity – exactly what you need for that professional cinematic look.
Polarizing Filters: Managing Reflections and Color Pop
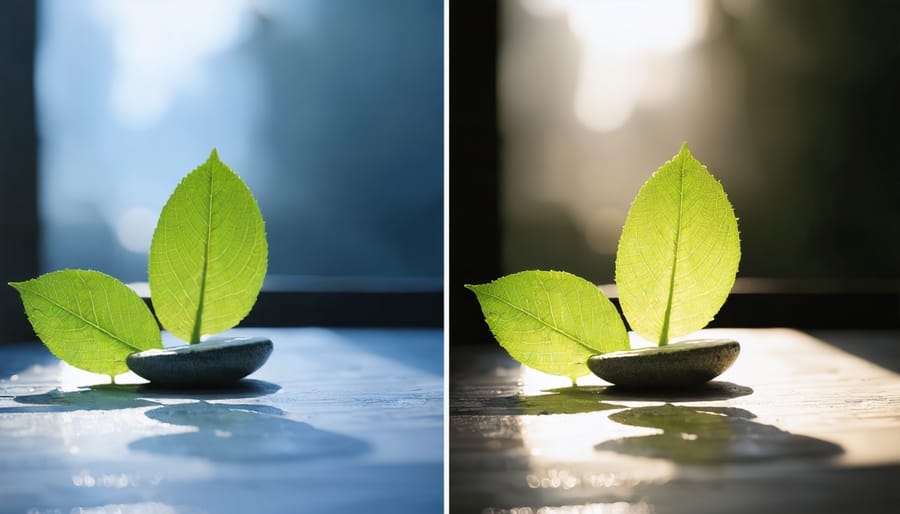
Polarizing filters are perhaps the most versatile tools in a cinematographer’s arsenal, capable of transforming an ordinary shot into something truly spectacular. These filters work by managing reflected light, effectively reducing glare from non-metallic surfaces like water, glass, and foliage.
When shooting outdoors, a polarizing filter can dramatically enhance the richness of blue skies and make clouds pop with stunning contrast. By rotating the filter, you can control the degree of polarization, allowing you to find the sweet spot for your specific scene. This control is particularly valuable when shooting water scenes, where you can either emphasize beautiful reflections or eliminate them entirely to reveal what lies beneath the surface.
Beyond glare reduction, polarizers enhance color saturation naturally, without the artificial look often associated with post-production adjustments. They’re especially effective at bringing out the deep greens in foliage and the rich blues in bodies of water, adding that sought-after cinematic depth to your footage.
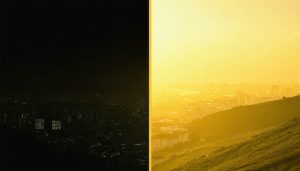
However, be mindful that polarizing filters typically reduce light transmission by about two stops, so you’ll need to account for this in your exposure settings. The effect is also strongest when shooting at 90 degrees to the sun, making these filters particularly useful during golden hour shoots.
Diffusion Filters: The Secret to Dreamy Highlights
Diffusion filters are the secret weapon behind that dreamy, ethereal glow you see in high-end productions. These specialized filters scatter light in a controlled way, softening harsh highlights and creating a subtle, romantic halo effect around bright light sources. Think of them as the cinematographer’s equivalent of a soft-focus lens, but with more control and finesse.
Popular options like the Tiffen Black Pro-Mist or Classic Soft filters come in various strengths, typically ranging from 1/8 to 2, with higher numbers producing more pronounced effects. For beginners, starting with a 1/4 strength filter offers a nice balance between subtlety and impact. These filters not only soften highlights but also help reduce the digital edge of modern cameras, creating that coveted film-like quality that defines the cinematic look.
Remember that diffusion filters work best when shooting with strong light sources or highlights in your frame – think practical lights, sunsets, or street lamps. They’re particularly effective for portraits, creating that stunning, glowing skin effect that’s become a hallmark of professional cinematography.
Creative Applications and Techniques
Portrait Photography Enhancement
In portrait photography, lens filters can transform an ordinary shot into a captivating visual story. Diffusion filters, particularly those in the 1/8 to 1/4 strength range, create a subtle softening effect that’s particularly flattering for skin tones while maintaining essential detail. This gentle diffusion helps minimize the appearance of blemishes and fine lines without producing an artificially smooth look that’s common in digital post-processing.
Pro-mist filters have become increasingly popular for their ability to create a luminous glow around light sources while subtly reducing contrast across the entire image. When combined with dynamic cinematography techniques, these filters can add a dreamy, atmospheric quality to your portraits that’s reminiscent of classic Hollywood glamour photography.
Color warming filters, such as the 81A or 81B series, can enhance skin tones by adding a subtle golden hue that makes subjects appear more vibrant and healthy. These filters work particularly well during golden hour shoots, amplifying the natural warmth of the setting sun. For more dramatic effects, consider using gradient filters to control the exposure between your subject and the background, especially useful when shooting against bright skies or in challenging lighting conditions.
Remember that filter strength should be chosen based on your subject’s features and the overall mood you’re trying to achieve. Start with lighter density filters and gradually experiment with stronger effects as you develop your style.

Landscape Photography Effects
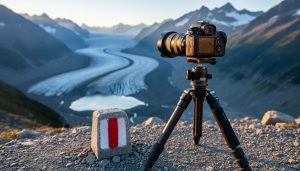
Landscape photography presents unique opportunities to create dramatic, cinematic scenes through the strategic use of lens filters. By mastering natural light and combining it with the right filters, you can transform an ordinary landscape into something truly extraordinary.
Neutral Density (ND) graduated filters are particularly valuable for balancing exposure between bright skies and darker foregrounds. These filters help capture the full dynamic range of the scene, preventing blown-out skies while maintaining detail in the shadows – a hallmark of cinematic landscape shots.
Polarizing filters are another essential tool, especially when shooting around water or through atmospheric haze. They reduce glare and enhance color saturation, bringing out the rich blues in skies and the verdant greens in foliage. This increased contrast and color depth instantly adds production value to your landscapes.
For moody, atmospheric shots, try using a light mist filter or diffusion filter during golden hour. These create a subtle, dreamy effect that softens harsh light while maintaining overall image sharpness. The result is particularly effective for misty mountain scenes or ethereal forest shots.
Pro tip: Stack your filters thoughtfully. Combine a polarizer with a graduated ND filter to control both reflection and exposure in scenes with dramatic skies over water bodies. Just remember that each additional filter slightly reduces light transmission, so adjust your exposure accordingly.
Low-Light and Night Photography
When shooting in low-light conditions or at night, selecting the right filters can make a dramatic difference in achieving that coveted cinematic look. While many photographers might think filters are only useful in bright conditions, understanding low-light photography techniques with filters can elevate your nighttime imagery to new heights.
Neutral Density (ND) filters, particularly variable NDs, can be surprisingly useful in low-light situations when you want to capture motion blur or create dreamy long exposures of city lights. However, be cautious with stacking multiple filters, as this can introduce unwanted light loss and potential vignetting.
For night photography, consider using a polarizing filter to manage reflections from wet streets or illuminated buildings, adding depth and atmosphere to your urban scenes. Clear or UV filters can also protect your lens from moisture and condensation during night shoots without affecting exposure.
Pro tip: When shooting in challenging light conditions, opt for high-quality, multi-coated filters to minimize ghosting and flare from artificial light sources. This is especially important when capturing scenes with multiple light points, such as cityscapes or street photography at blue hour.
Remember to keep your filters spotlessly clean for night shoots, as any smudges or fingerprints will be particularly noticeable when shooting bright points of light against dark backgrounds. A microfiber cloth and cleaning solution should always be in your camera bag for quick maintenance.
Filter Quality and Investment Considerations

Budget vs. Professional Grade Filters
When it comes to lens filters, the price difference between budget and professional options can be substantial, but understanding what you’re paying for is crucial. Budget filters, typically ranging from $20-50, often use lower-grade glass and less precise manufacturing processes. While these can be suitable for beginners or occasional use, they may introduce unwanted effects like color casting, reduced sharpness, or flaring.
Professional-grade filters, usually priced between $100-300, offer superior optical quality through multi-coated glass, precise manufacturing tolerances, and better build quality. The difference becomes particularly noticeable in challenging lighting conditions or when shooting at wide apertures. High-end filters maintain better color neutrality, reduce ghosting, and preserve the sharpness of your expensive lenses.
However, the impact on image quality isn’t always black and white. A clean, well-maintained budget filter can outperform a scratched or dirty professional one. For casual shooting or learning purposes, budget filters can be a practical starting point. But for professional work or when using high-end lenses, investing in quality filters makes sense – they protect your expensive glass while maintaining its optical performance.
Consider starting with one high-quality neutral density filter rather than a complete set of budget options. This approach allows you to experience the difference in quality while building your collection gradually as your needs and budget evolve.
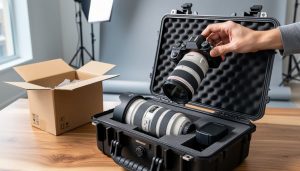
Building Your Filter Kit
Building a versatile filter kit doesn’t have to break the bank, but it should align with your shooting style and creative goals. For beginners, start with a high-quality circular polarizer – it’s the Swiss Army knife of filters, helping you manage reflections and enhance color saturation. Add a neutral density (ND) filter with a 3-stop reduction as your second essential piece; this will give you the flexibility to shoot wide apertures in bright conditions or achieve smooth motion blur.
If you’re serious about cinematic work, invest in a variable ND filter (2-8 stops) and a pro-mist filter (1/4 or 1/8 strength). The variable ND saves you from carrying multiple fixed NDs, while the pro-mist creates that characteristic halation and gentle highlight rolloff seen in Hollywood productions.
For advanced shooters, consider adding graduated ND filters for landscape work and a set of fixed NDs (3-stop, 6-stop, and 10-stop) for maximum image quality. While magnetic filter systems cost more initially, they’re worth considering for their quick-change convenience and reduced risk of cross-threading.
Remember to match your filter sizes to your largest lens diameter and use step-up rings for smaller lenses – this approach is more cost-effective than buying multiple sets. Always invest in multi-coated filters from reputable manufacturers to maintain image quality and reduce unwanted flare.
Common Mistakes and Solutions
Even experienced cinematographers can encounter challenges when working with lens filters. Here are some common mistakes to watch out for and their solutions:
Stacking multiple filters often seems like a good idea, but it can lead to vignetting and reduced image quality. Instead, consider using a single high-quality filter that combines the effects you need, or carefully test your filter combinations before important shoots.
Poor filter maintenance is another frequent issue. Fingerprints, dust, and scratches can seriously impact image quality. Always handle filters by their edges, use a microfiber cloth for cleaning, and store them in protective cases when not in use.
Many beginners make the mistake of using ND filters incorrectly in varying light conditions. If you notice flickering in your footage, you’re probably using a variable ND filter at its extreme ends. Stay within the middle range of the filter’s capabilities for optimal results.
Color cast issues often plague cheaper filters, especially with ND filters. This can be particularly problematic when shooting skin tones. Invest in high-quality, color-neutral filters, and always test them under different lighting conditions before crucial shoots.
Filter size mismatches are frustratingly common. Rather than buying multiple filters for different lens sizes, invest in filters that fit your largest lens diameter and use step-up rings for smaller lenses. This approach is more cost-effective and ensures consistency across your kit.
Some cinematographers overlook filter orientation, especially with polarizing filters. Incorrect orientation can result in uneven skies or ineffective glare reduction. Take time to rotate the filter while watching your monitor to achieve the desired effect.
Lastly, using filters in challenging weather conditions without proper protection can lead to damage. In wet conditions, use a lens hood to protect your filter from rain drops, and always carry a weather-sealed filter case to prevent moisture damage during storage.
Lens filters are powerful tools that can transform your ordinary footage into compelling visual narratives. Throughout this guide, we’ve explored how different filters can enhance your cinematic storytelling capabilities, from the subtle mood enhancement of neutral density filters to the dramatic effects of polarizers and diffusion filters.
Remember that while technical knowledge is essential, the true magic happens when you experiment and develop your unique visual style. Start with a basic ND filter and gradually expand your collection as you become more comfortable with their effects. Don’t be afraid to break conventional rules – sometimes the most striking images come from unexpected filter combinations or unconventional usage.
Keep in mind that filters are tools, not magic solutions. They work best when combined with thoughtful composition, proper lighting, and intentional camera movement. Take time to practice with each filter in different lighting conditions and scenarios. Document your experiments and learn from both successes and failures.
Whether you’re shooting a personal project or professional work, the right filter can elevate your imagery to new heights. As you continue your journey in cinematography, let these tools inspire you to push creative boundaries and develop your signature look. The world of lens filters is vast and exciting – embrace the learning process and enjoy the journey of discovery.