Every compelling photograph tells a story beyond its visual elements, weaving composition and narrative into a single, powerful moment. When you understand how leading lines guide the eye, how negative space creates emotional impact, and how light shapes the narrative, you transform from documenting scenes to crafting visual stories that resonate deeply with viewers.
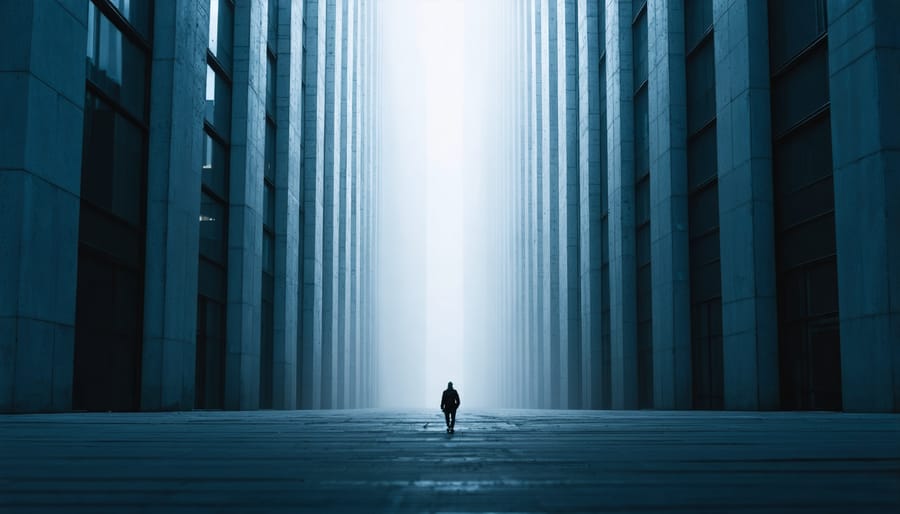
Consider a street photographer capturing a lone figure walking through an urban canyon of towering buildings. The vertical lines of architecture draw viewers into the scene, while the subject’s small scale against the overwhelming environment tells a story of human resilience in modern cities. This isn’t just about following the rule of thirds – it’s about using compositional tools to convey meaning, emotion, and narrative.
Great visual storytelling happens when technical mastery meets intentional design. Each element in your frame – from the placement of subjects to the careful balance of light and shadow – should serve your story’s purpose. Whether you’re shooting landscapes, portraits, or street photography, the most memorable images are those where composition and narrative work in harmony to create something greater than the sum of their parts.
In this guide, we’ll explore how to move beyond basic compositional rules to create images that don’t just look good, but tell stories that linger in viewers’ minds long after they’ve looked away. You’ll learn to see composition not as a set of rigid guidelines, but as a powerful storytelling language waiting to be mastered.
The Power of Visual Hierarchy
Leading Lines and Story Direction
Leading lines are powerful compositional tools that act as visual pathways, guiding viewers through your image with purpose and intent. These lines can be obvious, like a winding road or railroad tracks, or subtle, such as the natural flow of a river or the gentle curve of a person’s gesture.
To effectively use leading lines, consider where you want your viewer’s eye to travel. Start by identifying natural lines in your scene – architecture, landscapes, or even shadows can create strong directional elements. Position these lines to originate from the corners or edges of your frame, drawing attention toward your main subject or a significant point of interest.
The direction of your lines significantly impacts the story you’re telling. Diagonal lines create dynamic tension and movement, while horizontal lines suggest calm and stability. Vertical lines can convey strength and growth, and curved lines add a sense of grace and natural flow to your composition.
Remember that leading lines don’t always need to be literal. The implied direction of a person’s gaze, the arrangement of multiple subjects, or even the progression of light to shadow can create subtle pathways through your image. These visual journeys should feel natural and intuitive, enhancing rather than distracting from your story.
Experiment with different perspectives to strengthen your leading lines. Sometimes, getting lower to the ground or finding a higher vantage point can transform an ordinary scene into a compelling visual narrative.

Rule of Thirds for Character Focus
The rule of thirds becomes particularly powerful when working with human subjects and storytelling. Instead of simply centering your subject, positioning them along the third lines creates a more dynamic and engaging composition that naturally draws viewers into the narrative.
When photographing portraits, try placing your subject’s eyes along the upper third line. This placement creates a natural focal point while leaving space for the viewer to explore the subject’s expression and environment. If your subject is looking off-camera, position them on one third line and leave negative space in the direction of their gaze, creating visual tension and implied narrative.
For environmental portraits, use the intersecting points of your thirds grid to position your subject. This allows you to include contextual elements that enhance the story while maintaining a strong compositional structure. A street photographer standing at the left third line, looking toward bustling city life on the right, tells a different story than if they were centered in the frame.
The rule of thirds also helps create emotional depth. Positioning a subject in the lower third can convey vulnerability or isolation, while placing them in the upper third might suggest power or dominance. When photographing multiple subjects, use the third lines to establish relationships and hierarchy between characters, guiding viewers through your visual story.
Creating Emotional Impact Through Framing
Negative Space and Isolation
Negative space, often overlooked but incredibly powerful, serves as the silent storyteller in photographic composition. When used intentionally, empty space creates breathing room that draws attention to your subject while evoking powerful emotional responses in viewers.
Think of negative space as the visual silence in your image. Just as a pause in conversation can emphasize what’s been said, empty space in photography can amplify the impact of your subject. A single tree against a vast sky, a solitary figure walking through an empty street, or a small object positioned at the edge of the frame – these compositions use isolation to create compelling narratives.
The psychological impact of negative space can’t be understimated. When you surround a subject with emptiness, you create a sense of solitude, contemplation, or even melancholy. Urban photographers often use this technique to comment on isolation in modern cities, while nature photographers employ it to convey the grandeur of landscapes.
To effectively use negative space, look for clean backgrounds like clear skies, blank walls, or smooth water surfaces. Position your subject to interact with this space meaningfully – perhaps having them gaze into the empty area, creating a sense of longing or contemplation. Remember that negative space doesn’t have to be completely empty; subtle textures or gradients can add depth while maintaining the isolating effect.
Start experimenting by photographing familiar subjects with more empty space than you typically would. You’ll be surprised how this simple adjustment can transform an ordinary scene into a powerful visual story.
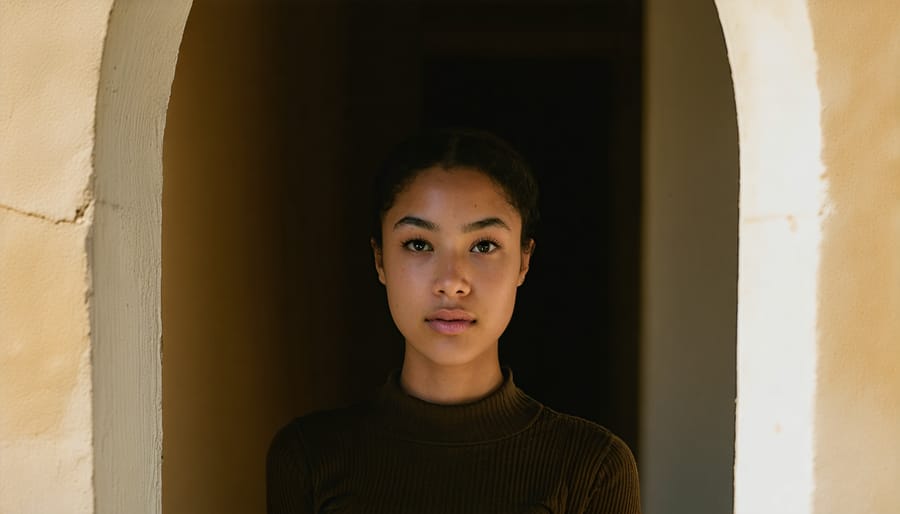
Natural Frames Within the Scene
Natural frames within your scene are like Mother Nature’s gift to photographers – they’re ready-made compositional elements that can transform an ordinary shot into something extraordinary. Think of a stone archway framing a medieval castle, or tree branches creating a perfect window to showcase a mountain vista. These environmental frames serve multiple purposes: they add depth, create visual layers, and naturally guide your viewer’s eye to the main subject.
When looking for natural frames, start by scanning your environment for architectural elements like doorways, windows, or bridges. In nature, you’ll find endless possibilities with tree branches, rock formations, or even clouds. The key is to position these elements so they wrap around your subject without overwhelming it.
The beauty of natural framing lies in its subtlety. A well-placed frame doesn’t just box in your subject – it creates a sense of discovery, as if your viewer is personally uncovering the scene. For instance, shooting through tall grass can create a soft, organic frame that adds mystery and intimacy to a wildlife photograph.
Remember that frames don’t need to be complete to be effective. Sometimes, partial frames work even better. A single tree branch reaching across the top of your frame, or rocks positioned along just one side, can create a more dynamic composition while still directing attention where you want it.
Experiment with different apertures when using natural frames. A wide aperture can blur the framing elements, creating a dreamy, ethereal effect that emphasizes your main subject even more strongly.
Dynamic Storytelling Through Perspective
High and Low Angles
Camera angle choice is one of the most powerful tools for creating emotional impact and establishing relationships between subjects in your photographs. When you shoot from a low angle, pointing upward at your subject, you instantly create a sense of power, dominance, or importance. This technique is particularly effective in portrait photography when you want to make your subject appear more authoritative or commanding.
Conversely, shooting from a high angle, looking down on your subject, can evoke feelings of vulnerability, submission, or isolation. This perspective is often used in documentary photography to create empathy or highlight social issues. Think about how photographing a child from their eye level versus standing above them completely changes the emotional context of the image.
The psychological impact of these angles isn’t limited to portraiture. In landscape photography, a low angle can emphasize the majesty of mountains or towering architecture, while a high angle can reveal patterns and relationships that might not be visible from ground level. When photographing animals, getting down to their eye level creates a more intimate connection with the subject, while shooting from above can emphasize their vulnerability or size.
Remember that these angles don’t exist in isolation – they work in conjunction with other compositional elements to tell your story. Experiment with different heights and perspectives to find the angle that best supports your narrative intention.
Point of View Shots
Point of view (POV) shots are powerful tools that put viewers directly into your subject’s perspective, creating an intimate connection with the story you’re telling. When combined with thoughtful camera movement for storytelling, these shots can transform an ordinary scene into an immersive experience.
Consider photographing from a child’s eye level to capture the world as they see it – towering adults, high countertops, and an entirely different perspective on everyday objects. This technique works equally well for pet photography, where shooting at your animal’s height reveals their unique view of their environment.
Low-angle shots can make subjects appear more powerful or imposing, while high angles often create a sense of vulnerability or isolation. For example, photographing upward at a rock climber emphasizes their strength and determination, while shooting down at a solitary figure in a crowded street can convey urban loneliness.
Remember that POV isn’t limited to just height – consider what your subject is looking at or interacting with. If you’re photographing an artist at work, capture shots from their viewpoint of the canvas. For food photography, shoot from where a diner would be seated to make viewers feel like they’re about to enjoy the meal themselves.
The key is to think about whose story you’re telling and literally put yourself – and your camera – in their shoes.
Color and Light as Narrative Tools
Color Psychology in Composition
Color plays a vital role in visual storytelling, acting as a silent narrator that guides viewers through your photographic narrative. Understanding color psychology helps you create images that resonate emotionally with your audience and strengthen your intended message.
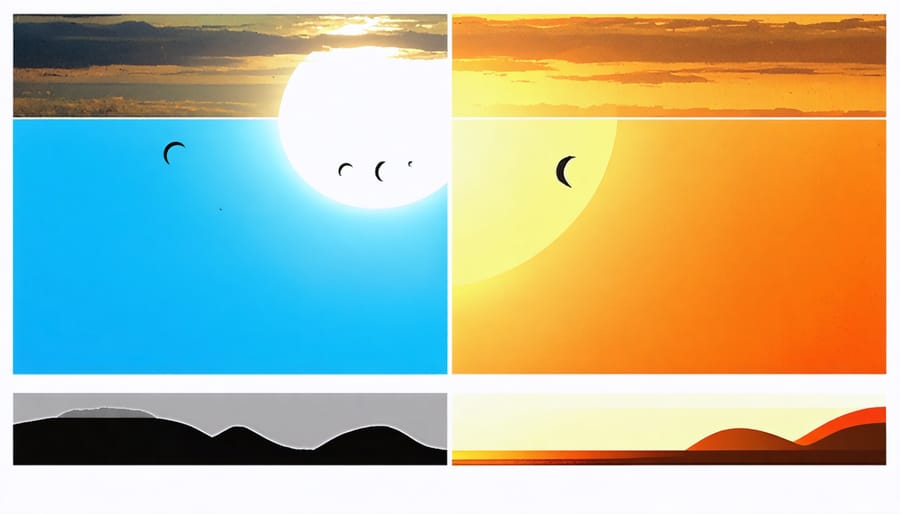
Warm colors like red, orange, and yellow typically evoke feelings of energy, passion, and optimism. Think of how golden hour light can transform an ordinary scene into something magical, creating those coveted film-like lighting effects that add warmth and nostalgia to your images.
Cool colors such as blue, green, and purple tend to communicate calmness, mystery, or melancholy. A misty mountain landscape bathed in blue tones naturally creates a sense of tranquility, while deep purples can add drama and sophistication to portrait compositions.
Color harmony and contrast also play crucial roles in directing viewer attention. Complementary colors create dynamic tension, while analogous color schemes promote harmony and unity. Consider how a single red umbrella against a predominantly blue rainy scene immediately draws the eye and tells a compelling story of contrast.
When planning your compositions, think about how your color choices align with your narrative goals. Are you trying to convey serenity? Opt for softer, cooler tones. Want to express joy or energy? Embrace vibrant, warm colors that pop. Remember that color grading in post-processing can further enhance these emotional connections, but the foundation begins with intentional color choices during capture.
Dramatic Lighting Techniques
Light and shadow are powerful storytelling tools that can transform an ordinary photograph into a compelling visual narrative. By mastering dramatic lighting techniques, you can guide your viewer’s attention and create emotional depth in your images.
Consider the difference between harsh and soft lighting. Harsh lighting, with its strong shadows and high contrast, can convey tension, mystery, or conflict. Think of film noir photography, where deep shadows create an atmosphere of intrigue. Soft lighting, on the other hand, wraps gently around your subject, suggesting warmth, intimacy, or nostalgia.
Direction of light plays a crucial role too. Side lighting reveals texture and form, perfect for portraying character through facial features or highlighting architectural details. Backlighting creates silhouettes and rim lighting, adding an element of mystery or divine presence to your subject. Front lighting, while flattening features, can symbolize honesty and directness.
The time of day also influences your story. Golden hour casts long shadows and warm light, ideal for romantic or contemplative scenes. Blue hour’s subtle, diffused light works wonderfully for moody urban photography. Even artificial lighting can be manipulated to create specific moods – a single overhead light can suggest interrogation, while multiple soft lights can create a glamorous portrait setting.
Remember, the absence of light is just as important as its presence. Strategic shadows can hide details, creating suspense or leaving room for viewers’ imagination to complete the story.
Practical Application Tips
Let’s explore some real-world scenarios where you can immediately apply composition and storytelling techniques to enhance your photography. Start by identifying a clear subject or story element before raising your camera. For example, if you’re photographing a street vendor, consider whether you want to focus on their weathered hands, their interaction with customers, or the colorful array of goods they’re selling.
When shooting environmental portraits, use leading lines naturally present in the scene to draw attention to your subject. A narrow alley can frame a person walking, while urban architecture can create powerful diagonal lines directing viewers’ eyes. Combined with professional lighting secrets, these composition techniques can transform ordinary scenes into compelling narratives.
Practice the “three-layer” approach in your compositions: foreground, middle ground, and background. At a busy market, your foreground might be colorful produce, your middle ground the vendor, and your background the market atmosphere. This creates depth and draws viewers into the story.
Try this exercise: Choose a location and spend 15 minutes photographing it from at least five different perspectives. For instance, in a café, shoot from table level, from above, through window reflections, focusing on hands holding cups, or capturing steam rising from coffee. Each angle tells a different story about the same space.
When photographing events, look for moments that connect multiple elements. At a wedding, capture the flower girl watching the bride with wonder, incorporating both characters in your frame to tell a story of admiration and innocence. Remember that negative space can be as powerful as your subject – sometimes what you leave out of the frame tells as much of the story as what you include.
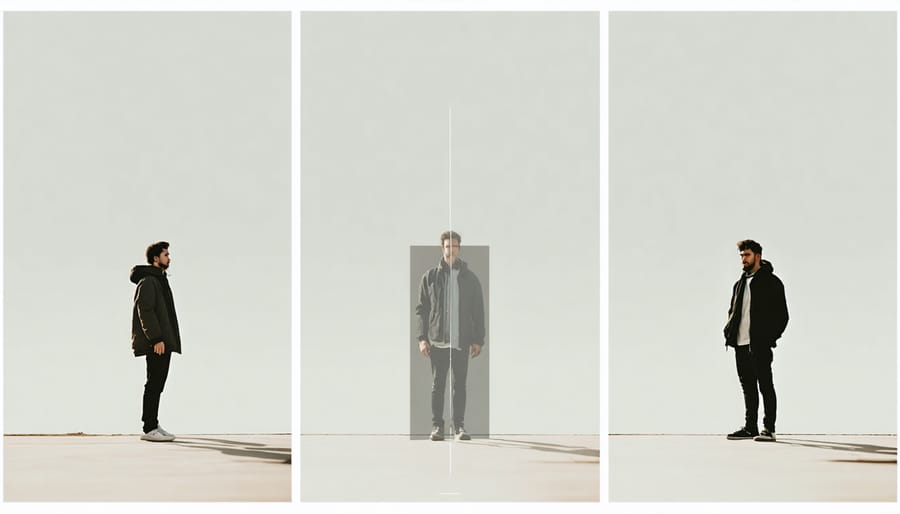
Finally, create visual sequences. Instead of trying to capture everything in one shot, take a series of images that work together to tell a complete story. This could be three images showing preparation, action, and aftermath, or multiple shots showing different aspects of the same scene from varying perspectives.
Mastering composition and storytelling in photography is an ongoing journey that rewards both patience and experimentation. As we’ve explored throughout this article, the intersection of technical composition skills and narrative elements creates powerful images that resonate with viewers on both visual and emotional levels.
Remember that while rules and guidelines provide a solid foundation, they’re meant to be understood, then selectively broken when your creative vision demands it. The most compelling photographs often come from photographers who know the rules well enough to bend them intentionally, creating images that challenge expectations while maintaining visual coherence.
Don’t be afraid to step out of your comfort zone and try new approaches. Start by practicing one technique at a time – perhaps focusing on leading lines one week, and negative space the next. Document your progress, analyze your results, and learn from both your successes and failures. Consider creating personal projects that challenge you to tell stories through a series of images rather than single shots.
Most importantly, develop your unique visual voice. Your experiences, perspective, and emotional connection to your subjects will always be your greatest assets in creating meaningful photographs. As you continue to grow, you’ll find that strong composition becomes second nature, allowing you to focus more on the stories you want to tell through your lens.
The best photographs don’t just show us what something looks like – they reveal how it feels. Armed with these composition and storytelling techniques, you’re ready to create images that don’t just capture moments, but tell stories that linger in viewers’ minds long after they’ve looked away.