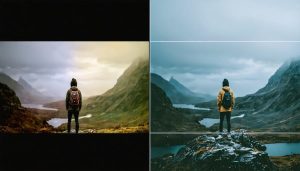
Transform your ordinary photos into stunning visual masterpieces with HDR photography software – the essential toolkit for capturing every detail from the deepest shadows to the brightest highlights. Modern HDR applications have revolutionized how photographers handle high-contrast scenes, making advanced post-processing techniques accessible to everyone.
Gone are the days of choosing between blown-out skies and murky shadows. Today’s HDR software combines multiple exposures seamlessly, delivering natural-looking results that preserve the drama of the original scene while revealing hidden details throughout the entire dynamic range. Whether you’re a landscape photographer battling harsh sunlight or an interior photographer managing mixed lighting conditions, HDR software provides the precise control needed to create images that truly reflect what your eyes see.
From industry standards like Aurora HDR and Photomatix Pro to integrated solutions within Adobe Lightroom and Capture One, the market offers options for every skill level and budget. These powerful tools not only merge exposures but also provide sophisticated tone-mapping algorithms, advanced ghost reduction, and intuitive workflows that make complex HDR processing feel effortless.
Understanding HDR Photography Software
How HDR Software Works
HDR software works by combining multiple exposures of the same scene to create a single image with enhanced dynamic range. The process begins with bracketed shots – typically three or more photos taken at different exposure levels (underexposed, properly exposed, and overexposed). These images capture details in shadows, midtones, and highlights that a single exposure might miss.
When you import these bracketed images into HDR software, it analyzes each photo pixel by pixel, identifying the best-exposed areas from each frame. The software then uses sophisticated algorithms to merge these optimal exposures into a single high dynamic range image. This process, known as tone mapping, compresses the extended dynamic range into something that can be displayed on standard screens while maintaining natural-looking contrast and detail.
Most HDR software offers additional controls for fine-tuning the merge process. These include ghost removal tools that eliminate motion artifacts from moving objects, alignment features that correct slight camera movement between shots, and tone mapping adjustments that let you control how dramatic or natural the final result appears.
Advanced HDR programs also provide selective editing capabilities, allowing you to adjust specific areas of the image independently. This helps achieve a balanced look where both highlight and shadow details remain visible without appearing artificial or oversaturated.
Key Features to Look For
When choosing HDR photography software, several essential editing features can make or break your workflow. First, look for robust ghost removal capabilities, which help eliminate artifacts from moving objects between exposures. This is particularly crucial for scenes with flowing water, moving clouds, or swaying trees.
Auto-alignment tools are another must-have feature, as they precisely align your bracketed shots even when shooting handheld. The best HDR software offers both automatic and manual deghosting options, giving you complete control over the final image.
Tone mapping controls should be comprehensive yet intuitive, allowing you to adjust highlights, shadows, and mid-tones with precision. Look for software that offers both global and selective adjustments, enabling you to fine-tune specific areas of your image without affecting others.
A good preview system is essential – you’ll want to see real-time changes as you adjust settings. Some advanced programs even offer split-screen views to compare different versions of your HDR merge.
Consider whether the software supports batch processing, which can be a huge time-saver when working with multiple sets of bracketed exposures. Finally, ensure the program can handle your camera’s RAW files and offers a variety of export options, including common formats like JPEG, TIFF, and PSD with layer support.
Top HDR Photography Software Options
Professional-Grade Solutions
For photographers seeking the highest quality HDR results, investing in professional editing software can make a significant difference in their final images. Leading the pack is Photomatix Pro, widely regarded as the industry standard for HDR processing. Its comprehensive tone-mapping algorithms and extensive adjustment options give photographers precise control over their bracketed exposures, while its batch processing capabilities streamline workflow for high-volume projects.
Aurora HDR, developed in collaboration with renowned photographer Trey Ratcliff, offers an impressive array of AI-powered tools specifically designed for HDR photography. Its layer-based workflow and advanced features like HDR Denoise and Aurora HDR Smart Structure make it particularly effective for architectural and landscape photography.
For those already invested in the Adobe ecosystem, Lightroom Classic paired with Photoshop provides a powerful HDR solution. While not dedicated HDR software, this combination offers exceptional flexibility through its 32-bit HDR merge capability and advanced masking tools. The ability to seamlessly integrate HDR processing into a broader editing workflow makes it particularly attractive for professional photographers.
Capture One Pro has also emerged as a compelling option, especially for commercial photographers. While its HDR merging capabilities might not be as extensive as dedicated solutions, its superior color editing tools and tethering capabilities make it valuable for studio work requiring HDR techniques.
These professional-grade solutions typically offer features like:
– Advanced ghost removal for moving subjects
– Custom tone mapping curves
– Selective adjustments
– RAW file support
– Batch processing capabilities
– Plugin support for extended functionality
While these options command premium prices, they justify their cost through superior image quality, workflow efficiency, and technical support. Many offer trial versions, allowing photographers to evaluate their features before making an investment.
Budget-Friendly Alternatives
Creating stunning HDR images doesn’t have to break the bank. Several budget-friendly options deliver professional-quality results without the hefty price tag of premium software. Luminance HDR stands out as a completely free, open-source alternative that offers robust HDR merging capabilities and tone mapping options. While its interface might not be as polished as commercial solutions, it provides all the essential tools needed for creating compelling HDR photographs.
Another cost-effective option is EasyHDR, which offers a permanent license at a fraction of the cost of high-end alternatives. It features an intuitive interface and includes advanced ghost removal algorithms, making it particularly suitable for beginners who want to explore HDR photography without a significant investment.
Photographers using Microsoft Windows can take advantage of Microsoft ICE (Image Composite Editor), a free tool that, while primarily designed for panoramas, can effectively handle HDR merging. Though it offers fewer tone mapping options, it’s remarkably stable and user-friendly.
For mobile photographers, several free or low-cost apps deliver impressive results. Snapseed, a free mobile editing app from Google, includes HDR capabilities that work surprisingly well for single-image HDR processing. HDR Max, available for both iOS and Android at a modest price, offers multiple exposure merging and various preset styles.
Remember that many entry-level photo editing software packages, like Affinity Photo, include HDR merging capabilities as part of their standard features. These all-in-one solutions can be more cost-effective than dedicated HDR software while providing additional editing tools for your photography workflow.
Built-in HDR Tools
Many popular photo editing applications now include built-in HDR tools, making it easier than ever to create stunning high dynamic range images without additional software. Adobe Lightroom and Photoshop, industry standards for photo editing, offer robust HDR merging capabilities that produce natural-looking results with minimal effort.
Lightroom’s HDR merge feature is particularly user-friendly, allowing you to combine multiple exposures with a single click while maintaining a non-destructive workflow. The software automatically aligns images, removes ghosting from moving subjects, and provides tone-mapping controls for fine-tuning your results.
Capture One, another professional-grade editing suite, has recently enhanced its HDR tools with improved alignment algorithms and sophisticated tone mapping options. While not as automated as Lightroom’s approach, it offers more precise control over the merging process and final output.
For Mac users, Apple Photos includes basic HDR functionality that, while limited compared to professional solutions, can produce decent results for casual photographers. Similarly, Windows Photos app offers elementary HDR capabilities suitable for quick edits.
DxO PhotoLab deserves special mention for its excellent HDR tools that leverage the software’s renowned noise reduction technology. This combination is particularly effective when working with challenging lighting conditions or high-ISO bracketed shots.
When choosing between built-in HDR tools, consider your workflow needs. While dedicated HDR software might offer more advanced features, the convenience of built-in tools often outweighs their limitations, especially for photographers who want to streamline their editing process without switching between multiple applications.
Common HDR Software Challenges
Ghost Reduction and Alignment
One of the biggest challenges in HDR photography is dealing with movement between bracketed shots. When objects or people move during the capture sequence, they can create unsightly ghosting artifacts in the final image. Fortunately, modern HDR software offers sophisticated ghost reduction and alignment tools to combat these issues.
Most premium HDR applications use advanced algorithms to automatically detect and correct misalignments between frames. These tools are particularly effective for correcting minor camera shake or tripod movement. Some software can even compensate for larger movements, though results may vary depending on the severity of the motion.
Ghost reduction works by identifying moving elements across your bracketed shots and intelligently choosing data from a single frame for those areas. For instance, if a person walks through your scene during bracketing, the software can select their position from just one exposure rather than trying to blend multiple ghosted versions.
For best results, photographers should still aim to minimize movement during capture. However, when movement is unavoidable, features like “deghosting strength” controls let you fine-tune how aggressively the software handles motion artifacts. Lower settings work well for subtle movement like swaying branches, while higher settings may be necessary for more dramatic motion like moving vehicles or crowds.
Advanced users can often selectively apply ghost reduction to specific areas of their image, maintaining maximum detail in static regions while addressing problem areas separately.
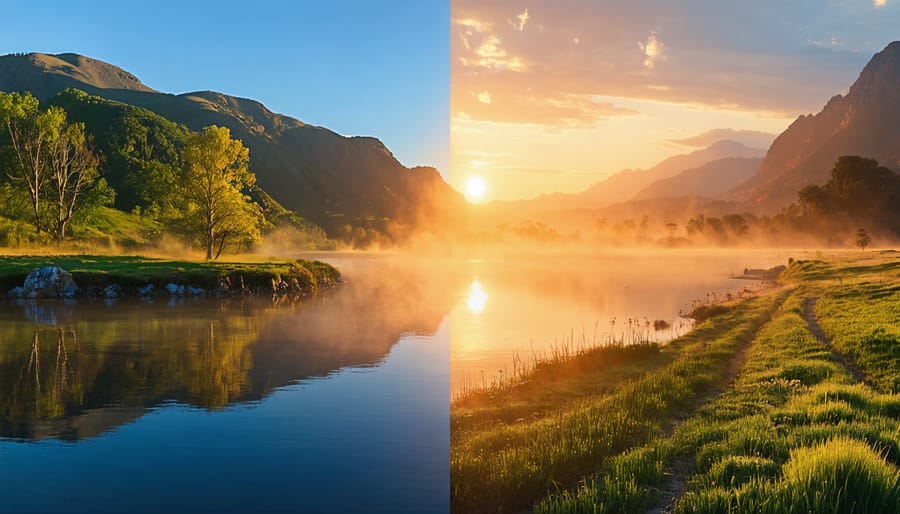
Avoiding the ‘HDR Look’
While HDR photography can create stunning images, it’s easy to fall into the trap of over-processing, resulting in the infamous ‘HDR look’ – those surreal, artificial-looking photos with haloing effects and unnatural colors. The key to successful HDR photography lies in maintaining subtlety and realism.
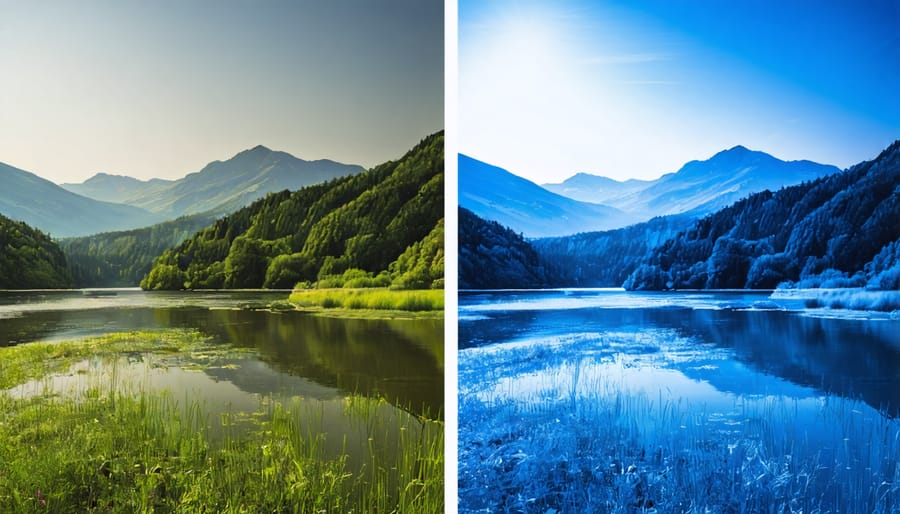
Start by being conservative with your tone mapping settings. Keep the strength or intensity slider below 50% as a general rule, and pay special attention to highlights and shadows. Instead of pushing them to extremes, aim for a balanced approach that preserves the natural contrast of the scene.
Color saturation is another crucial factor. The HDR process can intensify colors, so consider reducing saturation slightly in your software to maintain natural-looking results. Watch out for oversaturated skies and vegetation, which are common telltale signs of heavy-handed HDR processing.
To achieve more natural results, consider using luminosity masks or selective adjustments to apply HDR effects differently across various parts of your image. This approach allows you to preserve contrast in areas that need it while preventing over-processing in others.
Remember that the goal of HDR isn’t to make every photo look dramatic – it’s to capture the full range of light present in the scene. Sometimes, the most effective HDR images are those where viewers can’t tell HDR techniques were used at all.
Workflow Tips for Better HDR Results
Pre-Processing Preparation
Before diving into HDR software, proper preparation of your source images is crucial for achieving the best results. Start by ensuring your bracketed exposures are captured correctly in-camera. Typically, you’ll want at least three shots: one properly exposed, one underexposed (for highlight detail), and one overexposed (for shadow detail). Many cameras offer automatic exposure bracketing (AEB) to simplify this process.
Once you’ve captured your images, take a moment to review them for any obvious issues. Check for camera movement between shots, as this can cause alignment problems during merging. While most HDR software includes alignment tools, starting with well-aligned images will yield better results. If you’re shooting handheld, ensure your shutter speed was fast enough to prevent motion blur.
Next, establish an efficient editing workflow by organizing your bracketed sets into clearly labeled folders. Consider making backup copies of your original files before processing. If shooting in RAW (recommended), avoid making any preliminary adjustments to your images before merging – let your HDR software handle the exposure blending from the original files.
Finally, check that all images in your bracketed set share the same white balance setting. Inconsistent white balance between frames can lead to color shifts in your final HDR image. If shooting in changing light conditions, take note of any significant variations that might affect the merging process.
Post-Processing Refinements
After merging your HDR images, a few crucial refinements can elevate your final result from good to exceptional. Start by fine-tuning the global contrast to ensure your image maintains a natural look while preserving the enhanced dynamic range. Pay special attention to the transition areas between highlights and shadows, where HDR artifacts are most likely to appear.
Local adjustments are your next powerful tool. Use selective masks to address specific areas that need attention, such as brightening shadows in corners or recovering detail in bright skies. Many HDR software packages include AI-powered masking tools that make this process more intuitive than ever before.
Apply color grading techniques to enhance the mood and create a cohesive look across your image. This might involve adjusting color temperature in different zones or fine-tuning the saturation of specific hues to achieve a more pleasing result.
Don’t forget to address common HDR issues like noise and halos. Most contemporary HDR software includes dedicated tools for reducing these artifacts. A subtle application of noise reduction in shadow areas and careful attention to edge detail can make your HDR images look more professional and polished.
Finally, consider adding a gentle vignette or selective darkening around the edges to guide the viewer’s eye toward your main subject. Remember, the goal is to create a natural-looking image that maintains the viewer’s suspension of disbelief while showcasing the full dynamic range of the scene.
HDR photography software has come a long way, offering photographers powerful tools to create stunning images that capture the full dynamic range of a scene. From automated solutions like Aurora HDR and Photomatix Pro to the comprehensive capabilities within Adobe Lightroom and Photoshop, there’s a solution for every skill level and budget.
For beginners, we recommend starting with user-friendly options like Aurora HDR or HDR Efex Pro, which offer intuitive interfaces and preset-based workflows. These programs make it easy to achieve professional-looking results while learning the fundamentals of HDR photography. Intermediate users might find Photomatix Pro’s balance of control and automation particularly appealing, while advanced photographers will appreciate the precision and flexibility offered by manual HDR processing in Photoshop.
When choosing HDR software, consider your specific needs and workflow. If you’re primarily a landscape photographer, look for programs with strong ghost reduction and natural-looking results. For real estate photography, software with batch processing and architectural presets might be more valuable. Remember that the best software for you isn’t necessarily the most expensive or feature-rich option, but rather the one that fits seamlessly into your workflow and helps you achieve your creative vision.
Don’t forget that successful HDR photography begins with proper exposure bracketing in the field. Even the best software can’t compensate for poorly captured source images. Start with good fundamentals, experiment with different software options using their trial versions, and develop a workflow that works for you. With practice and the right tools, you’ll be creating beautiful, natural-looking HDR images that truly capture the world as you see it.