Transform your mobile photography workflow with Lightroom Mobile’s game-changing capabilities. Master essential mobile photo editing techniques that professional photographers rely on daily – from powerful selective adjustments to advanced color grading. Whether you’re editing on-the-go or fine-tuning your social media content, Lightroom Mobile offers sophisticated tools that rival its desktop counterpart. This guide reveals proven strategies to streamline your editing process, maximize creative control, and achieve professional-quality results using just your mobile device. Discover how to leverage premium presets, master local adjustments, and harness cloud synchronization to elevate your mobile photography from ordinary to extraordinary. With these expert tips and lesser-known features, you’ll unlock the full potential of Adobe’s powerful mobile editing suite and transform your smartphone into a professional-grade editing station.
Essential Lightroom Mobile Setup for Success
Cloud Storage and Syncing
Cloud storage and syncing are crucial aspects of using Lightroom Mobile effectively, making it one of the most essential mobile editing tools for photographers on the go. To maximize your experience, start by enabling auto-sync in your settings. This ensures your edits and collections seamlessly transfer between your mobile device and desktop.
Adobe provides 20GB of cloud storage with the Photography Plan, but you can manage this space efficiently by selecting specific albums for syncing rather than your entire library. Create separate collections for current projects and archive completed ones to local storage when finished.
To prevent storage issues, regularly review your synced photos and remove unnecessary duplicates. Enable the “Store Locally” option for albums you frequently access offline, but be mindful of your device’s storage capacity. For RAW files, consider using Smart Previews instead of original files to save space while maintaining editing capabilities.
Remember to connect to Wi-Fi when syncing large collections to avoid excessive mobile data usage. This approach ensures smooth performance while keeping your editing workflow efficient across all devices.
Custom Presets Organization
Organizing your custom presets effectively can transform your editing workflow from chaotic to seamless. Start by creating preset folders based on your photography genres – like “Portraits,” “Landscapes,” or “Street Photography.” This organization method helps you quickly locate the right preset for specific shooting scenarios.
To create a custom preset, edit a photo to your desired look, then tap the three-dot menu and select “Create Preset.” Give your preset a meaningful name that reflects its effect, such as “Warm Sunset” or “Moody B&W.” Consider adding a number prefix (like “01_”) to control the display order of your presets.
For maximum efficiency, create preset collections for different lighting conditions within each category. For instance, under “Portraits,” you might have sub-collections for “Indoor Natural Light” and “Golden Hour.” Remember to regularly review and clean up your preset collection, removing ones you rarely use to keep your workspace tidy.
Pro tip: When creating presets, consider excluding certain adjustments like exposure and white balance, as these often need to be adjusted individually for each photo.
Advanced Editing Techniques
Masking and Selective Adjustments
Masking in Lightroom Mobile has evolved significantly, offering precision that rivals its desktop counterpart. The app now includes AI-powered select subject and select sky tools, making complex selections a breeze. To access these features, tap the masking icon (brush symbol) in the selective editing panel.
For portraits, the select subject tool instantly identifies and masks your main subject, allowing you to make targeted adjustments without affecting the background. Want to enhance a sunset? The select sky tool creates a precise mask of the sky area, letting you boost colors and drama while keeping the foreground natural.
Beyond AI selections, you can use the brush tool for manual masking. A pro tip is to enable mask overlay (the red transparent layer) to see exactly where your adjustments are being applied. For precise work around edges, use two fingers to zoom in and adjust the brush size by sliding left or right on the screen.
The gradient tool is perfect for creating smooth transitions, especially useful for landscape photos where you want to darken skies or enhance foregrounds. You can even combine multiple masks – try using select subject with an inverted gradient to create dramatic environmental portraits.
Remember to use the mask refinement tools to fine-tune your selections. The feather slider helps create natural-looking transitions between masked and unmasked areas, while the invert option quickly switches your selection for creative effects.
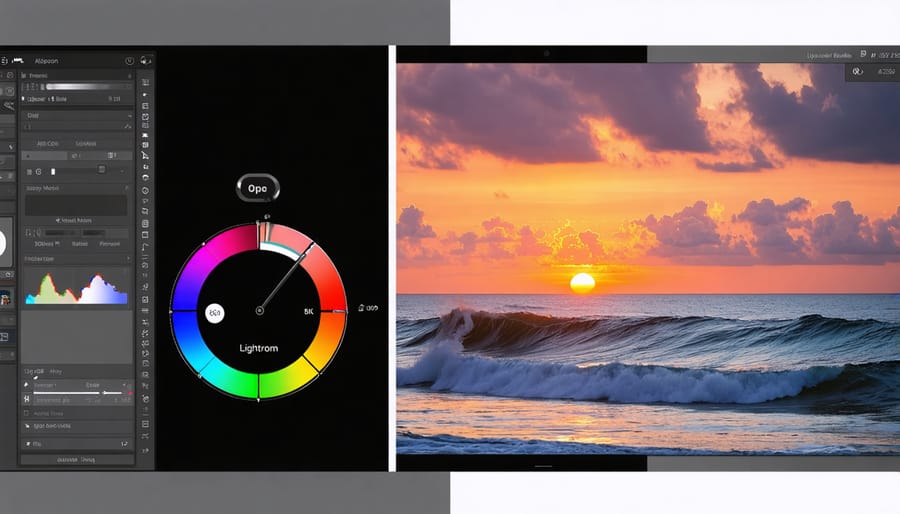
Color Grading Like a Pro
Color grading can transform your mobile photos from good to exceptional, and Lightroom Mobile offers powerful tools to achieve professional-looking results. Start by working with the Color Mixer panel, where you can fine-tune individual color channels. For instance, to create moody sunset images, try decreasing the luminance of blues while enhancing the oranges and reds.
The Color Grading wheels in Lightroom Mobile are game-changers for achieving cinematic looks. Work with shadows, midtones, and highlights separately to create depth and atmosphere. A subtle touch of teal in the shadows paired with warm midtones can instantly elevate your street photography.
Master the Split Toning technique by adding complementary colors to your highlights and shadows. For a filmic look, try copper tones in the highlights and deep blues in the shadows. Remember to keep the saturation subtle – usually between 10-20% – for natural-looking results.
Don’t overlook the Calibration panel at the bottom of your editing tools. Adjusting the Red, Green, and Blue Primary hues can dramatically alter your image’s mood while maintaining natural skin tones. For a signature look, create and save your color grading as a preset to maintain consistency across your portfolio.
Always finish your color grade by checking your image in different lighting conditions, as mobile screens can vary in brightness and contrast. This ensures your edits look great across all devices.
RAW Processing on Mobile
RAW processing in Lightroom Mobile unlocks the full potential of your smartphone photography, giving you greater control over image quality and creative possibilities. Unlike JPEG files, RAW images preserve all the data captured by your phone’s sensor, providing more flexibility during editing.
To get started with RAW editing, first ensure your phone’s camera settings are configured to capture RAW files. Most modern smartphones support this feature, though you may need to enable it manually. Once enabled, you’ll be able to capture better smartphone photos with significantly more detail in highlights and shadows.
When processing RAW files in Lightroom Mobile, focus first on adjusting white balance, as RAW files give you complete control over color temperature. Next, tackle exposure and recover details in highlights and shadows – you’ll notice much more latitude compared to JPEG editing. The texture and clarity sliders are particularly effective with RAW files, allowing you to enhance fine details without introducing unwanted artifacts.
One often-overlooked advantage of RAW processing is the ability to correct lens distortions and chromatic aberration, common issues in smartphone photography. Lightroom Mobile’s lens corrections can automatically fix these imperfections, resulting in cleaner, more professional-looking images.
Remember that RAW files take up more storage space than JPEGs, so consider using cloud storage or regularly transferring files to your computer to maintain adequate space on your device.
Time-Saving Workflow Secrets
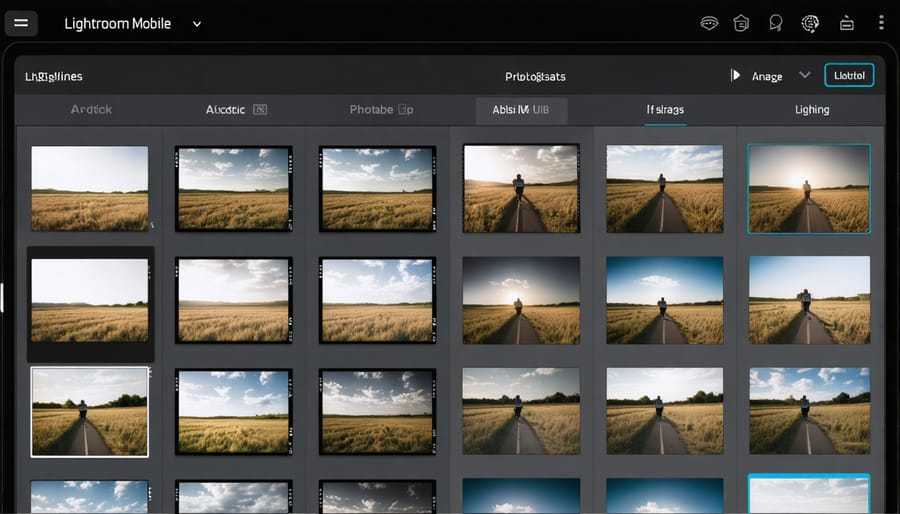
Batch Editing Strategies
When you’re working with multiple photos from a shoot, batch editing in Lightroom Mobile can be a real time-saver. The key is to start with a strong preset or edit on one representative image, then apply those adjustments across similar photos. Start by selecting your hero image – one that best represents the lighting and conditions of your shoot.
After perfecting your edits on the hero image, long-press the three-dot menu and select “Copy Settings.” Here, you can choose which specific adjustments you want to apply to other photos. This selective copying is particularly useful when you want to maintain certain unique elements in individual shots while standardizing others.
For ultimate efficiency, use the “Select” feature to choose multiple similar photos, then tap “Paste Settings.” Your edits will apply to all selected images instantly. Pro tip: when batch editing, focus on universal adjustments like exposure, white balance, and basic color grading first, then fine-tune individual photos as needed.
Another powerful batch editing strategy is creating and saving your own presets. Once you’ve developed a look you love, save it as a custom preset by tapping the “Presets” button and selecting “Create Preset.” Name it something memorable and specific to the shooting conditions – like “Outdoor Portraits – Sunny Day” – so you can easily find and apply it to future sessions.
Remember to review each photo after batch editing, as some images might need slight adjustments to account for variations in lighting or composition. This combination of batch processing and individual refinement strikes the perfect balance between efficiency and quality.
Keyboard Shortcuts and Gestures
Mastering keyboard shortcuts and gestures in Lightroom Mobile can dramatically speed up your editing workflow. Let’s explore some of the most efficient ways to navigate and edit using your device’s touch interface.
For basic navigation, use two fingers to pinch and zoom on any image, or double-tap to quickly zoom to 100%. Swipe left or right with three fingers to move between editing modules, and use a two-finger swipe up or down to show or hide the toolbar.
When adjusting sliders, try this time-saving trick: instead of dragging the slider precisely, tap anywhere on the slider track to jump to that value instantly. For fine-tuning, use a long-press and slide gesture on any adjustment slider for more precise control.
In the crop tool, rotate your image by placing two fingers on the screen and turning them clockwise or counterclockwise. To straighten a horizon quickly, use the auto-straighten feature by double-tapping the angle slider.
Some lesser-known but powerful shortcuts include:
– Double-tap the edit icon to reset any adjustment
– Long-press the compare button to see before/after views
– Three-finger tap to toggle between grid and loupe view
– Two-finger tap on a preset to see its effect intensity
For selective adjustments, use a two-finger pinch to resize brushes and masks. When working with the healing tool, double-tap the area to automatically find the best source point.
Remember that you can customize the order of your editing tools by long-pressing and dragging them to your preferred position in the toolbar, creating a personalized workflow that matches your editing style.
Creative Effects and Styles
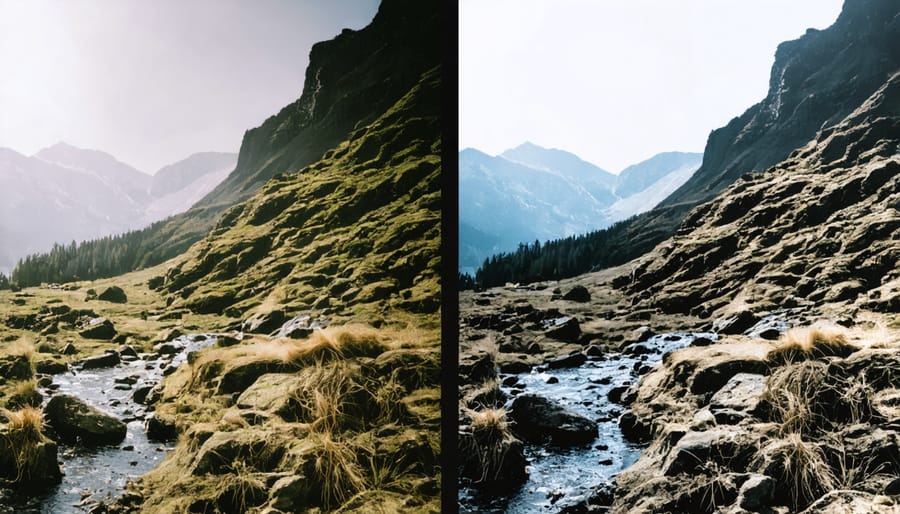
Creating Film-Like Effects
Film photography’s timeless aesthetic has made a strong comeback, and you can recreate these beloved analog looks right in Lightroom Mobile. Start by adjusting the tone curve to create that characteristic film fade by lifting the shadows slightly and pulling down the highlights, resulting in a softer contrast range.
For a classic Kodak Portra look, warm up your temperature slightly and push your tints toward magenta. In the color mixer, reduce the saturation of blues and greens while maintaining rich, warm skin tones. Add subtle grain in the Effects panel – aim for about 20-30 amount with a size of 40-50 for that authentic film texture.
To achieve the popular Fuji-inspired look, shift your highlights toward green-yellow and shadows toward blue in the split toning panel. This creates that distinctive cross-processed effect many film photographers love. For black and white film simulation, try increasing contrast while slightly reducing blacks, then add stronger grain (around 40-50) with a larger size setting.
Don’t forget to save your favorite film looks as presets for quick application. Remember that genuine film aesthetics often embrace imperfections – slight color shifts, lifted blacks, and grain all contribute to that authentic analog feel. Experiment with different combinations until you find your signature film style.

Modern Portrait Enhancement
Modern portrait editing in Lightroom Mobile has evolved significantly, offering powerful tools to create professional-looking mobile portraits with just a few taps. Start by mastering the selective adjustment tools, particularly the brush tool, which allows you to enhance specific facial features while maintaining natural skin tones.
For skin retouching, use the Clarity slider with negative values (-15 to -25) to soften imperfections while keeping important texture intact. Combine this with subtle healing brush strokes for spot corrections. The Color Mix panel is your secret weapon for skin tone refinement – adjust the Orange and Red channels to achieve natural-looking results.
Eyes can be enhanced using the Radial Filter tool: create a small oval over each eye, then boost Exposure and Clarity slightly. For added depth, create a larger, feathered radial filter around the subject’s face, decreasing exposure slightly to draw attention to your subject.
Don’t overlook the power of the Color Grading wheels for mood enhancement. Use the Midtones wheel to add warmth to skin tones, while the Shadows wheel can introduce subtle color contrasts that make your portraits pop. Remember to use the masking tool to protect certain areas from adjustments, ensuring your edits remain precise and professional.
Keep your adjustments subtle – the goal is to enhance, not transform. Save your favorite settings as presets to maintain consistency across your portrait editing workflow.
Mastering Lightroom Mobile opens up a world of creative possibilities right at your fingertips. From organizing your photo library with custom presets to making precise selective adjustments, these tools empower you to elevate your mobile photography game significantly. Remember that while these tips and tricks provide a solid foundation, the real magic happens when you experiment and develop your unique editing style.
Don’t be afraid to push boundaries and combine different techniques we’ve covered. Try blending selective adjustments with color grading, or mix custom presets with local adjustments to create striking images that stand out. The beauty of Lightroom Mobile lies in its flexibility – you can edit anywhere, anytime, while maintaining professional-quality results.
Keep practicing these techniques, and you’ll soon develop an efficient mobile editing workflow that suits your style. Whether you’re editing on the go or prefer the convenience of mobile editing at home, these skills will help you transform ordinary photos into extraordinary memories. Remember, great editing enhances the story your images tell – so keep exploring, learning, and creating with confidence.