By
By 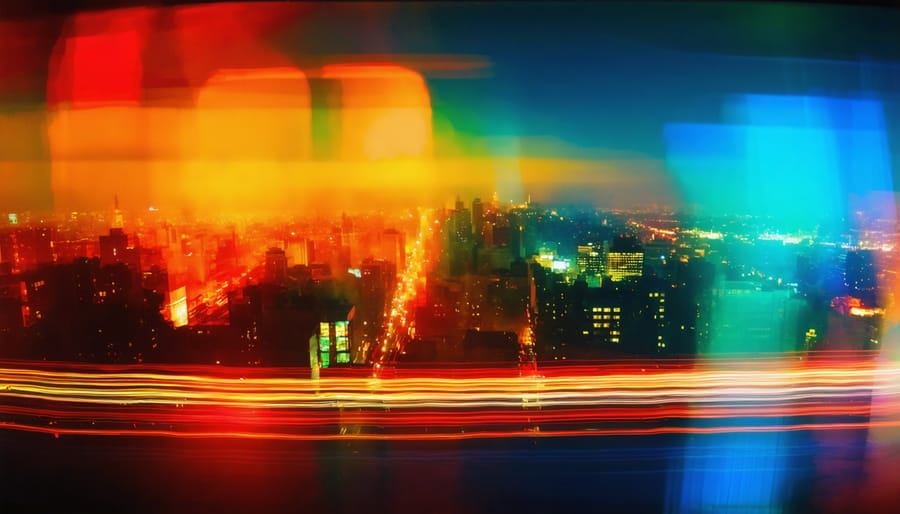
Experiment with long exposure techniques to capture motion blur, light trails, and smooth water for surreal, artistic effects. Learn the essentials of long exposure photography here.
Play with perspective by getting low to the ground, climbing to high vantage points, or using a tilt-shift lens to miniaturize scenes. Unusual angles add visual interest.
Create abstract images by zooming or panning the camera during exposure, photographing reflections, or getting in close for macro shots of details and textures. Dive deeper into abstract photography techniques.
Incorporate creative lighting like silhouettes, lens flare, colored gels, steel wool sparks, or light painting with flashlights and other light sources at night. The right lighting can dramatically transform an image.
Double Exposure
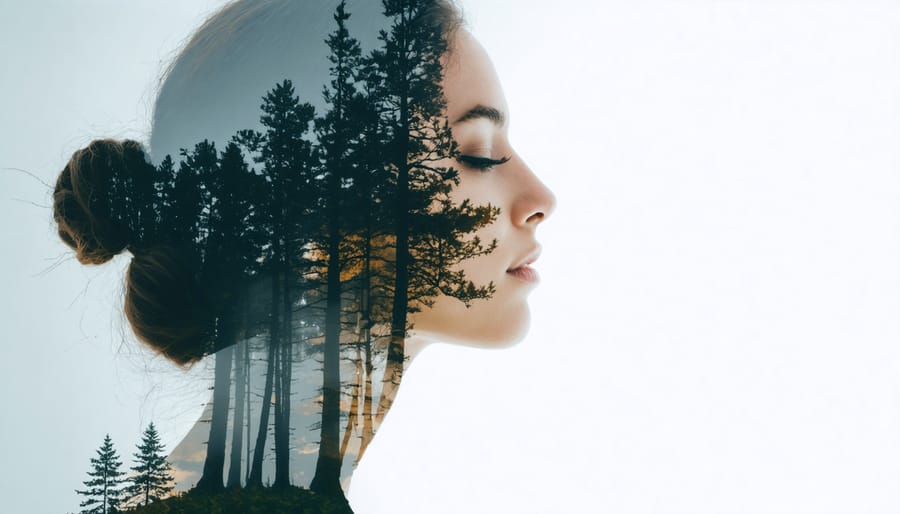
Double exposure photography merges two or more images into a single frame, creating dreamlike compositions that challenge our perception of reality. What was once a purely analog technique, born from accidentally exposing the same piece of film twice, has evolved into one of the most versatile creative tools available to smartphone photographers. Modern phones make this effect accessible through dedicated apps and built-in camera features, letting you blend portraits with cityscapes, silhouettes with nature scenes, or textures with architectural details.
The beauty of double exposure lies in its ability to tell layered stories. A profile silhouette filled with forest imagery can convey someone’s connection to nature. A cityscape overlaid on clasped hands might represent urban relationships. Unlike simple photo filters, double exposures require intentional composition in both your base image and overlay, making the creative process more deliberate. You’ll need to think about contrast, negative space, and how the two images will interact before you even press the shutter.
Whether you’re shooting with an iPhone’s native editing tools or using third-party apps like Snapseed or Adobe Lightroom Mobile, the fundamentals remain consistent. Start with a strong silhouette or high-contrast base image, then layer a secondary photo that fills the darker areas. The technique works particularly well when you understand basic principles of light and exposure since managing brightness levels between your two images determines whether the final result looks intentional or muddled.
In-Camera Double Exposures
In-camera double exposures allow photographers to combine two images into one, creating surreal, dreamlike effects without post-processing. Many modern DSLRs and mirrorless cameras have built-in double exposure features that make this technique accessible to photographers at any skill level.
Popular camera models as of 2026 with built-in double exposure capabilities include:
- Canon EOS R6 Mark II and EOS R5
- Nikon Z8 and Z9
- Sony Alpha 7 IV and Alpha 7R V
- Fujifilm X-T5 and X-H2S
To start, enable the multiple exposure mode in your camera’s settings. Then, frame your first shot and take the picture. The image will appear semi-transparent on the screen, allowing you to line up your second shot. Adjust the composition and exposure as needed, then take the second picture. The camera will merge the two images into a single frame.
Experiment with different subject matter: silhouettes against textures or patterns, portraits with nature elements, or cityscapes with motion blur. The key is to visualize how the two images will interact and complement each other. With practice, in-camera double exposures can yield stunning, one-of-a-kind photographs that push your creativity to new heights.
Creating Double Exposures in Photoshop
Creating a double exposure effect in Photoshop involves combining two images using layer blending modes. Start by opening both images and placing one on top of the other in separate layers. Experiment with various blending modes like “Screen,” “Lighten,” or “Multiply” to see how they interact. Adjust the opacity of the top layer to fine-tune the effect. You can also use layer masks to selectively reveal or hide parts of each image for more control. With some post-processing finesse, you’ll be creating stunning double exposures in no time!
Freelensing
Freelensing is a creative photography technique that involves detaching your lens from the camera body to create unique tilt, shift photography effects and play with depth of field. By holding the lens slightly away from the camera, you can tilt it in various directions, allowing you to selectively focus on specific parts of the scene while blurring others. This technique adds an artistic, dreamy quality to your images.
To achieve sharp focus when freelensing, start by setting your lens to manual focus and your camera to aperture priority mode. Compose your shot, then slowly tilt the lens until the desired area comes into focus. Experiment with different angles and distances between the lens and camera body to control the effect. Keep in mind that freelensing works best with manual focus lenses and wider apertures.
One important consideration when freelensing is the potential for dust to enter the camera body and settle on the sensor. To minimize this risk, always point your camera downward when changing lenses and avoid freelensing in dusty or windy environments. Regularly cleaning your sensor with a specialized kit can help maintain image quality.
With practice, freelensing can open up a world of creative possibilities, allowing you to capture unique perspectives and add an ethereal touch to your photographs.
Intentional Camera Movement (ICM)
Intentional camera movement (ICM) is a creative photography technique that involves moving the camera during a long exposure to create abstract, impressionistic images. By deliberately introducing motion blur, photographers can transform everyday scenes into dreamy, ethereal works of art.
To get started with ICM, switch your camera to manual mode and select a slow shutter speed, typically 1/4 second or longer. A narrow aperture (f/11 or higher) will help maintain some detail while the shutter is open. Begin with subtle movements, such as gentle panning or tilting, and experiment with different directions and speeds to achieve various effects.
Vertical movement can elongate and stretch subjects, while horizontal panning blurs the background into a wash of color. Circular or zigzag motions produce more chaotic, unpredictable results. The key is to move the camera smoothly and consistently throughout the exposure.
ICM works best in scenes with strong contrast, bold colors, or distinct lines, such as a forest, cityscape, or sunset. Look for patterns, textures, and repetition that can become intriguing abstract elements when blurred. Backlighting and reflections also lend themselves well to this technique.
Embrace the unpredictable nature of ICM and let your creativity guide the process. Not every shot will be a masterpiece, but with practice, you’ll develop a feel for the types of movement and subjects that yield the most striking results. ICM is a liberating way to break free from the constraints of traditional photography and express your unique artistic vision.
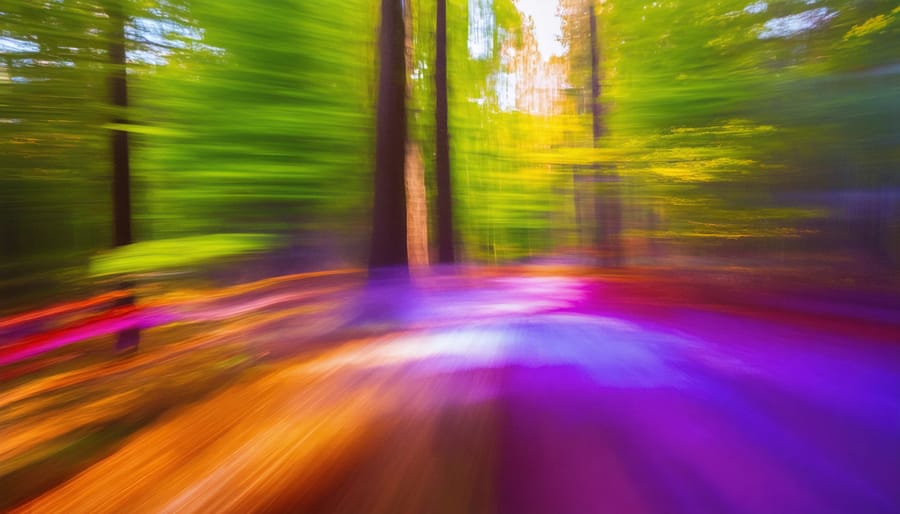
- Choose your subject: Select a scene with strong contrast, bold colors, or distinct lines. Forests, cityscapes, sunsets, and anything with patterns or repetition work particularly well.
- Set your camera to manual mode: Manual control gives you full authority over the exposure settings needed for this technique.
- Configure shutter speed and aperture: Start with a shutter speed of 1/4 second or longer to allow time for movement. Use a narrow aperture (f/11 or higher) to maintain some detail and prevent overexposure during the long exposure.
- Choose a movement pattern: Decide whether you’ll pan horizontally, tilt vertically, move in circles, or try a zigzag motion. Each creates a different effect.
- Execute the motion during exposure: Press the shutter and move the camera smoothly and consistently throughout the entire exposure. The key is fluid, deliberate motion rather than jerky movements.
- Review and adjust: Check your result immediately. Adjust your shutter speed, movement speed, or direction based on what you see. ICM requires experimentation.
Prisming
Prisming is a creative photography technique that involves placing a prism in front of your camera lens to refract light and create captivating effects. By exploiting the prism’s ability to split and bend light, photographers can produce artistic flares, reflections, and distortions that add a unique touch to their images. Triangular prisms are the most commonly used type, offering a classic prismatic effect with rainbow-like color separation. However, photographers can also experiment with other shapes, such as hexagonal or octagonal prisms, to achieve different patterns and distortions.
To get started with prisming, simply hold the prism in front of your lens at various angles and distances. Rotate the prism to change the direction of the light refraction and experiment with tilting it to control the intensity of the effect. Combining prisming with other creative techniques, such as lens flares or bokeh, can further enhance the visual impact of your images. When Mastering Light, prisming allows you to manipulate and play with the available light in unexpected ways, resulting in dreamy, ethereal, or even surreal photographs that stand out from the crowd. Whether you’re shooting portraits, landscapes, or abstract scenes, incorporating prisming into your creative arsenal can help you discover new perspectives and unleash your artistic vision.
Infrared Photography
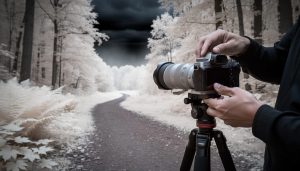
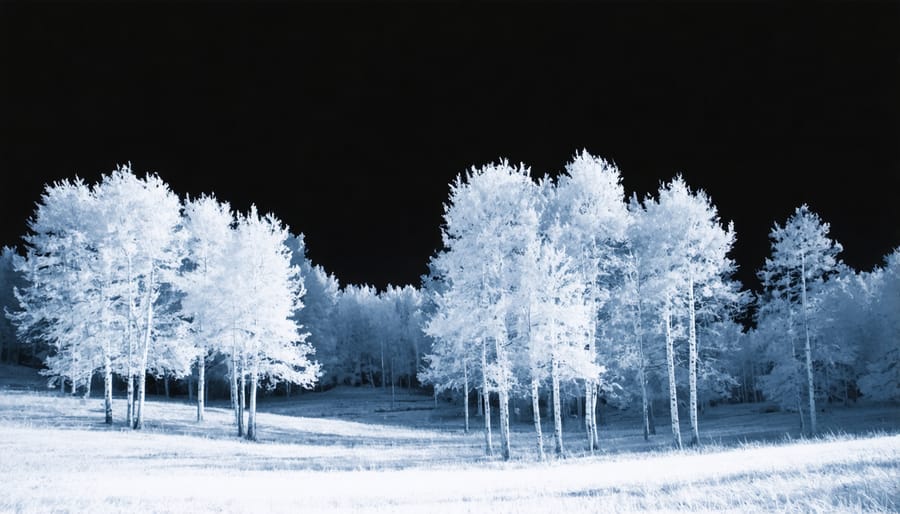
Infrared photography captures light beyond the visible spectrum, transforming everyday scenes into otherworldly images with glowing white foliage, dark skies, and an ethereal quality that’s impossible to achieve through standard photography. While traditional infrared photography requires cameras modified to remove their internal IR-blocking filters, smartphone photographers can explore this creative technique using external filters and specialized post-processing methods.
What makes infrared photography unique is its ability to record how different materials reflect infrared light. Healthy vegetation reflects IR light intensely, appearing bright white or pink, while blue skies absorb it and turn nearly black. Water and clouds retain their tonal relationships but with dramatically altered contrast. The result is a surreal aesthetic that turns familiar landscapes into dreamlike compositions.
Modern smartphones, despite their built-in IR filters, still capture a small amount of infrared light. This limitation means you won’t achieve the same pure IR effect as a converted camera, but you can create compelling hybrid images that blend visible and near-infrared wavelengths. The technique works best in bright sunlight when IR light is most abundant, particularly for outdoor scenes with vegetation, architecture, and expansive skies.
Choosing the Right Infrared Filter
When choosing an infrared filter, consider the wavelength it allows to pass through. A 720nm filter is a good starting point, producing a slight infrared effect while retaining some visible light. An 850nm filter blocks more visible light, resulting in a stronger infrared look with darker skies and more contrast. For an even more dramatic effect, opt for a 950nm filter, which eliminates almost all visible light. Keep in mind that the darker the filter, the longer the exposure time needed. Infrared filters also have different color cast characteristics – some produce a red or purple hue, while others lean towards blue. The color cast can be adjusted in post-processing, but selecting a filter with your preferred hue can streamline your workflow. Regardless of the filter chosen, be sure to use manual focus and the best lenses for your camera to ensure sharp images. With the right infrared filter, you can create otherworldly, surreal photographs that stand out from the crowd.
| Wavelength | Visible Light Retained | Color Effect | Exposure Adjustment | Best Use Cases |
|---|---|---|---|---|
| 590nm | Moderate | Red-orange cast, warmer tones | +2 to +4 stops | Beginners, landscapes with autumn color |
| 720nm | Minimal | Mild red/purple hue, balanced IR effect | +5 to +7 stops | Classic infrared, foliage, versatile applications |
| 850nm | Very little | Blue-black skies, high contrast | +8 to +10 stops | Dramatic landscapes, architectural photography |
Post-Processing Infrared Images
To edit your infrared photos, import the images into your preferred photo editing software like Adobe Photoshop or Lightroom. For a classic black and white look, convert the photo to grayscale and adjust the contrast, shadows, and highlights to emphasize texture and tonal range. Experiment with color channel mixing to swap red and blue channels, creating surreal “false color” effects where foliage appears snowy white and skies turn deep blue. Fine-tune white balance to correct any color cast from the infrared filter. Adjust exposure, clarity, and sharpness to bring out detail in leaves and landscapes. Apply noise reduction if needed, as high ISO may be used for infrared. Play with color grading and split toning to introduce creative hues into shadows and highlights. With the expanded sensitivity to light that infrared provides, you can create striking and ethereal interpretations of scenes through post-processing.
Steel Wool Photography
Steel wool photography is an exciting technique that produces mesmerizing images of glowing sparks dancing through the night sky. To capture these ethereal light trails, you’ll need a few key items: fine-grade steel wool, a metal whisk, some wire, and a lighter or 9V battery. It’s crucial to prioritize safety when attempting this technique. Always have a fire extinguisher or water source nearby, and avoid dry, flammable areas.
Once you’ve found a suitable outdoor location, secure the steel wool pad inside the whisk using the wire. With your camera on a tripod, dial in settings for a long exposure – typically between 5-30 seconds at f/8 or f/11, with ISO 100. Focus your lens to infinity and use a remote shutter release to minimize camera shake. Light the steel wool with a lighter or briefly touch it with a 9V battery, then quickly spin the flaming whisk in circles using a sturdy wire or cable. The burning wool will send a dazzling spray of sparks flying, which your camera will capture as glowing streaks across the frame.
Experiment with different compositions, spinning techniques, and even colored steel wool for truly unique results. Remember that safety comes first, so always have a spotter on hand to watch for any stray embers. With a bit of practice and creative vision, steel wool photography can add an eye-catching, dynamic element to your nighttime imagery.
Conclusion
Experimenting with these creative photography techniques can open up a world of possibilities for capturing unique and compelling images. By thinking outside the box and trying unconventional methods, you can discover new ways to express your artistic vision and set your photos apart from the crowd.
From long exposure and light painting to intentional camera movement and forced perspective, each technique offers a distinct way to transform everyday scenes into extraordinary images. While some may require specific gear or settings, many can be achieved with just a bit of creativity and a willingness to experiment.
Remember, the key is to have fun and embrace the unexpected. Not every attempt will be a masterpiece, but each shot is an opportunity to learn, grow, and refine your skills. As you become more comfortable with these techniques, you’ll develop your own style and approach, finding innovative ways to push your creative boundaries.
So grab your camera, let your imagination run wild, and start exploring the limitless potential of creative photography. With practice and persistence, you’ll be amazed at the stunning images you can create, and the new perspectives you’ll discover along the way.



 By
By