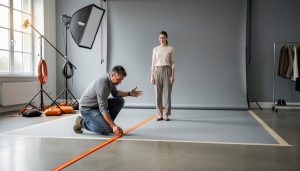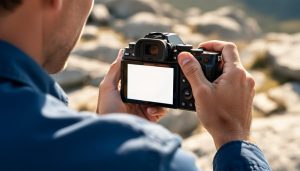
Set your camera to manual mode and embrace the magic of night photography with confidence. Start with a high ISO (1600-3200), wide aperture (f/2.8 or wider), and slow shutter speed (1/15 or longer) to capture the ethereal glow of cityscapes and starlit landscapes. Mount your camera on a sturdy tripod and activate your camera’s 2-second timer to eliminate motion blur from button pressing. Scout locations during daylight hours to identify compelling compositions and potential light sources, then return after sunset when artificial lighting creates dramatic contrasts and mood. Master long exposures to transform moving lights into stunning light trails and capture the subtle details in dark shadows while maintaining highlight detail in bright areas. These fundamental techniques unlock endless creative possibilities in low-light conditions, whether you’re shooting urban landscapes, astrophotography, or light painting in complete darkness.
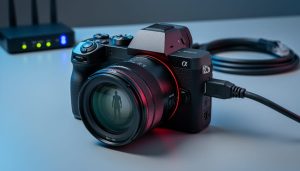
Essential Equipment for Night Photography
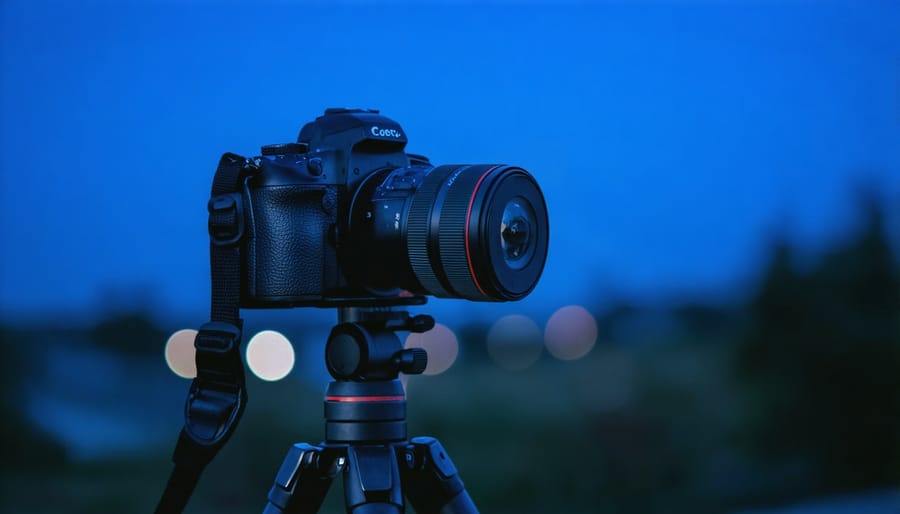
Camera Bodies and Settings
When shooting at night, your choice of camera body and settings plays a crucial role in capturing stunning images. Full-frame cameras generally perform better in low-light conditions due to their larger sensors, but modern crop-sensor cameras can also deliver excellent results when used correctly.
The key camera settings for night photography start with shooting in manual mode. Set your ISO between 800 and 3200, depending on the available light and your camera’s capabilities. While higher ISOs introduce noise, many contemporary cameras handle this well. Keep in mind that a lower ISO will produce cleaner images but require longer exposure times.
For sharp night shots, use a slow shutter speed, typically between 15-30 seconds for starry skies or 2-10 seconds for urban scenes. Your aperture should be wide open (f/1.4 to f/2.8) to gather maximum light, though you might want to stop down to f/8 or f/11 for sharper cityscapes when using a tripod.
Enable your camera’s long-exposure noise reduction if available, but be aware this doubles your processing time. Switch to manual focus, as autofocus often struggles in low light. Using your LCD’s live view with focus magnification can help achieve precise focus on distant lights or stars.
For the best results, shoot in RAW format to preserve maximum detail and allow for more flexibility in post-processing, especially when adjusting white balance and exposure.
Lenses and Filters
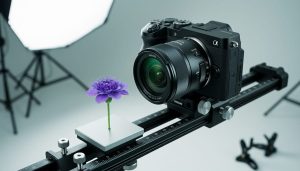
Choosing the right lens and filters can dramatically improve your night photography results. For night shooting, fast lenses with wide maximum apertures (f/2.8 or wider) are ideal, as they allow more light to reach your sensor. Wide-angle lenses, particularly in the 14-35mm range, are popular choices for capturing vast nightscapes and star trails.
Prime lenses often outperform zoom lenses in low-light conditions due to their wider maximum apertures. A 24mm f/1.4 or 35mm f/1.8 lens can be excellent for night photography, offering both speed and sharpness. However, don’t discount quality zoom lenses – they offer versatility when you need to quickly adjust your composition in changing conditions.
As for filters, a clear protective filter is always recommended to shield your lens from moisture and debris during night shoots. Neutral Density (ND) filters are less crucial for night photography but can be useful during blue hour or when photographing city lights. Light pollution filters are worth considering if you’re shooting in areas affected by artificial lighting – they help reduce the orange glow from sodium vapor lamps and enhance the natural colors of the night sky.
One often-overlooked but valuable filter is the polarizing filter, which can help reduce glare from wet surfaces and artificial lights in urban night photography. Just remember that any filter will slightly reduce the amount of light reaching your sensor, so consider removing non-essential filters when every photon counts.
Mastering Camera Settings After Dark
ISO and Noise Management
Managing ISO settings effectively is crucial for capturing stunning night photographs while keeping digital noise under control. While it might be tempting to crank up your ISO to its maximum, finding the right balance is key to achieving optimal camera settings for evening shots.
Start by determining your camera’s native ISO range and its “sweet spot” – typically between ISO 100 and 800, where image quality remains pristine. For night photography, you’ll likely need to push beyond this range, but do so incrementally. Modern cameras can handle higher ISOs better than ever, but each camera has its limits. Test your camera at different ISO settings to understand where noise becomes unacceptable.
To minimize noise while maintaining necessary exposure, consider these strategies:
– Use a tripod to enable longer shutter speeds at lower ISOs
– Shoot in RAW format for better noise reduction in post-processing
– Employ exposure bracketing when possible
– Take advantage of your camera’s built-in noise reduction features
Remember that some noise is acceptable and can even add character to night scenes. The key is managing it intentionally rather than letting it dominate your image. If you must shoot at high ISOs, expose slightly to the right (without blowing out highlights) as this can help reduce noise in shadow areas during post-processing.
Shutter Speed Techniques
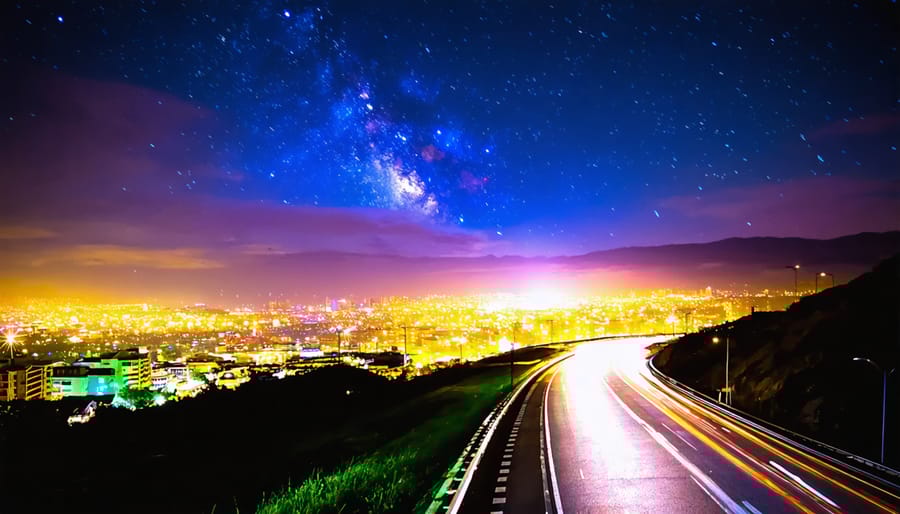
Mastering shutter speed is crucial for night photography, as it directly impacts how much light reaches your sensor and how motion is captured in your images. For basic night cityscapes, start with shutter speeds between 1-30 seconds, which allows enough time to capture ambient light while maintaining sharp details in stationary objects.
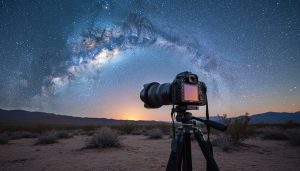
When photographing star trails, extend your exposure time to 30 minutes or longer. Use your camera’s bulb mode and a remote shutter release to prevent camera shake. For crisp star points instead of trails, follow the “500 rule” – divide 500 by your lens’s focal length to determine the maximum exposure time before stars begin to streak.
For capturing car light trails, experiment with exposures between 5-30 seconds. Position yourself safely above traffic and wait for vehicles to move through your frame. The longer the exposure, the more complete the light trails will appear.
Urban scenes with people require faster shutter speeds to freeze motion. Try 1/15 to 1/60 of a second, pushing your ISO higher to compensate. When shooting handheld, remember that slower speeds require extremely steady hands or image stabilization.
For moonlit landscapes, exposures typically range from 20-30 seconds at f/2.8, adjusting based on the moon’s phase and brightness. During the blue hour, shorter exposures of 1-15 seconds often suffice, capturing the rich colors of dusk while maintaining detail in both highlights and shadows.
Aperture Selection
When shooting at night, your aperture selection plays a crucial role in capturing the right amount of light and achieving the desired creative effect. Generally, you’ll want to use a wide aperture (lower f-number) like f/1.8, f/2.8, or f/4 to allow more light to reach your camera’s sensor. This is especially important when photographing in extremely low-light conditions.
However, the choice isn’t always straightforward. While a wider aperture lets in more light and creates beautiful bokeh effects, it also reduces your depth of field. This means less of your image will be in sharp focus. For cityscapes or landscapes where you want everything from the foreground to the distant elements to be sharp, consider stopping down to f/8 or f/11, but be prepared to compensate with longer exposure times or higher ISO settings.
For star photography, many photographers swear by the “rule of 500” and typically use apertures between f/2.8 and f/4 to capture enough starlight while maintaining reasonable sharpness. When photographing street scenes at night, an aperture around f/4 often provides a good balance between light gathering and depth of field.
Remember that lens quality becomes more apparent at wider apertures, so if you’re using a budget lens, you might get sharper results by stopping down slightly from its widest setting. Test your lens at different apertures to find its sweet spot for night photography.
Creative Composition Techniques
Light Painting
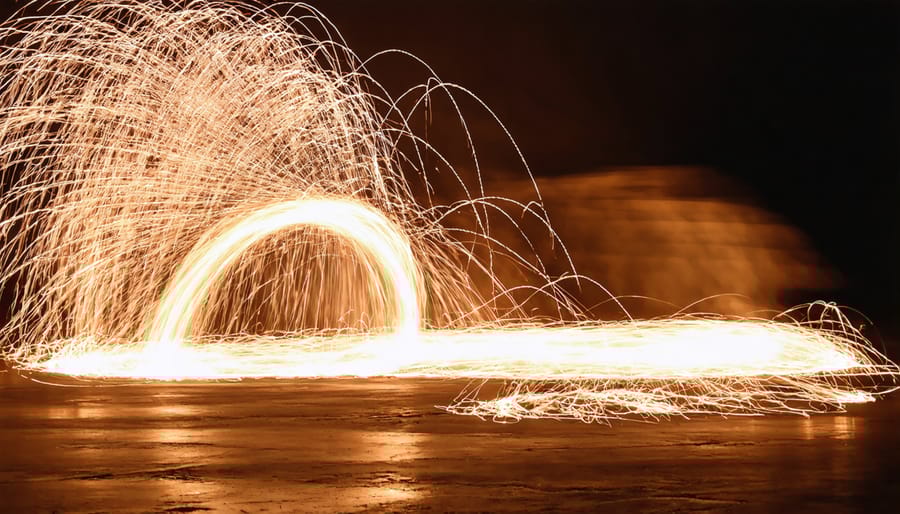
Light painting is one of the most captivating creative night photography ideas you can explore, transforming ordinary scenes into magical light-filled compositions. To get started, you’ll need a camera capable of long exposures, a sturdy tripod, and various light sources like LED strips, flashlights, or even steel wool for more dramatic effects.
Begin by setting your camera to manual mode with a shutter speed between 10-30 seconds. Keep your ISO low (100-400) to minimize noise, and set your aperture between f/8 and f/11 for good depth of field. Focus manually on your subject or scene before starting your exposure.
The key to successful light painting lies in smooth, deliberate movements. Start your exposure and move your light source continuously through the frame, creating patterns, writing words, or illuminating specific elements in your composition. Remember that you won’t appear in the final image as long as you keep moving and wear dark clothing.
For best results, choose a location with minimal ambient light and experiment with different colored lights and movement speeds. Try techniques like “dome lighting” by spinning a light source in a circular motion, or create leading lines by walking through your frame with a light source pointed at the ground.
Common mistakes to avoid include moving too slowly (which can create hot spots) or using lights that are too bright. Start with softer light sources and gradually work your way up to more intense ones as you gain experience. Multiple shorter exposures can often yield better results than single longer ones, as they give you more control over the final composition.
Urban Night Photography
Urban environments offer a spectacular canvas for night photography, with their vibrant lights, towering buildings, and dynamic energy. To capture these scenes effectively, start by scouting locations during daylight hours to identify compelling compositions and potential challenges. This preparation is especially valuable for urban architecture photography after dark.
Position yourself to capture leading lines created by street lights, car trails, or illuminated buildings. The blue hour (just after sunset) often provides the perfect balance between ambient light and artificial illumination, creating a magical atmosphere for cityscapes. Experiment with different creative lighting techniques by incorporating reflections from wet streets or glass buildings.
Use a sturdy tripod and remote shutter release to minimize camera shake during long exposures. Consider shooting in aperture priority mode at f/8 to f/11 for optimal sharpness and depth of field. ISO settings between 100-400 work well for most urban night scenes, helping maintain image quality while capturing sufficient light.
Look for unique perspectives: elevated viewpoints, street-level shots, or reflections in fountains can add drama to your urban night photography. Pay attention to mixed lighting sources – sodium vapor street lights, LED billboards, and tungsten building lights can create interesting color contrasts.
Remember to respect private property and local regulations when setting up your equipment. Some locations may require permits, especially for tripod use. Consider shooting during quieter hours to avoid crowds and obtain cleaner compositions of the urban landscape.

Post-Processing Night Photos
Noise Reduction Workflow
Digital noise can be particularly challenging in night photography, but with a structured workflow in post-processing, you can significantly improve your final images. Start by importing your RAW files into your preferred editing software, as RAW format gives you the most flexibility for noise reduction.
Begin with color noise reduction, which appears as random colored speckles in your image. Most editing software handles this well with minimal adjustment needed – usually a setting between 25-40 is sufficient. Be careful not to push it too far, as excessive color noise reduction can create an unnatural, plastic-like appearance.
Next, tackle luminance noise, which appears as grainy texture throughout your image. This requires a more delicate touch, as aggressive luminance noise reduction can destroy fine detail. Start with a conservative setting around 20-30 and gradually increase while watching your image at 100% zoom. Pay special attention to areas with subtle texture, like star fields or distant city lights.
Use masking techniques to apply selective noise reduction. Dark areas typically show more noise than bright areas, so consider creating separate adjustment layers for shadows and highlights. This targeted approach helps preserve detail in well-exposed areas while cleaning up noisier shadow regions.
Detail preservation is crucial during noise reduction. Most modern editing software offers detail preservation sliders – use these to maintain sharp edges and important texture while smoothing unwanted noise. A setting between 50-70 usually works well for maintaining this balance.
Finally, consider applying sharpening after noise reduction to restore any lost detail. Use a high-pass filter or selective sharpening tool with a light touch, focusing on main subject areas rather than the entire image. This helps create a clean yet natural-looking final result without introducing new noise artifacts.
Remember to periodically toggle your noise reduction on and off to ensure you’re not over-processing the image. The goal is to reduce distracting noise while maintaining the natural atmosphere of your night scene.
Color Balance and Exposure
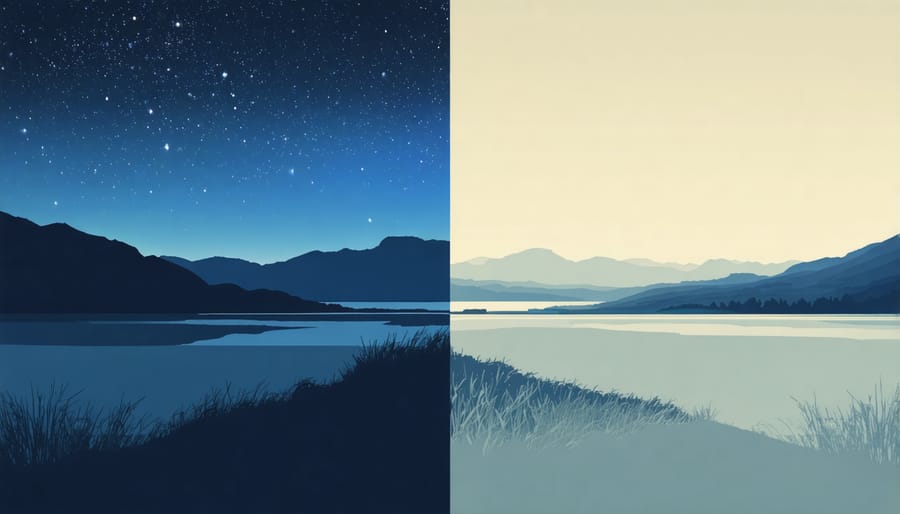
Getting the right color balance and exposure in night photography can be tricky, but mastering these elements will dramatically improve your nocturnal shots. Unlike daytime photography, artificial light sources often create a mix of different color temperatures that can confuse your camera’s auto white balance.
Start by setting your white balance manually rather than relying on auto settings. For city scenes with artificial lighting, try setting your white balance between 3200K and 4000K to capture the warm glow of streetlights while maintaining natural-looking colors. For starlight photography, a cooler setting around 4800K to 5500K often works better to preserve the natural blue tones of the night sky.
When it comes to exposure, night photography requires a different approach than daylight shooting. Your camera’s light meter might struggle in low-light conditions, often suggesting settings that would overexpose your scene. Instead, start with these baseline settings:
– ISO: Begin at 800-1600, adjusting higher if necessary
– Aperture: f/2.8 to f/4 for most night scenes
– Shutter speed: 15-30 seconds for static scenes
Remember that the “correct” exposure at night is often darker than what your camera suggests. Don’t be afraid of deep shadows – they’re essential for creating atmosphere and depth in night photography. Look for the balance between maintaining detail in your highlights while allowing darker areas to fade naturally into shadow.
For scenes with mixed lighting, consider bracketing your exposures. Take multiple shots at different exposure values and blend them in post-processing. This technique helps manage high-contrast scenes where bright artificial lights compete with darker areas.
Keep in mind that your camera’s LCD screen can be deceiving at night. It often appears brighter than the actual image, so check your histogram to ensure you’re capturing the full range of tones without clipping highlights or losing shadow detail.
Night photography opens up a magical world of creative possibilities, and with the techniques we’ve explored, you’re now equipped to capture stunning images after dark. Remember that successful night photography is built on three fundamental pillars: understanding your camera settings, having the right equipment, and practicing proper technique.
Don’t be discouraged if your first attempts don’t match your expectations. Like any skill, night photography requires patience and practice. Start with simple compositions in well-lit urban environments before tackling more challenging scenarios like astrophotography or light painting. Keep experimenting with different exposure settings, and don’t forget to review your images carefully to understand what worked and what didn’t.
Make it a habit to check weather conditions and scout locations during daylight hours. This preparation will help you focus on creativity when darkness falls. Additionally, consider joining local photography groups or online communities where you can share experiences and learn from fellow night photographers.
Whether you’re capturing city lights, star trails, or the Milky Way, the key is to get out there and practice. Each session will build your confidence and expand your creative possibilities. Keep your camera manual handy, pack extra batteries, and most importantly, enjoy the peaceful solitude that night photography often brings.
Remember, some of the most memorable images are captured when most people are asleep. So grab your tripod, dress warmly, and embrace the challenge of photographing after dark. The night is waiting for you to capture its beauty.