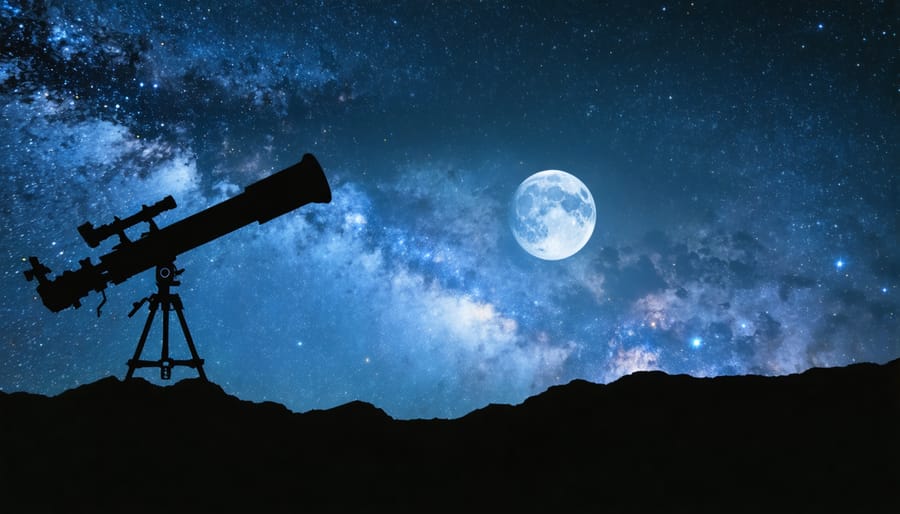
Capture the cosmos through your telescope with precision-engineered equatorial mounts, ensuring perfect star tracking during long exposures. Master essential night photography techniques by starting with bright targets like the Moon and Jupiter, using their high luminosity to practice focusing and exposure settings. Connect your DSLR camera to your telescope using a T-ring adapter and prime focus method, eliminating the need for eyepieces while maximizing light transmission. Transform your backyard into an observatory by selecting dark sky locations away from light pollution, mounting your setup on solid ground, and allowing proper cool-down time for your telescope’s optics to achieve thermal equilibrium with the surrounding air.
Astrophotography combines the technical precision of astronomy with the creative artistry of photography, opening a gateway to capturing distant nebulae, galaxies, and star clusters. While the learning curve may seem steep, modern technology has made this fascinating hobby more accessible than ever. With the right equipment, patience, and methodical approach, you’ll soon progress from capturing basic lunar photographs to stunning deep-sky images that reveal the hidden beauty of our universe.
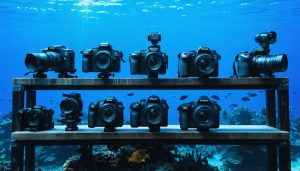
Essential Equipment for Telescope Astrophotography
Choosing Your First Telescope
Selecting your first telescope for astrophotography can feel overwhelming, but it doesn’t have to be. For beginners, a refracting telescope with a focal length between 400mm and 800mm offers an excellent starting point. These telescopes provide good image quality and are typically more forgiving when it comes to alignment and tracking.
The Celestron 80ED and Sky-Watcher ProED 80mm are popular entry-level choices that won’t break the bank. These apochromatic refractors minimize chromatic aberration, producing clearer images of celestial objects. Their relatively short focal lengths also make them more forgiving of tracking errors, which is crucial when you’re learning.
If you’re on a tighter budget, consider a quality Newtonian reflector. While they require more maintenance and collimation (optical alignment), they offer excellent value for money. The Orion 6″ f/4 Newtonian Astrograph, for instance, provides a wide field of view perfect for capturing larger deep-sky objects.
Whatever telescope you choose, ensure it’s compatible with your camera and mount. Look for models with a solid focuser and the ability to reach focus with your DSLR or dedicated astronomy camera. Avoid telescopes marketed as “planetary” or with focal lengths over 1000mm for your first setup – these require more precise tracking and are less forgiving for beginners.
Remember, the best telescope is one you’ll actually use. Start with something manageable and upgrade as your skills develop.
Camera Requirements and Compatibility
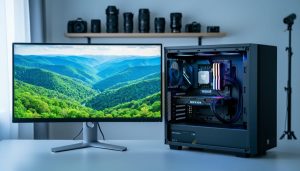
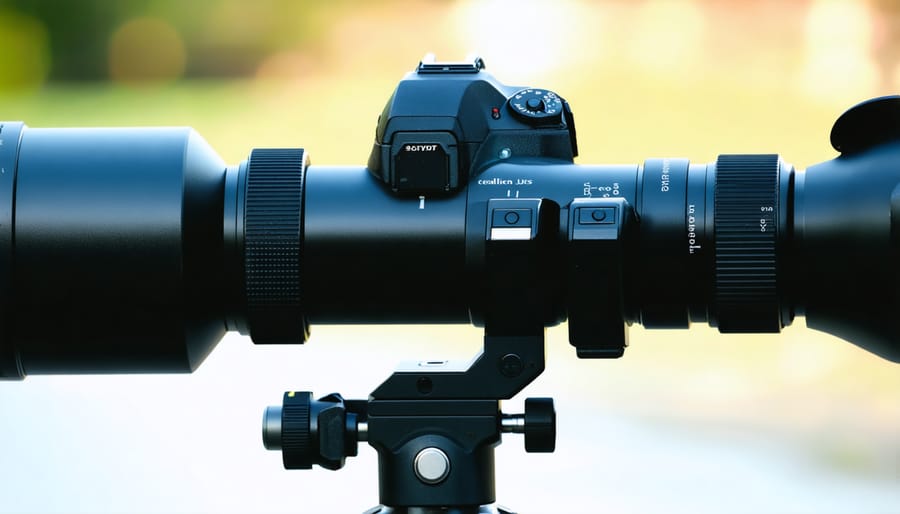
When it comes to astrophotography, your choice of camera plays a crucial role in capturing the night sky. DSLR and mirrorless cameras are excellent options for beginners, particularly models that offer manual settings and the ability to shoot in RAW format. Look for cameras with good high-ISO performance and noise handling capabilities, as you’ll often be shooting in extremely low-light conditions.
To attach your camera to a telescope, you’ll need specific adapters. The most common setup includes a T-ring (which is camera-brand specific) and a T-adapter (which connects to your telescope). Make sure these components are compatible with both your camera mount and telescope’s focuser diameter.
For planetary photography, consider dedicated astronomy cameras with high frame rates. These specialized cameras can capture hundreds of frames per second, allowing for image stacking to improve detail and reduce noise. However, they typically require a laptop connection and additional software to operate.
Don’t overlook smartphone astrophotography – modern phones with night mode capabilities can capture impressive shots through a telescope using a smartphone adapter. While not as versatile as dedicated cameras, they’re a great way to start without significant investment.
Remember that any camera you choose should have the ability to take long exposures, ideally 30 seconds or longer. If your camera has a “bulb” mode for extended exposures, even better!
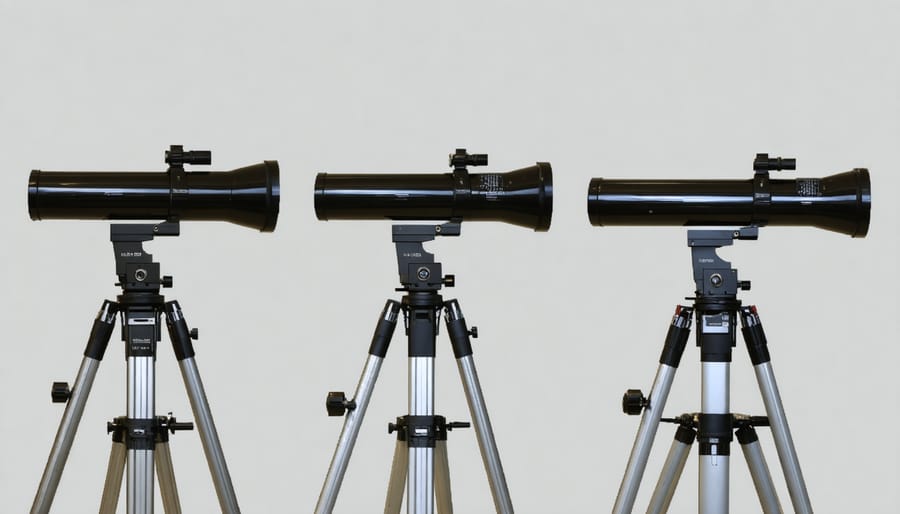
Mount Options: Making Tracking Possible
When it comes to astrophotography, your mount is just as crucial as your telescope and camera. The Earth’s rotation means that stars appear to move across the night sky, which can result in blurry images during long exposures. This is where proper mounting solutions come into play.
The most basic option is an altitude-azimuth (alt-az) mount, which moves up-down and left-right. While suitable for visual astronomy, it’s generally not ideal for astrophotography because it doesn’t track the sky’s natural motion. However, some computerized alt-az mounts can work for shorter exposures.
For serious astrophotography, an equatorial mount is essential. These mounts align with Earth’s axis of rotation, allowing them to track celestial objects smoothly across the sky. The German Equatorial Mount (GEM) is particularly popular among beginners due to its reliability and relative affordability.
Many modern mounts come with computerized tracking systems, often called “GoTo” mounts. These can automatically locate and track celestial objects, making your imaging sessions much more productive. While they’re more expensive, the investment is worthwhile if you’re serious about astrophotography.
For beginners, a mid-range computerized equatorial mount is often the sweet spot. Look for one that can handle at least 1.5 times the weight of your complete setup (telescope, camera, and accessories) to ensure stable tracking during long exposures.
Setting Up Your First Shoot
Finding the Perfect Location
Location selection can make or break your astrophotography endeavors. Finding dark sky locations away from city lights is crucial for capturing clear, detailed images of celestial objects. Start by checking light pollution maps online to identify promising spots within driving distance of your home.
Rural areas, national parks, and designated dark sky preserves offer ideal conditions for telescope astrophotography. Look for locations with clear horizons and minimal obstruction from trees or buildings. Higher elevations often provide better viewing conditions, as you’ll be above some of the atmospheric interference that can blur your images.
Weather plays a vital role too. Choose nights with clear skies and low humidity for the best results. Apps like Clear Outside or Astrospheric can help you plan your sessions by providing detailed astronomical forecasts. Consider accessibility and safety as well – you’ll be carrying equipment and setting up in the dark, so choose locations with stable ground and easy parking access.
Remember to scout your chosen location during daylight hours first. This helps you identify potential setup spots and safety concerns before attempting a nighttime shoot.

Aligning Your Equipment
Proper alignment is crucial for successful astrophotography, and while it may seem daunting at first, breaking it down into steps makes the process manageable. Start by finding true north using a compass or smartphone app, remembering to account for magnetic declination in your area.
For equatorial mounts, polar alignment is essential. Position your telescope’s mount so that the polar axis points toward the celestial pole (Polaris in the Northern Hemisphere). Most modern mounts feature a polar scope, which makes this process much easier. Look through the polar scope and adjust the mount’s altitude and azimuth until Polaris appears in the correct position according to your mount’s polar scope reticle.
If your mount has computerized GoTo capabilities, take advantage of the built-in alignment routine. This typically involves centering two or three bright stars in your finder scope and eyepiece. Follow the mount’s prompts carefully, as accurate star alignment will significantly improve your tracking accuracy throughout the imaging session.
For manual mounts, use the drift alignment method. Choose a star near the celestial equator and observe its drift through your telescope at high magnification. If the star drifts north or south, adjust your mount’s azimuth. For stars near the meridian, drift indicates the need for altitude adjustments.
Remember that perfect alignment isn’t always necessary for short exposure photos, but becomes increasingly important as exposure times lengthen. Spend extra time on alignment if you plan to take exposures longer than 30 seconds. A well-aligned telescope will track stars smoothly, resulting in pinpoint stars in your final images rather than elongated streaks.
Keep in mind that alignment needs to be checked periodically throughout your imaging session, especially if you’re shooting for several hours. Temperature changes and subtle mount movement can affect alignment accuracy over time.
Camera Settings for Night Sky
Capturing the night sky requires specific camera settings to achieve the best results. While there are various optimal camera settings for night shots, let’s focus on the fundamental settings for telescope astrophotography.
Start by setting your camera to full manual mode. This gives you complete control over every aspect of your exposure. Set your ISO between 800 and 3200, depending on your camera’s capabilities and the darkness of your location. Higher ISO settings increase sensitivity but also introduce more noise, so finding the right balance is crucial.
For shutter speed, use the “500 rule” as a starting point: divide 500 by your telescope’s focal length to determine the maximum exposure time before star trails appear. For example, with a 400mm focal length, your maximum exposure would be around 1.25 seconds (500 ÷ 400 = 1.25).
Always shoot in RAW format rather than JPEG. RAW files contain more data and give you greater flexibility during post-processing. Disable any automatic noise reduction features, as these can blur fine details in your stars.
Focus is absolutely critical. Use your camera’s live view mode, zoomed in 10x on a bright star, to achieve precise focus. Once focused, lock it in place and avoid touching the focus ring for the rest of your session.
Turn off any image stabilization features, as they can actually create blur when the camera is mounted on a stable platform. Finally, use a remote shutter release or your camera’s built-in timer to avoid any vibration when taking photos.
Basic Processing Techniques
Stacking Multiple Exposures
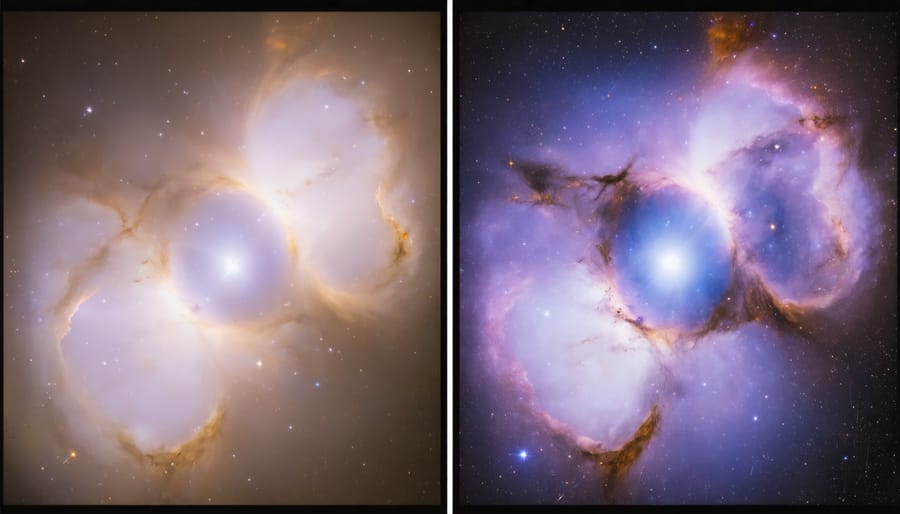
Stacking multiple exposures is a game-changing technique that can dramatically improve the quality of your astrophotographs. When you capture a single image of the night sky, it often contains noise and may lack detail. By combining multiple shots of the same celestial object, you can enhance the signal-to-noise ratio and reveal stunning details that weren’t visible in individual frames.
To get started with image stacking, you’ll need specialized software. DeepSkyStacker is a popular free option that’s perfect for beginners. Sequator is another user-friendly alternative for Windows users, while Mac users might prefer Starry Sky Stacker. These programs automatically align your images and combine them to create a cleaner, more detailed final photograph.
Here’s a basic workflow for stacking:
1. Capture multiple images of your target (aim for at least 20-30 frames)
2. Take several dark frames (images with the lens cap on)
3. Import both your light frames (actual images) and dark frames into your stacking software
4. Let the software align and stack the images
5. Make basic adjustments to the stacked result
The magic happens when the software combines these images. Random noise gets averaged out while genuine celestial details are enhanced. Think of it like laying transparent sheets on top of each other – the consistent details become stronger while random specks fade away.
Remember to shoot in RAW format for maximum data retention, and try to maintain consistent camera settings across all your frames. It’s also crucial to ensure your telescope’s tracking is accurate throughout the imaging session. While the stacking process might seem daunting at first, modern software has made it remarkably straightforward, and the results are well worth the effort.
Basic Enhancement Methods
Once you’ve captured your celestial images, the next crucial step is enhancing them to reveal the stunning details that might not be immediately visible. While advanced processing can be complex, there are several basic enhancement methods that can dramatically improve your astrophotography results.
Start with stacking, a fundamental technique where multiple images of the same subject are combined to reduce noise and enhance detail. Free software like DeepSkyStacker or Sequator makes this process surprisingly straightforward. Simply import your images, and the software will align and combine them automatically.
Adjusting levels and contrast is your next step. Think of it as bringing out the hidden details in your image, much like adjusting low-light imaging techniques for traditional photography. Most basic photo editing software offers these controls. Start by stretching the histogram to reveal faint details while being careful not to overexpose bright areas.
Color balance adjustment is essential for achieving natural-looking results. Stars and nebulae have specific colors that can be thrown off by light pollution or camera settings. Use the white balance tools to correct any unwanted color casts, aiming for neutral stars and authentic nebula colors.
Noise reduction is particularly important in astrophotography due to the long exposure times. Apply it conservatively to maintain detail while smoothing out grainy areas. Many beginners overlook this step, but it can make the difference between a professional-looking image and an amateur snapshot.
Finally, consider subtle sharpening to enhance detail. Use this sparingly, as over-sharpening can create artificial-looking results and emphasize noise. A light touch with the sharpening tool can help stars appear more precise and nebula details more defined.
Common Beginner Mistakes (And How to Avoid Them)
Even experienced photographers can stumble when first venturing into telescope astrophotography. Understanding these common pitfalls and their solutions will help you avoid frustration and achieve better results faster. Before diving into telescope work, it’s helpful to master beginner night photography basics to build a strong foundation.
One frequent mistake is rushing to photograph without proper polar alignment. Take time to accurately align your mount with the celestial pole – this prevents star trailing and makes tracking much more effective. Remember, patience during setup pays dividends in your final images.
Another common error is attempting to photograph deep-sky objects without first learning to focus properly. Use a Bahtinov mask or digital focusing aid, and always focus on a bright star before moving to your target. Don’t trust your eyes alone – what looks sharp through the viewfinder may not be perfect for long exposures.
Many beginners also overlook the importance of proper camera settings. Using too high an ISO can introduce excessive noise, while too low might miss faint details. Start with ISO 800-1600 and adjust based on your results. Similarly, skipping dark frames and flat frames is tempting but can seriously impact image quality.
Temperature management is often neglected – as your camera warms up during use, thermal noise increases. Allow your equipment to reach ambient temperature before starting, and consider using a cooling solution for longer sessions.
Lastly, don’t get discouraged by initial results. Every astrophotographer started somewhere, and each session is a learning opportunity. Keep detailed notes of your settings and outcomes to refine your technique over time.
Embarking on your telescope astrophotography journey may seem daunting at first, but remember that every expert astrophotographer started exactly where you are now. By following the basic principles we’ve covered – choosing the right equipment, understanding mount alignment, mastering camera settings, and practicing basic processing techniques – you’ll be well on your way to capturing stunning images of the night sky. Start with easier targets like the Moon and bright planets before moving on to deep-sky objects. Don’t be discouraged by initial results; astrophotography is a skill that develops with patience and practice. The satisfaction of capturing your first clear image of a distant galaxy or nebula makes all the learning worthwhile. So grab your telescope, head outside on the next clear night, and begin your adventure in astronomical imaging. The universe is waiting to be photographed, and you’re now equipped with the knowledge to start capturing its wonders.