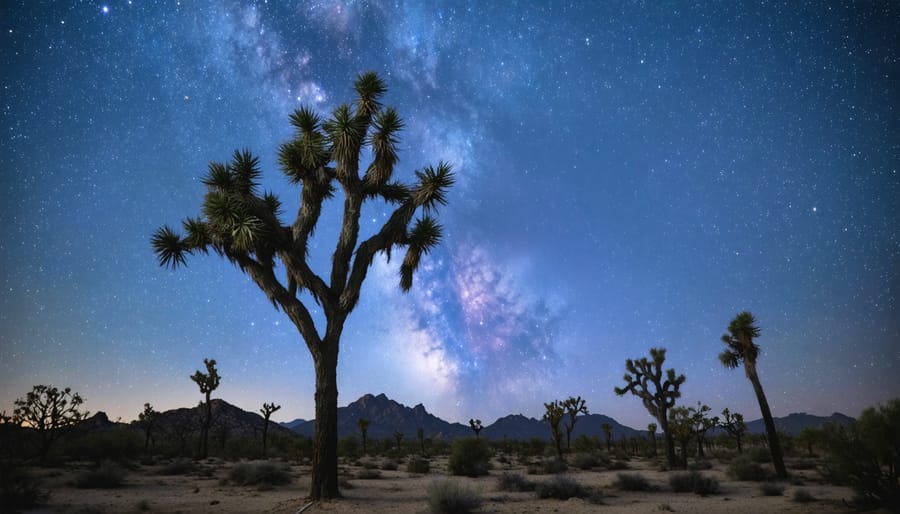
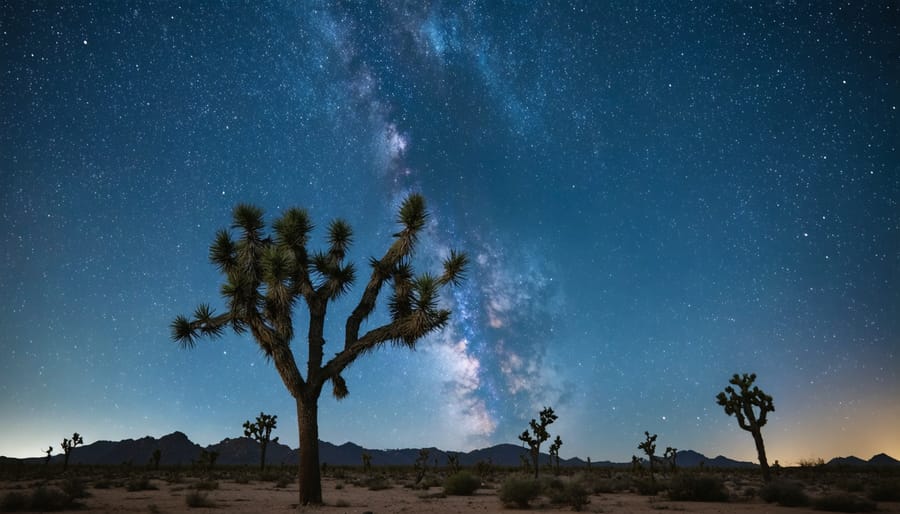
Stand beneath the twisted silhouettes of ancient Joshua trees while capturing the Milky Way in one of North America’s premier dark sky destinations. Joshua Tree National Park’s unique desert landscape transforms into a photographer’s paradise after sunset, offering unparalleled opportunities for night photography in wilderness areas. With minimal light pollution, clear desert air, and otherworldly rock formations, the park presents perfect conditions for capturing stunning astral photographs year-round.
Pack your fast prime lenses, sturdy tripod, and remote shutter release for technically precise shots that reveal the desert’s nocturnal drama. Position yourself near iconic formations like Arch Rock or Cap Rock before astronomical twilight, when the interplay of moonlight and starlight creates compelling natural contrast. Whether you’re chasing star trails over Keys View or capturing the ethereal glow of the Joshua trees under a new moon, mastering night photography in this desert sanctuary demands equal parts technical precision and creative vision.
Planning Your Joshua Tree Night Shoot
Best Locations and Timing
Joshua Tree National Park offers several prime locations for capturing stunning night photos. Arch Rock, accessible via a short 0.3-mile trail from White Tank Campground, provides an iconic foreground element against the starry sky. The Cholla Cactus Garden, particularly beautiful during blue hour, offers unique silhouettes and opportunities for creative compositions.
For unobstructed views of the Milky Way, head to Keys View, the park’s highest viewpoint. From spring through fall, you’ll find the galactic core rising in the southern sky. Hidden Valley and Jumbo Rocks areas feature massive boulder formations that create compelling foreground elements for your nighttime compositions.
Timing is crucial for successful night photography in Joshua Tree. Plan your visit during the new moon for the darkest skies, typically offering 2-3 days of optimal conditions on either side. The Milky Way is most visible from March through October, with peak viewing between June and August. Arrive at your chosen location at least 30 minutes before astronomical twilight to set up your equipment and compose your shots.
For light painting opportunities, the Cap Rock area provides excellent access and interesting joshua tree specimens. Consider visiting during the shoulder seasons (spring and fall) when temperatures are more comfortable for night shooting and the park is less crowded.
Weather and Moon Phase Considerations
Weather and moon phases play crucial roles in capturing stunning night photos at Joshua Tree National Park. Clear skies are essential for star photography, so check weather forecasts 2-3 days before your planned shoot. The desert’s weather can be unpredictable, but websites like Clear Sky Chart or Dark Sky specifically cater to astronomers and photographers, offering detailed cloud cover and visibility predictions.
The moon’s phase dramatically impacts your shooting opportunities. During a new moon, you’ll experience the darkest skies, perfect for capturing the Milky Way and star trails. However, a quarter or full moon can provide natural lighting for foreground elements like Joshua trees and rock formations. Plan your visit using lunar calendars, typically available 6-12 months in advance.
Desert temperatures can vary significantly between day and night, sometimes dropping by 30°F or more. Winter nights can be particularly cold, while summer evenings remain warm. Pack appropriate clothing layers and protect your equipment from temperature-related condensation.
Wind conditions also affect night photography, potentially causing camera shake during long exposures. Check wind forecasts and bring stabilizing equipment like sandbags or heavy-duty tripods. The park’s high elevation areas often experience stronger winds than lower regions, so factor this into your location choice based on weather predictions.
Remember that clear skies in Joshua Tree don’t guarantee good shooting conditions – particulate matter and light pollution from nearby cities can impact visibility even on cloudless nights.
Essential Gear for Desert Night Photography
Camera and Lens Selection
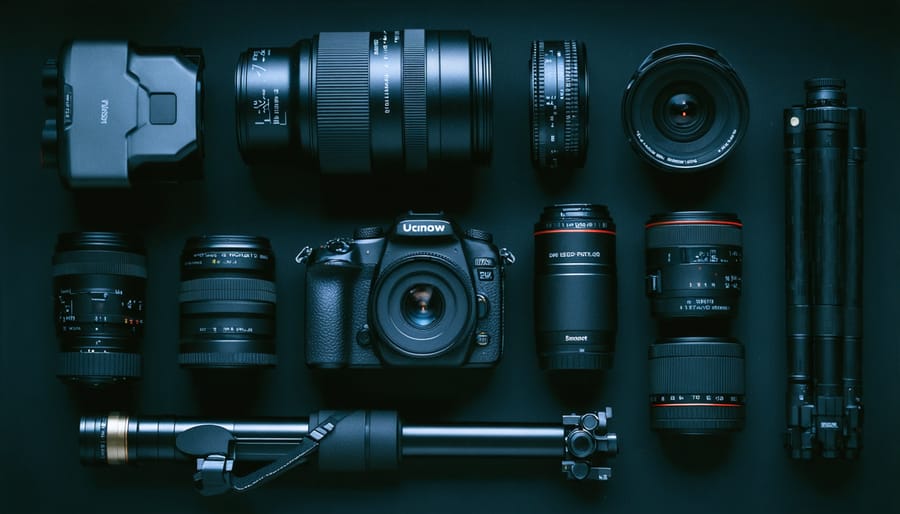
For night photography at Joshua Tree, your camera choice can make or break your shot. A full-frame camera is ideal due to its superior low-light performance and higher ISO capabilities. Popular options include the Sony A7 series, Nikon Z6/Z7, or Canon R series. However, crop-sensor cameras can still produce excellent results with proper technique.
Your lens selection is equally crucial. A fast, wide-angle lens with a maximum aperture of f/2.8 or wider is essential for capturing the Milky Way and star-filled skies. The 14-24mm f/2.8 or 16-35mm f/2.8 ranges are perfect for most nightscape compositions. Prime lenses like the 24mm f/1.4 or 20mm f/1.8 offer even better light-gathering capabilities, though at the expense of compositional flexibility.
Don’t forget your tripod – it needs to be sturdy enough to handle desert winds while supporting your gear. Carbon fiber tripods offer the best balance of weight and stability, though good aluminum options work well too.
Additional essential gear for desert night shooting includes:
– Remote shutter release to minimize camera shake
– Extra batteries (cold desert nights drain them quickly)
– Lens heater or hand warmers to prevent dew formation
– Headlamp with red light mode to preserve night vision
– Rocket blower for dealing with desert dust
Consider weather-sealed equipment if possible, as fine desert sand can be problematic for camera gear. While not absolutely necessary, it provides extra protection during those inevitable dusty moments that are common in Joshua Tree’s environment.
Support and Accessories
When shooting in Joshua Tree’s nocturnal environment, reliable support equipment isn’t just helpful—it’s essential. A sturdy tripod is your first line of defense against camera shake during long exposures. Look for models with robust legs and a ballhead that can support your camera setup. Carbon fiber tripods offer an excellent balance of strength and lightweight portability, though quality aluminum options work well too. Don’t forget to bring a level to ensure your horizon lines stay true.
Remote triggers are crucial for preventing camera movement during exposure. While basic cable releases work fine, wireless triggers offer more flexibility and reduce the risk of accidentally bumping your camera. Many modern cameras also support smartphone-based remote control apps, which can be a convenient backup option.
The desert environment demands additional protective gear. A rocket blower and microfiber cloths are must-haves for keeping sand and dust off your lens. Consider using clear filters to protect your expensive glass, but ensure they’re high-quality to maintain image clarity. Bring a small brush for cleaning tripod legs, as sand can affect their smooth operation.
Battery grips provide extended shooting time and improved handling in cold desert nights. Pack multiple fully-charged batteries—cold temperatures can drain them faster than usual. A headlamp with a red light mode helps preserve your night vision while adjusting camera settings.
For transporting gear, choose a backpack with good padding and weather sealing. Some photographers find chest harnesses useful for carrying additional lenses while keeping their hands free for scrambling over rocks. Don’t forget to pack some gaffer tape and a basic tool kit for emergency repairs in the field.
Camera Settings and Techniques
Exposure Settings for Star Photography
To capture stunning star photos at Joshua Tree, you’ll need to master specific low-light photography techniques and dial in the right camera settings. Start with the exposure triangle: set your aperture as wide as possible (typically f/2.8 or wider) to collect maximum light. Your shutter speed should follow the “500 rule” – divide 500 by your lens’s focal length to determine the longest exposure before stars start to trail. For example, with a 24mm lens, you’d use a 20-second exposure (500 ÷ 24 = 20.8).
For ISO, begin at 3200 and adjust based on your camera’s capabilities and the ambient light conditions. Full frame cameras can often push to ISO 6400 while maintaining acceptable noise levels, while crop-sensor cameras might perform better at ISO 1600-3200. Remember that Joshua Tree’s dark sky conditions allow for lower ISO settings compared to areas with more light pollution.
For the sharpest results, switch to manual focus and use your camera’s live view feature, zooming in on a bright star to achieve precise focus. Some photographers mark their lens’s infinity focus point with tape for quick reference during future shoots.
White balance settings between 3200K and 4800K typically work well for star photography, though shooting in RAW gives you the flexibility to adjust this in post-processing. Enable your camera’s long exposure noise reduction if available, but be aware this doubles your processing time between shots.
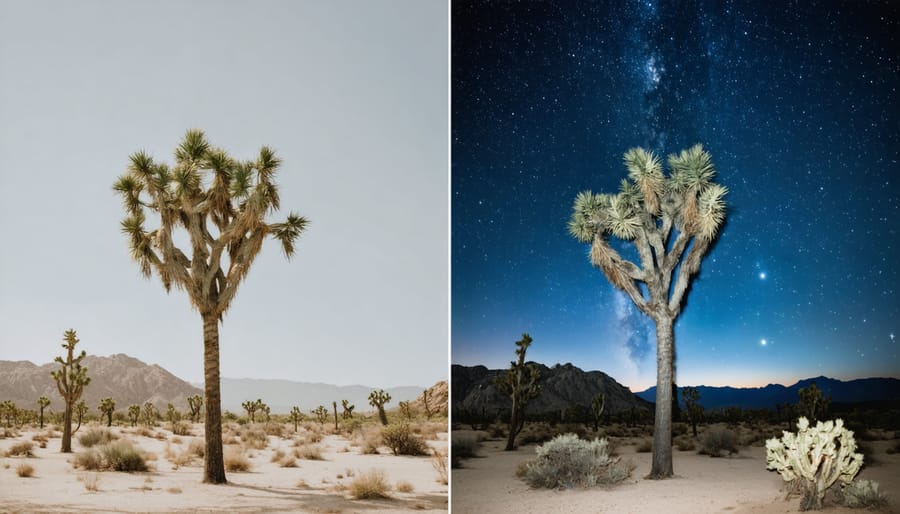
For Milky Way shots specifically, timing is crucial. Plan your shoot during the new moon phase when the galaxy core is visible above the horizon. The best results often come from combining multiple exposures: one for the foreground (using light painting or longer exposures) and another for the sky, blending them in post-processing for a balanced final image.
Focusing in the Dark
Achieving sharp focus in Joshua Tree’s dark landscape can be challenging, but several techniques can help you nail the perfect shot. Start by using your camera’s live view mode, which often performs better than the viewfinder in low light. Zoom in digitally on your LCD screen to check critical focus on stars or foreground elements.
For capturing the iconic Joshua trees against the starry sky, try focusing about one-third of the way into your frame using the hyperfocal distance technique. A good starting point is to focus roughly 15-20 feet away when shooting with a wide-angle lens at f/2.8. If you’re having trouble seeing through the viewfinder, shine a bright flashlight on your main subject to help your camera’s autofocus system lock on.
Manual focus is your best friend for night photography. Turn off autofocus and use your lens’s focus ring to dial in sharpness. Many photographers find success by focusing to infinity, but be careful – some lenses focus slightly past infinity, which can result in soft images. Take test shots and check them at 100% magnification to ensure everything is crisp.
Consider using focus stacking for complex compositions. Take multiple shots focused at different distances – perhaps one for the foreground Joshua tree, another for mid-ground elements, and a third for the stars – then blend them in post-processing.
Temperature changes in the desert can affect your focus throughout the night. As the temperature drops, your lens elements may contract slightly, shifting your focus point. Check your focus periodically, especially during longer shooting sessions.
A common mistake is forgetting to disable image stabilization when using a tripod. This feature can actually introduce blur during long exposures. Remember to turn it off once your camera is mounted securely.
Finally, if you’re shooting with companions, communicate about light pollution from headlamps and flashlights, which can interfere with focus acquisition and final exposure.
Creative Composition Tips
Using Joshua Trees as Subjects
Joshua Trees are nature’s sculptural masterpieces, and incorporating them into your night sky compositions can create truly memorable images. When working with these distinctive desert sentinels, understanding basic composition fundamentals becomes even more crucial in the dark.
Look for trees with interesting shapes and strong silhouettes – those with multiple branches or unique twists often create the most compelling foreground elements. Position yourself to frame the tree against the most active part of the night sky, whether that’s the Milky Way core or a meteor shower. The key is to maintain a balance between the tree’s presence and the celestial display above.
Consider shooting from a low angle to make the Joshua Tree appear more imposing against the star-filled sky. This perspective helps create a sense of drama and emphasizes the tree’s unique form. During your composition setup, use your headlamp to light the tree briefly and ensure proper framing before starting your exposure.
For the most striking results, try to find isolated trees that stand apart from their neighbors. This separation helps create clean silhouettes and prevents unwanted overlapping shapes in your frame. Remember that even in complete darkness, these trees can cast shadows from ambient starlight or moonlight, which can add depth to your final image.
Experiment with different lighting techniques, such as gentle side-lighting with a flashlight, to highlight the tree’s texture while maintaining the natural feel of the night scene. The goal is to complement, not overpower, the natural beauty of both the Joshua Tree and the night sky.
Light Painting Techniques
Light painting adds a magical dimension to Joshua Tree’s nocturnal landscape, transforming ordinary desert scenes into ethereal compositions. By mastering creative lighting techniques, you can highlight the distinctive shapes of Joshua trees and rock formations while maintaining the natural ambiance of the night sky.
Start with a powerful handheld LED light or a specialized light painting tool. For basic illumination, sweep your light across the Joshua tree from the side, creating depth and revealing its unique silhouette. Keep the beam moving to avoid hot spots, and experiment with different angles to find the most dramatic shadows.
Color gels can add another dimension to your compositions. Try using warm amber tones to complement the natural warmth of the desert landscape, or cool blue hues to create contrast with star-filled skies. For rock formations, position your light at a low angle to emphasize texture and create dramatic shadows that add depth to your image.
One effective technique is “painting” from behind objects, creating a ethereal glow that separates your subject from the dark background. When illuminating Joshua trees, try multiple short bursts of light rather than continuous illumination – this gives you more control over the final exposure and helps prevent overexposure.
Remember to adjust your light painting intensity based on your camera settings and distance from the subject. Start with lower power and gradually increase until you achieve the desired effect.

Safety and Environmental Considerations
When photographing in Joshua Tree National Park at night, safety should always be your top priority. The desert environment presents unique challenges, especially during shooting in extreme conditions after dark.
Always travel with a buddy and inform someone about your planned location and expected return time. Carry plenty of water, as the desert air can be deceptively dehydrating even at night. Pack emergency supplies including a first aid kit, backup flashlights, extra batteries, and warm clothing – desert temperatures can drop dramatically after sunset.
Stay on designated trails and shooting areas to protect the delicate desert ecosystem. Joshua trees and other desert plants are fragile and can take decades to recover from damage. Never move or disturb rocks, vegetation, or wildlife for your shot. Use red-light headlamps when possible, as they preserve your night vision while minimizing impact on nocturnal wildlife.
Keep a charged phone for emergencies, but be aware that cell service can be spotty in remote areas. Download offline maps before your trip and bring a traditional compass as backup. Watch your step in the dark – the terrain is uneven and contains hazards like cacti and wildlife.
Respect park rules regarding night photography permits and restricted areas. Some locations may require advance permission or have specific hours for night access. Practice “Leave No Trace” principles by packing out all equipment and waste. Remember that light pollution affects both wildlife and other photographers, so use artificial lighting mindfully and sparingly.
Night photography at Joshua Tree National Park offers an unparalleled opportunity to capture the magic of the desert after dark. From the iconic Joshua trees silhouetted against star-filled skies to the mesmerizing Milky Way arching over ancient rock formations, the possibilities are endless for creating stunning imagery.
We’ve covered essential gear requirements, optimal shooting locations, and technical settings to help you succeed in your nocturnal photography adventure. Remember to plan your visit around the lunar calendar, arrive before sunset to scout your locations, and always prioritize safety in the desert environment.
Don’t be discouraged if your first attempts aren’t perfect – night photography requires practice and patience. Experiment with different compositions, exposure times, and post-processing techniques to develop your unique style. The rewards of capturing the park’s otherworldly nightscape are well worth the effort.
Whether you’re an experienced photographer or just starting your journey, Joshua Tree’s dark skies provide the perfect canvas for creating memorable night images. So pack your gear, bring plenty of water and warm clothes, and prepare to experience one of the most remarkable night photography destinations in North America. The stars are waiting for you at Joshua Tree.