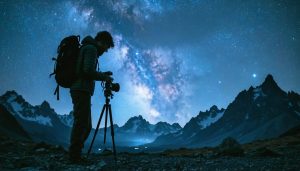
Master your camera’s manual mode before venturing into the desert darkness—automatic settings will fail you when temperatures plummet forty degrees after sunset and your sensor struggles to find focus on distant stars. Set your aperture between f/2.8 and f/4 for maximum light gathering, your shutter speed between 15-25 seconds to avoid star trails (use the 500 rule: divide 500 by your focal length), and push your ISO to 3200-6400 depending on your camera’s noise performance.
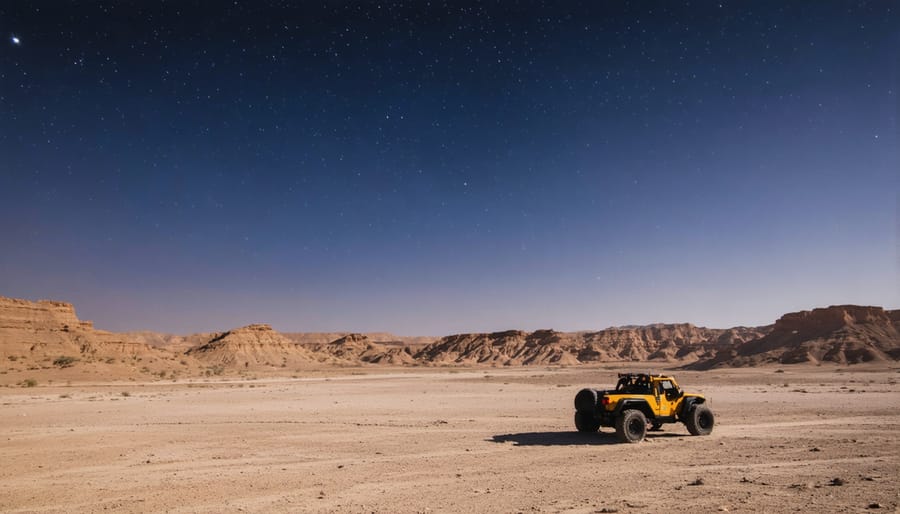
Scout locations during daylight hours to identify compelling foreground elements like weathered rock formations, ancient Joshua trees, or abandoned structures that will anchor your compositions against the vast night sky. Desert landscapes often lack the natural frames that wilderness night photography typically relies on, so you’ll need to work harder to create visual interest beyond just capturing stars.
Protect your gear from fine dust infiltration by keeping equipment sealed until the moment of use and using rocket blowers instead of compressed air. The desert’s extreme temperature swings cause condensation issues when moving between air-conditioned vehicles and hot environments, so allow thirty minutes for equipment acclimation before shooting.
Plan shoots around new moon phases in designated International Dark Sky Parks like Death Valley or Big Bend, where light pollution measures ensure optimal conditions for Milky Way photography. These protected environments offer the atmospheric clarity and minimal humidity that make desert night skies particularly exceptional—conditions you simply cannot replicate in more temperate climates.
Why Deserts Are Night Photography Paradise (And Your Biggest Challenge)
Deserts occupy a unique position in the night photographer’s world—they’re simultaneously the easiest and most difficult places to capture stunning astrophotography. Understanding this paradox is essential before you pack your gear and head into the backcountry.
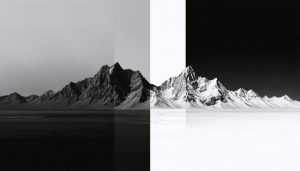
The advantages are immediately apparent. Desert regions offer some of the darkest skies on Earth, often located far from light-polluting urban centers. Places like Death Valley, the Atacama, and Australia’s Outback routinely score Class 1 or 2 on the Bortle Dark Sky Scale, meaning you’ll see the Milky Way’s core structure with breathtaking clarity. I’ve photographed from both forests and deserts, and the difference is striking—desert skies reveal galactic details that simply vanish elsewhere.
Atmospheric clarity gives deserts another crucial edge. Low humidity means minimal moisture to scatter light or create haze. While coastal or forested locations might struggle with atmospheric distortion, desert air often remains remarkably transparent, allowing sharper star points and more vibrant color in the night sky. This clarity extends your effective shooting window, too—you can capture quality images even when the moon is partially illuminated, conditions that would wash out skies in more humid environments.
Then there’s the foreground advantage. Desert landscapes provide dramatic geological features—weathered rock formations, cracked playas, twisted Joshua trees, towering saguaros—that create compelling compositions without the visual clutter of dense vegetation. These sculptural elements add context and scale to your celestial subjects.
But here’s where the challenge emerges: deserts are unforgiving environments. Temperature swings from scorching days to near-freezing nights stress both you and your equipment. Fine dust infiltrates camera bodies and lenses. Isolation means self-sufficiency is non-negotiable—there’s no running back to the car if you forget a critical battery or underestimate water needs. Wind can destabilize tripods mid-exposure, and in truly remote locations, a simple equipment failure could end your entire shoot.
This combination of exceptional opportunity and environmental extremes is what makes desert night photography so rewarding—and why proper preparation separates successful expeditions from frustrating ones.
Essential Gear That Actually Survives Desert Conditions
Camera Bodies Built for Temperature Extremes
Desert nights present a unique challenge for camera equipment—temperatures that soar during sunset can plummet to near-freezing after midnight. Your camera body needs to handle this thermal roller coaster without missing a beat.
Weather-sealed cameras are essential for desert work. Models like the Canon EOS R6 Mark II, Nikon Z8, and Sony A7R V feature robust sealing against dust infiltration, which is just as critical as moisture protection in arid environments. These cameras perform reliably in extreme conditions photography, maintaining sensor performance across wide temperature ranges.
Speaking of sensors, modern mirrorless cameras generally handle cold better than expected heat. However, long exposures in hot conditions can increase sensor noise. If you’re shooting during the warmer evening hours, keep ISO conservative and consider taking dark frames for noise reduction in post-processing.
Battery life deserves special attention—cold temperatures can reduce capacity by 30-40%. I’ve learned to keep spare batteries in an interior jacket pocket close to body heat, swapping them out regularly. Lithium batteries perform better than older chemistries in extreme temperatures, so invest in manufacturer-original or high-quality third-party options.
For real-world reliability, the Nikon D850 and Canon 5D Mark IV have earned reputations as workhorses in harsh environments, while newer mirrorless options offer improved electronic viewfinders for precise focusing under starlight.
Lenses That Capture Desert Darkness
Your lens choice can make or break desert night photography. For astro-landscape work, you’ll want fast glass—lenses with maximum apertures of f/2.8 or wider are essential for gathering enough starlight in a single exposure. A 14mm or 16mm wide-angle lens captures the expansive desert sky while including compelling foreground elements like rock formations or cacti. For tighter compositions focusing on specific celestial objects, a 24mm offers versatility without sacrificing too much light-gathering ability.
The sheer scale of desert landscapes rewards ultra-wide focal lengths. That 14mm lens doesn’t just capture more stars—it creates dramatic perspective that emphasizes the vastness surrounding you. I’ve found 20mm hits a sweet spot between environmental context and compositional control.
Protecting your optics from sand and dust is non-negotiable. Always use lens hoods to minimize particle intrusion, and keep UV or clear filters mounted as sacrificial barriers. Between shots, cap your lenses immediately—desert winds kick up without warning. Carry a rocket blower and microfiber cloths, but resist the urge to wipe sand across your front element. Instead, blow particles away first, then gently brush with a dedicated lens pen. Consider weather-sealed lenses if you’re serious about regular desert shooting; they’re worth every penny when dust inevitably infiltrates your camera bag.
Support and Power Systems for Remote Shoots
Desert conditions demand robust support systems that can withstand wind, sand, and temperature extremes while keeping you safe miles from civilization.
**Tripod Selection and Stability**
Your tripod becomes your anchor point in the desert wilderness. Look for models with thick, sturdy legs rated for at least 25 pounds—considerably more than your camera’s weight. The extra capacity matters when sudden wind gusts hit at 2 AM. Carbon fiber tripods offer excellent stability without adding excessive weight to your pack, though quality aluminum models work well if you’re driving close to your shooting location.
Here’s a practical tip I learned after watching my lightweight tripod skitter across hardpan: always hang your camera bag from the center column hook for added stability. In sandy areas, wider tripod feet prevent sinking, while spiked feet grip rocky terrain. Some photographers carry both types and swap them based on conditions.
**Preserving Your Night Vision**
A headlamp with red light mode is non-negotiable for desert night photography. Red light preserves the rhodopsin in your eyes, allowing you to see stars clearly when you look up from adjusting settings. I keep mine on the dimmest red setting and only switch to white light for brief equipment changes. Consider bringing two headlamps—one as backup—since a dead light in complete darkness creates serious safety concerns.
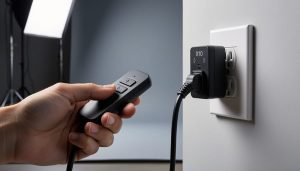
**Power Management in Extreme Temperatures**
Cold desert nights drain batteries faster than you’d expect. Carry at least three backup batteries per camera body, keeping spares in an inside jacket pocket where body heat maintains their charge. For multi-day expeditions, portable solar panels (20-30 watts) provide daytime charging capability, though they add weight.
**Essential Safety Equipment**
Always bring GPS navigation, offline maps on your phone, a first-aid kit, and enough water for twice your planned duration. Desert distances deceive, and getting lost after dark is genuinely dangerous.
Camera Settings That Work When Desert Darkness Falls
Exposure Triangle for Desert Stars
The exposure triangle takes on special significance under desert stars, where extreme darkness demands careful balancing of aperture, shutter speed, and ISO. These foundational low-light photography techniques require desert-specific adjustments to capture both tack-sharp stars and compelling foreground details.
Start with your aperture wide open—f/2.8 or faster is ideal, though f/4 works in moonlit conditions. Your ISO will typically range from 3200 to 6400, depending on your camera’s noise performance and available ambient light. For shutter speed, apply the 500 rule: divide 500 by your focal length to determine maximum exposure time before stars trail. With a 24mm lens, that’s approximately 20 seconds. The more precise NPF rule accounts for sensor size and aperture, typically yielding shorter exposures—around 13-15 seconds with the same lens—for truly pinpoint stars.
Desert darkness presents a unique challenge: your sky might be perfectly exposed while your foreground disappears into blackness. Combat this by shooting during twilight’s blue hour, adding subtle foreground light painting with a dim flashlight, or blending multiple exposures in post-processing. Remember that deserts often have reflective sand and rock that capture more ambient light than you’d expect, so bracket your exposures. Test shots are your friend—check focus and exposure frequently, as the pitch-black viewfinder won’t reveal problems until you review your LCD.
Focusing in Complete Darkness
When darkness descends on the desert, your autofocus system becomes nearly useless. Manual focusing becomes essential, and knowing multiple techniques ensures you’ll capture sharp images even when conditions are less than ideal.
Start with live view and magnification—your most reliable tool. Zoom in 10x on the brightest star or distant light source, then slowly adjust your focus ring until that point becomes a pinprick. Focus peaking, available on many mirrorless cameras, highlights sharp edges with colored overlays, making this process even more intuitive in the dark.
For landscapes incorporating foreground elements like cacti or rock formations, hyperfocal distance becomes your friend. In the vast desert scale, setting your lens to infinity often works beautifully, but for scenes requiring depth from three meters to infinity, calculate your hyperfocal point beforehand. A 14mm lens at f/2.8 has a hyperfocal distance of about 6 meters—focus there, and everything beyond 3 meters stays acceptably sharp.
Always check your lens’s distance markers with a headlamp (use red light to preserve night vision). Many experienced desert photographers mark their favorite focus positions with thin tape as a tactile reference. When all else fails, take multiple shots at slightly different focus points—focus bracketing saves the shot when you can’t verify sharpness on your LCD screen in harsh conditions.
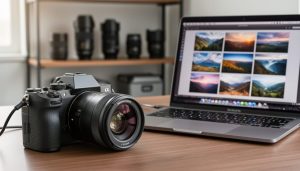
File Format and Processing Considerations
Shooting in RAW format is non-negotiable for desert night photography. The extreme contrast between dark landscapes and bright celestial elements demands maximum shadow recovery capabilities—something JPEG simply can’t deliver. RAW files preserve all sensor data, allowing you to pull detail from seemingly black foreground elements during post-processing without introducing ugly artifacts. I’ve salvaged countless images where the dunes looked completely underexposed in-camera but revealed beautiful textures after lifting shadows in editing.
Set your color temperature to around 3400-4000K to preserve the natural cool tones of moonlight and starlight, rather than using auto white balance which often skews too warm. You’ll have full control to adjust this later with RAW files anyway.
Disable in-camera noise reduction for long exposures—it doubles your shooting time by processing dark frames after each shot, killing your ability to capture multiple compositions during optimal conditions. Instead, handle noise reduction during post-processing where you have better control. The one exception: keep high ISO noise reduction on low or standard settings, as this provides cleaner base files without significant workflow penalties.
Composing with Desert Landscapes Under Stars
Finding Foreground Interest in Barren Terrain
Desert landscapes might seem devoid of interest at first glance, but they’re actually treasure troves of photographic subjects that come alive under starlight. The key is training your eye to spot elements that add depth and context to your night compositions.
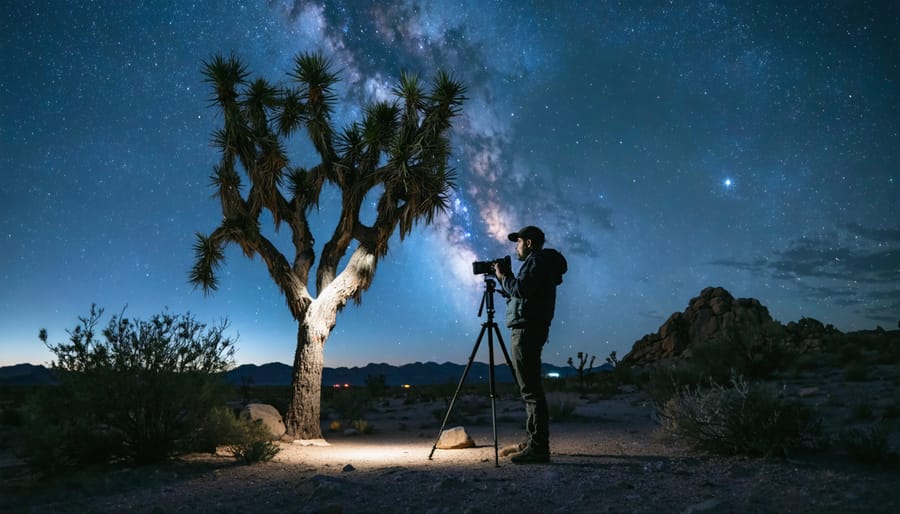
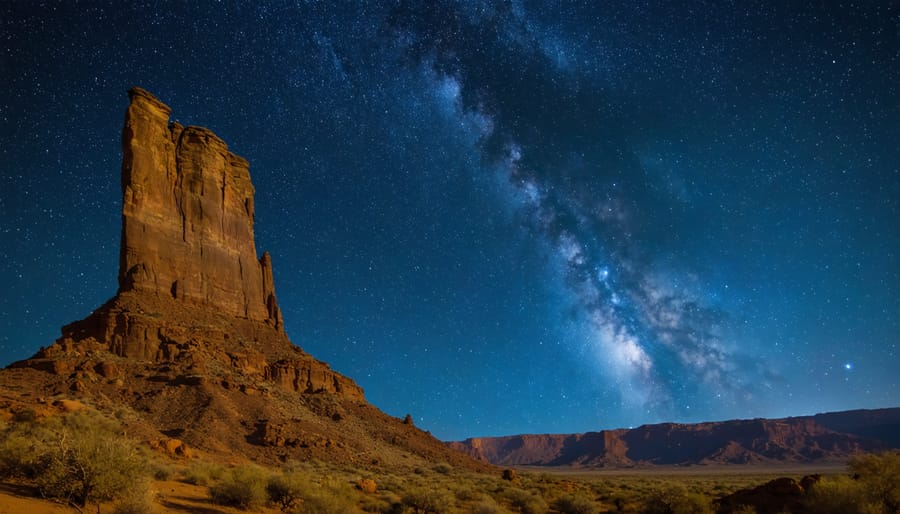
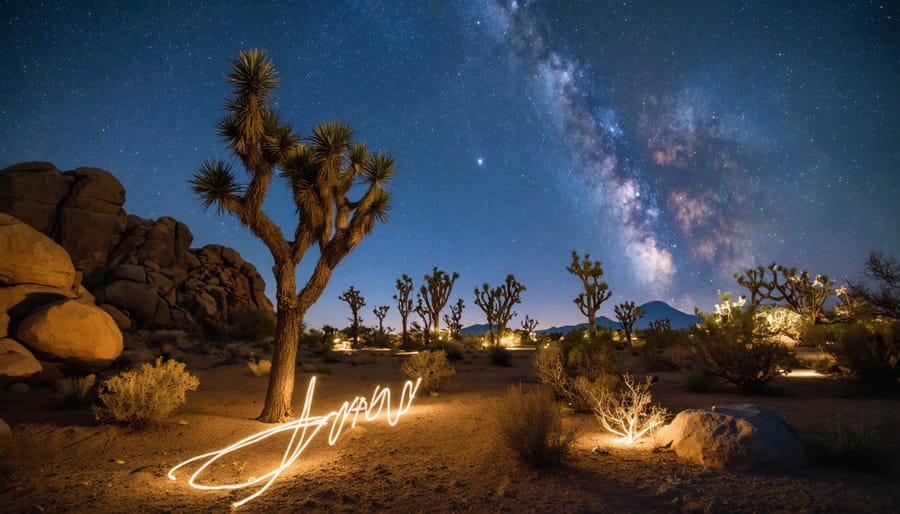
Rock formations are among the most dramatic foreground subjects. Natural arches, balanced rocks, and weathered hoodoos create striking silhouettes against the Milky Way. Scout these locations during daylight to identify the strongest angles and compositions. Similarly, iconic desert vegetation like saguaro cacti and Joshua trees provide instantly recognizable shapes that anchor your frame and give viewers a sense of place—learn more specialized techniques in our guide to Joshua Tree night photography.
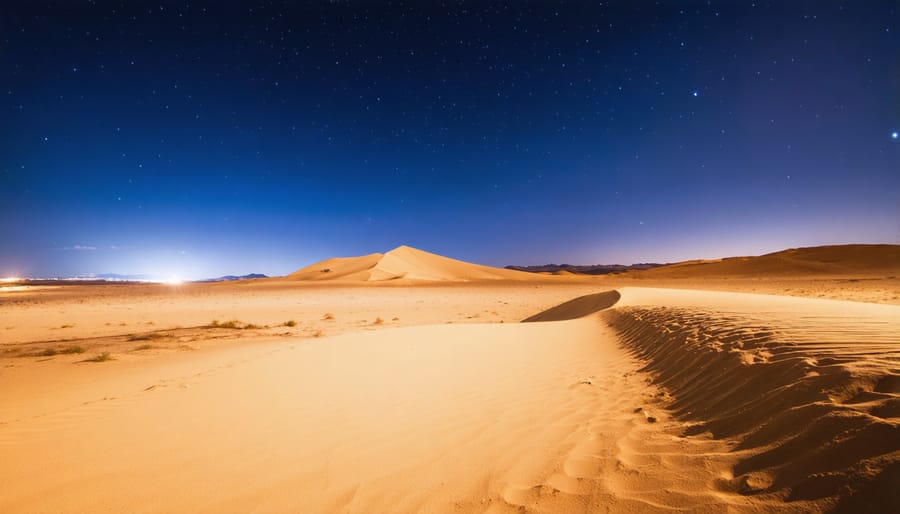
Sand dunes present unique opportunities with their flowing lines and textured surfaces that catch subtle moonlight or ambient glow from distant cities. The curves naturally lead the viewer’s eye through the frame toward the night sky.
Once you’ve identified your subject, decide between silhouettes or light-painting. Silhouettes work beautifully when your subject has a distinctive shape—they create bold, graphic compositions with minimal effort. Simply expose for the sky and let your foreground go dark.
Light-painting adds dimension and reveals texture but requires restraint. Use a flashlight or headlamp at low intensity, sweeping briefly across your subject during the long exposure. Warm-toned lights (around 3000K) complement the cool blue tones of night skies. Practice beforehand—overlighting destroys the nocturnal atmosphere you’re working to capture.
Working with the Galactic Core and Moon Phases
Understanding the relationship between moon phases and the Milky Way’s visibility transforms your desert night photography from guesswork into strategic planning. The galactic core—that spectacular, densest portion of our galaxy—appears most prominently in the Northern Hemisphere from March through October, with peak visibility from May to July. During these months, plan your shoots for the hours after astronomical twilight when the core rises above the horizon, typically between 10 PM and 3 AM depending on your location and the specific month.
Moon phases dramatically affect your creative options in the desert. A new moon or thin crescent provides the darkest skies, allowing faint Milky Way details and meteors to shine through brilliantly. This darkness is ideal when your foreground elements have strong natural silhouettes—think distinctive saguaro cacti, rock formations, or distant mountain ridges. You’ll need longer exposures here, typically 20-30 seconds at f/2.8, ISO 3200-6400.
Conversely, a quarter or gibbous moon acts as a natural softbox, painting your desert landscape with subtle, directional light. This illumination reveals textures in sand dunes, colors in rock faces, and depth in canyon walls that would otherwise disappear into blackness. The tradeoff? You’ll sacrifice some Milky Way contrast. Position yourself so moonlight hits your foreground at an angle rather than from directly overhead—this creates dimensional shadows that add depth to otherwise flat desert terrain, making your compositions more compelling and three-dimensional.
Desert-Specific Challenges and Real Solutions
Managing Extreme Temperature Swings
Desert temperature swings can be brutal—dropping 40°F or more between afternoon and midnight. I learned this the hard way when my lens fogged completely during a Joshua Tree shoot, ruining an hour of carefully composed Milky Way shots.
**Preventing condensation** is critical. When moving cold gear from an air-conditioned car into warm evening air (or vice versa), seal your camera and lenses in airtight plastic bags first. Let them acclimate gradually for 20-30 minutes. Keep a microfiber cloth and lens warmers handy—these battery-powered strips wrap around your lens barrel to maintain a temperature slightly above the dew point.
**Battery performance** plummets in cold desert nights. Lithium batteries can lose 20-40% capacity below 40°F. Carry twice as many spares as you think you’ll need, and keep extras in an inside jacket pocket where body heat maintains their charge. Some photographers even use rechargeable hand warmers adjacent to their battery grips.
**Pre-shoot heat protection** matters too. During afternoon scouting, never leave gear in direct sun. Black camera bags can reach 150°F inside, potentially damaging LCD screens and battery cells. Store equipment in insulated coolers (without ice) or beneath reflective emergency blankets in your vehicle. These same strategies apply to other weather challenges at night you might encounter.
Sand, Dust, and Equipment Protection
Desert environments present unique challenges for protecting your camera gear, but with the right precautions, you can keep your equipment functioning flawlessly throughout your shoot. Sand and dust are your primary adversaries—they’re extraordinarily fine in desert environments and can infiltrate even the smallest openings in your gear.
When changing lenses, create a protective barrier by turning your back to the wind and crouching low to shield your camera body. Work quickly and deliberately: have your new lens cap removed and ready before detaching the current lens. Point the camera opening downward during the swap to prevent dust from settling on your sensor. Consider using a large zippered plastic bag as a makeshift changing tent—cut a hole for your hands and work inside this protected space. Many photographers carry sensor-cleaning supplies, but avoid field-cleaning unless absolutely necessary; it’s better to remove spots in post-processing than risk grinding particles across your sensor.
For long exposures during windy conditions, stability becomes critical. Hang your camera bag from your tripod’s center column as ballast, and keep the tripod legs short whenever possible. Position your tripod so the wind hits it head-on rather than from the side, and consider anchoring legs with rocks or sand stakes.
After each shooting session, use a rocket blower to remove loose particles from camera bodies, lens barrels, and tripod joints—never use compressed air, which can force debris deeper into mechanisms. Store gear in sealed bags with silica gel packets overnight. When you return home, allow equipment to acclimate to room temperature before opening bags to prevent condensation, then perform a thorough cleaning with appropriate brushes and microfiber cloths.
Safety and Planning for Remote Desert Shoots
Desert night photography offers unparalleled opportunities for stunning images, but the isolation and extreme conditions demand serious preparation. I’ve learned through experience that what seems like a minor oversight during daylight can become a serious problem when you’re miles from help in complete darkness.
**Essential Pre-Shoot Planning**
Before venturing out, always tell someone your exact location and expected return time. Share GPS coordinates, not just general descriptions—”near Joshua Tree” won’t help search and rescue teams. Download offline maps to your phone since cellular service is unreliable in most desert areas. I recommend carrying a dedicated GPS device as backup; phone batteries drain quickly in cold night air.
Study your location during daylight first. Note hazards like cliff edges, loose terrain, and cacti positions that become nearly invisible after dark. Mark your parking spot with a portable light or reflective tape—wandering deserts at night can be disorienting, and finding your vehicle again is crucial.
**Navigation and Emergency Gear**
Pack multiple light sources: a headlamp with red-light mode (to preserve night vision), backup flashlight, and emergency glow sticks. Bring more water than you think necessary—desert nights are cold, but dehydration happens quickly. A comprehensive first-aid kit, emergency blanket, and fully charged power bank are non-negotiable.
**Wildlife Awareness**
Desert creatures become active after dark. Scorpions, rattlesnakes, and spiders seek warmth and may approach your gear or shelter. Always check before sitting or placing hands anywhere. Use a UV flashlight to spot scorpions—they glow under ultraviolet light. Make noise when moving to avoid surprising snakes, and never reach into crevices or behind rocks without looking first.
Finally, monitor weather conditions obsessively. Desert storms develop rapidly, creating flash flood risks even miles from rainfall. If conditions deteriorate, abandon the shoot—no photograph is worth your safety.
Desert night photography offers rewards that few other photographic pursuits can match—the profound silence, impossibly dark skies, and otherworldly landscapes create images that resonate with viewers on a visceral level. While the technical and logistical challenges might seem daunting at first, they’re absolutely surmountable with practice and preparation.
Start with accessible desert locations closer to home rather than immediately planning an expedition to remote wilderness areas. Many regional deserts offer excellent dark skies within a few hours’ drive, allowing you to build your skills progressively. As you gain confidence with your camera settings and learn how your equipment responds to temperature extremes and dust, you’ll naturally expand your range.
Remember that your safety framework isn’t a limitation—it’s what enables your creativity. When you know you’re prepared for emergencies, have communicated your plans, and understand your environment, you can focus entirely on the artistic vision before you.
The experience of standing beneath a desert night sky, watching your compositions take shape through your viewfinder, is genuinely transformative. It changes how you see darkness, silence, and the natural world, creating photographs that capture something ancient and timeless.