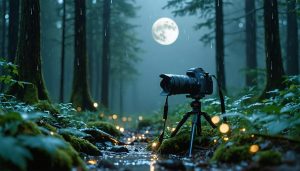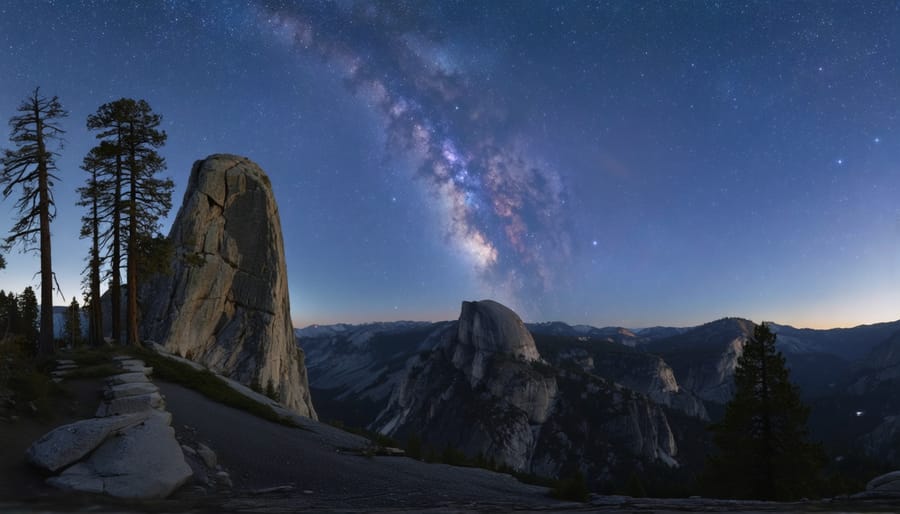
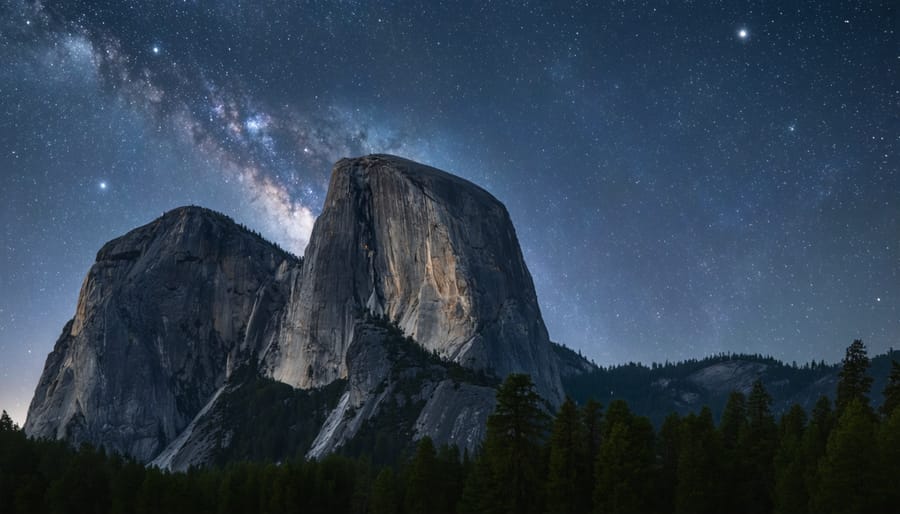
Arrive at Glacier Point two hours before astronomical twilight to secure positioning for capturing Half Dome’s granite face against the Milky Way core, visible from late April through early September. This iconic vantage point requires advance planning—the road closes in winter, and summer parking fills by sunset—but rewards photographers with unobstructed views of Yosemite’s most recognizable formations framed by celestial drama.
Scout your specific compositions during daylight hours, marking GPS coordinates and noting foreground elements like Jeffrey pines or granite outcroppings that will anchor your star-studded frames. Yosemite’s unique challenge lies in balancing its massive vertical scale—El Capitan rises 3,000 feet from the valley floor—with proper exposure for both moonlit rock faces and star fields. Understanding wilderness night photography fundamentals becomes essential when you’re miles from vehicle access with rapidly dropping temperatures.
Time your visit around new moon phases for maximum star visibility, though a thin crescent moon can beautifully illuminate valley walls without overpowering the stars. The park’s 1,200 square miles of designated wilderness offers extraordinary darkness—Yosemite Valley measures between Bortle Class 2-3 on light pollution scales—making it among North America’s most accessible truly dark locations for astrophotography.
Pack redundant batteries and dress in layers exceeding daytime requirements; temperatures routinely drop 30-40 degrees Fahrenheit after sunset, even in summer. Your equipment will cold-soak quickly at elevations ranging from 4,000 to 13,000 feet, draining power faster than valley conditions. Beyond technical preparation, you’ll navigate permit requirements, wildlife awareness protocols, and the physical demands of reaching remote locations in complete darkness—challenges that separate casual snapshots from portfolio-worthy Yosemite night imagery.
Why Yosemite is Both Heaven and Hell for Night Photographers
The Dark Sky Advantage
Yosemite’s protected wilderness status gives it a remarkable advantage for astrophotography: genuinely dark skies. Most of the park registers between Bortle Class 2 and 3 on the light pollution scale, with some remote areas reaching Class 1—the darkest skies possible. To put this in perspective, Class 1 means the Milky Way can cast visible shadows, and the zodiacal light becomes a prominent feature across the sky.
The park’s eastern side, particularly areas near Tuolumne Meadows and Tenaya Lake, offers the darkest conditions due to distance from major population centers. Even Yosemite Valley, despite having some facility lighting, maintains impressively dark skies above the rim. On a clear, moonless night, you’ll easily see 6,000 to 7,000 stars with the naked eye—compared to fewer than 100 in a typical suburban setting.
This minimal light pollution translates directly to photography opportunities. The Milky Way’s galactic core becomes intensely visible from late spring through early fall, with enough detail and contrast that even modest exposures capture stunning results. You’ll photograph not just stars, but nebulae, dark dust lanes, and color variations that simply don’t register in light-polluted environments. The difference isn’t subtle—it’s transformative for anyone who’s only photographed skies near urban areas.
The Obstacles Nobody Warns You About
Here’s the reality that those stunning Instagram shots from Yosemite don’t show: getting there at night involves navigating a maze of regulations and natural challenges that can derail your plans if you’re unprepared.
First, the permit situation. While general park access doesn’t require advance permits, overnight wilderness permits are mandatory if you’re planning backcountry camping for sunrise shots. During peak season (May through September), popular trailheads fill up months ahead. Even if you’re not camping, Half Dome Village and other valley locations may restrict after-hours parking, and gates close at certain areas after dark. I learned this the hard way on my first trip when I arrived at Glacier Point at 10 PM to find the road gated shut for the season.
Wildlife encounters present another concern that’s amplified in darkness. Bears are most active during twilight and nighttime hours. I once set up near Sentinel Bridge only to have a bear walk between my tripod and the river—terrifying but a reminder to always keep bear spray accessible and make noise while moving between locations. Mountain lions, though rare to encounter, also hunt nocturnally.
The altitude factor catches many photographers off-guard. At 4,000 to 8,000 feet, batteries drain faster in the cold thin air, and you’ll tire more quickly while hiking with gear. Pack extras of everything.
Weather unpredictability is perhaps the biggest wild card. Clear skies at sunset can turn to fog by midnight, particularly in spring and fall. Summer thunderstorms roll in with little warning, and winter conditions can become dangerous rapidly. Always check multiple weather sources and have a backup plan—your safety matters more than any photograph.
Essential Gear That Actually Matters in the Wilderness
The Camera Setup That Won’t Fail You
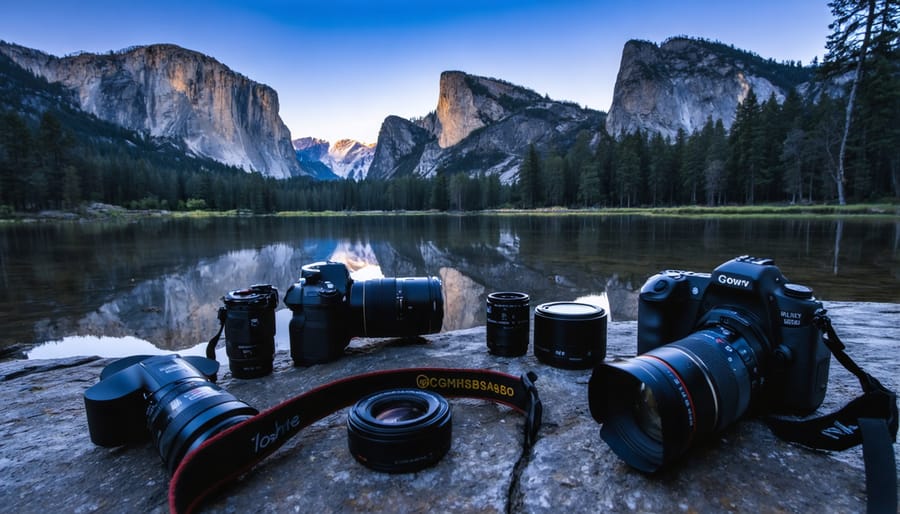
Your gear choices can make or break a night shoot in Yosemite, especially when you’re dealing with cold temperatures, rocky terrain, and the pressure of limited shooting windows during prime dark sky conditions.
Let’s start with the sensor debate. Full-frame cameras give you a clear advantage for night photography, offering better high-ISO performance and cleaner files when you’re pushing to ISO 3200 or higher. That said, crop sensor cameras have improved dramatically, and if you’re working with what you have, don’t let this hold you back. Modern APS-C sensors handle noise remarkably well. The real question for camera selection for wilderness shooting comes down to how much you’ll need to recover in post-processing and your comfort level with noise reduction software.
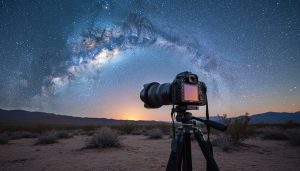
Your lens matters more than your camera body. You need fast glass, period. An f/2.8 lens is the minimum for capturing enough light during those critical exposures, though f/1.4 or f/1.8 primes give you even more flexibility. Wide-angle focal lengths work best, think 14-24mm range, letting you capture sweeping compositions of El Capitan beneath the Milky Way. Yes, premium fast wide-angles cost more, but they’re the tool that actually gathers the light you need.
Tripod stability is non-negotiable on Yosemite’s granite surfaces and uneven trails. Skip the lightweight travel tripods. You need something robust enough to stay planted when you’re shooting 20-second exposures on sloped rock faces. Add a hook for hanging your camera bag underneath for extra stability.
Cold drains batteries ruthlessly. I’ve watched a fully charged battery drop to 30 percent in under an hour during winter shoots. Carry at least three spare batteries, keep them in interior jacket pockets against your body warmth, and rotate them throughout the night.
The Non-Photography Gear You Can’t Skip
Your camera gear won’t matter much if you’re stumbling around in the dark or shivering through your shoot. Yosemite’s wilderness conditions demand respect, and having the right non-photography essentials can mean the difference between a successful shoot and an uncomfortable—or dangerous—situation.
Start with a quality headlamp that includes a red light mode. Red light preserves your night vision while allowing you to adjust camera settings or navigate between compositions. I keep mine on a lanyard so I can easily redirect the beam without repositioning my head. Bring extra batteries—cold temperatures drain them faster than you’d expect.
Temperature management is critical. Even summer nights in Yosemite can drop into the 40s, and higher elevations get colder. Pack more layers than you think you’ll need: a warm base layer, insulating mid-layer, and windproof outer shell. Don’t forget a warm hat and gloves. Those fingerless photography gloves let you operate your camera while keeping your hands functional.
For navigation, download offline maps to your phone before you arrive. Cell service is spotty to nonexistent in many locations. A GPS device adds an extra safety margin for remote shoots.
If you’re camping overnight, proper food storage in bear canisters isn’t optional—it’s required in many areas and essential everywhere. Finally, consider an emergency communication device like a satellite messenger. When you’re photographing alone in remote locations at 2 AM, that peace of mind is priceless.
Smart Redundancy for Remote Shooting
When you’re deep in Yosemite’s backcountry at 2 AM, equipment failure isn’t just inconvenient—it can end your shoot entirely. I learned this the hard way at Olmsted Point when my primary battery died faster than expected in the cold, and I’d left my spare in the car three miles away.
Always carry at least two extra batteries, stored in an inside pocket close to your body where warmth keeps them charged longer. This is especially crucial for cold weather shooting strategies when temperatures plummet after sunset.
For memory cards, use the dual-card slot strategy if your camera supports it—shoot RAW to one card and JPEG to another. Keep a spare card in a waterproof case in your pack. I prefer 64GB cards over larger ones; if one fails, you haven’t lost everything.
Bring backup lighting too. Your primary headlamp should have fresh batteries, but pack a small flashlight as insurance. Consider a portable battery bank for powering USB-rechargeable lights or even emergency camera charging. Weight matters on long hikes, but redundancy matters more when you’re miles from civilization.
Location Scouting: Finding Your Shot Without Getting Lost
The Classic Spots Worth the Hype
Let’s start with the iconic trio that defines Yosemite night photography. These locations deliver consistently stunning results, but timing and positioning make all the difference between a good shot and a portfolio piece.
Tunnel View offers the valley’s most recognizable composition, framing El Capitan, Half Dome, and Bridalveil Fall in one sweeping vista. For night photography, position yourself on the far right side of the viewing area where you can include foreground trees without light pollution from passing vehicles. Spring brings both the Milky Way core visibility (late May onward) and peak waterfall flow, though crowds linger until 11 PM. Winter offers solitude and occasional fog inversions that create ethereal foreground layers. The key challenge here is car headlights—shoot after midnight or use multiple exposures to blend clean sky captures with your foreground.
Valley View provides a more intimate perspective with the Merced River reflecting celestial subjects. Wade carefully into the shallow areas during summer’s low flow for unique reflection compositions. Face southwest to capture the Milky Way arcing over Cathedral Rocks from June through August. Arrive by 9 PM during summer weekends to claim your spot, or visit during the off-season when you’ll often have complete solitude. The cottonwood trees here add excellent foreground interest, especially when moonlit.
Glacier Point stands 3,200 feet above the valley floor, offering unobstructed 360-degree views. The road typically opens late May and closes after the first significant snowfall, usually November. Position yourself near the geology hut (not the main overlook railing) to avoid the safety lighting that illuminates the viewing area until 10 PM. For milky way shots, face south-southeast. The thin air here means sharper stars but also colder temperatures—expect conditions 15-20 degrees cooler than the valley floor.
Hidden Gems for Advanced Shooters
While Half Dome and El Capitan draw crowds even at midnight during peak season, experienced night photographers know Yosemite’s real treasures lie along less-traveled paths. These locations reward the extra effort with solitude and compositional opportunities you simply can’t find at the valley’s iconic viewpoints.
Olmsted Point sits at 8,000 feet along Tioga Road, offering an unobstructed view of Half Dome’s backside framed by glacially polished granite domes. The approach takes just five minutes from the parking area, making it surprisingly accessible for such dramatic results. Difficulty rating: easy to moderate. The exposed granite provides natural foreground interest that catches starlight beautifully, and the elevated position minimizes light pollution from the valley below. Best visited during new moon phases when the Milky Way arcs directly over the granite formations.
Sentinel Dome presents a moderate challenge with its 1.1-mile uphill hike gaining 400 feet, but you’ll arrive at one of Yosemite’s finest 360-degree viewpoints. Approach time averages 45 minutes in daylight, closer to 75 minutes at night. The summit’s bare granite creates clean compositions without interfering tree branches, while the famous Jeffrey Pine snag adds dramatic foreground potential. Your low-light shooting techniques will be tested here as you balance sky exposure with the subtle landscape details below.
Taft Point rewards adventurous shooters with vertiginous perspectives over Yosemite Valley’s sheer walls. The 1.1-mile trail rates as easy to moderate, taking roughly 30 minutes, but nighttime navigation requires careful attention near the unfenced cliff edges. The natural rock fissures create unique leading lines toward El Capitan, offering compositions impossible anywhere else in the park.
Scouting During Daylight: The Non-Negotiable Step
In Yosemite’s wilderness, attempting night photography without daytime reconnaissance isn’t brave—it’s reckless. I learned this the hard way stumbling over fallen logs in pitch darkness, trying to remember where that perfect composition was supposed to be.
Scout your locations during daylight hours, ideally in the late afternoon when the light quality mimics what you’ll experience during blue hour. Walk your intended path multiple times, noting every potential hazard: loose rocks, drop-offs, water crossings, and wildlife trails. Take compass readings or GPS coordinates of your exact shooting position—that boulder field looks entirely different at 2 AM.
Identify your foreground elements and visualize how they’ll interact with the night sky. That interesting tree might block your view of Half Dome once you factor in your wide-angle lens. Use your phone to snap reference photos from various angles, marking each with a waypoint.
Create physical markers where appropriate—small cairns or biodegradable flagging tape on branches (remove it when you leave). Note where you’ll set up your tripod and practice your composition in daylight. This preparation transforms your night shoot from a frustrating guessing game into a confident, efficient session where you can focus on capturing magic rather than avoiding injury.
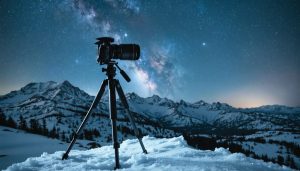
Camera Settings That Work in Real Wilderness Conditions
The Starting Point: Manual Mode Fundamentals
Before you start experimenting, you need a solid baseline for capturing Yosemite’s night skies. Think of these settings as your launching pad rather than a rigid formula—they’ll work in most situations, then you’ll fine-tune based on what you’re seeing.
Start with ISO 3200-6400, aperture wide open at f/2.8 or wider if your lens allows, and shutter speeds between 15-25 seconds. Why these numbers? You’re balancing three competing needs: gathering enough light to see the stars, keeping exposure times short enough to prevent star trails, and maintaining acceptable image quality.
Here’s where the 500 rule comes in handy, though with a modern twist. The traditional 500 rule says divide 500 by your focal length to find your maximum shutter speed before stars start trailing. With a 24mm lens, that’s about 20 seconds. However, today’s high-resolution sensors show trailing more readily, so many photographers now use the NPF rule or simply adopt a more conservative approach—I typically knock off 5 seconds from whatever the 500 rule suggests.
Yosemite throws a couple curveballs at these baseline settings. The elevation means clearer skies but colder temperatures that drain batteries faster. Granite walls can reflect moonlight or ambient light from distant civilization, sometimes allowing you to drop your ISO to 1600-2500 for cleaner files. Test your settings immediately upon arrival—take a 15-second exposure, zoom in on your LCD to check for trailing and noise, then adjust accordingly.
Focusing in Absolute Darkness
In Yosemite’s wilderness, autofocus becomes nearly useless once the sun sets, so mastering manual focus is essential. Start by switching to manual focus mode and using your camera’s live view function. Zoom in to 10x magnification on a bright star or distant light—Half Dome’s silhouette against the Milky Way works wonderfully when visible. Adjust your focus ring slowly until the star appears as a crisp pinpoint rather than a fuzzy blob.
For landscapes where you want sharp foreground and distant stars, hyperfocal distance is your friend. As a practical rule, focus about one-third into your scene. With a wide-angle lens at f/2.8, focusing around 15-20 feet typically keeps everything acceptably sharp from a few feet away to infinity. Test this during daylight to build confidence.
Here’s a field tip: once you’ve achieved perfect focus, use a small piece of gaffer tape to lock your focus ring in place. In cold conditions with gloves on, it’s surprisingly easy to accidentally shift focus between shots.
When wind cooperates—usually after midnight in Yosemite Valley—consider focus stacking. Capture multiple exposures focused at different distances, then blend them in post-processing for extraordinary sharpness throughout the entire frame. This technique works beautifully with moonlit foreground elements like Jeffrey pines paired with star-studded skies.
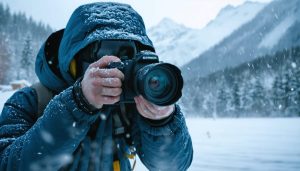
Adapting to Wind, Cold, and Altitude
Yosemite’s high-altitude environment presents unique challenges that require adjusting your standard night photography approach. When winds pick up—which happens frequently in exposed areas like Glacier Point—even a sturdy tripod can transmit vibrations during long exposures. Instead of fighting it, adapt by increasing your ISO to 6400 or even 12800 and shortening your exposures to 10-15 seconds. Yes, you’ll introduce more noise, but a sharp, slightly grainy image beats a blurred one every time.
Cold temperatures drain batteries at alarming rates, sometimes cutting capacity in half. Keep spare batteries in an inner jacket pocket against your body heat, and swap them regularly throughout the night. Your camera body itself benefits from staying warm until you’re ready to shoot—consider insulated camera wraps or simply keeping it under your jacket between compositions.
Altitude compounds weather challenges at night in unexpected ways. At 7,200 feet on Glacier Point, condensation forms rapidly when bringing cold gear into warm spaces. Before heading indoors, seal your camera in a plastic bag while still outside, allowing it to warm gradually and preventing moisture from forming on internal elements—a lesson many photographers learn the expensive way.
Composition Strategies for Wilderness Night Scenes
Balancing Iconic Landmarks with the Night Sky
Composing a compelling night image in Yosemite means thoughtfully balancing those magnificent granite landmarks with the celestial drama overhead. The ratio between foreground and sky depends on your creative intent, but a good starting point is the rule of thirds. For dramatic Milky Way shots, allocate about two-thirds of your frame to sky, leaving the lower third for your chosen landmark. This gives the galaxy breathing room while maintaining terrestrial context.
Silhouettes work beautifully in Yosemite’s night photography because these iconic formations are instantly recognizable even in shadow. Half Dome’s distinctive profile or El Capitan’s sheer face need no detail to communicate their majesty. Position them along the bottom third or side of your frame, allowing their dark forms to anchor the composition against the star-filled sky.
The Milky Way’s position changes with seasons and time of night, so plan accordingly. During summer months, you might capture the galactic core arching dramatically over Half Dome from Glacier Point, or position yourself at Valley View to frame El Capitan with the Milky Way stretching diagonally across your composition. Use apps like PhotoPills or Stellarium to preview exactly where the Milky Way will appear relative to your chosen landmark.
One practical tip: arrive before sunset to compose your shot in daylight. Mark your tripod position and note your framing, then wait for darkness. This prevents fumbling with composition in the dark and ensures your landmark sits exactly where you want it in relation to the emerging stars overhead.
Light Painting Without Ruining the Scene
Light painting can add dimension to foreground elements in your Yosemite night shots, but restraint is key. A quick sweep with a dim headlamp or even your phone’s flashlight can reveal rock textures or tree details without overpowering the natural scene. The goal is subtlety—viewers shouldn’t immediately notice you’ve added light.
Start with your headlamp on its lowest red-light setting, or cover a white light with red cellophane to preserve night vision. During a long exposure, briefly “paint” from the side rather than straight-on to create natural-looking shadows. Test exposures are essential; what seems faint to your eye often appears blazingly bright in the final image.
Consider whether light painting actually improves your composition. Sometimes embracing pure darkness and silhouettes creates more dramatic, authentic imagery. Yosemite’s granite formations often have enough ambient light reflection from moonlight or distant sources to show form without intervention.
Be mindful of other photographers. Before lighting anything during an exposure, scan the area for other tripods and ask if anyone’s shooting. A single flash of light can ruin dozens of long exposures happening simultaneously. At popular locations like Tunnel View or Valley View, coordinate with nearby shooters or wait for clear moments. This courtesy ensures everyone captures the Yosemite night magic they traveled to experience.
Timing Your Shoot: Moon Phases, Milky Way, and Seasons
Moon Phase Strategy
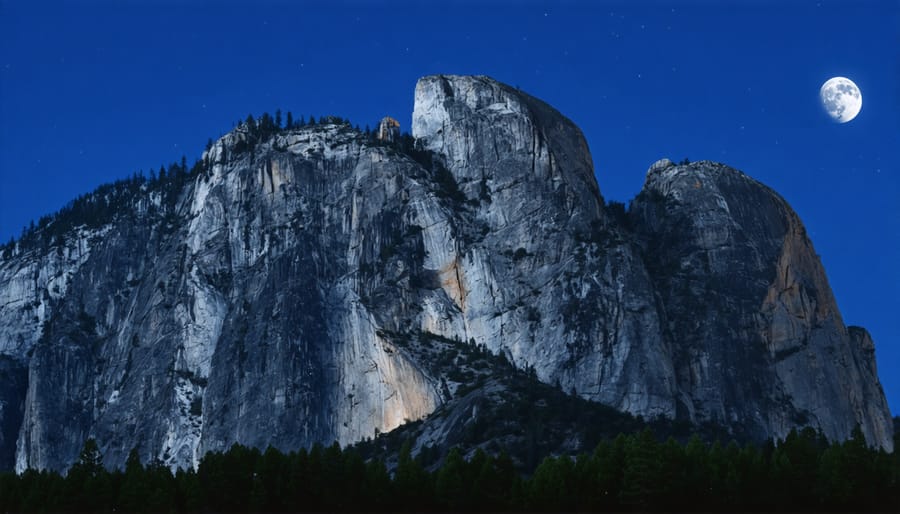
Choosing the right moon phase transforms your Yosemite night photography experience. New moon periods (when the moon is invisible) offer the darkest skies with the most visible stars and the brightest Milky Way core—ideal for classic starry landscape shots. However, you’ll need artificial light sources like headlamps or flashlights to illuminate foreground elements during long exposures.
Moonlit scenes tell a different story. A quarter or half moon provides just enough natural light to illuminate granite formations like El Capitan or Half Dome without overpowering the stars. Full moon nights create dramatic blue-hour lighting that reveals incredible landscape detail, but you’ll only capture the brightest stars and planets—the Milky Way essentially disappears.
I’ve found moonlight particularly helpful when shooting waterfalls or reflections in Mirror Lake, as it creates a soft, ethereal quality that artificial lighting can’t replicate. The tradeoff is fewer visible stars.
Planning apps like PhotoPills or The Photographer’s Ephemeris become invaluable tools here. They show exactly when the moon rises and sets, its phase, and how moonlight will illuminate specific landmarks at your chosen location. Before your trip, use these apps to scout virtual compositions and time your shoot perfectly. This preparation is especially crucial in Yosemite, where hiking to remote locations in darkness requires precise timing to capture that perfect celestial moment.
Milky Way Visibility in Yosemite
Yosemite offers exceptional Milky Way viewing opportunities from April through October, with the galactic core arcing across the sky during these warmer months. The prime season runs from May through September when the core rises higher and appears more prominently in the night sky.
For planning Milky Way shots over Yosemite’s iconic landmarks, timing matters significantly. Late May through early July positions the galactic core beautifully over Half Dome when shooting from Olmsted Point or Glacier Point around midnight to 2 AM. By August and September, the core appears earlier in the evening, rising around sunset and reaching optimal positioning between 9 PM and midnight—ideal for photographers who prefer not working through the early morning hours.
June and July are particularly magical months. The core aligns perfectly with El Capitan and the valley features during the late evening hours, and you’ll benefit from warmer temperatures at elevation. August brings the Perseid meteor shower as a bonus, though moonlight becomes your primary concern. Always check moon phases when scheduling your visit—a new moon or early crescent provides the darkest skies, while even a quarter moon can wash out the galactic center’s subtle details.
Seasonal Access and Weather Realities
Yosemite’s seasonal accessibility dramatically impacts your night photography plans. Tioga Road, which provides access to high-country locations like Olmsted Point and Tenaya Lake, typically closes from November through late May or even June, depending on snowpack. Check current road status before your trip—winter closures can strand you on the wrong side of the park.
Summer brings generally clear skies ideal for Milky Way shots, but afternoon thunderstorms frequently roll through, particularly in July and August. These storms usually clear by evening, leaving crisp, clean air that’s perfect for star photography. Monitor weather forecasts and be prepared to adjust your shooting schedule.
Winter offers solitude and snow-draped landscapes under stars, but expect challenging conditions. Many valley roads remain open, but you’ll need proper winter gear and may face icy conditions that make nighttime hiking dangerous.
Spring presents a unique opportunity: thundering waterfalls paired with longer nights and often stable weather patterns. April and May offer the sweet spot when waterfalls peak from snowmelt while temperatures remain comfortable for extended night sessions. The clearing storms also leave exceptionally transparent skies for astro-landscape compositions.
Staying Safe While Shooting Alone in the Dark
Wildlife Awareness in Low Light
Yosemite’s wilderness comes alive after dark, and that includes its most famous residents. Black bears are active throughout the park, particularly during spring and fall, and they’re surprisingly quiet when they want to be. Before heading out for a night shoot, review the park’s current bear activity reports and always carry bear spray in an accessible pocket, not buried in your camera bag.
Learn to recognize the sounds around you. The rustle of a bear moving through brush sounds heavier and more deliberate than a deer or raccoon. If you hear grunting, huffing, or the distinctive clack of teeth, it’s time to make noise, appear large, and slowly back away from your setup. Keep your headlamp handy but avoid shining it directly at wildlife, which can startle them unpredictably.
Never bring food, scented items, or toiletries to your shooting location. Even residual food odors on your jacket from dinner can attract animals. Store everything properly in bear lockers before you begin shooting. If you’re shooting near your vehicle, ensure all items remain secured inside.
Trust your instincts. That perfect Milky Way alignment isn’t worth a dangerous encounter. If you feel uneasy, hear repeated animal activity nearby, or notice fresh scat or tracks, pack up your gear calmly and relocate. There’s no shame in prioritizing safety over a single photograph.
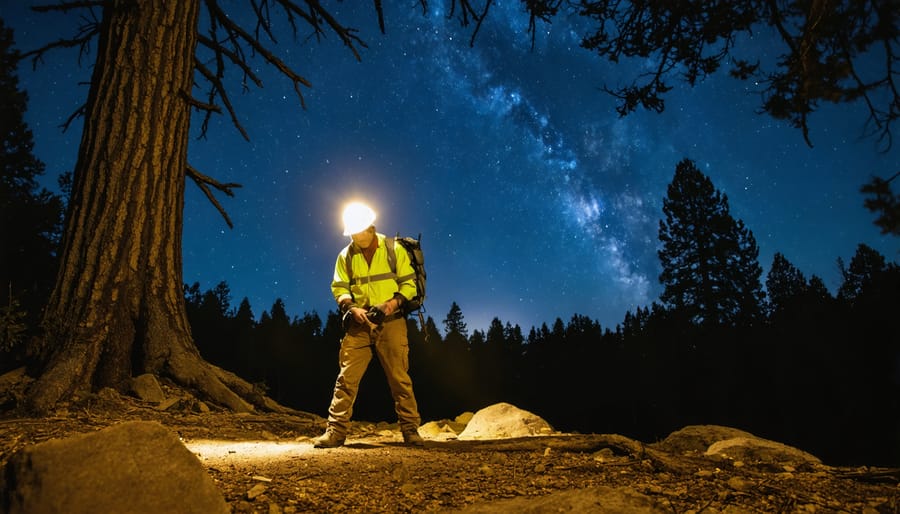
Navigation and Emergency Protocols
Yosemite’s backcountry can be unforgiving after dark, making solid navigation and emergency planning essential for any night photography expedition. Before leaving your accommodation or vehicle, download offline maps to your phone using apps like Gaia GPS or AllTrails—cellular service is nonexistent in most photography locations. I always carry a physical topographic map and compass as backup, since batteries drain faster in cold conditions.
Leave a detailed trip plan with someone reliable, including your exact location, expected return time, and emergency contact information. Be specific about which trailhead you’re using and which viewpoint you’ll be shooting from. This simple step has saved lives when photographers have gotten injured or disoriented in the dark.
For emergency communication, consider renting or purchasing a satellite communication device like a Garmin inReach. These devices work anywhere and let you send SOS signals with your exact GPS coordinates to search and rescue teams. Some photographers share them to split costs on group trips.
Know when to call it off. If weather deteriorates rapidly, you’re feeling unwell, or your instincts say something’s wrong, pack up and head back. No photograph is worth risking your safety, and Yosemite will always be there for another attempt under better conditions.
Mastering night photography in Yosemite isn’t just about understanding your camera settings—it’s about becoming equally comfortable with wilderness navigation, weather awareness, and the practical realities of working in remote terrain after dark. The photographers who consistently capture stunning images here are those who’ve developed both their technical craft and their backcountry competence in tandem.
If you’re new to Yosemite night photography, resist the temptation to immediately head for the most remote, dramatic locations. Start with accessible spots like Tunnel View or Valley View where you can park nearby and focus purely on your photography technique. These locations offer spectacular compositions while letting you work out your workflow, test your gear, and build confidence. As your skills grow, gradually progress to locations requiring short hikes, then eventually to backcountry destinations that demand more preparation and self-sufficiency.
The learning curve might feel steep initially, but remember that every challenge you overcome—nailing your focus in complete darkness, successfully navigating back to your car by headlamp, or capturing that perfect alignment of moonlight and granite—makes you a more capable photographer and outdoor enthusiast.
There’s something profoundly rewarding about standing alone beneath Yosemite’s star-filled sky, watching your images appear on your camera’s screen and knowing you’ve successfully combined technical skill with wilderness adventure. That unique intersection of photography and wild places is what makes night photography in Yosemite truly unforgettable.