Mastering wildlife photography demands equal parts technical precision and naturalist intuition. In the golden light of dawn, when a fox emerges from morning mist or an eagle swoops for its prey, success hinges on split-second decisions and meticulous preparation. Professional wildlife photographers know that extraordinary images emerge from the perfect blend of gear knowledge, fieldcraft, and raw patience.
Whether you’re stalking elusive big cats in the Serengeti or photographing songbirds in your backyard, the fundamental techniques remain constant. The right combination of camera settings, positioning, and understanding animal behavior transforms fleeting moments into compelling visual stories. This guide distills decades of field experience into practical, actionable techniques that elevate your wildlife photography from simple documentation to artistic expression.
From selecting the optimal lens and camera body configuration to mastering the art of concealment and anticipating animal movement, we’ll explore the essential skills that separate amateur snapshots from professional-quality wildlife images. Learn to work with natural light, handle challenging weather conditions, and develop the instincts needed to capture those decisive moments that define exceptional wildlife photography.
Join us as we delve into the technical and artistic elements that will transform your approach to photographing nature’s most captivating subjects.
Essential Gear for Wildlife Photography Success
Choosing the Right Lens
When it comes to choosing telephoto lenses for wildlife photography, focal length is your primary consideration. For most wildlife situations, you’ll want a minimum focal length of 300mm, though 400mm to 600mm is often ideal. These longer focal lengths allow you to maintain a safe distance from your subjects while still capturing detailed, frame-filling shots.
Prime lenses, like a 400mm f/2.8 or 600mm f/4, offer superior image quality and wider apertures, making them perfect for low-light conditions and creating beautiful background blur. However, they’re typically heavier and more expensive than zoom alternatives. For beginners or photographers who need more versatility, a 100-400mm or 150-600mm zoom lens provides excellent flexibility without sacrificing too much image quality.
Consider your typical shooting environment and subjects when selecting your lens. If you primarily photograph larger animals like deer or bears, a 300mm lens might suffice. For bird photography or smaller subjects, you’ll likely need 500mm or longer. Don’t forget about minimum focusing distance – some telephoto lenses struggle with close-up shots, which can be limiting when wildlife approaches unexpectedly.
Weight is another crucial factor, especially if you’ll be hiking or hand-holding your camera for extended periods. Modern lens technologies have made lighter options available, though they often come with compromises in maximum aperture or build quality.

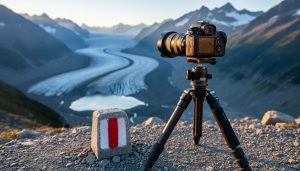
Support Systems and Stabilization
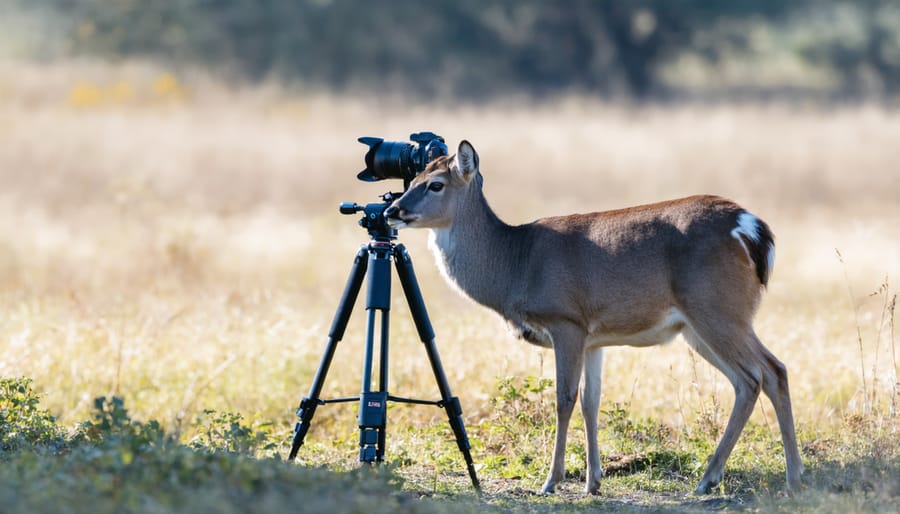
A stable support system is crucial for capturing sharp wildlife images, especially when using long telephoto lenses. Tripods form the foundation of wildlife photography support, with carbon fiber models offering the ideal balance of stability and portability. When selecting a tripod, ensure it can handle at least 1.5 times the weight of your heaviest camera-lens combination.
Gimbal heads are game-changers for wildlife photographers, allowing smooth tracking of moving subjects while supporting heavy equipment. These specialized heads enable perfect balance and near-weightless operation, making it easier to follow birds in flight or running animals. The Wimberley WH-200 and Really Right Stuff PG-02 are popular choices among professionals.
Monopods offer a compelling alternative when mobility is paramount or when tripods aren’t permitted. They’re excellent for providing vertical support while maintaining the flexibility to move quickly. Consider using a monopod foot to create a stable three-point stance with your legs.
For added stability in any situation, employ proper technique: spread tripod legs wider in windy conditions, use the leg spikes on soft ground, and avoid extending the center column unless absolutely necessary. When shooting from vehicles, specialized window mounts or beanbags can provide stable platforms without the bulk of traditional supports.
Remember to disable image stabilization when your camera is mounted on a stable tripod, as it can actually introduce unwanted movement in completely static situations.
Camera Settings for Wildlife Success
Mastering Autofocus for Moving Subjects
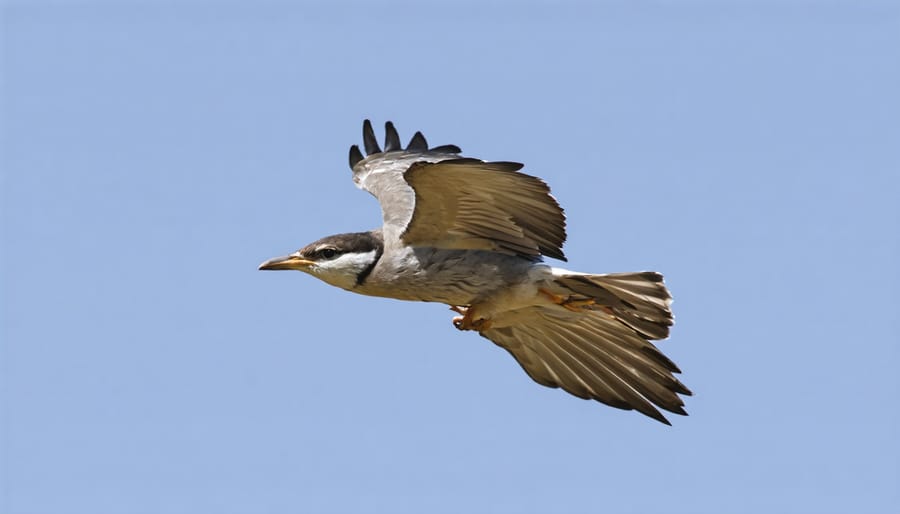
When it comes to capturing fast-moving subjects like birds in flight or running wildlife, mastering your camera’s autofocus system is crucial. Modern cameras offer various AF modes, but knowing when and how to use them makes all the difference.
For wildlife photography, Continuous AF (AI Servo for Canon, AF-C for Nikon) is your best friend. This mode constantly adjusts focus as your subject moves, essential for tracking animals in motion. Pair this with back-button focus for maximum control – it separates focus activation from your shutter button, allowing you to maintain or release focus independently.
Choose your AF points wisely. While single-point AF offers precision for stationary subjects, dynamic-area or zone AF modes work better for moving wildlife. These modes use a cluster of focus points, giving you more flexibility when tracking erratic movements. For birds in flight, try setting up an expanded focus area around your central point.
Focus tracking sensitivity is another crucial setting to understand. In dense environments like forests, setting a slower tracking response prevents your camera from jumping to background elements. Conversely, in open areas, faster tracking helps follow quick-moving subjects.
Remember to pre-focus on areas where you anticipate action. If you’re photographing birds at a watering hole, for example, pre-focus on the spot where they typically land. This gives your AF system a head start when the action begins.
Practice these techniques with predictable subjects first – perhaps birds at a backyard feeder – before tackling more challenging wildlife scenarios. With time, these focusing techniques will become second nature, allowing you to concentrate on composition and timing.
Exposure Settings for Different Conditions
Wildlife photography demands a keen understanding of exposure settings to capture stunning images across diverse conditions. For bright daylight scenarios, start with the “Sunny 16” rule: set your aperture to f/16 and shutter speed to 1/your ISO value. This provides a solid baseline for well-exposed images of stationary subjects.
When photographing active wildlife, prioritize faster shutter speeds. For birds in flight or running mammals, aim for at least 1/1000th of a second to freeze motion. You might need to open up your aperture or increase ISO to maintain proper exposure while keeping these quick shutter speeds.
During golden hour, the warm, directional light demands different considerations. Try shooting in Aperture Priority mode (A/Av) with an aperture around f/5.6 to f/8, letting your camera adjust shutter speed accordingly. This approach helps maintain consistent depth of field while adapting to rapidly changing light conditions.
For challenging low-light photography settings, such as photographing nocturnal animals or subjects in dense forest cover, consider opening up your aperture to its widest setting (f/2.8 or f/4) and increasing your ISO. Modern cameras handle higher ISOs well, so don’t be afraid to push to ISO 3200 or even 6400 if needed.
Remember to use exposure compensation when photographing subjects with extreme contrast, like white birds or dark-furred animals. Add positive compensation (+1 to +2 stops) for predominantly dark scenes and negative compensation (-1 to -2 stops) for bright subjects to prevent over or underexposure.
Field Techniques That Get Results
Reading Animal Behavior
Successfully anticipating animal behavior is the cornerstone of wildlife photography. Animals often follow predictable patterns throughout their day, from feeding routines to preferred resting spots. Start by researching your subject species’ habits, including their daily rhythms, seasonal behaviors, and typical reactions to environmental changes.
Learn to recognize warning signs that indicate an animal might flee or change its behavior. Flattened ears, direct stares, or sudden stillness often precede movement. Understanding these cues helps you prepare for action shots while maintaining a respectful distance. Watch for subtle indicators like the direction an animal’s ears are pointing, which often reveals where they’re focusing their attention.
Weather conditions significantly influence animal behavior. Many species are most active during dawn and dusk, known as the “golden hours.” Predators often hunt after rain when prey becomes more visible, while certain birds display unique behaviors before storms. Familiarize yourself with these patterns to increase your chances of capturing compelling moments.
Territory markers, tracks, and droppings can help you identify frequented areas. Look for well-worn paths, feeding spots, and watering holes. These locations often yield the best photography opportunities. Remember that patience is crucial – sometimes waiting quietly in one promising location is more effective than actively searching.
By developing your observation skills and understanding of animal behavior, you’ll not only capture better images but also ensure you’re photographing wildlife in an ethical, non-disruptive manner.
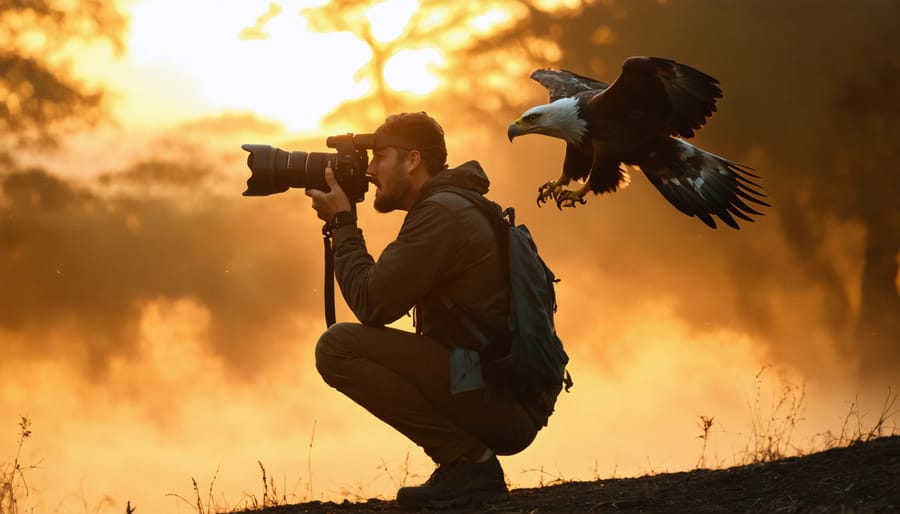
Approaching Wildlife Safely
Getting close to wildlife requires a delicate balance between capturing compelling images and respecting the safety and well-being of both photographer and subject. Always maintain a safe distance – a good rule of thumb is to stay far enough away that the animal’s behavior isn’t altered by your presence. If an animal shows signs of distress, such as stopping feeding or displaying defensive postures, you’re too close.
Use natural blinds and camouflage to your advantage. Position yourself near natural features like trees or rocks, and wear earth-toned clothing that blends with the environment. Avoid wearing bright colors or strong fragrances that might attract or disturb wildlife.
Approach animals slowly and indirectly, never moving straight toward them. Make yourself as predictable as possible – sudden movements can startle wildlife and potentially trigger defensive responses. Always leave yourself an escape route and never position yourself between a parent and its offspring.
Consider using a longer lens rather than getting physically closer. A 400mm or longer telephoto lens will let you maintain a safe distance while still capturing intimate portraits. If shooting from a vehicle, use it as a blind and keep the engine off to minimize disturbance.
Remember that no photograph is worth compromising an animal’s well-being. Never bait or lure wildlife, and always follow local guidelines and park regulations regarding wildlife interaction. Patience and respect will lead to better, more natural images while ensuring the safety of all involved.
Composing in Nature
Composing compelling wildlife photographs in nature requires a delicate balance between artistic vision and adapting to unpredictable conditions. Unlike studio photography, you can’t control your subject’s movement or the environment, making it essential to think and react quickly while maintaining strong compositional principles.
Start by identifying natural frames within your environment, such as branches, rocks, or foliage. These elements can help draw attention to your subject while adding depth to your images. Remember the rule of thirds, but don’t be afraid to break it when the situation calls for something different – wildlife doesn’t always position itself perfectly!
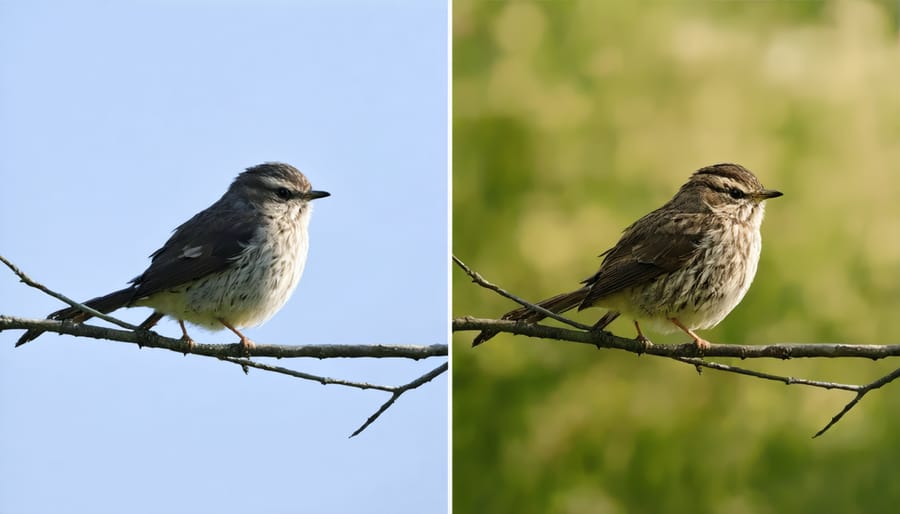
Pay attention to the background as much as your subject. Look for clean, uncluttered areas that won’t compete with your main subject. Sometimes, taking a few steps to the left or right can dramatically improve your composition by eliminating distracting elements. Consider the direction of light and how it affects your subject – early morning and late afternoon light can create beautiful rim lighting and long shadows that add drama to your images.
When photographing moving subjects, leave space in the frame for them to move into. This technique, known as “leading room,” creates a more dynamic and natural-feeling image. Also, try to capture your subject at eye level whenever possible – this perspective creates a more intimate connection between the viewer and the animal.
Remember that patience is key. Sometimes waiting for the right moment – when your subject’s pose aligns with the perfect background and lighting – can make the difference between a good photo and a great one.
Post-Processing Wildlife Images
Raw Processing for Natural Results
Raw processing is a critical step in wildlife photography that requires a delicate balance between enhancing your images and maintaining their natural authenticity. The goal is to showcase the true beauty of wildlife while addressing technical limitations of camera sensors.
Start by adjusting your white balance to match the natural lighting conditions of your scene. Wildlife often appears in challenging lighting situations, so finding the right balance between shadows and highlights is crucial. Use the raw file’s extensive dynamic range to recover details in both dark and bright areas without creating an artificial HDR look.
When it comes to color, resist the temptation to oversaturate. Wild animals’ natural colors are often subtle and beautiful on their own. Instead, focus on fine-tuning the color temperature to accurately represent the scene’s atmosphere. Clarity adjustments can help enhance texture in fur or feathers, but use this tool sparingly to avoid an overly processed appearance.
Noise reduction requires special attention in wildlife photography, as many shots are taken in low light or at high ISOs. Apply selective noise reduction to maintain sharpness in key areas while smoothing out background noise. When sharpening, focus on the animal’s eyes and essential details rather than applying global adjustments.
Finally, consider using local adjustments to guide viewer attention to your subject. Subtle vignetting or selective exposure adjustments can help create depth without looking artificial. Remember, the best processing often goes unnoticed, allowing the viewer to connect with the animal rather than the edit.
Noise Reduction and Sharpening
Wildlife photography often pushes our cameras to their limits, resulting in noisy images from high ISO settings. However, with careful post-processing, you can salvage and even enhance these challenging shots. Start by applying noise reduction selectively – focus on smooth areas like skies or out-of-focus backgrounds while preserving detail in fur, feathers, and other textured areas.
Most editing software offers two types of noise reduction: luminance (affecting brightness variations) and color (targeting color speckles). Begin with color noise reduction, as it can be more aggressive without losing detail. For luminance noise, start conservatively at around 25-30% and adjust based on your image’s needs. Remember that too much noise reduction can make your subject look artificial or plastic-like.
After reducing noise, apply selective sharpening to restore and enhance important details. Use masking techniques to target only the areas that need emphasis, such as your subject’s eyes, fur patterns, or distinctive markings. The “unsharp mask” filter with settings around 100% amount, 1.0 radius, and 3-4 threshold often works well for wildlife images.
For the best results, zoom in to 100% view while making these adjustments. Consider working in layers or using adjustment masks to apply different levels of noise reduction and sharpening to different parts of your image. This targeted approach helps maintain a natural look while cleaning up technical imperfections.
Mastering wildlife photography is a journey that combines technical expertise, creative vision, and endless patience. Throughout this guide, we’ve explored essential techniques that can transform your wildlife images from simple snapshots to compelling visual stories. Remember that successful wildlife photography hinges on understanding your subject’s behavior, maintaining proper camera settings, and positioning yourself thoughtfully in the field.
The fundamentals we’ve covered – from selecting the right gear to mastering exposure in challenging conditions – form the foundation of wildlife photography. However, the true magic happens when you combine these technical skills with field craft and ethical practices. Always prioritize the welfare of your subjects and respect their natural behaviors.
Don’t be discouraged if your first attempts don’t match your expectations. Wildlife photography requires practice, persistence, and often multiple attempts to capture that perfect moment. Start with familiar subjects in your local area – backyard birds, urban wildlife, or nearby nature reserves are excellent training grounds for honing your skills.
Keep experimenting with different techniques, angles, and lighting conditions. Each shooting session is an opportunity to learn and improve. Document your experiences, analyze your results, and build upon what works. Most importantly, maintain your passion for wildlife and let it shine through in your images.
Remember, some of the most memorable wildlife photographs aren’t technically perfect but capture authentic, meaningful moments in nature. So grab your camera, head outdoors, and start creating your own wildlife photography stories.