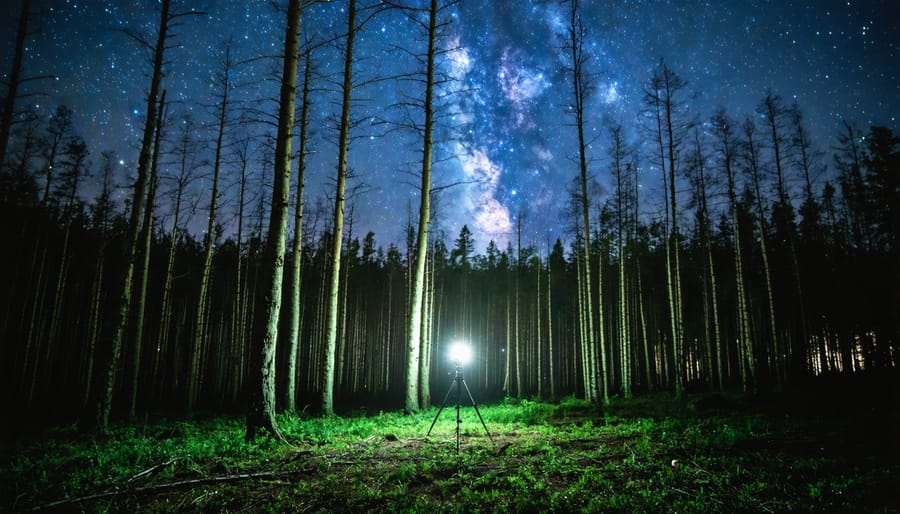
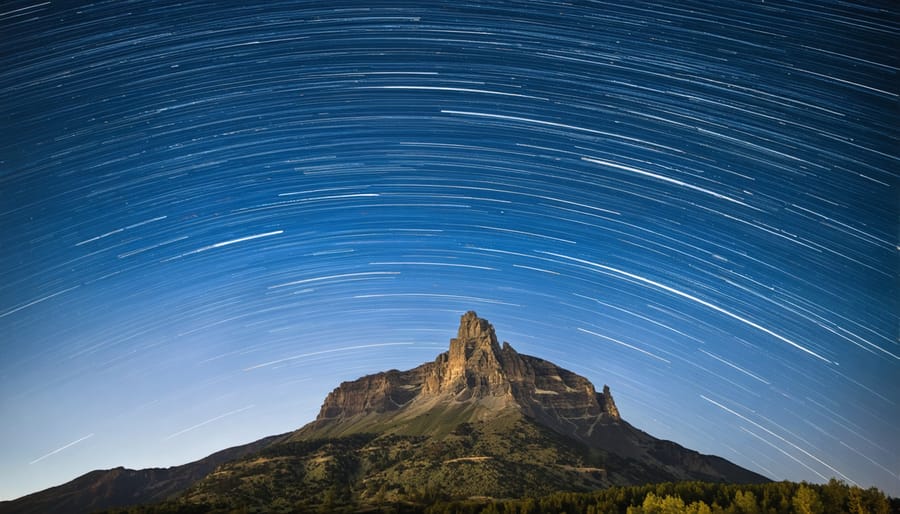
Master the art of capturing stunning wilderness after dark by mastering your camera’s manual settings. Switch to full manual mode and set your ISO between 1600-3200 to capture sufficient light while managing digital noise. Open your aperture to its widest setting (typically f/2.8 or lower) to maximize light gathering capability, and start with a 15-20 second exposure to capture star trails and ambient light. Position your tripod on solid ground and use your camera’s timer or a remote shutter release to eliminate camera shake completely. Understanding these fundamental settings transforms challenging nocturnal conditions into opportunities for creating compelling nighttime imagery, whether you’re shooting star-filled skies, moonlit landscapes, or the subtle glow of twilight. These techniques form the foundation for consistently capturing sharp, well-exposed photographs in low-light conditions without relying on artificial illumination.
Essential Camera Settings for Night Photography
ISO Settings and Noise Management
ISO management is arguably the most critical balancing act in night photography, where you’re constantly weighing the need for light sensitivity against image quality. While modern cameras handle high ISOs better than ever, understanding how to optimize these settings can make or break your nighttime shots.
Start with the lowest ISO possible that still allows for a reasonable shutter speed. For most night scenes, begin around ISO 1600 and adjust based on your exposure metering in low light. Many current cameras can produce clean images at ISO 3200 or even 6400, but remember that each camera handles noise differently.
To minimize noise while maintaining necessary sensitivity:
– Use your camera’s native ISO settings (multiples of 100 or 200) rather than expanded values
– Shoot in RAW format to preserve more detail for noise reduction in post-processing
– Consider using longer exposures with lower ISO when shooting stationary subjects
– Enable your camera’s long exposure noise reduction for exposures over 30 seconds
If you’re photographing the night sky, you might need to push your ISO higher, sometimes to 6400 or beyond. In these cases, take multiple exposures of the same scene – you can stack them later in post-processing to reduce noise while maintaining detail. Remember that some noise is better than an underexposed image, as dark areas tend to show more noise when brightened in post-processing.
Shutter Speed for Different Night Scenes
Different night scenes demand different shutter speeds to capture their unique characteristics effectively. For cityscapes with moving lights, try shutter speeds between 5-30 seconds to create stunning light trails from passing vehicles. These long exposure techniques transform ordinary street scenes into dynamic compositions of light and motion.
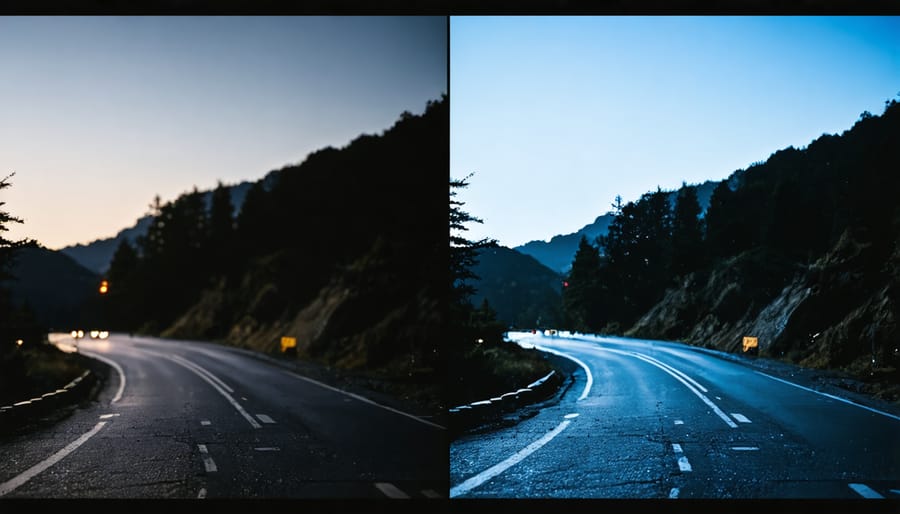
When photographing the night sky, your shutter speed depends on your specific subject. For basic starry sky shots, use the “500 rule” – divide 500 by your lens’s focal length to determine the maximum exposure time before stars begin to trail. For example, with a 24mm lens, try around 20 seconds (500÷24).
Urban architecture under artificial lighting typically requires shorter exposures, usually between 1-5 seconds, to maintain detail while capturing ambient light. For moonlit landscapes, experiment with exposures between 20-30 seconds to gather enough light while keeping the scene natural-looking.
Remember that these are starting points – factors like ambient light levels, desired creative effect, and your camera’s ISO capabilities will influence your final shutter speed choice. Start with these recommendations and adjust based on your results and artistic vision. Using your camera’s histogram will help ensure proper exposure across different night scenes.
Aperture Selection in Low Light
When shooting at night, selecting the right aperture becomes crucial for balancing light gathering capability with depth of field. A wider aperture (lower f-number like f/1.4, f/1.8, or f/2.8) allows more light to reach your sensor, which is particularly valuable in low-light conditions. These larger apertures can be the difference between capturing a usable image and ending up with an unusable dark frame.
However, there’s a trade-off to consider. Wider apertures create a shallower depth of field, meaning less of your scene will be in sharp focus. While this can create beautiful bokeh effects with close subjects like illuminated cityscapes, it might not be ideal when you’re trying to capture sharp detail throughout a nighttime landscape.
For night photography that requires more depth of field, such as starscapes or architectural shots, consider stopping down to f/4 or f/5.6. You’ll need to compensate for the reduced light by either increasing your ISO or lengthening your exposure time, but you’ll achieve sharper results across the frame. Some night photographers even push to f/8 for maximum sharpness, though this requires significantly longer exposures.
The sweet spot often lies between f/2.8 and f/4 for most night photography scenarios, offering a workable balance between light gathering and depth of field. Remember that every lens has its own “sweet spot” where it performs best, typically 2-3 stops down from its widest aperture.
Focus Techniques in the Dark
Manual Focus Mastery
Achieving sharp focus in low-light conditions can be challenging, but mastering manual focus techniques is crucial for stunning night photography. While autofocus might struggle in the dark, these methods will help you nail focus consistently.
Live View magnification is your best friend for night photography. Zoom in to 100% on your camera’s LCD screen and carefully adjust your focus ring until stars or distant lights appear as sharp, precise points. Many cameras offer focus peaking, which highlights in-focus areas with colored outlines, making it easier to confirm accurate focus.
For landscape compositions, use the hyperfocal distance technique. Focus roughly one-third into your scene, typically about 10-15 feet away when shooting starscapes with a wide-angle lens. This ensures both your foreground elements and distant stars remain adequately sharp.
If your subject includes bright lights in the distance, use these as focus points. City lights, moonlit objects, or even a friend’s headlamp can serve as reference points. Once you’ve achieved focus, switch your lens to manual mode to prevent any accidental adjustments.
Consider marking your lens with tape or a marker once you’ve found infinity focus. This creates a reliable reference point for future shoots, saving time and reducing frustration in the field. Remember that some lenses focus slightly before the infinity mark (∞) on the distance scale, so always verify with Live View.
Using Live View for Critical Focus
In low-light conditions, achieving sharp focus can be particularly challenging. This is where your camera’s Live View feature becomes an invaluable tool. Unlike the optical viewfinder, Live View allows you to see exactly what the sensor sees, making it easier to judge focus accuracy in dark situations.
Start by mounting your camera on a tripod and switching to Live View mode. Locate a bright element in your composition – this could be a star, distant light, or any distinguishable feature in your scene. Use the zoom function (usually marked with a magnifying glass icon) to enlarge this area by 5x or 10x. This digital zoom doesn’t affect your final image; it simply helps you see details more clearly for focusing.
When focusing manually, turn your lens’s focus ring slowly while watching the Live View display. The point of critical focus becomes apparent when your subject appears sharpest on screen. Some cameras offer focus peaking, which highlights in-focus areas with colored outlines, making the process even more straightforward.
For starscapes, focus on a bright star or distant light source. For general night landscapes, try focusing on high-contrast edges like the horizon or illuminated building outlines. Once you’ve achieved sharp focus, avoid touching the focus ring and consider taping it in place if you’ll be shooting multiple frames.
Remember to turn off Live View after focusing to conserve battery life, as it consumes more power than using the viewfinder.
Advanced Camera Modes and Features
Long Exposure Noise Reduction
Long Exposure Noise Reduction (LENR) is a powerful feature that can significantly improve your night photography, though it comes with both benefits and trade-offs. When activated, this function takes a second “dark frame” exposure immediately after your main shot, capturing only the sensor noise. The camera then automatically subtracts this noise pattern from your original image, resulting in cleaner final photographs.
LENR works best when shooting exposures longer than 30 seconds, particularly during warm nights when sensor heat can generate significant digital noise. It’s especially valuable when capturing star trails, moonlit landscapes, or light painting scenes where image quality is crucial.
However, there’s a catch: the dark frame exposure takes as long as your original shot. This means if you’re taking a 4-minute exposure, you’ll need to wait another 4 minutes for the noise reduction process to complete. During this time, you can’t take another photo, which can be problematic when shooting time-sensitive events or when you’re trying to capture multiple shots in sequence.
Consider turning LENR off when:
– Shooting star trails with multiple consecutive exposures
– Photographing rapidly changing scenes like aurora
– Working in cold conditions where sensor noise is naturally lower
– Battery life is a concern
For optimal results, enable LENR when:
– Taking single, long exposures of static scenes
– Working in warm conditions
– Image quality is more important than shooting speed
– You have sufficient battery power
Remember that LENR is different from high ISO noise reduction, and you can always apply noise reduction in post-processing if needed, though in-camera LENR often produces superior results for very long exposures.
Exposure Bracketing in Low Light
When shooting night scenes, the contrast between bright and dark areas can be extreme, making it challenging to capture all the details in a single exposure. This is where exposure bracketing becomes your secret weapon, especially when dealing with night photography in challenging weather conditions.
Start by setting up your camera for auto exposure bracketing (AEB) or manually adjusting exposure values. A typical bracketing sequence involves taking three to five shots: one at the base exposure, others at -2 EV and +2 EV, and optional shots at -1 EV and +1 EV for smoother transitions. This range ensures you capture both the deep shadows and bright highlights effectively.
For city scenes, bracket to capture both the illuminated buildings and darker foreground elements. In natural settings, use bracketing to balance the starlit sky with landscape features. Set your camera on a sturdy tripod and use a remote shutter or timer to avoid camera shake between brackets.
When processing, you can either choose the best single exposure or blend multiple exposures in post-processing software. For blending, start with the middle exposure as your base and selectively bring in details from the other exposures. Pay particular attention to preserving the natural feel of the night scene – avoid over-processing that might make the final image look artificial.
Remember that not every night scene requires bracketing. Sometimes, a single well-exposed shot might capture all the detail you need. Trust your creative judgment and use bracketing when the scene’s dynamic range exceeds what your camera can capture in one frame.

Essential Equipment Considerations
Tripod Stability Techniques
A rock-solid tripod setup is absolutely essential for crisp night photography, especially in extreme shooting conditions. Start by fully extending your tripod’s legs on stable ground, avoiding soft surfaces like sand or mud. For maximum stability, spread the legs at their widest angle and ensure each leg is locked firmly in place.
Here’s a pro tip: hang your camera bag from the tripod’s center hook (if available) to add weight and reduce vibration. If you’re shooting in windy conditions, keep the center column as low as possible – raising it increases camera shake dramatically.
Always double-check your tripod’s bubble level to ensure your horizon line will be straight. If your tripod doesn’t have one, most modern cameras include a digital level in their viewfinder or LCD screen.
Remember to disable any image stabilization features on your lens or camera body when using a tripod. These systems can actually create subtle movement when the camera is completely still, compromising image sharpness.
Before pressing the shutter, use your camera’s self-timer or a remote release to avoid introducing vibration. Even the slight motion of pressing the shutter button can cause blur in long exposures. For extra stability during lengthy exposures, consider enabling your camera’s mirror lock-up feature to eliminate the tiny vibration caused by the mirror’s movement.
Finally, periodically check your tripod’s leg locks and head movement throughout your shooting session, as temperature changes can affect their tightness.
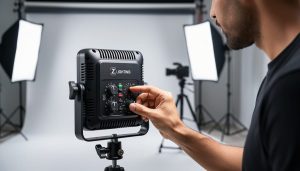
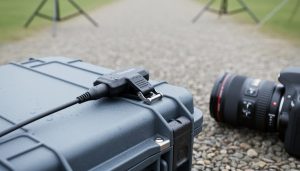
Remote Trigger Settings
Remote trigger settings are crucial for achieving sharp, shake-free images during night photography. When shooting in low light conditions with slow shutter speeds, even the smallest camera movement from pressing the shutter button can introduce blur. This is where remote triggers become invaluable tools in your night photography arsenal.
The simplest option is your camera’s built-in self-timer. Setting it to 2 or 10 seconds gives the camera time to stabilize after you press the shutter button. However, for more control and flexibility, consider investing in a wireless or cable remote trigger. These devices allow you to release the shutter without touching the camera at all.
Many modern remote triggers offer advanced features like intervalometers, which are perfect for star trails and time-lapse photography. You can program specific intervals between shots and set the total number of images you want to capture. This automation frees you to focus on other aspects of your shoot while ensuring consistent results.
For those shooting in particularly cold conditions, wireless triggers have an advantage over cable releases as they allow you to stay warm in your car or tent while triggering the camera. Just ensure your wireless trigger has fresh batteries, as cold temperatures can significantly reduce battery life.
When using remote triggers, always enable your camera’s “Mirror Lock-up” feature for extra stability. This feature lifts the mirror before the exposure begins, eliminating another potential source of camera shake.
Composition in the Dark
Composing stunning night photographs when you can barely see your surroundings might seem daunting, but it’s entirely possible with the right approach. Start by using your camera’s live view display, which can often reveal details your eyes might miss in the darkness. When possible, arrive at your location before complete darkness to scout potential compositions and identify interesting foreground elements.
Use artificial light sources strategically to create depth in your images. City lights, moonlight, or even distant car headlights can serve as natural leading lines or points of interest. For wilderness shots, consider using a dim headlamp to briefly illuminate foreground elements during composition.
The rule of thirds remains valuable in night photography, but don’t be afraid to break it for dramatic effect. Strong silhouettes against starlit skies or city lights can create compelling minimalist compositions. Look for reflective surfaces like still water or wet streets, which can double the impact of light sources and add symmetry to your images.
Remember that negative space takes on special significance in night photography. A vast dark sky filled with stars can be just as important as your main subject. When composing urban scenes, try incorporating the contrast between lit and unlit areas to create visual tension and interest.
Use your camera’s electronic level to ensure straight horizons, as tilted horizons are particularly noticeable in night scenes with artificial lighting or star trails.
Mastering night photography without flash requires patience, practice, and a solid understanding of your camera’s capabilities. By applying the settings and techniques we’ve discussed – from selecting the right ISO and aperture to managing long exposures and focusing in low light – you’ll be well-equipped to capture stunning nighttime images. Remember that every location and lighting situation is unique, so don’t be afraid to experiment with different combinations of settings. Start with the recommended baseline settings, then adjust based on your specific conditions and creative vision. The more you practice, the more intuitive these adjustments will become, and you’ll develop your own style of night photography. Take time to review your results, learn from any mistakes, and keep pushing your boundaries. With dedication and the right technical approach, you’ll soon be creating captivating night photographs that truly showcase the magic of after-dark scenes.