Bundle up in layers and venture into the crisp winter darkness, where pristine snow transforms ordinary landscapes into ethereal canvases for wilderness night photography. Against the backdrop of star-filled skies, winter nights offer unique opportunities to capture nature’s most dramatic moments – from the dance of the Northern Lights to the pristine silence of snow-covered forests bathed in moonlight.
Master this challenging art form by embracing winter’s distinctive conditions. The snow’s natural reflective properties create exceptional lighting situations, while sub-zero temperatures produce crystal-clear skies perfect for astrophotography. Cold weather also minimizes atmospheric distortion, resulting in sharper star images and crisper details in long exposures.
However, winter night photography demands more than just technical skill – it requires careful preparation and intimate knowledge of your environment. The combination of darkness and freezing temperatures presents unique challenges that transform every shoot into an adventure. Whether you’re capturing ice-crusted branches against a starlit sky or documenting the subtle interplay of moonlight on fresh powder, winter nights offer photographers an unparalleled canvas for creating extraordinary images.
Essential Gear for Winter Night Photography

Cold-Weather Camera Protection
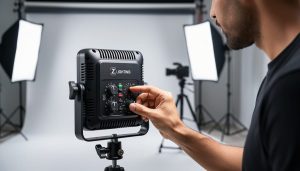
When shooting in extreme conditions, protecting your camera gear becomes crucial for both equipment longevity and successful image capture. Start by gradually acclimating your gear to the cold temperature before heading out – this helps prevent condensation from forming on and inside your camera.
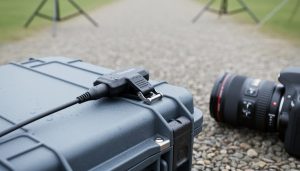
Use silica gel packets in your camera bag to absorb moisture, and keep spare batteries close to your body, as cold temperatures significantly reduce battery life. A weatherproof camera bag with proper insulation is essential, but don’t forget to bring several microfiber cloths to wipe away any snow or moisture that accumulates on your gear.
Consider using camera covers or protective housings specifically designed for cold weather. These act as barriers against wind and moisture while still allowing access to essential controls. For longer exposures, hand warmers strategically placed near your camera can help prevent frost formation on the lens.
When returning indoors, place your gear in a sealed plastic bag before entering the warm environment. This allows your equipment to warm up slowly while preventing condensation from forming on sensitive electronics.
Must-Have Accessories
When venturing into winter night photography, having the right accessories can mean the difference between capturing stunning shots and heading home disappointed. First on your must-have list should be a sturdy tripod with all-terrain feet or spikes – essential for maintaining stability on snow and ice. Consider investing in leg warmers for your tripod to prevent the metal from becoming too cold to handle.
A reliable remote trigger or intervalometer is crucial to eliminate camera shake during long exposures. Choose one with a backlit display for easier operation in the dark, and consider models with timer functions for star trails and time-lapses.
Extra batteries are non-negotiable in cold conditions, as battery life can decrease by up to 70% in freezing temperatures. Keep at least three fully charged spares in an inside pocket close to your body to maintain their warmth and efficiency.
Hand and toe warmers aren’t just for comfort – they can also protect your gear. Place them strategically around your camera to prevent condensation on your lens and keep your LCD screen functioning properly.
Other essential items include a headlamp with a red light mode to preserve your night vision, microfiber cloths for wiping condensation, and a weather-sealed camera bag. Don’t forget lens filters, particularly a clear protective filter to shield your glass from snowfall, and neutral density filters for capturing longer exposures of moonlit landscapes.
Personal Comfort Gear
When shooting in winter nights, your personal comfort is just as crucial as your camera gear. Start with a reliable base layer of merino wool or synthetic thermal wear, followed by an insulating mid-layer and a waterproof outer shell. Quality winter boots with proper insulation are essential – your feet will thank you during those long exposure shots.
Don’t forget your extremities: wear fingertip-less gloves with mitten covers, allowing you to operate camera controls while keeping your hands warm. A warm hat or beanie, plus a neck gaiter or balaclava, will help retain vital body heat. Hand and toe warmers can be lifesavers during extended shooting sessions.
Pack a thermos of hot beverage and high-energy snacks to maintain your energy levels. A headlamp with both white and red light modes is crucial for setting up equipment while preserving your night vision. Consider bringing a small foam pad to kneel or sit on while composing low-angle shots – it provides insulation from the cold ground and keeps your gear dry.
Remember, if you’re uncomfortable, you won’t be able to focus on creating great images, so invest in quality winter gear that suits your local conditions.
Camera Settings for Winter Nights
Exposure Settings for Snow Scenes
Snow scenes at night present a unique exposure challenge, as you’re dealing with highly reflective surfaces under dark skies. Understanding these extreme weather photography techniques is crucial for capturing the perfect shot.
Start by setting your camera to manual mode and use the histogram as your guide rather than relying solely on your camera’s meter. Snow tends to fool automatic metering systems, often resulting in underexposed images that appear gray rather than white. As a starting point, try setting your aperture between f/2.8 and f/4 to gather enough light while maintaining reasonable depth of field.
For ISO settings, begin at 1600 and adjust based on available light sources like moonlight or artificial lighting. If you’re shooting aurora or stars along with snowy landscapes, you might need to push to 3200 or higher, but be mindful of noise in the darker areas.
When it comes to shutter speed, experiment between 15-30 seconds for most night snow scenes. However, if there’s moonlight reflecting off the snow, you might need shorter exposures to prevent overexposure. A good trick is to take a test shot at these settings and then adjust based on your histogram – you want the snow peaks to be bright but not completely blown out.
Remember to expose to the right (ETTR) without clipping your highlights, as this will give you more detail to work with in post-processing while keeping the magical atmosphere of your winter night scene intact.
Focus Techniques in the Dark
Achieving sharp focus in winter darkness requires specific low-light photography techniques that differ from daytime shooting. Start by switching your lens to manual focus, as autofocus systems often struggle in low-light conditions. Use your camera’s live view feature and zoom in digitally to fine-tune focus on bright stars or distinct landscape elements.
For landscape shots, try focusing at infinity, but be careful not to turn the focus ring all the way to the end – true infinity focus usually lies slightly before the lens’s infinity mark. A useful trick is to focus on a distant light source, like a bright star or even the moon, then lock that focus using tape or by switching to manual focus mode.
In snowy conditions, your headlamp can be a valuable focusing aid. Shine it on your subject briefly to establish focus, then maintain that focus setting throughout your shoot. For extra precision, use the hyperfocal distance technique: focus at roughly one-third into your scene to maximize depth of field.
Don’t forget to check your focus periodically during your session, as cold temperatures can cause slight shifts in your lens elements. Taking test shots and reviewing them at maximum magnification on your camera’s LCD screen helps ensure consistently sharp images throughout your winter night photography session.
White Balance Considerations
Winter nights present unique challenges for white balance, as snow tends to reflect the colors of both moonlight and artificial lighting. The natural color temperature of moonlight typically sits around 4100K, giving snow a cool, bluish tint. However, this can clash with artificial light sources like streetlamps or cabin lights, which often cast warm orange or yellow hues.
To tackle this, start by shooting in RAW format, which gives you maximum flexibility in post-processing. While Auto White Balance might seem tempting, it often struggles with mixed lighting conditions in winter scenes. Instead, try setting a manual white balance between 3800K and 4300K as a starting point for moonlit scenes. This range typically renders snow with natural-looking tones while maintaining the atmospheric mood of the night.
When dealing with mixed lighting, consider taking multiple shots with different white balance settings. You might want a cooler setting to capture the ethereal blue of moonlit snow drifts, while a warmer setting could better suit areas illuminated by artificial light. Many photographers intentionally embrace the color contrast, using it to create dramatic compositions where warm and cool tones play off each other.
Remember that there’s no strictly “correct” white balance for night snow scenes – it’s often about creative interpretation and the mood you want to convey. Don’t be afraid to experiment with different settings to find what best matches your creative vision.
Creative Composition Techniques
Using Natural Elements
Winter’s natural elements offer photographers unique opportunities to create magical nighttime compositions. Snow acts as a natural reflector, bouncing available light and creating an ethereal glow that can transform ordinary scenes into enchanting winterscapes. When photographing snowy landscapes at night, look for untouched snow surfaces that can add texture and depth to your images.
Ice formations, particularly icicles and frozen waterfalls, can create stunning focal points when lit by moonlight or artificial lighting. Try positioning your light source at different angles to experiment with how the ice catches and refracts light. On clear nights, capture ice crystals sparkling under starlight for an almost otherworldly effect.
Winter trees, stripped of their leaves, create striking silhouettes against the night sky. Their bare branches can frame celestial objects or add geometric patterns to your composition. Fresh snowfall clinging to branches adds another dimension, creating natural leading lines that guide viewers through your image.
Consider incorporating winter weather phenomena like fog or falling snow into your shots. Fog can add mystery and depth, while capturing falling snow requires a faster shutter speed and proper lighting to freeze the flakes in mid-air. For an artistic touch, try using a longer exposure to create streaking effects with falling snow.
Remember that winter landscapes often feature high contrast between dark elements and bright snow. Use this to your advantage by composing shots that emphasize these natural contrasts while being mindful of your camera’s exposure settings to retain detail in both highlights and shadows.
Light Painting in Snow
Light painting adds a magical dimension to winter night photography, transforming ordinary snowy scenes into ethereal wonderlands. The pristine white snow acts as a natural reflector, making it an ideal canvas for creative light painting techniques.
Start with basic tools like LED flashlights, light wands, or even your smartphone’s light. The key is to use lights with adjustable brightness and different color temperatures to create varied effects. Warm lights (2700-3200K) create a cozy, intimate atmosphere, while cool lights (5000-6500K) complement the natural blue tones of moonlit snow.
Set your camera on a sturdy tripod and use bulb mode or long exposures of 10-30 seconds. Begin with smaller movements, painting light across snow-covered trees or creating patterns in untouched snow. The snow’s reflective quality means you’ll need less light than usual – start with lower power settings to avoid overexposure.
Try walking through the scene with a light source while wearing dark clothing. This creates mysterious paths of light without capturing your presence in the final image. For added depth, combine different lighting techniques in one shot: illuminate the foreground with selective painting while allowing stars or moonlight to expose the background naturally.
Remember to protect your lights from moisture and bring backup batteries – cold temperatures can significantly reduce battery life. Experiment with different angles and distances to find the sweet spot where your light painting complements rather than overwhelms the natural winter atmosphere.


Star Trails and Aurora Photography
Winter nights offer perfect conditions for capturing star trails and aurora displays, thanks to longer dark hours and typically clearer skies. The cold air often brings exceptional atmospheric clarity, making celestial phenomena more vibrant and defined.
For star trails, set up your camera on a sturdy tripod and use an intervalometer to capture multiple exposures over several hours. Start with settings of f/2.8-f/4, ISO 800-1600, and 30-second exposures. The frigid temperatures will affect your battery life, so keep spares warm in your inner pockets and consider using a battery grip for extended shoots.
Aurora photography requires similar basic setup but demands more flexibility in your settings. When the northern lights appear, start with f/2.8, ISO 1600-3200, and exposures between 5-15 seconds, adjusting based on the aurora’s intensity. Remember that auroras can move quickly, so shorter exposures often capture more defined patterns and prevent overexposure of bright displays.
In both cases, focus manually on a bright star using your camera’s live view with maximum magnification. Choose a compelling foreground element – perhaps a snow-covered tree or frozen lake – to add depth to your composition. The contrast between the dark sky and snow-covered landscape can create striking results, especially when the moon provides subtle ambient lighting.
To prevent lens fogging, use hand warmers secured with rubber bands around your lens barrel, and allow your gear to gradually acclimate to the outside temperature before shooting.
Post-Processing Winter Night Photos
Managing Dynamic Range
Managing dynamic range in winter night photography presents a unique challenge: balancing the bright, reflective snow against the dark night sky. Snow reflects an incredible amount of light, even at night, while the sky remains deeply shadowed, creating an extreme contrast that can be tricky to capture in a single exposure.
To tackle this challenge, start by shooting in RAW format, which preserves more detail in both highlights and shadows. During post-processing, use selective adjustments to bring out details in different areas of your image. Begin by setting a base exposure that preserves the highlights in the snow, then carefully lift the shadows in the darker areas of the frame.
The graduated filter tool in editing software like Lightroom is particularly useful for balancing sky exposure with the foreground. Apply it subtly to avoid an artificial look. For more precise control, use luminosity masks to target specific brightness ranges in your image, allowing you to adjust the snow and sky independently.
HDR techniques can be effective, but use them sparingly. Blend two or three exposures naturally, focusing on maintaining realistic contrast while recovering detail in both bright and dark areas. Pay special attention to the transition zones between snow and sky to ensure they look smooth and natural.
Remember that some contrast is desirable – you don’t want to flatten the image completely. The goal is to create a balanced photograph that retains the magical quality of a winter night while showing detail throughout the frame.
Color Correction Techniques
Color correction in winter night photography presents unique challenges, particularly with snow reflecting various light sources. The key is achieving a natural balance between the cool tones of snow and any artificial lighting present in your scene.
Start by setting your white balance manually rather than relying on auto settings. Winter nights often trick cameras into producing overly warm or blue images. A good starting point is between 3800K and 4200K, which typically renders snow closest to how our eyes perceive it.
When shooting in RAW (which you absolutely should for night photography), pay special attention to your highlights and shadows during post-processing. Snow tends to pick up subtle color casts from the sky and surrounding light sources. Use selective adjustments to maintain pure whites in snow while allowing for natural color variations in shadows and mid-tones.
One effective technique is to slightly desaturate blues and cyans in your images while maintaining natural color in elements like trees, buildings, or the night sky. This helps prevent that artificial, over-processed look that often plagues winter night photos.
Consider using gradient filters in post-processing to balance different color temperatures within your frame. For instance, if you have artificial lighting in the foreground and natural moonlight in the background, you can selectively adjust each area to achieve a more cohesive final image.
Remember that perfect color accuracy isn’t always the goal – sometimes embracing the natural color contrasts of a winter night can create more compelling images.
Winter night photography offers a unique opportunity to capture the serene beauty of the coldest season in ways that daylight simply cannot match. Throughout this guide, we’ve explored the essential elements that contribute to successful winter night shoots, from selecting the right gear to mastering technical settings and creative compositions.
Remember that preparation is key – both for your equipment and yourself. Protecting your camera from moisture and cold, bringing backup batteries, and dressing appropriately can make the difference between a frustrating experience and a rewarding photographic adventure.
The technical foundations we’ve discussed – understanding exposure triangles, focusing in low light, and managing long exposures – will serve as your building blocks. However, don’t be afraid to experiment beyond these basics. Some of the most striking winter night photographs come from photographers who push boundaries and try unexpected approaches.
The creative possibilities are endless: star trails over snow-covered peaks, the ethereal glow of moonlight on fresh powder, or the dance of northern lights reflected in frozen lakes. Each winter night presents unique conditions and opportunities for distinctive images.
Most importantly, practice patience. Winter night photography can be challenging, but the results are worth the effort. Start with familiar locations, gradually build your skills, and don’t let early setbacks discourage you. With time and experience, you’ll develop your own style and techniques for capturing the magical atmosphere of winter nights.