Transform your lens cleaning routine with ultrasonic technology – a professional-grade solution that penetrates deeper than traditional methods to remove stubborn debris, oil residues, and microscopic particles. As part of essential equipment maintenance, ultrasonic cleaning harnesses high-frequency sound waves to create microscopic bubbles that implode against lens surfaces, delivering unmatched cleaning precision without risking damage to delicate optical coatings.
Photography professionals trust this method because it reaches into the finest crevices where manual cleaning tools can’t access, eliminating contaminants that affect image quality and lens performance. The process takes just minutes, using specialized solutions and frequencies calibrated specifically for photographic equipment, making it an invaluable investment for serious photographers who demand pristine optical clarity.
Whether you’re considering professional service or exploring home ultrasonic cleaning systems, understanding this technology’s capabilities and limitations is crucial for maintaining your valuable glass collection. Let’s explore how ultrasonic cleaning works, when to use it, and why it’s become the gold standard for professional lens maintenance.
Why Traditional Lens Cleaning Falls Short
The Hidden Dangers of Manual Cleaning
While many photographers are familiar with basic camera cleaning techniques, manual lens cleaning can be a risky endeavor if not done properly. Even seemingly gentle materials like microfiber cloths can harbor microscopic particles that may scratch your expensive glass. I’ve seen countless cases where well-intentioned photographers damaged their lenses through improper cleaning methods.
The biggest risk comes from applying too much pressure while cleaning, which can grind dirt particles into the lens coating. Another common mistake is using household cleaning solutions that contain harsh chemicals, which can deteriorate the lens’s protective coatings or seep into the lens assembly. Even breathing on the lens to fog it up before wiping – a technique many of us learned years ago – can deposit acidic residue that gradually etches the glass.
Paper products, including lens tissues, can leave behind fibers that become trapped under lens rings or in corners. These debris not only affect image quality but can also interfere with focus ring operation and eventually lead to mechanical issues.
When Microfiber Isn’t Enough
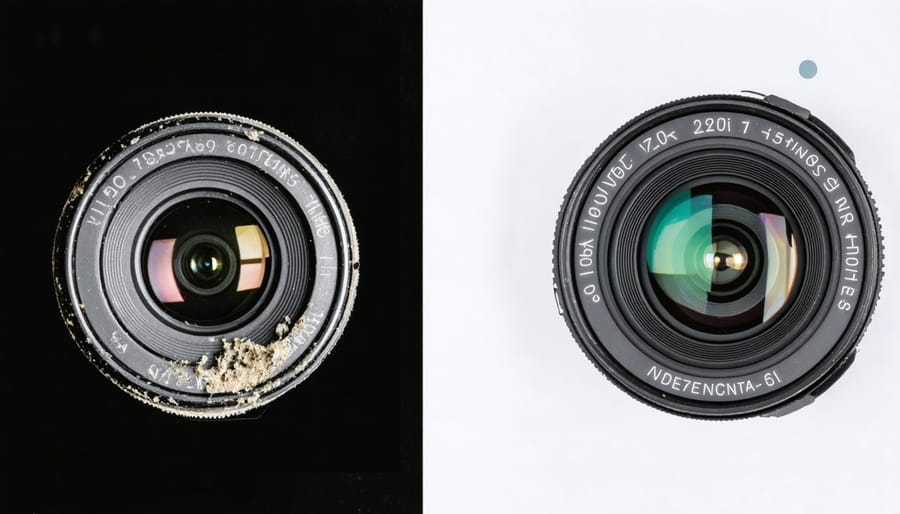
Even the most diligent photographer using microfiber cloths and lens cleaning solutions can encounter stubborn issues that refuse to budge. Dried water spots, fungal growth in humid conditions, and microscopic debris trapped in lens crevices are common challenges that standard cleaning methods can’t always handle. Professional photographers often discover this the hard way when shooting in harsh environments like dusty deserts or humid rainforests.
These situations typically arise when contaminants have made their way deep into the lens assembly or when mineral deposits have formed and hardened on lens surfaces. If you’re noticing persistent smudges that won’t clear up, visible spots that seem to be under the surface, or a general haziness that affects image quality despite regular cleaning, your lens might benefit from ultrasonic cleaning.
Traditional cleaning methods also fall short when dealing with vintage lenses or equipment that’s been in storage for extended periods. In these cases, accumulated grime and oxidation often require more thorough intervention than what manual cleaning can provide. The precision and penetrating power of ultrasonic cleaning becomes particularly valuable in restoring these valuable pieces of equipment to their former glory.
The Science Behind Ultrasonic Lens Cleaning
Cavitation: The Microscopic Cleaning Power
At the heart of ultrasonic lens cleaning lies a fascinating phenomenon called cavitation. When ultrasonic waves travel through the cleaning solution, they create millions of microscopic bubbles in a process that might sound complex but is surprisingly elegant in its simplicity.
These waves, vibrating at frequencies beyond human hearing (typically 20-400 kHz), cause rapid changes in pressure within the cleaning solution. During the low-pressure phase, tiny vacuum bubbles form, only to collapse violently during the high-pressure phase. This collapse creates intense local energy, with temperatures reaching nearly 10,000°F and pressure waves that act like microscopic scrubbing brushes.
Think of it as having millions of tiny cleaning assistants working simultaneously across your lens surface. These imploding bubbles reach into the smallest crevices and remove dirt, oil, and debris that manual cleaning might miss. The process is so thorough that it can clean areas that would be impossible to reach with traditional cleaning methods.
What makes cavitation particularly effective for lens cleaning is its gentle yet thorough nature. Unlike physical scrubbing, which might risk scratching your valuable optics, ultrasonic cavitation provides consistent cleaning power without direct contact. The bubbles do all the work, breaking down and lifting away contaminants while leaving the delicate lens coating untouched.

Safe Frequencies for Optical Glass
When it comes to safely cleaning optical glass with ultrasonic technology, frequency selection is crucial. Most professional lens cleaning systems operate between 35-45 kHz, which provides effective cleaning while minimizing the risk of damage to delicate lens elements and coatings.
The sweet spot for most camera lenses lies around 40 kHz – this frequency creates bubbles small enough to effectively remove contaminants without risking damage to lens coatings or cement between elements. Higher frequencies (above 50 kHz) can potentially cause microscopic separations in multi-element lenses, while lower frequencies (below 30 kHz) produce larger cavitation bubbles that might be too aggressive for delicate optical surfaces.
For vintage lenses or those with known fragile coatings, staying on the lower end of the safe range (35-37 kHz) is recommended. Modern lenses with robust coatings can typically handle the full recommended frequency range without issues. However, it’s essential to never exceed 45 kHz for any photographic optics.
Professional cleaning services typically use variable-frequency systems that can be precisely tuned based on the specific lens being cleaned. If you’re considering a home ultrasonic cleaner, look for units that operate within these safe parameters and offer frequency adjustment capabilities. This allows you to start with lower frequencies and gradually increase them while monitoring the cleaning process.
Professional vs. DIY Ultrasonic Cleaning
When to Trust a Professional
While DIY lens cleaning methods have their place, certain situations call for professional ultrasonic cleaning services. The key is recognizing when your equipment needs expert attention to protect your photography investment.
Consider professional cleaning if you notice persistent debris that won’t budge with standard cleaning methods, especially if it’s affecting image quality. Vintage or rare lenses deserve special attention, as their construction and materials may require expertise you don’t have. If your lens has been exposed to salt water, sand, or other damaging elements, a professional cleaning can prevent long-term damage.
Warning signs that indicate it’s time to visit a professional include unusual grinding sounds when focusing, sticky aperture blades, or visible fungus growth inside the lens. These issues often require partial disassembly, which should only be attempted by trained technicians with proper tools and experience.
The cost of professional ultrasonic cleaning typically ranges from $50 to $200, depending on the lens complexity and service required. While this might seem expensive, it’s a worthwhile investment compared to the potential cost of replacing a damaged lens or missing important shots due to compromised image quality.
Remember, if you’re unsure about the severity of the problem or your ability to clean the lens safely, it’s always better to err on the side of caution and consult a professional.
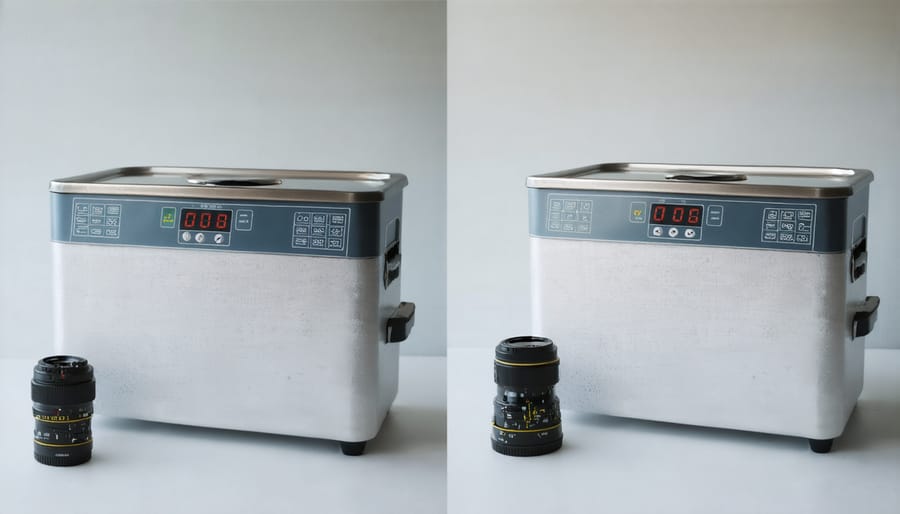
Home Ultrasonic Cleaner Setup
Setting up your home ultrasonic cleaner for lens cleaning requires careful attention to detail. Start by placing your cleaner on a stable, level surface away from any electronics or water-sensitive items. Fill the tank with distilled water up to the marked line – never use tap water as its minerals could damage your equipment.
For optimal cleaning, maintain a temperature between 100-120°F (38-49°C). Most units have built-in temperature controls, but if yours doesn’t, use warm distilled water and monitor with a thermometer. Add 2-3 drops of lens-specific cleaning solution to the water – avoid household detergents as they can harm lens coatings.
Place your lens in a clean, sealable plastic bag with enough cleaning solution to cover it. Remove as much air as possible before sealing – this prevents the lens from floating. Lower the sealed bag into the water bath, ensuring it doesn’t touch the bottom of the tank directly. A small platform or basket can help maintain proper positioning.
Set the timer for 3-5 minutes initially. Modern ultrasonic cleaners typically operate at 40-50 kHz, which is safe for most camera lenses. Never run the cleaner for more than 10 minutes at a time, as prolonged exposure to ultrasonic waves could potentially affect lens cement.
After cleaning, remove the lens carefully and dry it with a microfiber cloth. Always test the cleaner first with a less valuable lens to ensure proper operation and familiarize yourself with the process.
Best Practices and Safety Precautions
Pre-Cleaning Inspection
Before diving into ultrasonic cleaning, it’s crucial to carefully assess your lens’s condition. Start by examining the lens under good lighting, preferably using a magnifying glass or loupe. Look for any loose parts, cracks, or structural damage that could worsen during the cleaning process.
Check the lens coating for signs of deterioration or peeling, as damaged coatings can be further compromised by ultrasonic cleaning. Pay special attention to the lens mount and any rubber gaskets – if these are damaged, moisture could penetrate deeper into the lens during cleaning.
Document any existing scratches, dust patterns, or fungal growth with photos or notes. This helps you track the cleaning’s effectiveness and ensures you don’t mistake pre-existing issues for cleaning-related damage.
Test all mechanical functions: focus ring, zoom mechanism (if applicable), and aperture blades. If any of these components feel sticky or resistant, they might need professional attention before ultrasonic cleaning.
Finally, verify that your lens is actually suitable for ultrasonic cleaning – some vintage lenses or those with delicate coatings might require alternative cleaning methods.
Solution Selection and Temperature
The success of ultrasonic lens cleaning heavily depends on selecting the right cleaning solution and maintaining optimal temperature. For most photographic lenses, a specialized ultrasonic cleaning solution is recommended over generic alternatives. These solutions are specifically formulated to be gentle on lens coatings while effectively breaking down oils, fungus, and other contaminants.
The ideal cleaning solution should be alcohol-free and pH-neutral to prevent damage to sensitive lens elements and coatings. Many professional cleaning services use solutions containing surfactants that help break surface tension and improve cleaning efficiency. For those cleaning at home, solutions marketed specifically for optical equipment are your safest bet.
Temperature plays a crucial role in the cleaning process. The optimal range typically falls between 40-60°C (104-140°F), with most professional services operating at around 45°C (113°F). This temperature range ensures effective cleaning while protecting delicate lens components. Higher temperatures might improve cleaning efficiency but risk damaging lens cement and coatings, while lower temperatures may not effectively remove stubborn contaminants.
It’s worth noting that some solutions work better at specific temperatures, so always check the manufacturer’s recommendations. For best results, allow the solution to reach the desired temperature before beginning the cleaning process, and maintain consistent temperature throughout the session.
Post-Cleaning Care
After your lenses emerge from the ultrasonic cleaning process, proper drying and testing are crucial for maintaining their pristine condition. Start by using compressed air to remove any remaining moisture, keeping the can upright and at a safe distance to prevent liquid propellant contact. Gently pat the lens with a microfiber cloth, paying special attention to the edges and mount.
Allow the lens to air dry completely in a dust-free environment for at least two hours before reassembly. During this time, position the lens elements vertically to ensure any residual cleaning solution drains properly. Once dry, carefully reassemble the lens following your earlier documentation.
Before mounting the lens to your camera, perform a thorough visual inspection under bright light. Check for any streaks, spots, or residue that might affect image quality considerations. Test the lens’s focusing mechanism and aperture operation. Take a series of test shots at various apertures and focal lengths, checking for clarity and proper function. If you notice any issues, allow additional drying time or consider repeating the cleaning process.
Ultrasonic lens cleaning represents a significant advancement in photography equipment maintenance, offering photographers a reliable and professional-grade solution for keeping their valuable glass in pristine condition. Throughout this exploration of ultrasonic cleaning, we’ve seen how this technology effectively removes stubborn debris, oil, and fungus that conventional cleaning methods might miss.
The benefits are clear: ultrasonic cleaning provides thorough, consistent results while minimizing the risk of damage to delicate lens elements. For professional photographers, this translates to maintained image quality and extended lens life. Hobbyists can benefit from the peace of mind that comes with knowing their equipment is being cleaned at a molecular level, preserving their investment for years to come.
Remember that while ultrasonic cleaning is highly effective, it’s not a replacement for regular maintenance and careful handling of your equipment. The best approach combines preventive care with periodic professional cleaning. Whether you choose to invest in a home ultrasonic cleaner or rely on professional services, understanding this technology helps you make informed decisions about your gear’s maintenance.
Consider your specific needs, equipment value, and usage patterns when deciding on an ultrasonic cleaning solution. For many photographers, the combination of improved optical performance, extended equipment life, and reduced maintenance costs makes ultrasonic cleaning an invaluable tool in their photography arsenal.