A properly cleaned camera lens delivers razor-sharp images and protects your valuable investment from permanent damage. Professional photographers know that even the smallest smudge or particle can compromise image quality and potentially scratch delicate lens coatings. Whether you’re shooting landscapes in dusty conditions or portraits in a controlled studio, maintaining pristine glass surfaces requires both the right tools and proper technique.
Think of your camera lens as precision medical equipment – it demands careful, methodical cleaning with specialized materials. The wrong cleaning method or materials can permanently damage your lens’s sophisticated coatings, turning a simple maintenance task into an expensive repair. This guide will walk you through the professional approach to lens cleaning, from essential supplies to step-by-step techniques that preserve your gear’s optical performance.
Before diving into specific cleaning methods, remember this golden rule: clean your lenses only when necessary. Over-cleaning can increase the risk of damage, while proper handling and preventive care will minimize the need for frequent cleaning sessions. Let’s explore how to keep your glass crystal clear while protecting your valuable investment.
Essential Lens Cleaning Tools and Materials
Must-Have Cleaning Equipment
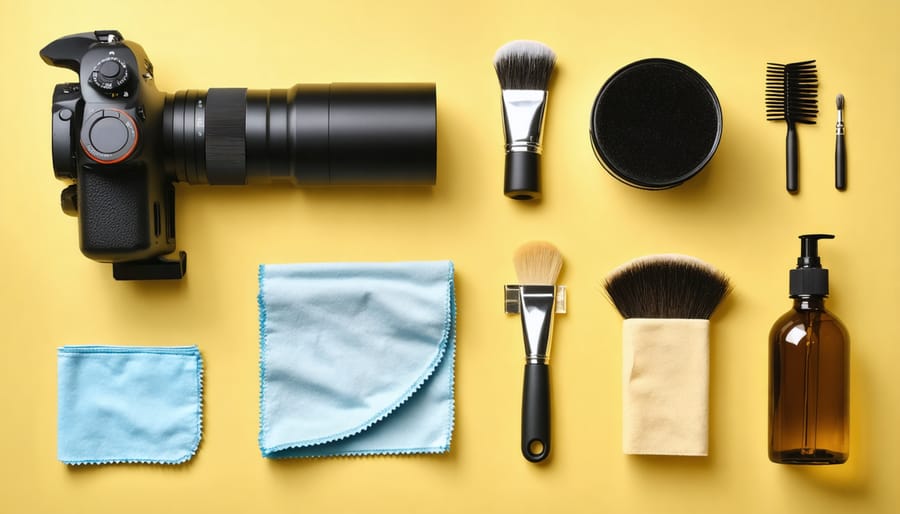
Every photographer needs a reliable cleaning kit to maintain their precious glass. Let’s explore the essential tools that should be in your arsenal for effective lens maintenance.
First up is the lens blower, an indispensable tool for safely removing loose dust and debris. Look for a high-quality rubber blower with a one-way valve to prevent it from inhaling particles that could be blown back onto your lens. The Rocket Blower series has become a trusted favorite among professionals for its powerful yet controlled air stream.
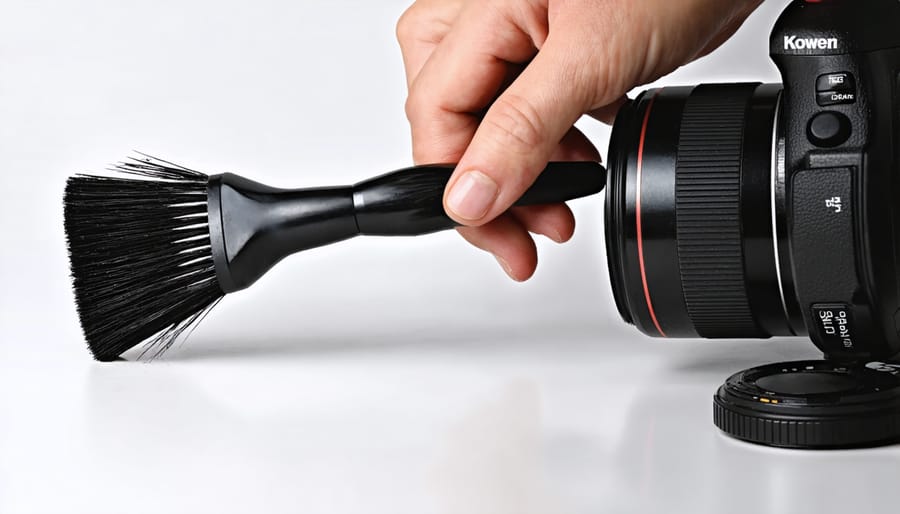
Your next must-have is a soft-bristled lens brush. Choose one specifically designed for camera equipment, with natural or synthetic bristles that won’t scratch your glass. Many photographers pair this with microfiber cleaning techniques for optimal results.
When it comes to cleaning solutions, stick to products specifically formulated for camera lenses. Avoid generic glass cleaners, as they can damage your lens’s protective coatings. Look for alcohol-free solutions that evaporate quickly without leaving residue.
Finally, invest in high-quality microfiber cloths – and plenty of them. Keep separate cloths for different cleaning stages: one for initial dusting, another for solution application, and a third for final polishing. Replace them regularly, as dirty cloths can scratch your lens. Store them in sealed plastic bags to prevent contamination from dust and debris.
Remember, quality tools make a significant difference in maintaining your expensive glass, so don’t skimp on your cleaning equipment.
What to Avoid
When it comes to lens cleaning, certain materials and methods can cause permanent damage to your valuable optics. Never use regular tissues, paper towels, or clothing to clean your lenses, as these materials can contain wood fibers that scratch the delicate lens coating. Avoid household glass cleaners, rubbing alcohol, or any harsh chemicals, as these can deteriorate the lens coating and potentially seep into the lens assembly.
Compressed air cans, while tempting, should be used with extreme caution. If held at the wrong angle or too close, they can spray liquid propellant onto your lens or force dust particles into the lens mechanism. Similarly, your breath might seem like a harmless way to fog up the lens for cleaning, but it contains acids and particles that can corrode the lens coating over time.
Stay away from circular motions when cleaning, as this can potentially grind particles into the glass surface. Also, never apply cleaning solution directly to the lens – always apply it to your cleaning tool first. Finally, avoid excessive pressure during cleaning, as this can damage both the coating and potentially the lens element itself.
Step-by-Step Cleaning Process
Pre-Cleaning Inspection
Before diving into the cleaning process, take a moment to carefully inspect your lens under good lighting. Hold your lens at various angles to catch the light – this will help reveal fingerprints, dust, and smudges that might not be immediately visible. Pay particular attention to both the front and rear elements of your lens.
You’ll typically encounter three main types of lens contamination: dust particles, which appear as loose specks; fingerprints or smudges, which create oily marks and affect image clarity; and water spots or mineral deposits, which leave stubborn white residue. Each of these requires a different cleaning approach.
Check the lens mount and filter threads for any accumulated grime, as these areas can harbor debris that might transfer to the glass elements. Also, examine the lens barrel and focus ring for any sticky residue or excessive dirt that could affect operation.
If you notice any scratches, separation of lens elements, or internal fogging, these issues require professional attention rather than DIY cleaning. Remember, proper identification of the contamination type will help you choose the most effective and safe cleaning method.
Dry Cleaning Methods
Before using any wet cleaning methods, it’s essential to remove loose particles from your lens surface using dry cleaning techniques. Start with a rocket blower, which uses forced air to dislodge dust and debris without making contact with the lens. Hold your camera facing downward while using the blower to prevent particles from settling back onto the lens.
If the blower doesn’t remove all particles, your next tool should be a soft-bristled lens brush. Always use brushes specifically designed for camera equipment – never substitute with household brushes, which can scratch your lens. Start from the center and work your way outward in a gentle circular motion. Remember to clean your brush regularly by blowing it out with the rocket blower to prevent transferring particles back onto the lens.
For stubborn particles, a lens pen can be incredibly effective. These dual-ended tools feature a brush on one end and a special carbon compound on the other that helps lift fingerprints and smudges without liquid. The carbon tip is self-replenishing, ensuring a clean surface with each use.
Keep in mind that excessive cleaning can potentially damage your lens coating, so only clean when necessary. Always store your camera with lens caps on to minimize the need for frequent cleaning, and handle your equipment in clean environments whenever possible.
Wet Cleaning Techniques
When dealing with stubborn marks that won’t budge with dry cleaning methods, it’s time to consider wet cleaning techniques. However, it’s crucial to approach this method with caution, as improper use of cleaning solutions can damage your valuable lens.
Start by selecting a proper lens cleaning solution – avoid household glass cleaners or alcohol-based products, as these can harm lens coatings. Instead, opt for solutions specifically designed for camera lenses. These solutions are formulated to break down oils and fingerprints while protecting delicate lens surfaces.
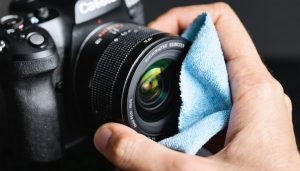
Begin by applying 1-2 drops of the cleaning solution to a fresh microfiber cloth – never apply the solution directly to the lens. Work from the center outward in gentle circular motions, being careful not to apply excessive pressure. For particularly stubborn spots, allow the solution to sit for a few seconds before wiping.
Always use a clean portion of the cloth for each wipe to avoid spreading dirt around. If needed, follow up with a dry section of the cloth to ensure no cleaning solution residue remains on the lens surface. Remember that less is more when it comes to cleaning solutions – using too much liquid can lead to seepage around lens elements.
For optimal results, perform wet cleaning in a dust-free environment and allow the lens to air dry completely before attaching any caps or filters. If you notice any streaking after the lens dries, gently buff it with a clean, dry microfiber cloth.
Pro tip: Keep your cleaning supplies in a sealed plastic bag when not in use to prevent contamination with dust and debris that could scratch your lens during future cleaning sessions.
Preventive Care and Protection
Daily Maintenance Habits
Developing proper daily maintenance habits is crucial for protecting your valuable camera lenses and ensuring their longevity. As part of your camera maintenance best practices, start by always keeping lens caps on when your equipment isn’t in use. This simple habit prevents dust accumulation and protects against accidental bumps or scratches.
When changing lenses, point your camera body downward to minimize dust entering the sensor chamber. Keep your hands clean and dry, and always handle lenses by their barrel rather than touching the glass elements or electronic contacts. Make it a routine to check your lenses for dust or smudges before and after each shooting session.
Store your lenses in a dry, temperature-controlled environment. Consider using silica gel packets in your camera bag to combat moisture, especially if you live in a humid climate. When traveling, keep lenses in padded cases and avoid exposing them to extreme temperatures or direct sunlight.
Before mounting or removing filters, clean both sides to prevent trapped particles from scratching your lens. Finally, develop a habit of regularly checking lens mount connections for signs of wear or debris. These small daily actions will significantly extend your lens’s lifespan and maintain optimal image quality.
Protective Accessories
Protecting your camera lenses is just as important as keeping them clean. A well-chosen set of protective accessories can significantly extend the life of your valuable glass and reduce the frequency of deep cleaning sessions.
UV filters are your first line of defense, acting as a sacrificial shield for your lens’s front element. While they require regular cleaning UV filters, they’re much easier to replace than a scratched lens. Consider investing in multi-coated filters from reputable manufacturers to maintain optimal image quality.
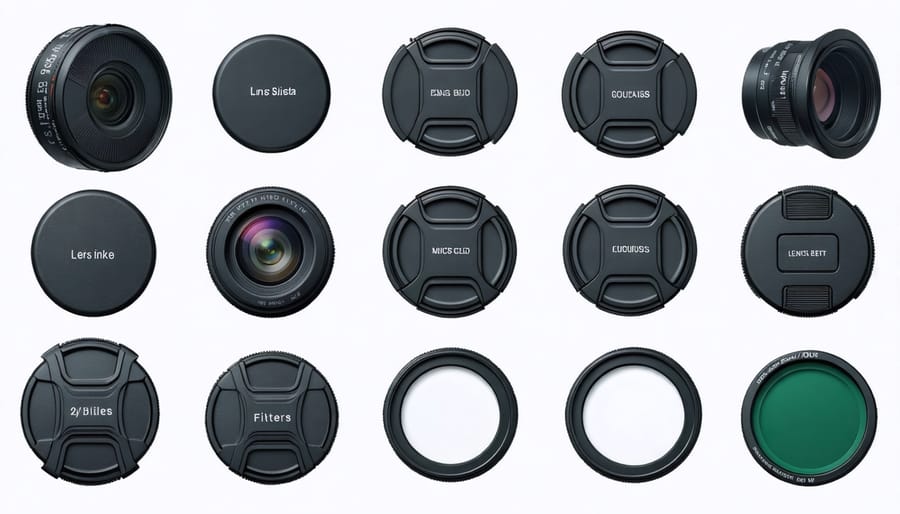
Lens caps are non-negotiable essentials. Always keep both front and rear caps on when your lens isn’t in use. Make it a habit to immediately replace the cap after each shoot – those few extra seconds can save you hours of cleaning and potentially costly repairs. Pro tip: keep a spare front cap in your bag, as they have a mysterious way of disappearing at the worst moments.
Protective cases deserve special attention. A dedicated lens case provides crucial protection against impacts, dust, and moisture. Opt for cases with padding and weather-resistant materials. For additional protection in humid environments, consider storing your lenses with silica gel packets to prevent fungal growth.
When shooting in challenging conditions, lens hoods offer both physical protection and improved image quality by preventing stray light and unwanted flare. They also act as a buffer against accidental bumps and light rain, reducing the need for frequent cleaning sessions.
Remember, these protective accessories are an investment in your gear’s longevity. While they may seem like an additional expense, they’re far more cost-effective than replacing or repairing damaged lenses.
Troubleshooting Common Issues
Even with proper cleaning techniques, you might encounter some stubborn issues when cleaning your camera lenses. Here’s how to address common challenges safely and effectively.
For water spots that won’t budge, try using a specialized lens cleaning solution rather than increasing pressure, which could damage the coating. Apply the solution to your microfiber cloth first, never directly to the lens, and work in gentle circular motions from the center outward.
Fungus development is a serious concern, especially when protecting gear from humidity has been challenging. While minor fungus can sometimes be addressed with professional cleaning, severe cases may require lens repair or replacement. Prevention through proper storage is crucial.
Sticky residue from accidentally touching the lens surface can be particularly troublesome. Start with a lens pen, and if that doesn’t work, use a cleaning solution specifically designed for optical surfaces. Never use household cleaners or alcohol-based products, as these can permanently damage lens coatings.
For stubborn dust particles that seem to reappear immediately after cleaning, check your cleaning tools. Old or contaminated microfiber cloths can redistribute dirt rather than remove it. Always use fresh cleaning materials and store them in sealed containers between uses.
If you notice smears that worsen with cleaning, you might be dealing with deteriorating lens coating. Stop cleaning immediately and consult a professional repair service, as continued cleaning attempts could exacerbate the damage.
Remember that some issues, particularly those involving internal lens elements or mechanical problems, should only be addressed by qualified technicians. When in doubt, it’s better to seek professional help than risk damaging expensive equipment through aggressive cleaning attempts.
Maintaining clean camera lenses is essential for capturing sharp, professional-quality images and protecting your valuable equipment. Regular cleaning not only ensures optimal image quality but also extends the life of your lenses. Remember to always start with the gentlest cleaning methods first, using appropriate tools and cleaning solutions designed specifically for camera equipment. Make it a habit to check your lenses before and after each shoot, and store them properly with lens caps and in protective cases. While cleaning your lenses might seem like a tedious task, the few minutes you spend maintaining them can save you hours of post-processing work and potentially expensive repairs down the line. By following proper cleaning techniques and establishing a regular maintenance routine, you’ll keep your lenses in pristine condition and ready for that perfect shot whenever inspiration strikes.