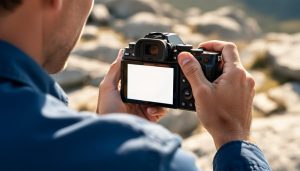
Three-point lighting stands as the cornerstone of professional photography and videography, transforming ordinary shots into compelling visual narratives. By strategically positioning three distinct light sources – key, fill, and back lights – photographers create depth, dimension, and mood that single-source lighting simply cannot achieve. As AI photography technology continues to revolutionize our industry, even this classic technique is evolving, with smart lighting systems that automatically adjust to achieve perfect ratios and intelligent sensors that optimize light placement for different subjects.
Whether you’re shooting portraits in a studio or products for e-commerce, mastering three-point lighting unlocks the ability to sculpt shadows, eliminate unwanted darkness, and create that professional separation between subject and background that distinguishes amateur work from professional results. This fundamental technique, when properly executed, delivers consistent, repeatable results while offering endless creative possibilities through subtle adjustments in light intensity and positioning.
From Hollywood studios to home photography setups, three-point lighting remains the go-to arrangement for photographers who demand complete control over their visual narrative. Understanding this technique isn’t just about following a formula – it’s about gaining the power to shape light itself, creating images that capture not just the subject, but the mood and story behind every shot.
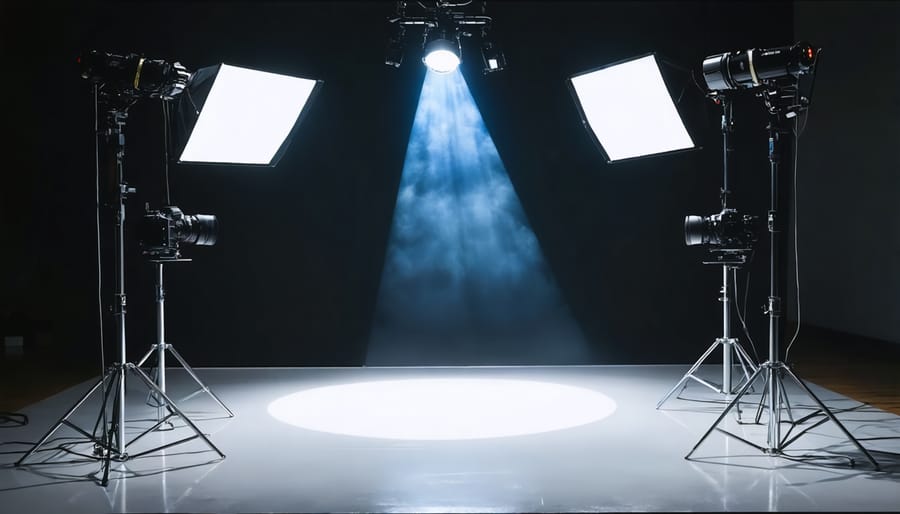
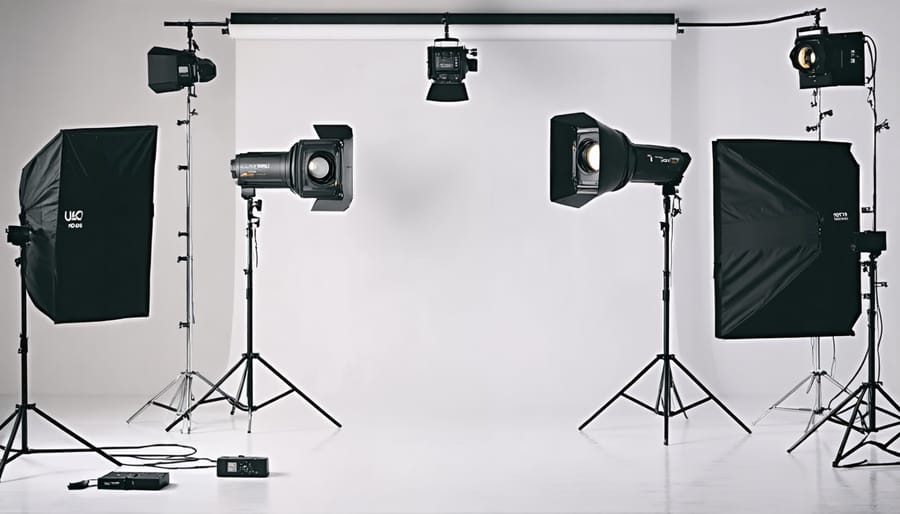
Understanding Traditional Three-Point Lighting
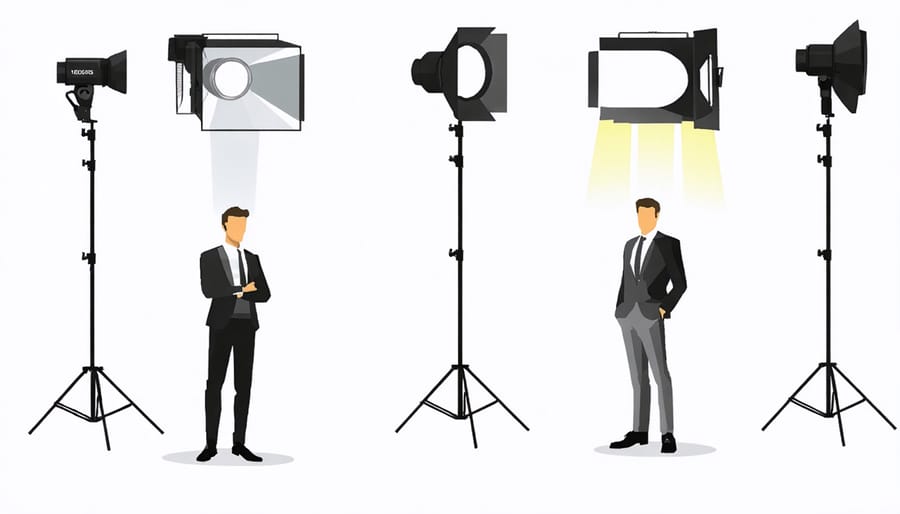
Key Light: The Primary Illumination
The key light serves as the primary source of illumination in three-point lighting, setting the overall mood and defining the main features of your subject. Typically positioned at a 45-degree angle to your subject, both horizontally and vertically, this light creates the dominant shadows and highlights that give your images depth and dimension.
Think of the key light as the sun in a natural lighting scenario – it’s your most powerful light source and determines the fundamental character of your shot. When positioning your key light, consider its distance from your subject; closer placement creates harder shadows, while moving it farther away softens the overall effect.
For portrait photography, placing the key light slightly above eye level helps create flattering shadows under the chin and nose, while maintaining natural-looking catch lights in the eyes. The intensity of your key light should be balanced carefully – strong enough to illuminate your subject clearly, but not so bright that it washes out important details or creates harsh shadows.
Experiment with different positions and intensities until you find the perfect balance for your specific subject and creative vision. Remember, while there are standard positions, don’t be afraid to break the rules for artistic effect.
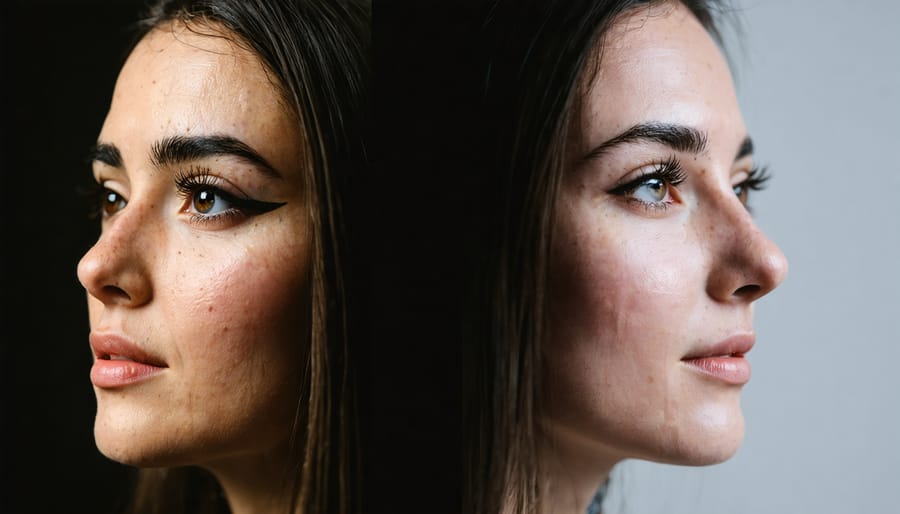
Fill Light: Balancing the Shadows
Fill light serves as your shadow’s best friend, positioned opposite to your key light to soften harsh shadows and reveal crucial details in darker areas. Think of it as nature’s overcast sky – it doesn’t eliminate shadows completely but makes them more pleasing to the eye.
Typically placed at a 45-degree angle from your subject, fill light should be less intense than your key light, usually around half the power. This ratio creates depth while maintaining natural-looking dimensionality. A good starting point is a 2:1 ratio between key and fill, though you can adjust this based on your creative vision.
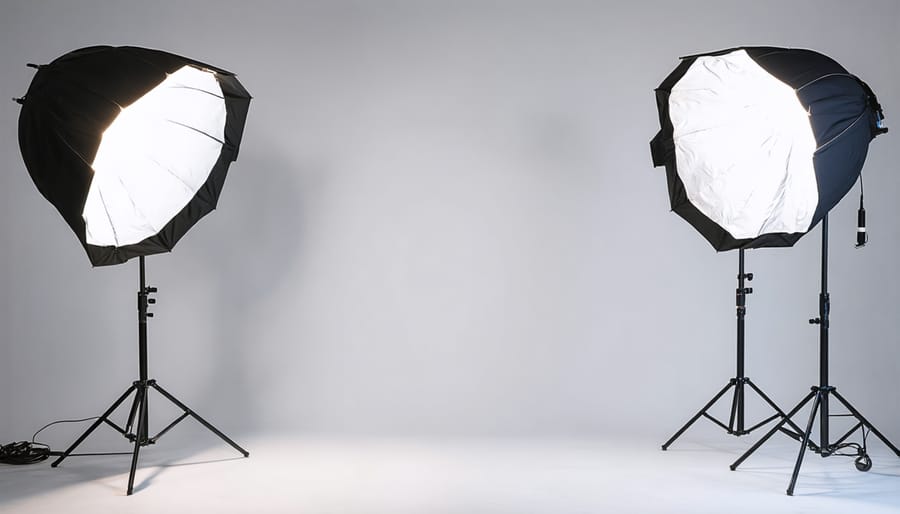
For softer shadows, try using a large diffuser or bouncing your fill light off a white surface. This creates a more flattering, wrapped light that’s especially beneficial for portrait photography. If you’re working with limited equipment, a simple white reflector can serve as an excellent fill light, utilizing the ambient light in your scene.
Remember that the goal isn’t to eliminate all shadows – they’re essential for creating depth and dimension. Instead, aim to find that sweet spot where shadows enhance rather than obscure your subject’s features.
Back Light: Creating Depth
The back light, positioned behind your subject, is the secret weapon that makes your subject pop from the background. Think of it as drawing a glowing outline around your subject, creating that sought-after separation effect that professional photos are known for. By casting light from behind, you create a subtle rim of light or “halo effect” that defines edges and adds dimension to your subject’s form.
When properly positioned, back lighting adds depth to hair, emphasizes shoulders, and creates a three-dimensional feel that flat lighting simply can’t achieve. The key is subtle application – you typically want the back light to be slightly less intense than your key light to avoid overwhelming the scene. For portraits, try positioning it slightly higher than your subject’s head at a 45-degree angle for that perfect edge definition.
Remember that back lighting isn’t just about separation – it can also create beautiful atmospheric effects when interacting with hair, fabric, or particles in the air. This dramatic element can transform an ordinary shot into something truly memorable.
How AI Transforms Three-Point Lighting
Smart Light Positioning
Modern AI algorithms have revolutionized how we approach three-point lighting setups, making it easier than ever to achieve professional-looking results. These smart systems analyze your subject, space, and desired mood to suggest optimal positions for your key, fill, and back lights.
Using computer vision and machine learning, AI lighting assistants can detect facial features, analyze skin tones, and consider the ambient lighting conditions in real-time. This technology helps photographers by recommending precise angles and distances for each light, eliminating the traditional trial-and-error approach.
For example, when photographing portraits, AI systems can instantly calculate the ideal key light position to create Rembrandt lighting or butterfly lighting patterns. The software considers factors like subject height, facial structure, and the presence of glasses or jewelry that might cause unwanted reflections.
The real magic happens when these systems adapt to moving subjects. As your subject changes position, smart lighting systems can automatically adjust light intensities and positions to maintain consistent illumination. Some advanced setups even feature motorized lights that physically move to maintain optimal lighting ratios.
For photographers new to three-point lighting, these AI tools serve as excellent learning aids. By observing the system’s suggestions and understanding the reasoning behind each placement, you can develop a stronger intuition for lighting design. However, remember that while AI provides excellent starting points, your creative vision should always guide the final decisions.
Automated Light Intensity Control
Modern photography has embraced a revolutionary advancement in lighting control through AI-powered lighting optimization systems. These intelligent solutions take the guesswork out of achieving perfect light ratios and intensity levels, making professional-quality lighting more accessible than ever.
Using sophisticated sensors and machine learning algorithms, these systems continuously monitor your subject and automatically adjust each light’s output in real-time. Imagine shooting a moving subject – as they shift position, the AI seamlessly modifies the key, fill, and back lights to maintain optimal exposure and dramatic effect.
The beauty of automated control lies in its ability to learn from your preferences. After a few sessions, the system begins to recognize your lighting style and can replicate it consistently across different shoots. Whether you’re capturing corporate headshots or dynamic fashion poses, the AI maintains your signature look while adapting to changing conditions.
For beginners, this technology serves as an excellent learning tool. By observing how the AI adjusts lighting ratios, you’ll develop an intuitive understanding of three-point lighting principles. More experienced photographers can use it as a time-saving assistant, focusing more on composition and directing their subjects while the system handles technical adjustments.
These systems typically offer both fully automatic and semi-automatic modes, allowing you to maintain creative control while benefiting from AI assistance when needed.
Real-time Light Adaptation
One of the most exciting developments in modern photography lighting is the ability to adapt lighting setups in real-time as your subject moves. Gone are the days of constantly adjusting lights manually during a dynamic shoot. Today’s smart lighting systems, enhanced by AI photography innovations, can track subject movement and adjust intensity, color temperature, and direction automatically.
Imagine photographing a dancer in motion: as they leap across the studio, the key light smoothly follows their movement while the fill and back lights adjust their output to maintain perfect exposure and depth. These intelligent systems use sensors and predictive algorithms to anticipate subject position, ensuring consistent illumination throughout the performance.
For portrait photographers, real-time adaptation means more natural-looking results during casual sessions. When your subject turns their head or shifts position slightly, the lighting adjusts subtly to maintain optimal ratios between key, fill, and back lights. This creates a more relaxed atmosphere as subjects don’t need to maintain rigid poses.
The technology also helps in challenging mixed-lighting situations. When shooting in locations with varying ambient light, smart systems can compensate for these changes while maintaining your desired three-point lighting effect. This is particularly valuable for event photographers who need to move quickly between different lighting environments while maintaining consistent results.
Practical Applications and Setup
Studio Portrait Photography
Studio portrait photography requires careful attention to your three-point lighting setup to create professional, flattering results. Start by positioning your subject about 6-8 feet from your backdrop, allowing enough room for light manipulation without creating unwanted shadows.
Place your key light at a 45-degree angle to your subject’s face, approximately 3-4 feet away and slightly above eye level. This main light source should be your brightest, typically set at full power. For traditional portraits, position it on the same side as your subject’s dominant facial features.
Your fill light goes on the opposite side, also at 45 degrees but set to about half the power of your key light. This softer illumination helps reduce harsh shadows while maintaining depth. Adjust the power ratio between key and fill lights to control contrast – a 2:1 or 3:1 ratio usually works well for most portraits.
The back light (or rim light) should be positioned behind your subject, slightly higher than their head and aimed downward at about a 45-degree angle. Set this light to approximately the same power as your fill light. This creates that beautiful separation between subject and background while adding dimension to hair and shoulders.
Remember to test your setup with a stand-in before your actual subject arrives. Take test shots and adjust as needed – factors like subject’s clothing color, skin tone, and glasses can all impact how the light behaves. Start with these basic positions, then fine-tune based on your creative vision and the specific requirements of your shoot.
Video Production
While three-point lighting originated in photography, it has become a cornerstone of video production, offering consistent and professional-looking results for everything from interviews to YouTube content. When shooting video, the principles remain the same, but there are some unique considerations to keep in mind.
Unlike still photography, video subjects often move, requiring careful placement of lights to maintain consistent illumination throughout the scene. The key light should follow your subject’s primary movement path, while the fill and back lights need to provide balanced coverage across the entire shooting area.
For interview setups, position your key light at a 45-degree angle to your subject, about eye level or slightly higher. The fill light should be placed on the opposite side, while the back light needs to be positioned higher than your subject to create that subtle separation from the background. Remember that video cameras often handle contrast differently than still cameras, so you might need to adjust your fill light to be slightly brighter than in traditional photography setups.
When shooting B-roll or moving subjects, consider using LED panels instead of traditional studio lights. They provide more flexibility and often come with adjustable color temperature settings, which is crucial for maintaining consistent lighting across different shots and locations.
For live streaming or vlogging, compact LED panels with built-in diffusion can effectively create a three-point setup in tight spaces. Many modern video lights also offer smartphone control, making it easier to adjust intensity and color temperature while staying behind the camera.
Monitor your lighting setup through your camera’s LCD screen or external monitor rather than relying on what your eyes see, as video cameras may interpret the light differently than the human eye.
Product Photography
Product photography demands precision and consistency in lighting, making the three-point setup particularly valuable for capturing items in their best light. Whether you’re shooting jewelry, electronics, or lifestyle products, this classic lighting arrangement helps eliminate unwanted shadows while highlighting key product features.
Start by positioning your key light at a 45-degree angle to the product, typically on the right or left side. This primary light source establishes the main illumination and defines the product’s primary features. For reflective products like glass or metal, consider using a softbox to diffuse the light and minimize harsh reflections.
Your fill light should be placed opposite the key light, but at about half the intensity. This helps soften shadows without eliminating them completely, maintaining depth and dimension in your product shots. For smaller items, a white reflector card can often substitute for the fill light, offering a more subtle and controlled fill.
The backlight, positioned behind and slightly above your product, creates separation from the background and adds a subtle rim light that defines edges. This is particularly important when shooting products against white backgrounds for e-commerce platforms.
Modern product photography has evolved with technology, and AI-enhanced product photography now offers additional tools for perfecting your shots. However, mastering the traditional three-point setup remains fundamental.
For transparent or highly reflective products, consider using polarizing filters on your lights and lens to control reflections. Additionally, shooting tethered to a computer allows you to fine-tune your lighting setup in real-time, ensuring consistent results across multiple products.
Remember to adjust your light intensities based on the product’s surface properties. Matte surfaces can handle more direct lighting, while glossy items might require softer, more diffused illumination to avoid hot spots. Start with balanced power settings across all three lights, then adjust individually until you achieve the desired effect.
Future-Proofing Your Lighting Setup
As photography technology continues to evolve, investing in a versatile and adaptable three-point lighting setup becomes increasingly important. Today’s photographers need to consider not just current requirements but also future developments in the field. When building your collection of essential lighting equipment, focus on solutions that offer flexibility and upgradeability.
One significant trend is the integration of smart lighting systems. These advanced setups allow remote control via smartphone apps and can automatically adjust to different shooting conditions. While traditional manual lights still have their place, considering hybrid options that offer both manual and smart features can future-proof your investment.
LED technology continues to advance rapidly, offering improved color accuracy, power efficiency, and durability. When selecting lights, look for models with high CRI (Color Rendering Index) ratings and those that support firmware updates. This ensures your equipment can adapt to new color standards and technical requirements as they emerge.
Modular lighting systems are another worthy consideration. These systems allow you to start with basic components and gradually add or upgrade elements as your needs evolve. Look for brands that offer comprehensive ecosystems of compatible products, from light modifiers to power solutions.
Compatibility with emerging industry standards is crucial. Consider investing in lights that support multiple power options, including both AC and battery power, and those that offer various mounting solutions. This flexibility ensures your equipment remains useful as studio setups and shooting environments change.
Finally, don’t overlook the importance of build quality and repairability. While premium equipment may cost more initially, robust construction and the ability to replace parts rather than entire units can significantly extend the life of your lighting setup. This approach not only saves money in the long run but also reduces environmental impact through sustainable equipment maintenance.
The integration of AI technology with traditional three-point lighting has revolutionized the way photographers approach their craft. By combining time-tested lighting principles with intelligent automation and real-time adjustments, photographers can achieve consistent, professional results while saving valuable setup time. The AI-enhanced systems not only help maintain perfect ratios between key, fill, and back lights but also adapt to changing conditions and subject movement.
Looking ahead, we can expect even more sophisticated AI implementations in lighting technology. From advanced facial recognition that automatically adjusts lighting for different skin tones to smart systems that learn your preferred lighting styles, the future of photography lighting is bright. These developments will make professional-quality lighting more accessible to photographers at all skill levels.
However, it’s important to remember that AI is a tool to enhance, not replace, your understanding of lighting fundamentals. The most successful photographers will be those who combine their creative vision and technical knowledge with these innovative AI capabilities, creating stunning images that stand out in an increasingly competitive field.