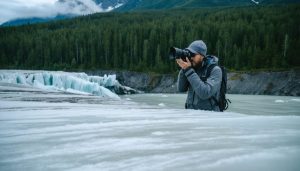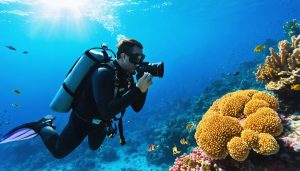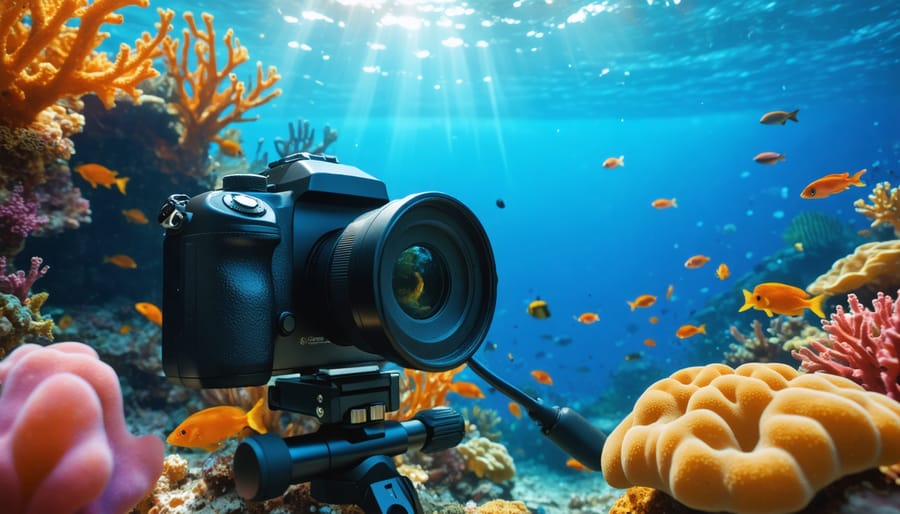
Plunge into professional-quality underwater footage with precision-engineered housings that protect up to $50,000 worth of camera equipment at depths exceeding 200 feet. Master the fundamentals of underwater photography essentials with specialized wide-angle dome ports that maintain image clarity and minimize distortion in challenging aquatic environments. Transform ordinary marine scenes into cinematic masterpieces using powerful underwater lighting systems that cut through murky waters and reveal vibrant colors lost at depth. Professional underwater videographers require a sophisticated ecosystem of equipment that seamlessly integrates modern camera technology with advanced aquatic protection systems, from dedicated focus lights to specialized color correction filters that compensate for water’s light-absorbing properties. Whether documenting delicate coral reefs or capturing high-speed marine life encounters, the right combination of housings, ports, lights, and stabilization gear creates the foundation for exceptional underwater cinematography.
Housing Systems: Your Camera’s First Line of Defense
Professional vs Consumer Housings
When it comes to underwater housings, there’s a clear distinction between professional and consumer options, each serving different needs and budgets. Professional housings, typically crafted from aluminum or high-grade stainless steel, offer superior depth ratings, often reaching beyond 100 meters. These robust units feature precision-engineered controls, multiple port options, and exceptional build quality that can withstand frequent use in challenging conditions.
Consumer housings, usually made from durable polycarbonate plastic, are designed for recreational divers and enthusiasts operating at shallower depths (typically 40 meters or less). While more affordable, they still provide reliable protection and basic functionality for most underwater shooting scenarios. These housings are generally lighter, making them ideal for travel and casual use.
The key differences extend beyond materials and depth ratings. Professional housings offer advanced features like vacuum check systems, multiple electronic bulkheads for external monitors or lights, and modular configurations that adapt to different shooting requirements. They also tend to have better ergonomics, with precisely positioned controls that mirror the camera’s original layout.
Consumer models, while more limited in features, often include essential controls and can produce excellent results for most recreational purposes. They’re particularly suitable for vloggers, travel enthusiasts, and underwater photography beginners. Some even offer smartphone compatibility, making underwater imaging more accessible than ever.
When choosing between professional and consumer housings, consider your diving depth requirements, frequency of use, and budget. While professional housings offer superior durability and features, consumer options can be an excellent starting point for those entering the world of underwater videography.
Depth Ratings and Pressure Considerations
Understanding depth ratings is crucial when selecting underwater housing for your video equipment. Most recreational underwater videography occurs within recreational diving limits (130 feet/40 meters), but housing depth capabilities vary significantly based on construction and intended use.
Entry-level housings typically offer depth ratings between 130-200 feet (40-60 meters), suitable for most recreational diving scenarios. Professional-grade housings can withstand pressures at depths of 330 feet (100 meters) or more, making them suitable for extreme depth photography and technical diving operations.
Each additional 33 feet (10 meters) of depth adds approximately one atmosphere of pressure. Quality housings feature multiple O-ring seals, pressure-relief valves, and reinforced construction to maintain watertight integrity. It’s essential to regularly inspect these seals and maintain them properly to prevent flooding.
Temperature changes can affect housing performance due to material expansion and contraction. When diving in varying water temperatures, allow your equipment to acclimate before descending to prevent seal failures. Some housings incorporate vacuum systems that create negative pressure inside the housing, providing early warning of potential leaks before water ingress occurs.
Remember that exceeding your housing’s depth rating isn’t just risky for your equipment – it can lead to catastrophic flooding and damage to expensive camera gear. Always maintain a safety margin below your housing’s maximum rated depth, and consider future diving plans when selecting equipment to ensure your gear can grow with your underwater ambitions.
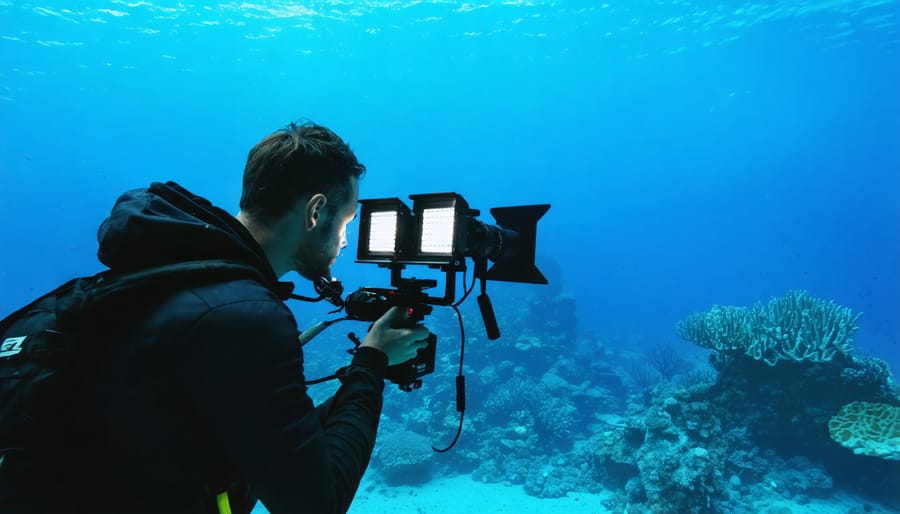
Lighting Systems That Make Colors Pop
Video Lights vs Strobes
When it comes to underwater videography, choosing between video lights and strobes can significantly impact your footage quality. Video lights provide continuous illumination, making them the go-to choice for most underwater videographers, while strobes deliver powerful bursts of light primarily used in photography.
Video lights offer several advantages for underwater filming. They allow you to see exactly how your scene will be lit in real-time, making composition and exposure adjustments more intuitive. Modern LED video lights provide excellent color rendering and can be adjusted for both intensity and beam angle. They’re particularly effective for capturing behavior and movement in marine life, especially in darker environments or at depth where natural light is limited.
However, video lights do have limitations. They typically offer less power than strobes and can quickly drain batteries during extended shooting sessions. They may also attract or disturb marine life due to their continuous output, something to consider when filming shy creatures.
Strobes, while primarily designed for photography, can be valuable tools for specific video applications, particularly when implementing advanced lighting techniques. Their brief, intense bursts of light can create dramatic effects or freeze motion in slow-motion footage. However, their discontinuous nature makes them less practical for standard video recording.
For optimal results, many professional underwater videographers use a combination of both lighting types. A typical setup might include two video lights for primary illumination and a strobe for creative effects or additional power when needed. When selecting your lighting equipment, consider factors like beam angle, color temperature, battery life, and depth rating.
For beginners, starting with a pair of quality video lights is recommended. Look for models offering at least 1000 lumens each, with wide beam angles around 100 degrees. As your skills develop, you can explore more sophisticated lighting combinations to achieve your creative vision.
Color Correction and Filters
Capturing accurate colors underwater presents unique challenges due to how water absorbs different wavelengths of light. As you descend, reds disappear first, followed by oranges and yellows, leaving footage with an overwhelming blue-green cast. This is where specialized color correction tools and filters become essential for underwater videographers.
Red filters are the most common solution for restoring natural colors when shooting in blue water. These filters work by selectively blocking blue light, helping to balance the color temperature and bring back warmer tones. For green water environments, like lakes or certain coastal areas, magenta filters are more effective at achieving natural-looking results.
White balance cards designed specifically for underwater use are invaluable tools for achieving accurate colors. These cards provide a neutral reference point for your camera’s white balance settings, making post-production color correction techniques more straightforward and effective.
Modern underwater video lights offer another solution, particularly for deeper dives or when shooting close-up subjects. These lights restore natural colors by providing full-spectrum illumination, though their effective range is typically limited to 3-6 feet depending on water conditions and light power.
For post-production, specialized software plugins designed for underwater footage can help address common color issues. These tools often include presets for different depths and water conditions, making it easier to achieve natural-looking results even if the original footage appears heavily tinted.
When choosing filters, consider your typical diving environment and depth range. Shallow water typically requires less aggressive filtering than deeper waters. Many videographers carry multiple filter options to adapt to changing conditions during a single dive. Remember that filters work best in natural daylight conditions between 15-50 feet depth, while video lights become more crucial beyond these ranges.
Stabilization Equipment for Smooth Footage
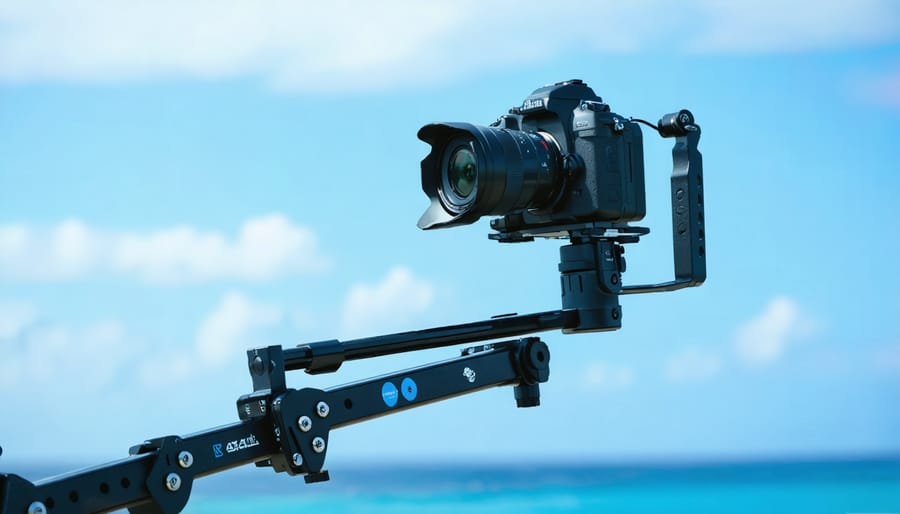
Underwater Gimbals and Handles
Capturing smooth, stable footage underwater presents unique challenges, which is where specialized underwater gimbals and handles come into play. These essential tools help combat the natural movement of water and maintain steady shots even in challenging conditions.
Underwater gimbals are specifically designed to counteract the effects of currents and wave action, featuring sealed housings and waterproof electronics. Most professional underwater videographers opt for 3-axis gimbals, which stabilize motion across pitch, yaw, and roll axes. Popular models like the Sublue WhiteShark and DJI OM series (with appropriate underwater housing) offer excellent stabilization capabilities while remaining neutrally buoyant.
Handles and trays provide additional stability and control underwater. Dual-handle trays offer a wider grip stance, reducing camera shake and allowing for more precise movements. Many feature mounting points for lights, monitors, or other accessories. Some videographers prefer single-handle configurations for increased maneuverability in tight spaces, such as shooting in coral reefs or shipwrecks.
When choosing underwater gimbals and handles, consider factors like depth rating, battery life in cold water, and compatibility with your camera system. Look for equipment with ergonomic grips and easy-to-operate controls while wearing diving gloves. The right combination of stabilization tools can dramatically improve the quality of your underwater footage, making the investment worthwhile for serious underwater videographers.
Buoyancy Control Systems
Maintaining neutral buoyancy is crucial for capturing steady underwater footage, and a well-designed buoyancy control system is essential for any underwater videographer. The primary component is the Buoyancy Compensator Device (BCD), which allows you to adjust your position in the water column with precision.
Modern BCDs come in two main styles: jacket-style and wing-style. Jacket-style BCDs wrap around your torso and provide comfortable, all-around buoyancy control, making them ideal for beginners and casual videographers. Wing-style BCDs, preferred by many professionals, feature an air bladder on your back, offering better trim and more freedom of movement while filming.
Weights are another critical component of your buoyancy system. A weight belt or integrated weight system helps counteract the natural buoyancy of your equipment and wetsuit. For videography, consider using trim weights – small weights that can be positioned strategically on your BCD or tank to achieve perfect horizontal trim.
Advanced videographers often incorporate specialized buoyancy aids like mini lift bags for supporting heavy camera rigs or neutral buoyancy arms that help stabilize camera systems underwater. Some also use drysuit inflation systems when filming in cold waters, which provide additional buoyancy control while maintaining warmth.
Remember to practice buoyancy control extensively before attempting serious underwater filming. Poor buoyancy not only results in shaky footage but can also damage delicate marine environments.
Additional Gear for Professional Results
Specialty Lenses and Ports
When it comes to underwater videography, the choice of lenses and ports can dramatically impact your footage quality. Specialized lenses designed for underwater use help compensate for the magnification effect of water, which makes objects appear about 25% larger and closer than they actually are.
Wide-angle lenses are particularly popular for professional underwater filming, as they allow you to get closer to your subject while maintaining a broader field of view. This proximity reduces the amount of water between your camera and the subject, resulting in clearer, more vibrant footage with better contrast.
Dome ports are essential companions to wide-angle lenses, helping to maintain image quality underwater. These curved ports correct for refraction and maintain the lens’s intended field of view. The size of your dome port matters – larger domes (8 inches or more) typically provide better image quality but can be more challenging to handle underwater.
For macro videography, flat ports are the go-to choice. They work perfectly with macro lenses, allowing you to capture stunning close-up details of smaller marine life. The flat port actually increases the magnification of your macro lens underwater, giving you even more detailed shots of tiny subjects.
When selecting ports, consider the material they’re made from. Optical glass offers superior image quality but comes at a higher price point and weight. Acrylic ports are more affordable and lighter but may be more prone to scratches. Whatever you choose, always ensure your port perfectly matches your lens specifications to prevent vignetting or loss of image quality.
Remember to factor in the working distance of your chosen lens-port combination. Some setups might require you to get very close to your subject, which could be challenging with easily startled marine life. Having a variety of lens and port combinations in your kit allows you to adapt to different underwater shooting scenarios and subjects.
Monitoring and Communication Systems
Effective monitoring and communication systems are crucial for successful underwater videography, ensuring both safety and optimal footage capture. At the heart of these systems are underwater monitors, which allow videographers to review footage in real-time and make necessary adjustments without surfacing. Modern underwater monitors feature bright, high-resolution displays with anti-glare coatings, making them visible even in challenging lighting conditions.
For professional productions, wireless video transmission systems have become increasingly popular. These systems transmit live footage to surface monitors or support boats, enabling directors and production teams to provide immediate feedback. Some advanced setups even incorporate split-screen capabilities, allowing simultaneous viewing of multiple camera angles.
Communication between underwater videographers and surface support teams is equally vital. Full-face masks equipped with through-water communication systems enable clear voice communication, which is essential for coordinating complex shots or responding to changing conditions. These systems typically use bone conduction technology or traditional speakers, with options ranging from basic two-way systems to professional-grade units supporting multiple channels.
Surface support teams often utilize support boards or slates with pre-arranged hand signals as a backup communication method. These proven techniques remain reliable when electronic systems fail or in situations where voice communication isn’t practical.
For solo videographers, personal monitoring solutions like head-up displays (HUDs) integrated into diving masks provide essential information without requiring handheld devices. These displays can show camera settings, diving metrics, and even composition guides, allowing for efficient operation while maintaining situational awareness.
Recording monitors with built-in storage capabilities are particularly valuable for immediate playback and backup purposes. These devices often feature histogram displays, focus peaking, and exposure tools, helping ensure technical excellence in challenging underwater conditions. Some advanced models even offer pre-recording buffers, capturing crucial moments that might otherwise be missed while activating the main camera.
Diving into underwater videography requires careful consideration of your equipment choices, and we hope this guide has helped illuminate the essential gear needed for capturing stunning underwater footage. From choosing the right underwater housing for your camera to selecting appropriate lighting systems, each piece of equipment plays a crucial role in achieving professional-quality results.
For beginners, we recommend starting with a compact camera system in a quality housing, paired with a basic video light and red filter. This setup provides a solid foundation while you develop your underwater videography skills. As you progress, consider investing in a mirrorless or DSLR system with dual strobes and advanced lighting options.
Advanced videographers should focus on professional-grade housings, multiple light sources, and specialized accessories like wet lenses and color correction filters. Remember that stability aids like trays and arms are just as important as your camera setup for achieving smooth, professional footage.
Whatever your skill level, always prioritize equipment maintenance and proper care. Regular checks of O-rings, housing seals, and electronic components will protect your investment and ensure reliable performance underwater. Start with the basics, build your kit gradually, and most importantly, practice regularly to maximize your equipment’s potential. Your underwater videography journey is as much about developing skills as it is about having the right gear.