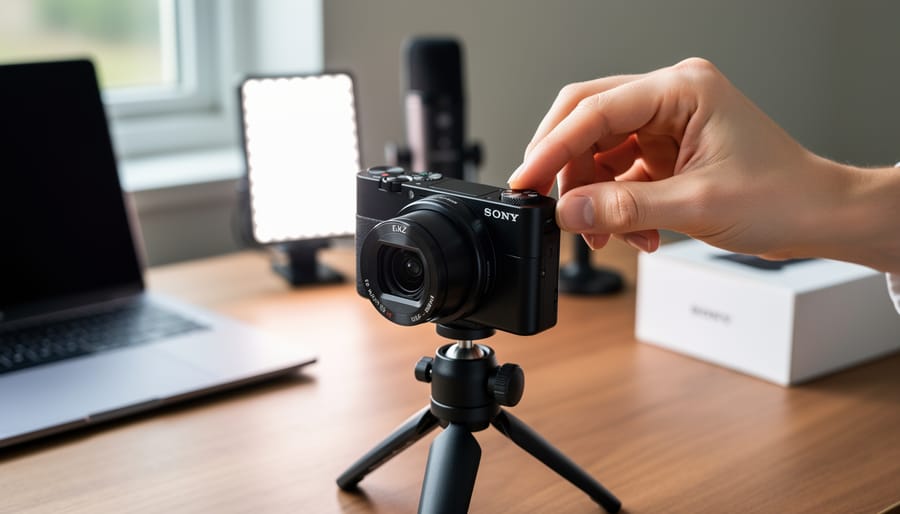
Navigate to Shooting Mode on your Sony ZV-1’s mode dial and select Program Auto (P) for your first sessions—this gives you control over ISO and exposure compensation while the camera handles aperture and shutter speed, creating a safety net as you learn. Open the camera’s Function Menu by pressing the Fn button, then customize your seven shortcut slots to include Product Showcase Setting, Background Defocus, and Self-Timer, which are the three most-used features for content creators and vloggers working solo.
Set your video recording format to XAVC S HD at 1920×1080 with 30p frame rate through Menu > Camera Settings > File Format, giving you manageable file sizes with excellent quality that edits smoothly on most computers without requiring expensive hardware upgrades. Toggle Face Priority in AF to On through the AF menu, ensuring your camera locks onto your face instantly when you step in front of the lens—a game-changer for single-operator vlogging scenarios.
Activate the Product Showcase Setting before unboxing videos or product demonstrations, which temporarily disables face detection and allows the camera to refocus on objects you bring close to the lens, then automatically returns to tracking your face when you move the item away. Assign the Background Defocus button to quickly toggle between sharp and blurred backgrounds depending on your creative vision for each shot, transforming the look of your content with a single press.
Understanding these foundational settings removes the overwhelm and gets you shooting professional-looking footage within your first hour of ownership.
Understanding the ZV-1’s Core Camera Modes
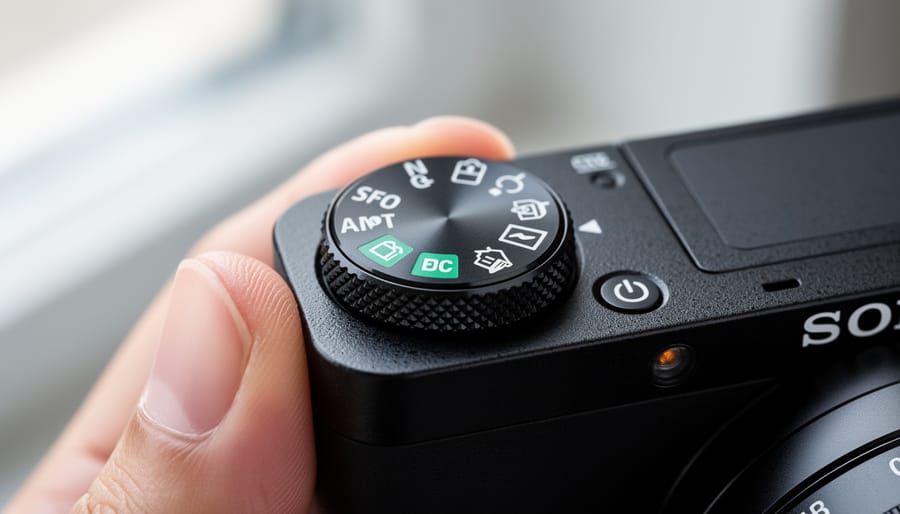
Intelligent Auto vs. Program Mode: When to Use Each
The ZV-1 offers two beginner-friendly modes that seem similar at first glance, but understanding their differences will help you grow as a content creator.
Intelligent Auto mode is your safety net. Think of it as having a photography assistant who makes every decision for you. The camera analyzes the scene, sets shutter speed, aperture, ISO, and even chooses whether you need the flash. It works wonderfully when you’re completely new to cameras or when you’re in rapidly changing situations where you need to focus entirely on what you’re saying rather than camera settings. For example, if you’re walking through a market vlogging about local food, Intelligent Auto handles the lighting transitions from bright sunlight to shaded stalls without missing a beat.
Program mode, however, gives you a gentle introduction to creative control. The camera still sets the basic exposure, but you can adjust the exposure compensation dial to make your video brighter or darker. More importantly, you gain access to white balance settings, picture profiles, and other features that Intelligent Auto locks away. This matters because automatic white balance sometimes struggles in mixed lighting situations, like filming indoors near a window. With Program mode, you can manually set white balance to prevent those awkward color shifts that make your skin look orange or blue.
Start with Intelligent Auto for your first few sessions to build confidence, then graduate to Program mode once you understand basic exposure concepts. You’ll immediately notice the difference in consistency across your shots.
Aperture Priority: Your Go-To for Beautiful Backgrounds
Aperture Priority mode (A on your mode dial) is your secret weapon for creating that professional, cinematic look where your subject pops against a beautifully blurred background. This blurred effect, called bokeh, instantly elevates your content from “smartphone snapshot” to “I know what I’m doing.”
Here’s how it works: In Aperture Priority, you control the f-stop (aperture size) while the camera automatically adjusts shutter speed for proper exposure. The ZV-1’s lens opens to f/1.8 at its widest, which is excellent for background blur, and stops down to f/11 at the narrowest.
For gorgeous bokeh in portraits or product shots, dial in f/1.8 to f/2.8. This wide aperture creates that dreamy separation between you and whatever’s behind you. It’s perfect when filming sit-down vlogs or beauty content where you want distracting backgrounds to melt away. Just remember: the closer you are to the camera and the farther the background, the more dramatic the blur becomes.
If you’re shooting outdoors in bright sunlight at f/1.8, you might notice your image getting too bright even at the camera’s fastest shutter speed. In this situation, bump your aperture to f/4 or f/5.6, or consider using the built-in ND filter (more on that later).
For group shots or scenery where you want more in focus, switch to f/5.6 through f/8. These middle apertures balance background softness with keeping multiple subjects sharp.
Exposure Triangle Simplified for the ZV-1
Aperture: Controlling Light and Depth
The ZV-1 features a bright f/1.8-2.8 variable aperture lens, which is one of its standout features for content creators. Understanding how aperture works will transform your footage from flat to professional-looking with beautiful background separation.
Aperture controls two important elements: how much light enters the camera and your depth of field (how blurred your background appears). The f-number might seem counterintuitive at first—smaller numbers like f/1.8 mean a wider opening, letting in more light and creating that dreamy blurred background, while larger numbers like f/2.8 reduce the opening, letting in less light but keeping more of your scene in focus. These camera settings fundamentals apply universally but work differently on every lens.
In real-world shooting, using f/1.8 when vlogging creates gorgeous background blur that makes you pop from your environment—perfect for indoor content or low-light situations. However, at f/1.8, your focus area becomes quite narrow, so even slight movements forward or backward can put you out of focus. For walking shots or group content, stopping down to f/2.8 provides more forgiveness while still maintaining decent background separation. The ZV-1’s lens automatically adjusts aperture as you zoom, starting at f/1.8 when fully wide and shifting to f/2.8 as you zoom in.
Shutter Speed: Freezing or Blurring Motion
Shutter speed controls how long your camera’s sensor captures light, and it directly impacts motion in your footage. For smooth, cinematic video with the ZV-1, you’ll want to follow the 180-degree shutter rule—a filmmaker’s guideline that creates natural-looking motion blur similar to what our eyes perceive.
Here’s how it works: set your shutter speed to double your frame rate. If you’re shooting at 24fps (the standard cinematic frame rate), use 1/50s shutter speed. For 30fps, choose 1/60s. For 60fps slow-motion footage, you’d use 1/120s. This creates just enough motion blur to make movement feel organic rather than jarring or stuttery.
To adjust shutter speed on the ZV-1, switch to Manual mode or Shutter Priority mode (S mode). Navigate using the control wheel to select your desired speed.
When should you break this rule? In bright outdoor conditions, you might need a faster shutter speed if you’re shooting without an ND filter—though this will create that overly-sharp “soap opera effect.” Conversely, slower shutter speeds work wonderfully for creative effects like capturing light trails or intentional motion blur in artistic shots.
For handheld vlogging, stick with 1/50s at 24fps for the most natural results. The ZV-1’s excellent stabilization handles minor camera shake at these speeds. If you notice footage looking too sharp or jittery despite proper exposure, you’re likely using too fast a shutter speed. Remember: motion blur isn’t your enemy—it’s what makes video look like video rather than a series of still images.
ISO: Your Digital Brightness Booster
ISO determines how sensitive your camera’s sensor is to light. Think of it like turning up the volume on your camera—higher ISO brightens your image, but just like cranking volume too high creates distortion, excessive ISO introduces noise (those grainy speckles that reduce image quality).
The ZV-1’s 1-inch sensor handles ISO impressively well for its size, but understanding its sweet spots will keep your vlogs looking crisp. The camera’s native ISO range extends from 125 to 12,800, though it can stretch to 80 on the low end and 25,600 at maximum.
For the cleanest footage, stick between ISO 125 and 800 whenever lighting permits. This range produces beautifully smooth images with minimal noise. ISO 1600 remains very usable—you’ll notice slight texture but nothing distracting. Between 3200 and 6400, noise becomes more visible, acceptable for occasional use or situations where capturing the moment outweighs perfect image quality. Beyond ISO 6400, reserve these settings strictly for emergencies when you absolutely need the shot.
In practice, shoot outdoors at ISO 125-400. For indoor vlogging with decent lighting, ISO 800-1600 works wonderfully. Dim restaurant or evening scenes might push you toward ISO 3200, which the ZV-1 handles reasonably well. Always prioritize proper lighting over cranking ISO—adding an affordable LED panel will dramatically improve your results compared to shooting at ISO 6400 in darkness.
White Balance Settings That Make Your Videos Look Pro

Quick White Balance Presets for Common Situations
The ZV-1 includes several white balance presets that work wonderfully for typical shooting scenarios. Think of these as your quick-access tools when you don’t have time to fiddle with custom settings.
The Daylight preset is your go-to for outdoor filming in direct sunlight, typically between 10am and 3pm. When you’re recording a product review in your backyard or shooting a travel vlog on a sunny afternoon, this preset will deliver accurate, natural-looking colors without the warm orange cast that Auto White Balance sometimes introduces.
Switch to Cloudy when shooting outdoors under overcast skies or in open shade. This preset adds warmth to compensate for the cool, blue-tinted light conditions. I use this regularly for outdoor interviews on gray days—it prevents your subjects from looking washed out or sickly.
The Tungsten preset handles traditional household light bulbs and warm indoor lighting. If you’re filming in your living room with incandescent bulbs, this setting counteracts the heavy orange glow, keeping skin tones neutral. Perfect for cozy indoor vlogs or late-evening content.
Fluorescent works best in office environments or commercial spaces with overhead fluorescent tubes. This preset neutralizes the greenish tint these lights typically produce, ensuring your footage doesn’t look unnaturally pale or sickly green—essential for professional-looking indoor content in commercial settings.
Custom White Balance for Perfect Color
Getting accurate colors straight from your ZV-1 can transform your footage from amateur to professional. Auto white balance works well in many situations, but when you’re shooting under mixed lighting—think indoor spaces with both window light and warm lamps—a custom white balance ensures your whites look truly white and colors appear natural.
Here’s how to set it on your ZV-1: First, grab a plain white piece of paper or a dedicated white balance card. Place it in the same lighting where you’ll be filming, filling your frame with the white surface. Press the Menu button and navigate to Camera Settings 1 (the camera icon), then scroll down to White Balance. Select Custom Setup. The screen will prompt you to press the shutter button while pointing at your white reference. Once you press the shutter, the camera analyzes the light and stores that custom setting.
Now select Custom as your white balance option in the menu, and you’re set. This process might seem unnecessary when you’re just starting out, but once you’ve shot a talking-head video where your skin tone shifts from orange to blue throughout, you’ll understand why content creators swear by custom white balance. It’s especially valuable for product reviews or tutorials where color accuracy matters. The best part? This setting saves time in post-production since your colors are already dialed in.
Focus Settings: Getting Sharp Footage Every Time
Face Priority vs. Tracking: Which to Use When
The ZV-1 offers two primary autofocus modes that serve different purposes, and understanding when to use each will dramatically improve your footage quality.
Face Priority autofocus is your go-to setting for stationary talking-head videos, interviews, or any content where you’re the main subject facing the camera. The ZV-1 excels at detecting and locking onto faces, automatically adjusting focus even when you move slightly forward or backward. This mode works brilliantly for standard vlogging scenarios where you’re sitting at a desk or standing in one general area. The camera intelligently recognizes your face and maintains sharp focus without you needing to touch anything.
Flexible Spot tracking becomes essential when filming moving subjects or dynamic scenes. If you’re walking through a location, demonstrating a product while moving around, or filming someone else in motion, activate tracking by tapping your subject on the LCD screen. The camera will follow that point as it moves through the frame, keeping it in focus. This feature shines during outdoor vlogs, behind-the-scenes content, or any situation requiring camera movement.
For most beginners, start with Face Priority for your first videos. Once you’re comfortable and ready to add movement to your content, experiment with tracking to unlock more creative possibilities.
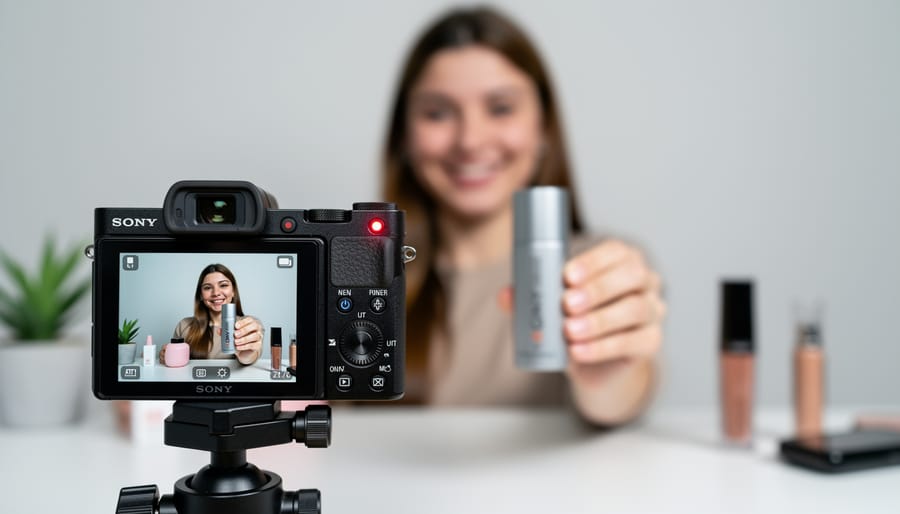
The Product Showcase Button: Your Secret Weapon
If you’ve ever struggled to quickly shift focus from your face to a product you’re reviewing, the ZV-1’s Product Showcase setting will feel like magic. This dedicated button completely transforms how you demonstrate items on camera.
Here’s what makes it special: normally, the ZV-1’s face detection works brilliantly to keep you in focus, but it can stubbornly refuse to focus on objects you hold up. With Product Showcase activated, the camera temporarily ignores your face and instantly locks onto whatever you bring into the foreground. Once you move the object away, it seamlessly returns focus to you.
To enable this feature, locate the Product Showcase button on top of the camera (it has a box icon). Press it once before filming, and you’ll see a small icon appear on screen confirming it’s active. Now hold up your latest gadget, book, or coffee mug, and watch the camera nail focus within a second.
This setting proves invaluable for unboxing videos, product reviews, or even casual vlogs where you want to show something to your audience. For example, food bloggers can effortlessly switch between talking about a dish and showcasing its details up close. The transition happens so smoothly that your viewers won’t even notice the technical wizardry happening behind the scenes.
Manual Focus Techniques for Creative Control
While the ZV-1 excels at autofocus, manual focus gives you complete creative control, especially when autofocus struggles or you want a specific look. To activate manual focus, tap the control wheel, scroll to MF (Manual Focus), and press the center button to confirm.
Here’s where the ZV-1’s focus tools become invaluable. Focus peaking highlights in-focus areas with colored outlines—access this by pressing the function button, selecting Focus Peaking, and choosing your preferred color (red, yellow, or white work best against different backgrounds). When shooting through glass or mesh, focus peaking prevents the camera from locking onto the wrong subject.
Focus magnification is your precision tool. Press the control wheel’s center while in manual focus mode to zoom into your frame at 5.9x or 11.7x magnification. This proves essential for product shots where you need tack-sharp focus on specific details, like the label on a bottle or texture of fabric.
Real-world application: When filming yourself speaking directly to camera at a fixed distance, set manual focus once using magnification to nail sharpness on your eyes, then maintain that distance throughout your take. This eliminates the focus hunting that sometimes occurs with autofocus during hand gestures or movement.
Picture Profiles and Creative Styles Decoded
Creative Styles for Beginners: No Color Grading Required
The Sony ZV-1 offers several picture profiles called Creative Styles that dramatically affect how your videos look straight out of camera. For beginners, these are absolute lifesavers because they eliminate the need for color grading in post-production.
Standard is your safe, dependable option. It delivers balanced colors and contrast that work well in most lighting conditions. Think of it as the all-rounder that won’t let you down when you’re just starting out. This style produces natural skin tones, which is crucial for vlogging where you’re the main subject.
Vivid pumps up saturation and contrast, making colors pop intensely. This works beautifully for outdoor adventure content, travel vlogs, or product showcases where you want eye-catching visuals. However, it can make skin tones appear overly warm or orange, so use it selectively.
Neutral produces flatter, less saturated images with lower contrast. While this seems counterintuitive for beginners, it actually gives you more flexibility if you decide to do basic color adjustments later. The muted look also appears more cinematic and professional.
For most beginners creating talking-head vlogs or daily content, Standard delivers the best results without any tweaking. It maintains accurate skin tones and pleasing colors that look polished immediately. Once you’re comfortable, experiment with Vivid for outdoor scenes or Neutral when you want a more subdued aesthetic. The beauty of Creative Styles is their simplicity—one setting change transforms your entire look without complicated menus or post-production knowledge.
Should You Use S-Log as a Beginner?
As a beginner, you should probably skip S-Log3 (PP10) for now. Here’s why: while picture profiles can create professional-looking videos, S-Log is designed to capture a flat, desaturated image that requires color grading expertise in post-production. Without proper grading, your footage will look washed out and lifeless.
The ZV-1’s standard shooting modes already produce excellent results straight out of camera, which means you can share content immediately without spending hours learning color grading software. S-Log also demands careful exposure control and ideal lighting conditions. Underexpose by even a stop, and you’ll introduce unwanted noise that’s difficult to remove.
That said, if you’re committed to learning video editing and plan to develop a consistent visual style across multiple videos, S-Log becomes valuable down the road. It offers greater dynamic range and flexibility for matching footage from different shooting scenarios.
The practical advice? Master the ZV-1’s standard modes first. Once you’re consistently creating content you’re proud of and feel limited by the standard profiles, then explore S-Log. Your editing skills and workflow will be ready for it.
Audio Settings That Complement Your Visuals
Great video is nothing without great audio, and the ZV-1 includes several smart features designed specifically for content creators who want clean, professional sound. While the camera’s built-in microphone is surprisingly capable, knowing how to optimize these settings will make a noticeable difference in your final product.
The most important audio setting you’ll encounter is the Wind Noise Reduction feature, found in the camera’s menu under Audio Recording. When activated, this processing significantly reduces that distracting rumbling sound that wind creates across your microphone. If you’re filming outdoors—whether that’s a travel vlog in a breezy location or a product review on your balcony—turn this on. The trade-off is minimal, though in extremely quiet indoor environments, you might prefer it off to preserve the most natural sound quality.
The ZV-1’s directional microphone naturally focuses on what’s in front of the camera, which works beautifully for talking-head vlogs and interviews. You’ll notice a dramatic difference compared to cameras with omnidirectional mics that pick up everything equally. This directionality means less distracting background noise and clearer voice capture when you’re the subject.
Audio level monitoring is accessible through the on-screen display while recording. Look for the small audio meter that appears on your screen—those bouncing bars should ideally peak in the yellow zone, occasionally touching red but never staying there. If your levels consistently hit the red, you’re clipping (creating distortion). Access the Audio Rec Level menu to manually adjust input sensitivity down. For most talking situations, keeping levels between negative twelve and negative six decibels produces clean, usable audio that won’t require extensive post-production rescue work.
Custom Button Configuration for Faster Shooting
The ZV-1 features two customizable buttons, C1 and C2, that can dramatically speed up your workflow once you assign them to your most-used functions. Think of these as your personal shortcuts to settings you’d otherwise need to dig through menus to access. Out of the box, they’re assigned to functions you might not use often, so taking five minutes to customize them pays dividends every time you shoot.
To customize these buttons, press the Menu button, navigate to the toolbox icon (second from the bottom), and select Custom Key. From there, select either C1 or C2 and scroll through the available functions. The C1 button sits on top of the camera behind the shutter button, making it perfect for one-handed operation, while C2 is positioned on the back near your thumb.
For content creators, here are some practical button assignments to consider. Setting C1 to Product Showcase allows you to instantly activate this feature when you want to shift focus from yourself to an object you’re showing viewers. It’s far faster than menu diving during a take. Alternatively, assigning C1 to Focus Magnifier helps you nail focus when shooting handheld b-roll or detail shots.
For C2, consider assigning Display All Info or Zebra. Display All Info toggles between clean and information-filled screens, useful when you need to quickly check settings mid-shoot. Zebra helps you monitor exposure in real-time, preventing blown highlights in challenging lighting conditions.
Experiment with different assignments over a few shooting sessions to discover what genuinely saves you time in your specific workflow.
Building Your First Custom Settings Setup
Now that you’ve explored the ZV-1’s key settings, let’s put everything together with a practical setup tailored for indoor vlogging—one of the most common scenarios you’ll encounter. This walkthrough will help you create a reliable custom configuration you can return to again and again.
Start by turning on your ZV-1 and switching to Manual mode using the mode dial on top of the camera. This gives you full control while still allowing the camera’s smart autofocus to do its job. Next, navigate to the menu and select Movie settings. Set your recording format to 1080p at 24fps or 30fps depending on your preference—24fps looks more cinematic, while 30fps is standard for online content. For indoor work, avoid 4K initially as it can introduce more noise in lower light situations.
Now tackle your exposure triangle. In typical indoor lighting with desk lamps or overhead lights, set your ISO to Auto with a maximum limit of 3200. This prevents excessive grain while giving you flexibility. Set your aperture to F2.8 or F4. The ZV-1’s wider apertures create beautiful background blur, but F4 provides a more forgiving depth of field when you’re moving slightly during recording. Your shutter speed should be double your frame rate—so 1/50 for 24fps or 1/60 for 30fps.
For white balance, switch to the Incandescent preset if you’re under standard household bulbs, or try the fluorescent setting for office-style lighting. You can always fine-tune this in the menu if colors look too warm or cool during test recordings.
Enable Face Priority in the autofocus settings—the ZV-1 excels at keeping faces sharp. Also activate Product Showcase mode by pressing the dedicated button on the left side of the camera. This lets you smoothly transition focus between your face and objects you’re showing the camera.
Finally, adjust your audio levels in the menu, setting the recording level to around 15-18 for normal speaking volume. Do a quick test recording, check your results, and make minor tweaks as needed. Save this configuration as a custom preset if your ZV-1 model supports it, making future setup instantaneous.
You’ve just learned the core settings that transform the Sony ZV-1 from a confusing gadget into an intuitive creative tool. Here’s the truth: mastering these fundamentals—exposure modes, Product Showcase, Background Defocus, and audio settings—is exactly how every professional content creator started their journey. The difference between feeling overwhelmed and feeling confident isn’t knowing every menu option; it’s understanding the settings that actually impact your footage.
Now comes the exciting part: experimentation. Take what you’ve learned about these essential photography tips and apply them in real situations. Try Product Showcase at a coffee shop, test Background Defocus during a walk, or shoot a quick vlog using different exposure modes. You’ll quickly discover which settings work best for your style and content.
Remember, every creator you admire spent their first day fumbling through menus and second-guessing their settings. The ZV-1 is designed specifically for you—the beginner ready to create professional content. So grab your camera, head outside, and start shooting. Your first great piece of content is just one practice session away.