Position your key light at a 45-degree angle from your subject’s face, elevated slightly above eye level, to create natural dimension and flattering shadows. This becomes your primary light source, doing about 70% of the work in your two-light setup.
Place your fill light on the opposite side at a lower intensity—roughly half the power of your key light—to soften those shadows without eliminating them completely. This ratio creates depth while keeping your subject’s features visible and professional-looking.
Master the classic Rembrandt setup by angling your key light to create a small triangle of light on the shadowed cheek, then add your fill light at camera level to control how dramatic those shadows appear. Professional portrait photographers rely on this configuration because it works consistently across different face shapes and shooting environments.
Experiment with a rim light variation by moving your second light behind your subject at a 45-degree angle, creating separation from the background. This technique transforms flat smartphone photos into images with genuine three-dimensional quality.
The beauty of a two-light system isn’t just the professional results—it’s the flexibility. You can shoot portraits, product photography, or even video content with the same basic equipment. Unlike single-light setups that often feel harsh or flat, or three-plus light configurations that overwhelm small spaces and tight budgets, two lights give you creative control without complexity. Whether you’re using affordable LED panels or smartphone-triggered flashes, understanding how these two light sources interact lets you replicate studio-quality results anywhere.
Why Two Lights Work Better Than One (Or Three)
If you’ve been experimenting with mobile photography lighting, you’ve probably noticed something: one light creates dramatic shadows that look great for moody portraits but can be too harsh for most everyday scenarios. Meanwhile, using three or more lights sounds professional, but let’s be honest—who wants to haul around multiple stands, power sources, and modifiers when the whole point of mobile photography is convenience?
Two lights hit that sweet spot between quality and practicality. Here’s why this setup works so well for smartphone photographers.
When you use a single light source, you’re essentially creating a split world—one side bright, the other dark. This works beautifully for dramatic effect, but it limits your versatility. Add a second light, and suddenly you control the shadows rather than eliminate them. Your key light provides the main illumination and creates form, while your fill light gently lifts those shadows to reveal detail without flattening the image. This dimension is what separates amateur snapshots from professional-looking mobile photos.
The magic of two lights becomes clear in real-world situations. Photographing products for an online shop? Your key light defines texture and shape while the fill ensures customers see important details. Shooting portrait content for social media? Two lights give you that coveted “studio look” without the studio. Even food photography benefits tremendously—one light creates appetizing highlights while the second prevents murky, unappealing shadows.
Beyond the technical advantages, two lights remain genuinely mobile-friendly. You can pack both in a small bag, set them up in minutes, and adjust them quickly between shots. Adding a third light means more time adjusting ratios and positions, more gear to transport, and honestly, diminishing returns for most mobile photography applications. Mastering artificial lighting techniques with two lights gives you professional control while keeping your setup streamlined and manageable.
Understanding Key and Fill Light Basics
The Key Light: Your Main Character
The key light is your primary light source and the hero of your two-light setup. Think of it as the sun in your mobile photography universe—it creates the main illumination, establishes the mood, and defines where shadows fall on your subject.
For mobile photography, your key light should typically be positioned at a 30-45 degree angle from your subject, slightly above eye level. This creates natural-looking shadows that add dimension without appearing harsh or unflattering. The distance matters too: place your light about 3-5 feet away from your subject as a starting point, then adjust based on the effect you’re after.
Intensity is where mobile photographers have a real advantage. Since smartphone sensors handle light differently than traditional cameras, you often need less power than you’d think. Start with your key light at around 60-70% intensity—you can always bump it up, but blown-out highlights are tough to recover in post-processing.
Here’s a practical tip from the field: use your phone’s screen as a live preview while positioning your key light. Move it around and watch how shadows shift across your subject’s face or product. When you see dimension without losing detail in the shadows, you’ve found your sweet spot. Remember, the key light does the heavy lifting in creating your image’s character, so take time to get this one right before introducing your second light.
The Fill Light: Your Shadow Tamer
Think of the fill light as your key light’s gentler companion—it’s not here to steal the show, but to soften those harsh shadows and bring balance to your image. While your key light creates dimension and drama, the fill light reveals detail in the darker areas without flattening your subject completely.
Position your fill light on the opposite side of your subject from the key light, typically at a 45-degree angle or slightly more head-on. The distance matters significantly here: placing it farther from your subject than your key light naturally reduces its intensity, which is exactly what you want. A good starting point is positioning it about 1.5 to 2 times the distance of your key light.
The real magic happens when you adjust the fill light’s intensity to control contrast. Start by dimming it to about half the power of your key light—this creates a pleasing contrast ratio of roughly 2:1, perfect for most portrait work. Want moodier, more dramatic images? Reduce the fill even further or move it back. Need softer, more evenly lit results for product photography? Bring it closer or increase the power slightly.
Here’s a practical tip: use your phone’s camera to take test shots while adjusting. The immediate feedback helps you see exactly how different fill intensities affect your shadows and overall mood.

Choosing Your Two Lights for Mobile Photography
Budget-Friendly Options That Actually Work
You don’t need to drain your bank account to create stunning mobile photos with a two-light setup. Some of the most effective solutions for smartphone photography come at surprisingly reasonable price points.
LED panel lights offer exceptional versatility for mobile photographers. Quality options like the Neewer 480 LED Panel (around $40-60) provide adjustable brightness and color temperature, making them perfect for both key and fill light duties. These panels are lightweight, battery-powered, and compact enough to slip into a backpack. The Lume Cube Panel Mini ($50-70) is another solid choice, offering smartphone control via Bluetooth and multiple mounting options.
Ring lights remain popular despite some limitations, particularly for beauty and portrait work. Budget-friendly options like the UBeesize 10-inch ring light ($25-35) include a phone holder and adjustable stand, making them ideal for social media content creators. However, they create a distinctive catchlight pattern that isn’t suitable for every shooting scenario.
Clip-on lights deserve serious consideration for their portability. The Luxli Viola ($99) punches above its weight class with impressive color accuracy, while the GVM RGB LED ($30-45) offers creative color options for experimental work. For ultra-budget setups, even basic LED work lights from hardware stores (under $20) can serve as effective fill lights when diffused properly with white fabric or parchment paper.
The key is matching your light investment to your specific needs rather than chasing the most expensive option.
What to Look for in Mobile-Friendly Lights
When shopping for lights to complement your smartphone photography, prioritize features that address the unique challenges of mobile shooting. Adjustable brightness is essential—you’ll need flexibility to dial intensity up or down depending on your distance from the subject and ambient light conditions. Look for lights offering at least 10-step dimming so you can fine-tune your exposure without constantly adjusting your phone’s settings.
Color temperature control matters tremendously. Quality lights should offer a range from warm (around 3200K) to cool (5600K or higher) to match different environments and creative moods. This prevents the dreaded orange or blue color casts that plague smartphone photos shot under mixed lighting.
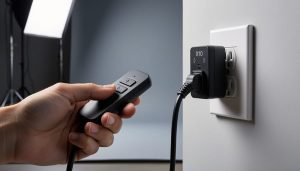
Battery power is non-negotiable for mobile photographers. You’re already untethered from bulky camera gear—don’t sacrifice that freedom with lights that need wall outlets. Rechargeable LED panels with at least two hours of runtime give you genuine mobility for outdoor shoots or location work.
Finally, portability and durability complete the package. Compact lights that fit in a small bag alongside other mobile photography accessories make setup quick and spontaneous shooting possible. Lightweight construction shouldn’t mean fragile—look for rubberized edges and solid build quality that survives being tossed in your everyday carry bag.
The Classic Setup: 45-Degree Key with Bounce Fill
Step-by-Step Positioning
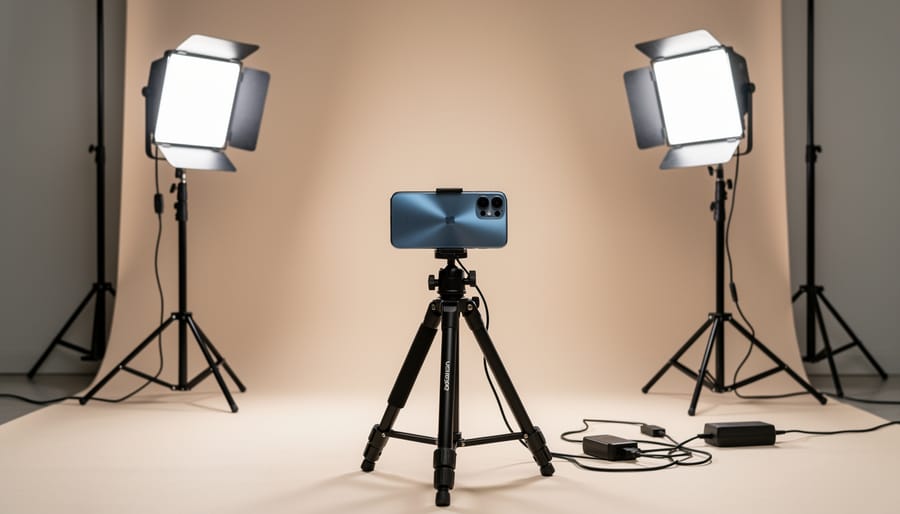
Let’s get your lights positioned properly so you can start capturing stunning images. The beauty of a two-light setup is its simplicity, but precision matters.
Start with your key light, which is your main light source. Position it at a 45-degree angle from your subject, roughly 3 to 5 feet away depending on your space. Here’s a practical tip: imagine your subject is standing at the center of a clock face. Place your key light at the 2 o’clock or 10 o’clock position, elevated about 2 feet above their eye level. This creates natural-looking shadows that add dimension to faces and products alike.
Now for your fill light. This goes on the opposite side of your key light, typically at a lower intensity. If your key light is at 2 o’clock, position your fill at 8 o’clock. Keep it slightly farther back than your key light, around 5 to 6 feet from your subject. The goal is to soften those shadows without eliminating them entirely. A good starting point is setting your fill light at about half the power of your key light.
Your phone camera should be positioned between these two lights, directly facing your subject. Think of it as creating a triangle: key light, fill light, and camera forming three points with your subject in the center.
For product photography, bring both lights closer, around 2 to 3 feet, and consider adding lighting modifiers like diffusers to create even softer shadows. Walk around your setup and check the light fall-off from different angles before shooting.
Adjusting for Different Subjects
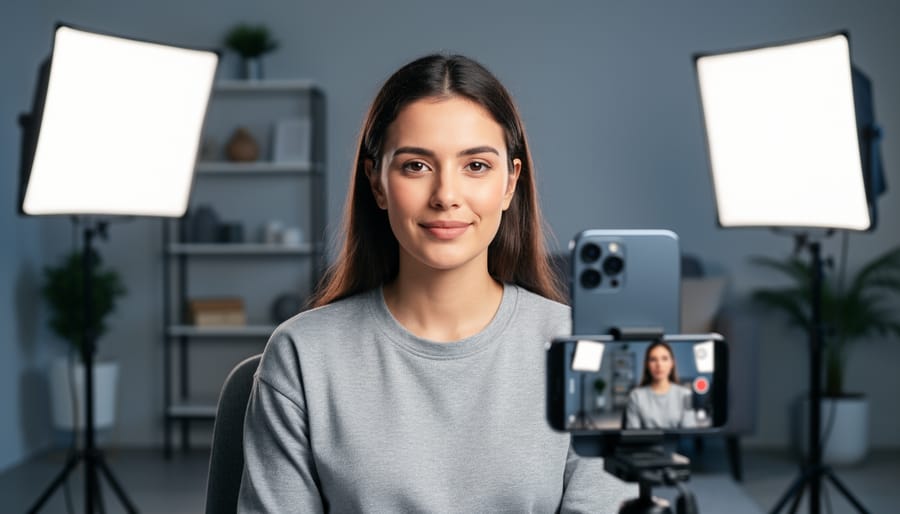
The beauty of a two-light setup is its adaptability across different subjects. For portraits, position your key light at a 45-degree angle to your subject’s face and slightly elevated, while the fill light reduces shadows on the opposite side at lower intensity. This classic approach flatters facial features beautifully, even when shooting with your smartphone’s camera. Keep your lights closer to the subject for softer shadows with a more intimate feel.
Product photography benefits from a modified approach. Place your key light at a sharper angle to create dimension and texture on the product surface, while positioning the fill light more directly opposite to minimize unwanted shadows that might obscure details. For reflective items like jewelry or glassware, move both lights further back and diffuse them heavily to prevent harsh hotspots that commonly plague mobile photos.
Flat lay photography requires the most significant adjustment. Position both lights at equal distances on either side of your setup, angled downward at roughly 45 degrees to create even, shadow-free illumination across your composition. This symmetrical arrangement ensures consistent lighting across the entire frame, which is particularly important given most smartphone cameras’ limitations in handling dramatic lighting variations. Experiment with slightly offsetting one light’s power to add subtle depth without creating distracting shadows.
Three More Two-Light Setups You’ll Actually Use
The Rim Light Setup for Drama
For a more artistic approach, rim lighting creates stunning separation between your subject and background by positioning both lights behind or to the sides of your subject. This technique produces dramatic edge lighting that outlines your subject with a luminous glow, adding depth and professional polish to your smartphone portraits.
Start by placing your first light at a 45-degree angle behind your subject on one side, aimed toward their profile. Position the second light on the opposite side at a similar angle. The goal is to graze light along the edges of your subject rather than illuminating their face directly. This creates those gorgeous highlight strips along the hair, shoulders, and cheekbones that you see in magazine-quality portraits.
Keep your lights slightly elevated and angled downward to avoid lens flare in your phone’s camera. If you notice too much glare, adjust the angle or move the lights slightly farther back. The key is achieving that golden outline without overpowering the shot.
This setup works beautifully in low ambient light conditions, allowing the rim lights to truly shine. Your subject will appear almost three-dimensional, separated from the background in a way that feels cinematic. For best results, shoot in portrait mode if your phone offers it, as the depth effect complements the dramatic separation rim lighting naturally provides.
Cross-Lighting for Texture
Cross-lighting creates dramatic texture emphasis by positioning your two lights at opposite angles to your subject, typically at around 45 degrees on either side. This technique works beautifully for product photography because it casts shadows that accentuate every groove, bump, and surface detail—transforming flat-looking objects into dimensional, tactile subjects.
Here’s how to set it up: Place your first light to the left of your subject at about a 45-degree angle, slightly elevated. Position your second light opposite on the right side, maintaining the same angle and height. The key is keeping both lights at equal power to create balanced shadows that don’t overwhelm either side. For maximum texture revelation, lower your lights closer to the subject’s level rather than shooting from above.
This setup excels with leather goods, woodwork, fabrics, and food photography. I’ve used cross-lighting to photograph handmade pottery where the glaze texture needed to shine—the dual shadows revealed every brushstroke the artist intended. Adjust the angle wider or narrower depending on how pronounced you want the texture; narrower angles create subtler effects, while wider positioning produces more dramatic contrast. Experiment with moving one light slightly forward or back to fine-tune the shadow depth.
The Clamshell for Flawless Portraits
The clamshell lighting setup gets its name from the distinctive positioning of your two lights—one above and one below your subject’s face, creating a shell-like effect that wraps flattering, diffused light around facial features. This technique is particularly effective for smartphone portraits because it minimizes shadows under the eyes, nose, and chin that often plague overhead lighting.
Start by positioning your main light source slightly above your subject’s eye level, angled downward at about 45 degrees. This serves as your key light. Place your second light below face level, either on the floor or a low stand, angled upward to fill in the shadows created by the top light. The bottom light should be less intense—about half the power of your top light works well. If you’re using identical lights, simply move the lower one farther away from your subject to reduce its intensity.
The real-world benefit? This setup creates the soft, even illumination you see in professional headshots and beauty photography. Your smartphone camera will capture smooth skin tones without harsh shadows, and the catch lights in your subject’s eyes appear more dimensional. For best results, position yourself and your phone between the two lights, shooting straight on at your subject’s face level.
Optimizing Your Phone Settings with Two Lights
Once you’ve positioned your two lights, the real magic happens when you dial in your smartphone camera settings to work harmoniously with your artificial lighting setup. Think of this as teaching your phone’s camera brain to see the scene the way you want it captured.
Start by taking manual control of exposure. Most smartphone camera apps allow you to tap on your subject and then slide a finger up or down to adjust brightness. With two lights illuminated, tap directly on your subject’s face or the main focal point, then reduce the exposure slightly—about 10-20 percent darker than what looks correct on screen. This prevents the highlights from blowing out and gives your images that professional, slightly moody quality. Your lit areas will appear properly exposed while maintaining detail in the shadows.
White balance requires special attention when working with artificial lights. Auto white balance often struggles under mixed or continuous LED lighting, creating unwanted color casts. Switch to manual white balance mode and either select the appropriate preset (typically tungsten for warm lights or daylight for LED panels) or use a custom white balance by photographing a white card under your lighting setup. This ensures skin tones appear natural rather than overly orange or blue.
For focus, enable manual focus lock by tapping and holding your subject until you see the AE/AF Lock indicator. This prevents your camera from hunting for focus between shots, especially important when you’re shooting multiple frames in the same setup. If your phone offers it, use focus peaking—a feature that highlights in-focus areas with colored outlines—to ensure tack-sharp results every time.
Common Mistakes That Kill Your Two-Light Setup
Even experienced photographers stumble when first working with two lights. Let’s look at the mistakes that can derail your setup and, more importantly, how to fix them.
Mismatched color temperatures create an unsettling, amateurish look that screams “mistake” rather than “creative choice.” If you’re mixing a warm tungsten key light with a cool LED fill, your subject will have an orange cast on one side and blue on the other. The fix is simple: match your light temperatures or use gels to balance them. Most smartphone cameras can’t compensate for extreme color mismatches the way DSLRs can.
Too much fill light is perhaps the most common error. Remember, the fill light should be roughly half the intensity of your key light. When your fill is too bright, you flatten the image completely, losing all the dimensionality that made you use two lights in the first place. Your subject ends up looking like they’re standing in a fluorescent-lit office rather than a professionally lit environment. Pull that fill back or move it farther away until you see definition return to your subject’s features.
Harsh shadows often result from positioning lights too close or at extreme angles. If you’re seeing hard shadow edges that look like they were cut with scissors, you need to either soften your lights with diffusion material or move them farther from your subject. Small smartphone sensors are unforgiving with contrast ratios.
Overexposure happens when photographers forget that two lights produce cumulative brightness. Your phone’s metering system might struggle with the setup initially. Always check your histogram and dial down light intensity rather than relying solely on your screen, which can be deceiving in different ambient conditions.
The beauty of two-light photography is that it’s genuinely within reach for anyone with a smartphone and a willingness to experiment. You don’t need a professional studio or thousands of dollars in equipment to create images that stand out. Start simple—grab two affordable LED panels or even desk lamps with daylight bulbs, position one as your key light at a 45-degree angle, and add the second as fill to soften those shadows. That’s it. Your first setup doesn’t need to be perfect.
What matters most is getting hands-on experience. Try photographing a subject this week using just two lights. Move them around, adjust their intensity, observe how the light shapes your subject differently with each change. You’ll quickly develop an intuition for what works in various situations. The learning curve is surprisingly gentle, and the results can be transformative—suddenly your mobile photos have depth, dimension, and that polished quality you’ve been chasing. This week, commit to one evening with two lights and your smartphone. You’ll be amazed at what you create.