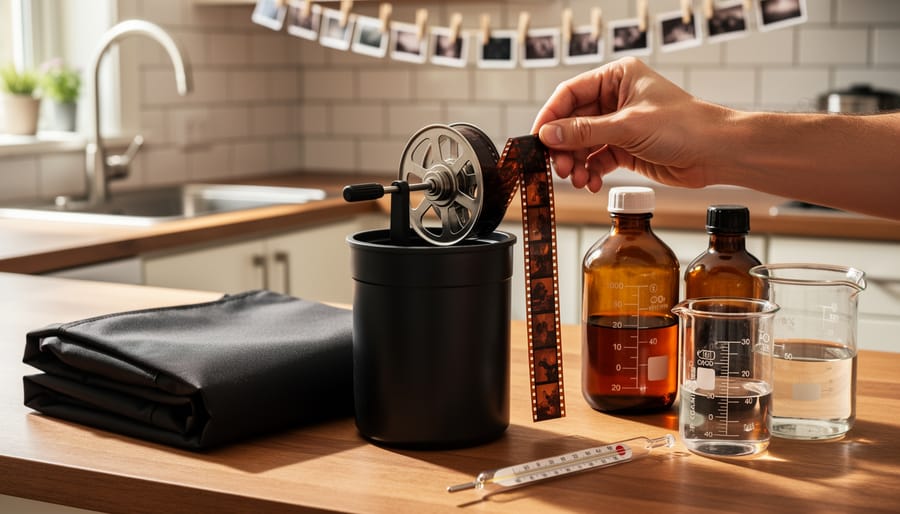
Developing film at home transforms your photography from a waiting game into an intimate, controlled craft. What once seemed like chemistry reserved for professionals now happens in spare bathrooms and kitchen corners worldwide, with photographers gaining complete creative control while saving money on lab fees.
The barrier to entry sits lower than most imagine. A basic black-and-white setup requires roughly $100-150 in initial investment: a developing tank, reels, measuring cylinders, thermometer, and chemistry. You don’t need a darkroom—just a changing bag for loading film onto reels in complete darkness, then normal room lighting for everything else. The entire process, from opening your film canister to hanging negatives to dry, takes about 30-45 minutes once you’ve practiced a few times.
The learning curve feels steep for exactly one reason: loading film onto developing reels in pitch darkness. This single skill frustrates beginners more than any other step, but it’s purely mechanical—your fingers learn the motion through repetition. Practice with sacrificial film in daylight first, then with eyes closed, before attempting it in a changing bag. Everything that follows involves simple mixing, pouring, and timing.
Home development offers tangible rewards beyond cost savings. You’ll see your images within the hour rather than waiting days for lab turnaround. You control contrast, grain, and tonality through temperature and agitation choices. Most compellingly, you’ll understand your negatives at a chemical level, making you a more intentional photographer from the moment you press the shutter.
What You’re Actually Getting Into: The Real Story Behind Home Developing
Let’s clear up some myths right away: developing film at home isn’t the complicated chemistry experiment you might imagine, nor is it particularly messy or dangerous. Think of it more like following a recipe than conducting laboratory research.
Here’s what you’re realistically committing to. Your first roll will take about an hour from start to finish, including setup and cleanup. By your fifth roll, you’ll have that down to 20-30 minutes. The actual developing process involves just three chemical baths and some water rinses—straightforward steps that become second nature quickly. Most beginners successfully develop their first roll, even if it’s not perfect.
The learning curve exists, but it’s gentle. You might see some uneven development or the occasional dust spot initially. These aren’t disasters—they’re part of learning. Within three to five rolls, you’ll develop a rhythm and consistency that rivals professional labs.
Let’s talk costs honestly. Your initial investment runs between 100 and 200 dollars for essential equipment and chemicals. After that, you’re looking at roughly 2 to 5 dollars per roll in chemistry costs, compared to 10 to 15 dollars at most labs. The break-even point hits around 15 to 20 rolls, which serious film shooters reach within months.
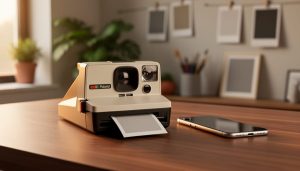
One crucial distinction: we’re discussing film developing here, not printing photographs. Developing produces negatives you can scan digitally. Printing requires building a darkroom and represents a separate investment entirely. Many home developers never print—they scan their negatives and work digitally from there.
Space requirements are minimal. A bathroom counter or kitchen table works perfectly. You don’t need dedicated space—just somewhere to work undisturbed for 30 minutes. The process isn’t messy if you’re reasonably careful, and modern developing chemicals are far safer than their historical counterparts.
The reality? Home developing is accessible, manageable, and genuinely satisfying. It demands attention to detail and consistency, not a chemistry degree.
The Essential Gear You Actually Need (And What You Can Skip)
The Non-Negotiables
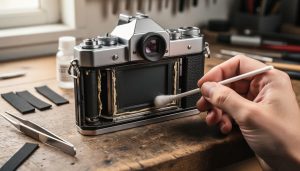
Before you dive into developing your first roll, let’s talk about the essential gear you absolutely need. The good news? This isn’t a massive investment, and you can start with quality equipment without breaking the bank.
First up is your developing tank and reels. This light-tight container is where the magic happens, allowing you to process film in normal room light after loading. The Paterson Universal Tank is the gold standard for beginners, running about $35-45 and accommodating multiple film formats. It comes with adjustable reels that work for both 35mm and 120 film. For a budget-friendly alternative, the AP Compact Tank performs admirably at around $25.
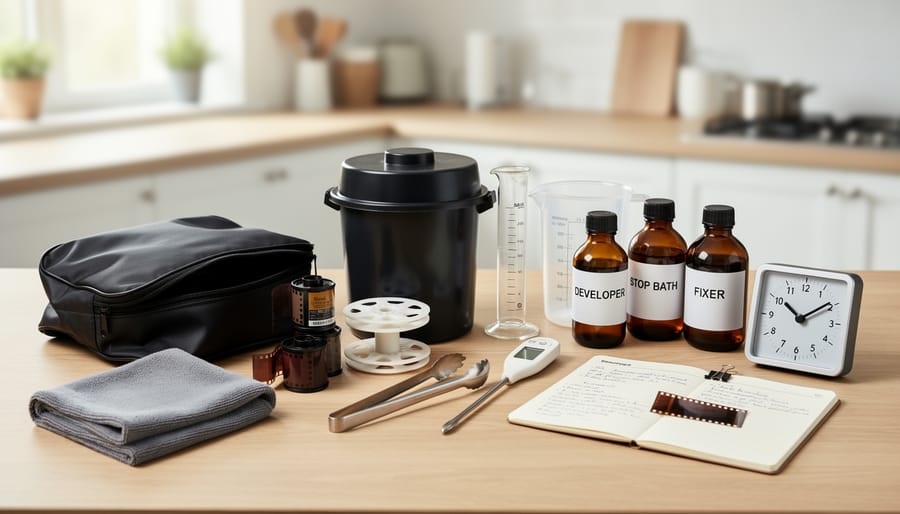
Next, you’ll need three core chemicals: developer (which reveals your latent image), stop bath (which halts development), and fixer (which makes your negatives permanent). A starter kit like the Ilford Simplicity pack costs roughly $25 and includes everything in easy-to-use portions. Alternatively, buying individual concentrates like Kodak D-76 developer ($8), Ilford Ilfostop ($7), and Kodak Fixer ($9) gives you more control and better value long-term.
Accurate measuring is crucial, so grab graduated cylinders or beakers. A set of three plastic graduates (100ml, 250ml, and 500ml) costs about $15 online. You’ll also need a reliable thermometer since temperature control matters significantly. A basic digital thermometer runs $8-12 and beats analog versions for accuracy.
Finally, unless you have a completely dark room, invest in a changing bag. This portable darkroom lets you load film onto reels anywhere. The Kaiser Universal Changing Bag (around $40) offers generous space for fumbling through your first loads without light leaks ruining your film.
Nice-to-Have Tools That Make Life Easier
Once you’ve got the basics down, certain tools can transform home developing from functional to genuinely enjoyable. These aren’t essential for your first few rolls, but they address common frustrations and often pay for themselves in time saved and consistency gained.
Film clips are usually your first worthwhile addition. Sure, you can hang film from clothespins or binder clips, but dedicated weighted clips prevent curling and make handling wet negatives dramatically easier. At around five to ten dollars, they’re worth buying after your first successful development session.
Temperature control becomes critical when you’re developing multiple rolls or working in extreme weather. A simple water bath—even a large bowl or small cooler filled with temperature-adjusted water—keeps your chemistry stable throughout the process. I learned this the hard way during a summer heat wave when my developer went from 68°F to 75°F mid-session, leaving me with unevenly developed negatives. For serious temperature precision, an immersion circulator borrowed from sous vide cooking maintains exact temperatures, though that’s definitely advanced territory.
Graduated cylinders marked in milliliters eliminate the guesswork from measuring small quantities of chemistry. Kitchen measuring cups work initially, but graduated cylinders give you the accuracy needed for consistent results, especially with concentrates. Expect to spend fifteen to twenty dollars for a basic set.
Photo-Flo or similar wetting agents prevent water spots during drying—those frustrating marks that appear just as you think you’re finished. A single bottle lasts years and costs under ten dollars, making it an easy early investment.
Quality storage bottles for mixed chemistry extend solution life and reduce waste. Amber glass or collapsible bottles minimize air exposure and light degradation. Consider these once you’re developing regularly enough that chemistry longevity matters to your budget.
Setting Up Your Home Developing Space
Good news: you probably need less space than you think. I’ve successfully developed film in tiny apartment bathrooms, kitchen counters after dinner, and even a corner of my laundry room. The footprint for the actual developing process is surprisingly modest—about the same as prepping a meal.
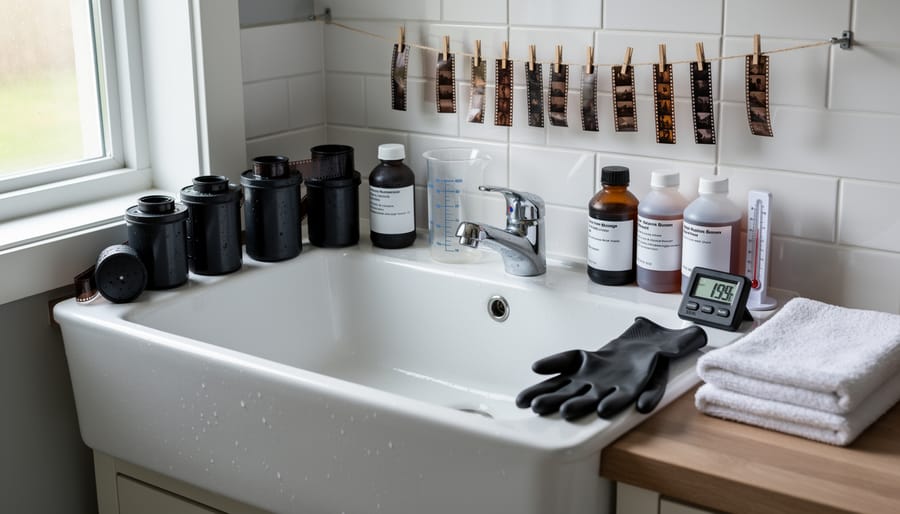
Your main requirements are access to running water, a reasonably flat surface, and the ability to control lighting. The bathroom is the classic choice for good reason. You can turn off the lights completely, the sink provides temperature-controlled water, and it’s already designed for easy cleanup. I’ve developed hundreds of rolls standing at my bathroom vanity, with chemicals lined up along the counter and my changing bag sitting on the closed toilet lid.
Kitchen sinks work equally well, especially if you can develop during evening hours when you won’t disrupt meal preparation. Just ensure you thoroughly clean surfaces afterward and never use photography chemicals near food preparation areas simultaneously. Some photographers dedicate a plastic tub or basin specifically for film work to maintain separation.
Temperature control matters more than space. Your developing chemicals need to stay around 68-70°F (20-21°C) for consistent results. A simple thermometer and either a warm water bath or ice bath lets you adjust as needed. In summer, I keep my chemicals in a cooler with ice packs; in winter, a sink filled with warm water does the trick.
Ventilation deserves attention without being paranoid about it. Open a window or turn on the bathroom fan when working with stop bath and fixer—they have that distinctive vinegar-like smell. The chemicals aren’t dangerous in small quantities, but fresh air keeps things comfortable.
Storage is straightforward: a dedicated cardboard box or small shelf holds bottles of chemistry, your tank, and accessories. Keep them away from light and temperature extremes. Unlike a full darkroom setup, film developing requires minimal permanent infrastructure. You can set up in fifteen minutes and pack away just as quickly, making it perfect for shared living spaces.
The Step-by-Step Process: From Exposed Roll to Finished Negatives
Preparing Your Workspace and Chemicals
Before you crack open that first film canister, take fifteen minutes to set everything up. This preparation step is what separates a calm, successful development session from a frantic scramble that can ruin your negatives.
Start by mixing your developer, stop bath, and fixer according to manufacturer instructions. If you’re using concentrate, measure carefully using graduated cylinders rather than eyeballing it. Even a 10% dilution error can affect your results. Many developers like HC-110 or Rodinal require dilution ratios like 1:31 or 1:50, which sounds complicated but simply means adding specific amounts of concentrate to water.
Temperature matters enormously. Most black and white developers work optimally at 68°F (20°C). Fill your kitchen sink with water at this temperature and place your chemical bottles in it while you prepare everything else. This water bath keeps chemicals stable throughout the process.
Lay out everything within arm’s reach: developing tank and reel, scissors, bottle opener, timer, thermometer, and a changing bag if you don’t have a darkroom. Having a written checklist prevents that sinking feeling of realizing you’re missing something critical halfway through. Real-world example: I once discovered my bottle opener was missing after I’d already loaded film in complete darkness. Don’t be that person.
Loading Film in Complete Darkness
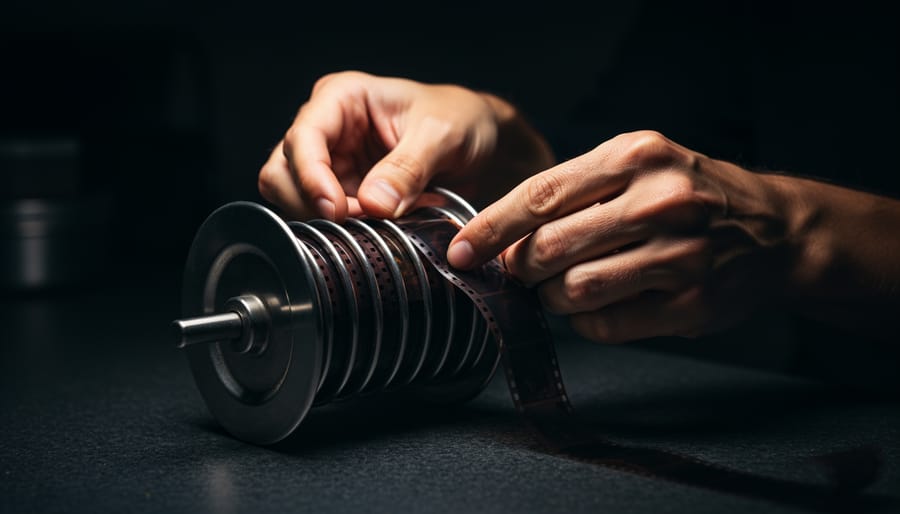
Let’s be honest: loading film onto a developing reel in pitch darkness is the step that stops many photographers from trying home development. The good news? It’s completely learnable, and with practice, you’ll wonder why it seemed so daunting.
Start by practicing in daylight with dummy film. Buy an old roll from a thrift store or use an already-developed roll you don’t mind sacrificing. Practice loading it onto your reels with your eyes open first, then with eyes closed. This muscle memory is everything. You’ll quickly learn how the film edges should feel as they enter the reel grooves, and what that satisfying click sounds like when the film catches properly.
For your workspace, you have two options: a dedicated darkroom or a changing bag. Changing bags are portable, affordable, and perfect for beginners, though they can feel cramped. Work on a clean, clutter-free table and arrange everything before inserting your hands: film, scissors, reel, and tank body.
Different formats require different approaches. 35mm film has sprocket holes and is generally easier to handle. Medium format (120) film has backing paper you’ll need to separate in darkness, and it’s wider, requiring careful alignment.
Common problems? If the film buckles or won’t advance on the reel, back it out slightly and try again. Don’t force it. Keep your hands dry, as moisture causes film to stick. Temperature matters too—cold film can be stiff and difficult to handle. If you’re struggling, let the film warm to room temperature first before attempting the load.
The Development Sequence
Once your film is loaded and your chemicals are at the right temperature, you’re ready for the magic to happen. The development sequence follows three main stages, each with a specific purpose and timing requirement.
Start with the developer, which typically takes 5-11 minutes depending on your film and developer combination. The developer’s job is to convert exposed silver halide crystals into visible metallic silver, creating your actual image. Pour it in quickly, start your timer immediately, and begin agitation. A standard pattern works well: invert the tank four times in the first 30 seconds, then repeat four inversions every 30 seconds thereafter. This keeps fresh developer moving across the film surface. Some photographers prefer gentler agitation, inverting twice per minute, which can reduce contrast slightly. Consistency matters more than the exact pattern you choose.
After draining the developer, pour in stop bath for 30-60 seconds with continuous agitation. This acidic solution halts the developing process instantly by neutralizing the alkaline developer. While some photographers use plain water, stop bath gives you precise control and protects your fixer from contamination.
The fixer comes next, typically running 5-10 minutes with similar agitation patterns. Fixer dissolves unexposed silver halides, making your negatives permanent and light-safe. Don’t rush this stage. Under-fixed negatives will gradually fog over time, ruining months of careful work.
Temperature maintenance throughout these stages is crucial. Even a few degrees of variation can significantly affect contrast and density. Keep that water bath handy, and check your thermometer between each step.
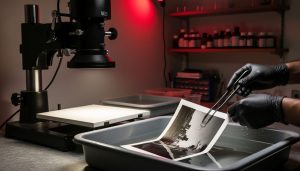
Washing and Drying Without Disaster
After fixing, your film needs a thorough wash to remove all chemical residue. This isn’t a quick rinse—residual fixer will degrade your negatives over time. Fill your tank with room temperature water, agitate for about 30 seconds, then dump it out. Repeat this process five to ten times, or use a constant water flow method for 10-15 minutes if your tank supports it. Some photographers use a hypo clearing agent between fixing and washing to reduce wash time and ensure complete removal of fixer.
Once washing is complete, add a few drops of photo-flo solution to your final rinse. This wetting agent breaks water’s surface tension, allowing it to sheet off evenly rather than forming droplets that leave spots on your negatives. Mix it according to package directions—more isn’t better here, as excess can actually create streaks.
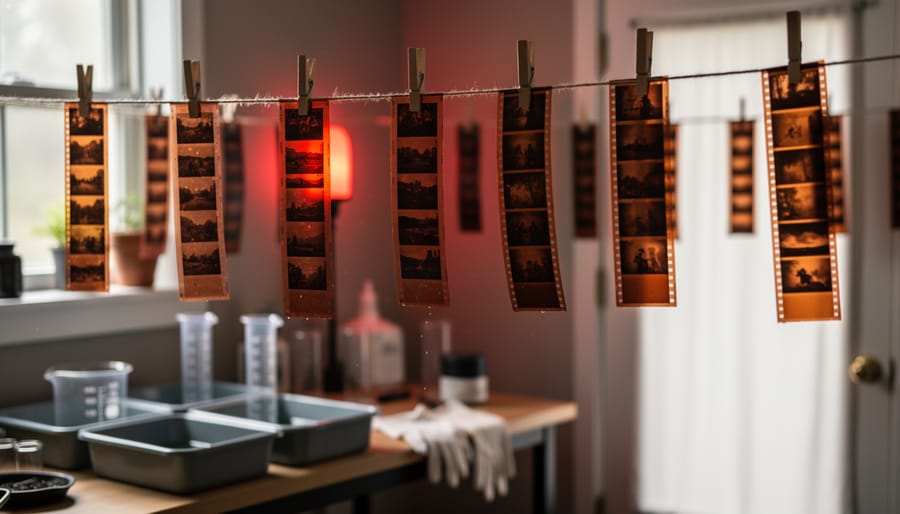
Now for the nerve-wracking part: hanging your film. Use film clips on both ends to keep it straight and prevent curling. Choose a dust-free location like a bathroom after running hot water to settle airborne particles. Avoid areas with forced air vents. Drying typically takes two to four hours depending on humidity. Resist touching the film during this time. Once completely dry, cut and sleeve your negatives for safe storage.
Black and White vs. Color: Which Should You Start With?
Here’s the truth that every film developer learns quickly: black and white is the forgiving friend who tolerates your mistakes, while color film is the demanding instructor who notices everything.
When you develop black and white film, you’re working with chemicals that remain stable across a surprisingly wide temperature range. If your developer sits at 68°F instead of the ideal 70°F, your negatives will still turn out fine with minor timing adjustments. The process uses three basic chemicals—developer, stop bath, and fixer—that are straightforward to mix and store. A complete B&W developing kit costs around $30-40 and can process 20-30 rolls of film.
Color C-41 development operates in an entirely different world. The chemistry demands precision within 0.5°F of the target temperature, typically 102°F. You’ll need a reliable way to maintain this heat throughout the process, whether that’s a sous vide setup, a water bath with constant monitoring, or a specialized warming device. The chemical kit itself is more expensive, starting around $50-60, and involves more components with shorter shelf lives once mixed.
This temperature sensitivity explains why roughly 90% of beginners start with black and white. You can develop B&W film in your kitchen sink without elaborate temperature control, learning the fundamental rhythm of agitation, timing, and handling before adding complexity.
Color becomes worth attempting once you’ve developed 10-15 rolls of B&W successfully and feel confident with your technique. At that point, investing in temperature control equipment makes sense, especially if you’re shooting color film regularly or interested in the color printing process. The cost per roll drops significantly compared to lab developing once you’re processing multiple rolls monthly.
Common Mistakes and How to Fix Them
Even experienced darkroom workers occasionally encounter issues, so don’t be discouraged if your first few rolls aren’t perfect. Understanding what went wrong helps you improve quickly.
Underdevelopment shows up as thin, pale negatives with low contrast. When you hold them up to light, you’ll barely see your images. This typically happens when development time is too short, chemicals are exhausted, or temperatures run too cold. For example, if you develop Ilford HP5 for only five minutes instead of the recommended nine, you’ll get weak negatives that produce muddy prints. The fix is straightforward: double-check your time-and-temperature charts, use fresh chemistry, and invest in a reliable thermometer. If you accidentally underdevelop a roll, remember that modern scanning software can sometimes salvage usable images, though they’ll lack the tonal range of properly developed negatives.
Overdevelopment creates the opposite problem: dense, dark negatives with blocked highlights and excessive grain. Your images will look harshly contrasty with blown-out bright areas. This occurs when you develop too long or at temperatures above the recommended range. I’ve seen photographers leave film in developer while answering the phone, returning to find their negatives nearly opaque. Prevention is simple—set a timer and don’t deviate from it. Modern smartphone timers work perfectly for this purpose.
Loading problems create distinctive patterns. If your reel doesn’t load properly, you’ll see overlapping sections where film touches itself, resulting in underdeveloped bands across frames. Practice loading with a sacrificial roll of film in daylight until the motion becomes second nature. The tactile feedback differs between brands of reels, so stick with one type initially.
Water spots appear as circular marks on dried negatives, caused by minerals in tap water. After your final rinse, use distilled water with a drop of wetting agent like Kodak Photo-Flo, then hang film to dry in a dust-free environment. Wipe gently with squeegee tongs if needed.
Fogging manifests as overall haziness or light streaks and usually indicates light leaks. Check that your changing bag seals completely and that you’re loading film in total darkness. Even a briefly opened tank lid during development causes distinctive fog patterns along film edges.
The Real Cost Breakdown: When Home Developing Pays Off
Let’s talk numbers, because that’s what really matters when you’re deciding whether to set up a home darkroom. The initial investment might seem steep, but the math tells an interesting story.
Your starter kit will run between $150-$300 for the essentials: developing tank and reels ($40-$60), a few bottles of chemistry ($30-$50), accurate thermometer ($15-$25), changing bag ($25-$40), and basic supplies like graduates, clips, and bottles. This covers black and white development. If you’re shooting color, add another $50-$100 for different chemistry and a more precise temperature control method.
Now here’s where it gets interesting. Professional lab services typically charge $12-$18 per roll for black and white, and $15-$25 for color. When you develop at home, your per-roll cost drops dramatically to roughly $1-$3 for black and white, and $4-$7 for color, depending on how efficiently you use your chemistry.
The break-even point? If you’re shooting two rolls per month, you’ll recover your initial investment in about 6-12 months. Shoot weekly, and you’re looking at breaking even within 2-4 months. San Francisco-based photographer Michael Chen shared his experience: “I was shooting four rolls monthly and spending nearly $300 yearly on lab fees. After my initial $250 setup, I broke even in three months and have saved over $800 in the past year alone.”
The equation changes based on your shooting frequency. If you only shoot occasionally, maybe five rolls per year, lab services make more financial sense. But for anyone shooting regularly, the economics favor home developing quite convincingly, with ongoing savings accumulating month after month.
Developing film at home offers benefits that extend far beyond the money you’ll save. Yes, the cost advantages are real, but the creative control and deeper understanding of the photographic process are what truly transform your relationship with film photography. When you see that first image appear in the developing tank, you’ll understand the chemistry and craft in a way no article or video can teach.
The best advice? Start this weekend. Grab a cheap roll of film—maybe an expired roll from a discount bin—and use it as your practice run. If you’re nervous, shoot it deliberately as a test roll: photograph mundane subjects, experiment with exposures, and give yourself permission to mess up. Those imperfect negatives will teach you more than a dozen perfectly developed rolls from a lab ever could. You’ll learn to read your mistakes, adjust your technique, and build genuine confidence.
Once you’re comfortable with black and white development, you might explore RA-4 color printing or color film development. Remember, every experienced home developer started exactly where you are now—uncertain but curious. Stop overthinking it and develop that next roll yourself.