
Transform raw footage into cinematic masterpieces through the art of video post-production – where technical precision meets creative vision. In today’s digital age, the difference between amateur content and professional-grade videos often lies not in the camera used, but in the meticulous post-production process that follows.
From color grading that evokes specific emotional responses to seamless audio mixing that immerses viewers in your story, post-production is where the magic of filmmaking truly comes alive. Industry veterans know that up to 70% of a video’s impact is crafted during this crucial phase, where every cut, transition, and effect works together to create a compelling narrative.
Whether you’re editing a short film, commercial content, or a feature-length documentary, mastering post-production workflows elevates your storytelling capabilities to new heights. Modern post-production combines traditional editing principles with cutting-edge digital tools, enabling creators to achieve Hollywood-quality results even with modest budgets.
This comprehensive guide explores the essential techniques, industry-standard software, and professional workflows that transform raw footage into polished, broadcast-ready content. From basic editing techniques to advanced color correction and sound design, we’ll dive deep into the tools and methods that define contemporary video post-production.
Essential Post-Production Workflow Steps
File Organization and Media Management
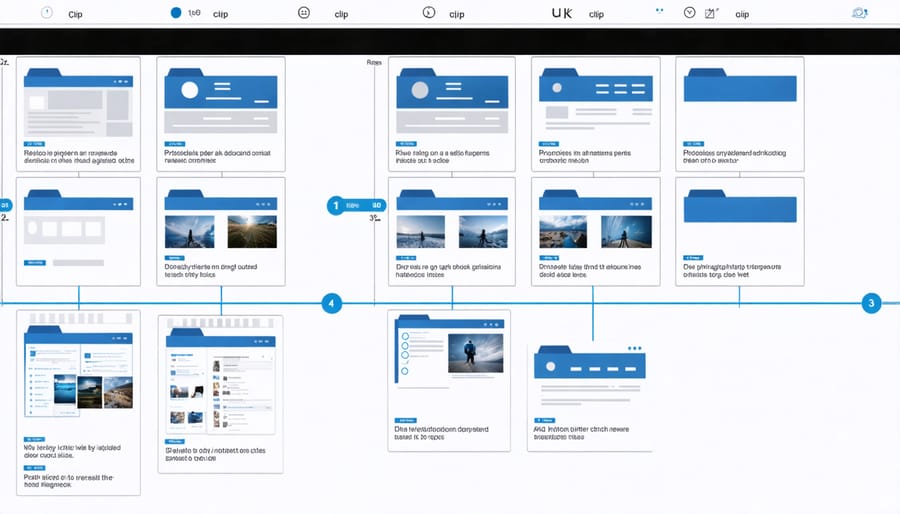
Proper file organization is the foundation of a smooth post-production workflow. Start by creating a clear folder structure for each project, with separate directories for raw footage, audio files, graphics, and project files. Name your files consistently and descriptively, including relevant details like scene numbers, take numbers, and dates.
Implement a robust backup system using the 3-2-1 rule: maintain three copies of your files, store them on at least two different types of media, and keep one copy off-site. External hard drives, cloud storage, and RAID systems are essential tools for protecting your work.
When managing project files, create a new version each time you make significant changes, using incremental numbering (e.g., ProjectName_v1, ProjectName_v2). This practice allows you to backtrack if needed and prevents file corruption issues.
Consider using media management software to catalog your footage and create proxy files for smoother editing on less powerful computers. Keep your project files clean by regularly clearing cache files and removing unused media to optimize performance and storage space.
Remember to archive completed projects systematically, documenting key information about codecs, effects, and plugins used for future reference.
Initial Assembly and Rough Cut
The initial assembly phase is where your raw footage begins to take shape into a coherent story. Start by organizing your clips according to your pre-production storyboarding sequence, which serves as your roadmap throughout the editing process. Import your selected footage into your editing software and create a rough timeline that follows your planned narrative structure.
Begin with larger cuts, focusing on getting the basic sequence and pacing right rather than perfecting individual transitions. This is often called the “paper edit” stage, where you’re essentially sketching out your story in video form. Place your strongest clips first – typically your establishing shots and key moments – then fill in the gaps with supporting footage.
Don’t get too caught up in precision at this stage; the goal is to create a workable foundation that you can refine later. Keep your edit relatively loose, maintaining slightly longer clips than you might want in the final cut. This gives you more flexibility for fine-tuning timing and pacing in later stages. Remember to save multiple versions of your rough cut – you might want to return to earlier decisions as the edit evolves.
Color Grading Magic
Basic Color Correction
Basic color correction forms the foundation of any professional video post-production workflow. Think of it as building a house – you need a solid foundation before adding the decorative elements. Starting with exposure adjustment, you’ll want to ensure your footage has proper brightness levels, making sure no important details are lost in the shadows or highlights.
White balance correction is crucial for maintaining color accuracy and consistency throughout your footage. This step involves adjusting the overall color temperature to ensure whites appear truly white, not yellowish or bluish. Many editors begin with this adjustment as it affects all other color decisions downstream.
When working with contrast, focus on creating a balanced image that maintains detail in both bright and dark areas. Modern editing software offers powerful tools like waveform monitors and histogram displays to help you make precise adjustments. Following a DaVinci Resolve color workflow can help streamline this process, especially when dealing with multiple clips that need to match.
Remember to pay special attention to skin tones during basic correction – they’re often the most noticeable element in your footage and viewers are particularly sensitive to unnatural-looking skin. Use scopes to ensure skin tones fall along the vectorscope’s skin tone line.
Start with subtle adjustments rather than dramatic ones. It’s easier to build upon a well-balanced image than to correct overcorrected footage. Keep in mind that basic color correction should make your footage look natural and properly exposed, setting the stage for more creative color grading decisions later in your workflow.
Creative Color Grading
Color grading is where the true magic of post-production comes alive, transforming ordinary footage into visually compelling narratives. By mastering cinematic color grading techniques, you can create distinct moods that enhance your storytelling.
Start by establishing a base grade that corrects exposure and white balance. From there, explore creative options like split-toning, where you apply different colors to highlights and shadows. For instance, adding subtle blue tones to shadows while warming up highlights can create depth and dimension that draws viewers into your scene.
The power of cinematic color effects lies in their ability to evoke specific emotions. Cool, desaturated tones can enhance melancholic scenes, while rich, warm grades can convey happiness or nostalgia. Consider using RGB curves to fine-tune individual color channels, allowing for precise control over your image’s emotional impact.
LUTs (Look-Up Tables) can serve as excellent starting points, but don’t rely on them exclusively. Instead, use them as inspiration while developing your unique style. Pay attention to skin tones – they should always look natural, even in stylized grades. Work with scopes (waveform, vectorscope, and histogram) to ensure your adjustments maintain proper exposure and color balance.
Remember that successful color grading isn’t about applying dramatic effects indiscriminately. It’s about making intentional choices that support your story’s mood and theme while maintaining consistency throughout your project. Start subtle and build up gradually until you achieve the perfect balance between style and substance.

Audio Enhancement Techniques
Sound Mixing and Balancing
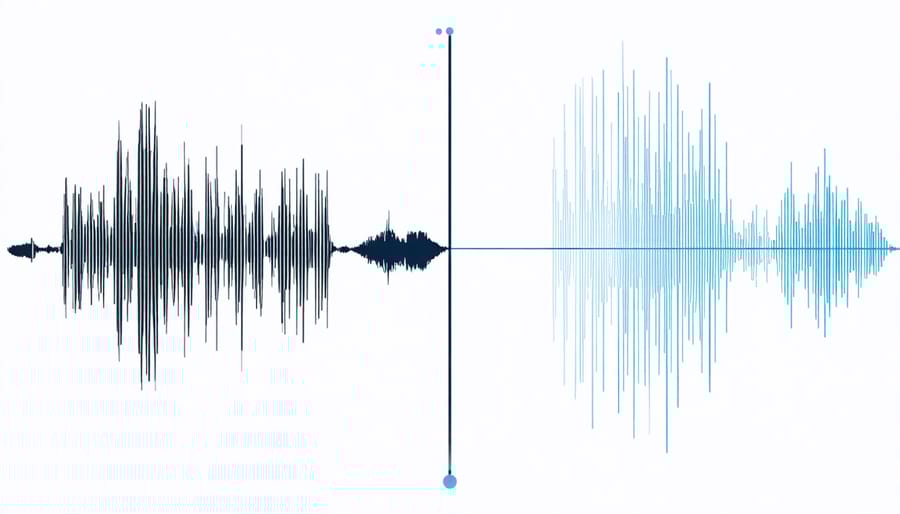
Sound mixing and balancing is a crucial step in video post-production that can make or break your final product. Creating engaging professional sound design requires careful attention to three main elements: dialogue, music, and sound effects.
Start by establishing proper dialogue levels as your baseline. Clean up any background noise using noise reduction tools, and ensure speech is clear and consistent throughout. A useful technique is to keep dialogue centered around -12dB to -15dB, allowing enough headroom for other audio elements.
When adding music, layer it beneath the dialogue, typically between -18dB to -24dB. This creates an emotional backdrop without overwhelming the spoken word. Use automation curves to duck the music during important dialogue moments, creating natural-sounding transitions.
Sound effects should be balanced according to their importance and realism. Ambient sounds like room tone or outdoor atmospherics should sit around -24dB to -30dB, while impact sounds or specific effects might peak closer to dialogue levels. Pay special attention to stereo positioning – background sounds can be panned to create depth, while crucial sound effects should generally stay centered.
Remember to use reference monitoring and check your mix on different speaker systems. A well-balanced mix should translate across various playback devices, from theater speakers to mobile phones, while maintaining clarity and impact throughout.
Audio Clean-up and Enhancement
Clear, professional-quality audio is crucial for any cinematic video production. Even the most visually stunning footage can be undermined by poor audio quality, which is why audio clean-up and enhancement is a vital step in post-production.
Start by removing unwanted background noise using noise reduction tools available in your editing software. These tools analyze and isolate consistent background sounds like air conditioning hum, wind noise, or electrical interference. Apply the noise reduction carefully to avoid creating artificial-sounding audio artifacts.
EQ (equalization) adjustment is your next powerful tool. Use it to enhance dialogue clarity by boosting frequencies around 2-4kHz while cutting problematic frequencies that might cause muddiness in the 200-400Hz range. For music and ambient sounds, careful EQ can help them sit better in the mix without competing with dialogue.
Compression helps control dynamic range, making quiet sounds louder and loud sounds softer for a more balanced audio experience. Apply compression subtly – too much can make your audio sound unnatural and fatiguing.
Finally, consider using audio restoration tools for specific problems. De-essing can tame harsh sibilance in dialogue, while de-clicking tools can remove unwanted pops and clicks. For location audio, reverb reduction can help minimize room echo that might detract from the clarity of your sound.
Remember to always maintain a backup of your original audio files before making any permanent changes. It’s also good practice to use reference monitors or high-quality headphones when doing detailed audio work.
Visual Effects and Motion Graphics
Basic Visual Effects
Basic visual effects form the foundation of video post-production, helping to enhance footage quality and create a more polished final product. Color correction is typically the first step, where you adjust the exposure, contrast, and white balance to ensure consistent lighting throughout your scenes. This is followed by color grading, which involves creating a specific mood or aesthetic through carefully crafted color schemes.
Another essential effect is stabilization, which smooths out shaky footage by tracking and compensating for camera movement. While it’s always better to shoot stable footage initially, post-production stabilization can save otherwise unusable shots.
Transitions are crucial for maintaining visual flow between scenes. While simple cuts work well, effects like cross-dissolves, fades, and wipes can add professional polish when used appropriately. Just remember that subtle transitions often work better than flashy ones.
Basic compositing techniques, such as removing unwanted objects or adding simple overlays, can dramatically improve your footage. This might involve using masks to isolate specific areas or applying basic green screen effects to change backgrounds.
Speed adjustments, including slow motion and time-lapses, can add dramatic effect when used thoughtfully. Modern editing software makes it easy to manipulate playback speed while maintaining smooth motion, especially if your footage was shot at a high frame rate.
These fundamental effects, when applied with restraint and purpose, can transform raw footage into compelling visual stories without appearing overly processed or artificial.
Text and Graphics Integration
Text and graphics integration is where your video truly starts to come alive with professional polish. Modern post-production software offers powerful tools for adding titles, lower thirds, and motion graphics that can enhance your storytelling without overwhelming the viewer.
When adding titles, consider using clean, readable fonts that match your video’s tone. For cinematic work, sans-serif fonts like Helvetica or Gotham are popular choices, while more artistic projects might benefit from carefully selected decorative fonts. Always ensure your text has enough contrast against the background, using drop shadows or subtle glows when necessary.
Motion graphics should complement your footage rather than compete with it. Start with simple animations – subtle fade-ins and slide transitions often look more professional than complex effects. When creating lower thirds (the identifying text typically placed in the bottom third of the screen), maintain consistent positioning and styling throughout your project.
For graphic elements, work with vector-based designs when possible, as they scale without losing quality. Many editors use pre-made templates as starting points, customizing colors and animations to match their project’s aesthetic. Remember to maintain adequate spacing between graphic elements and keep them within the “safe zones” of your frame to ensure visibility across different viewing platforms.
Layer your graphics thoughtfully, considering timing and duration. A good rule of thumb is to give viewers enough time to read text comfortably without letting it linger too long on screen.
Final Output and Delivery
Export Settings and Formats
Choosing the right export settings is crucial for ensuring your video looks its best across different platforms while maintaining manageable file sizes. For web delivery on platforms like YouTube and Vimeo, H.264 compression with a bitrate between 15-50 Mbps typically offers an excellent balance between quality and file size. For 4K content, consider using H.265 (HEVC) encoding, which provides better compression while maintaining high quality.
When exporting for social media, pay attention to platform-specific requirements. Instagram prefers square (1:1) or vertical (9:16) formats, while YouTube and most other platforms work best with 16:9 aspect ratios. Facebook recommends H.264 video with AAC audio, keeping file sizes under 10GB.
For broadcast or client delivery, you’ll want to maintain the highest possible quality. ProRes 422 or DNxHD codecs are industry standards, though they result in larger file sizes. When delivering to clients, consider providing both high-quality master files and compressed versions for easy viewing.
Frame rates should match your source footage – typically 24fps for cinematic content, 25fps for PAL regions, or 30fps for standard video. For slow-motion footage, ensure your export settings preserve the frame rate you shot in. Always export audio at 48kHz sample rate for professional work, and consider stereo vs. surround sound requirements for your delivery platform.
Remember to test your export settings with a short clip before committing to a full-length render, saving valuable time in the long run.
Quality Control and Review
Quality control is the final gatekeeper between your project and your audience, making it a crucial step that shouldn’t be rushed. Start by reviewing your entire video at full resolution, checking for both technical and creative elements. Pay special attention to color consistency between scenes, audio levels that remain balanced throughout, and smooth transitions between cuts.
Create a systematic checklist that includes common issues like dead pixels, frame drops, or audio sync problems. Watch your video on different devices and screen sizes to ensure your content looks good across various platforms. Pay particular attention to how your video appears on mobile devices, as they’re increasingly becoming the primary viewing method for many audiences.
Export a test render and review it thoroughly before creating your final file. Look for artifacts, particularly in areas with high contrast or rapid movement. Check that your titles and graphics are legible and properly positioned, with no elements being cut off at the edges of the frame.
Audio requires special attention during the final review. Listen through quality headphones and studio monitors to catch any inconsistencies, background noise, or mixing issues. Ensure your audio peaks don’t exceed industry-standard levels (-6dB for dialogue, -3dB for music).
Finally, verify that your export settings match your delivery requirements, including proper codec selection, frame rate, and resolution. Many distribution platforms have specific technical requirements, so double-check these before rendering your final version.
Video post-production is a transformative journey that can turn ordinary footage into compelling cinematic stories. Throughout this guide, we’ve explored the essential elements that make up professional post-production workflow, from organizing your footage and color grading to sound design and final delivery formats.
Remember that mastering these techniques takes time and practice. Start with the basics – establishing a solid workflow and organizing your footage efficiently. As you become more comfortable, experiment with advanced color grading techniques and dive deeper into sound design. Don’t be afraid to try new approaches and develop your unique style.
Keep in mind that technical excellence should always serve the story you’re trying to tell. Every edit, color adjustment, and sound effect should contribute to your narrative’s emotional impact. Stay current with industry trends and software updates, but don’t feel pressured to use every new technique in every project.
Whether you’re editing your first vlog or working on a professional documentary, the principles we’ve covered will help you create more polished, engaging content. Start implementing these techniques in your next project, and you’ll see your work transform into more professional, cinematic productions.