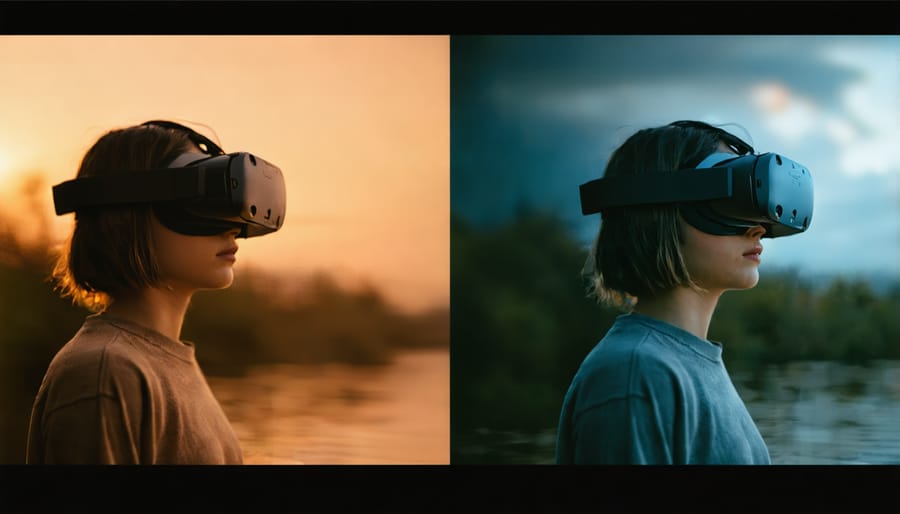
Close one eye, then the other, and notice how the scene shifts slightly—that subtle difference is the foundation of stereoscopic viewing, the technology that transforms flat VR photographs into immersive three-dimensional experiences. Your brain naturally performs this magic every waking moment, merging two slightly offset images from your eyes into a single perception with depth. VR photography harnesses this biological marvel by capturing and presenting two separate images, one for each eye, mimicking your natural vision with precise mathematical accuracy.
**Understanding stereoscopic viewing revolutionizes how you approach VR photography.** When you grasp that your viewer’s brain will fuse left and right images based on corresponding points, you’ll instinctively compose shots with proper interaxial distance—the spacing between your camera lenses. Position this distance too wide, and viewers experience uncomfortable “hyperstereo” that makes scenes look miniaturized. Set it too narrow, and depth collapses into a disappointing flatness. The sweet spot typically ranges from 63 to 65 millimeters, matching average human eye separation.
The viewing experience depends equally on your capture technique and your audience’s display technology. Whether viewers experience your work through a Meta Quest headset, Google Cardboard, or a desktop monitor affects convergence points and comfortable viewing angles. Master these principles, and you’ll create stereoscopic images that feel natural rather than gimmicky—photographs where depth enhances storytelling instead of overwhelming it, where viewers forget they’re wearing a headset and simply inhabit your captured moment.
What Stereoscopic Viewing Actually Means for VR Photography
Close one eye and try to thread a needle, or catch a ball someone tosses your way. Suddenly, what seems effortless becomes surprisingly difficult. That simple experiment reveals why stereoscopic viewing is so crucial to VR photography—our depth perception relies fundamentally on having two eyes working together.
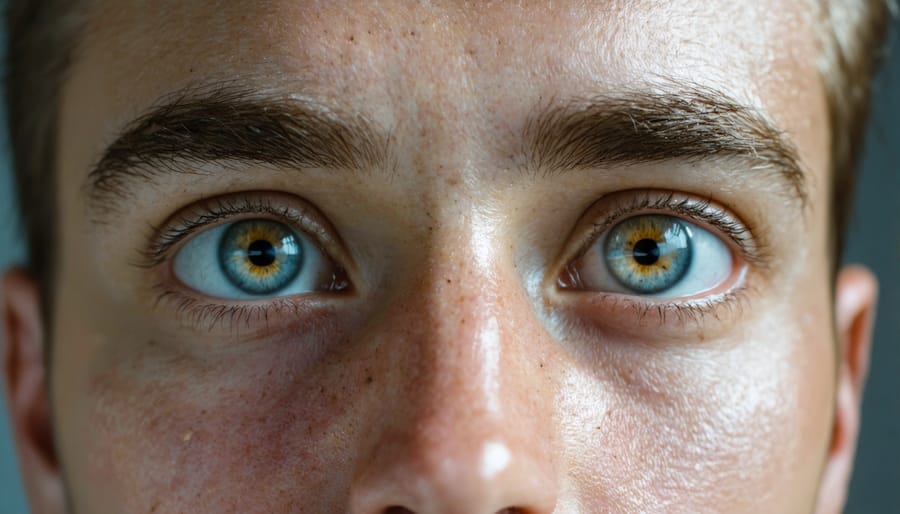
Your eyes are spaced roughly 2.5 inches apart, which means each eye sees the world from a slightly different perspective. This separation creates what’s called binocular disparity or parallax—the difference between the two views. Hold your finger close to your face and alternate closing each eye. Notice how your finger appears to “jump” against the background? That’s parallax in action. Your brain constantly receives these two slightly offset images and processes them into a single three-dimensional understanding of space.
This biological process is remarkably sophisticated. Your visual cortex compares the images from both eyes, analyzing the differences to calculate distances. Objects closer to you show greater disparity between the two views, while distant objects show minimal difference. This parallax gradient is what allows you to judge whether something is an arm’s length away or across the street.
Stereoscopic VR photography mimics this natural system by capturing two images from slightly separated positions—just like your eyes do. When you view these images through a VR headset, each eye sees only the image meant for it, recreating that critical parallax effect. Your brain processes these paired images exactly as it would process real-world visual information, generating the compelling illusion of three-dimensional depth and spatial presence.
This is fundamentally different from traditional 3D photography techniques where viewers simply see flat representations of depth cues like perspective or lighting. With proper stereoscopic viewing, you’re not looking at a picture of a scene—you’re experiencing spatial relationships as if you were physically present.
The magic happens because stereoscopic viewing taps directly into your brain’s hardwired depth perception mechanisms. When executed correctly, the effect is immediate and intuitive, requiring no conscious effort to “see” the three-dimensionality. Your visual system simply does what it’s always done—interpret binocular input as spatial reality.
How Your Brain Turns Two Images Into One 3D Scene
The Sweet Spot: Getting IPD Settings Right
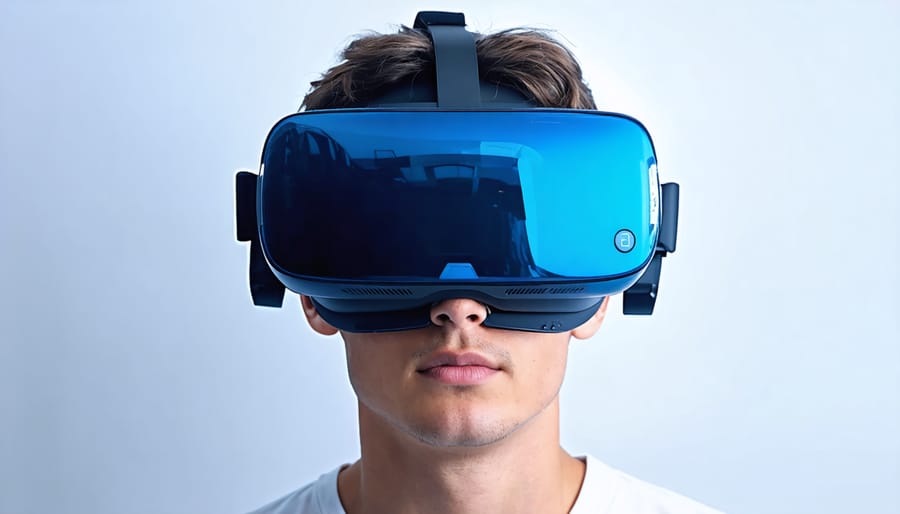
Getting your interpupillary distance (IPD) setting correct is perhaps the single most important adjustment you’ll make for comfortable stereoscopic viewing. Think of it like focusing binoculars—when everything clicks into place, the magic happens.
IPD is simply the distance between the centers of your pupils, typically ranging from 54mm to 74mm in adults, with most people falling around 63mm. Your VR headset needs to match this precisely to align each lens with your eye’s optical center. When properly adjusted, the stereoscopic image snaps into crisp, comfortable focus with natural depth. When it’s off, even by a few millimeters, you’ll notice the consequences quickly.
Incorrect IPD settings create two main problems. First, you’ll experience eye strain and headaches as your eyes work overtime trying to compensate for the misalignment. It’s similar to wearing someone else’s prescription glasses—your visual system fights against the optics. Second, the 3D effect becomes compromised. Images may appear flattened, doubled, or have an unnatural “cardboard cutout” quality where depth layers seem stacked rather than smoothly continuous.
Most modern headsets offer either mechanical IPD adjustment (physical lens movement) or software compensation. Mechanical adjustment is preferable for optimal results. To find your perfect setting, start at the middle position and adjust while viewing high-contrast content with clear depth. You’re looking for maximum sharpness and that moment when the stereoscopic image feels effortlessly three-dimensional. Many people find measuring their actual IPD with a ruler and mirror at home gives them an excellent starting point for headset adjustment.
Common Viewing Problems and Quick Fixes
Even with perfectly captured stereoscopic images, viewing problems can diminish the immersive experience. Let’s troubleshoot the most common issues you’ll encounter.
**Ghosting** appears as faint duplicate images bleeding between your left and right eyes. This typically happens with passive 3D displays when you’re not sitting at the optimal viewing angle, or when using red-cyan anaglyph glasses with color-heavy images. Quick fix: Adjust your head position to be perpendicular to the screen, or if you’re sharing stereoscopic pairs online, reduce color saturation in post-processing to minimize crosstalk.
**Double vision** means you’re seeing two distinct images rather than one fused 3D scene. This often results from excessive stereo separation during capture. The solution is reducing the interaxial distance between your camera positions—a good rule of thumb is keeping separation at about 1/30th of the distance to your nearest subject.
**Eye fatigue** strikes when your eyes struggle to converge properly. If viewers complain of headaches after just minutes, your convergence point might be too close or too far. Try adjusting the zero-parallax point in post-production, bringing it to about mid-depth in your scene rather than at extreme foreground or background elements.
The **cardboard cutout effect** makes subjects look flat against layered backgrounds rather than naturally three-dimensional. This happens when capturing subjects too close with insufficient depth. Increase your shooting distance and ensure adequate depth variation within your frame to create gradual depth transitions that feel natural.
Stereoscopic Viewing Methods: From Headsets to Browser-Based Solutions
Premium VR Headsets: The Gold Standard Experience
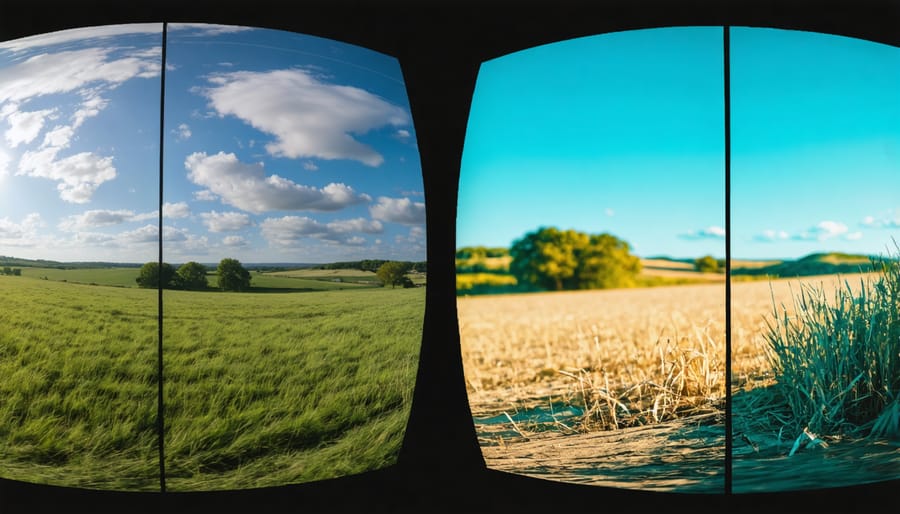
Premium VR headsets represent the pinnacle of stereoscopic viewing technology, delivering an experience that’s remarkably close to natural human vision. Devices like the Meta Quest 3, PlayStation VR2, and PC-based systems such as the Valve Index offer resolution approaching 2K per eye, wide fields of view exceeding 100 degrees, and refresh rates that eliminate motion blur.
What sets these headsets apart is their ability to render the subtle depth cues that make stereoscopic images truly convincing. The high pixel density means you can appreciate fine details captured by 4K 360 cameras, while the generous field of view creates that immersive “presence” photographers strive for. Advanced optics minimize the “screen door effect” that plagued earlier headsets, letting you focus on the scene rather than individual pixels.
For photographers evaluating their work, premium headsets reveal depth relationships that simply don’t translate to flat screens. You’ll notice how foreground elements separate from backgrounds, whether parallax issues exist in your stitching, and how effectively your stereo base creates comfortable depth. While these systems require investment—typically $400-$1000—they’re essential tools for anyone serious about creating compelling stereoscopic content.
Mobile and Accessible Viewing Options
You don’t need to break the bank to experience stereoscopic VR photography. Google Cardboard and similar fold-out viewers transform your smartphone into a surprisingly effective stereo viewer for just a few dollars. These simple devices use inexpensive lenses to separate the left and right images displayed on your phone screen, creating that magical depth effect we’re after.
For a more polished experience, dedicated mobile apps like VeeR VR and YouTube’s VR mode let you view stereoscopic content with or without a headset. Many of these apps support side-by-side and over-under formats, automatically adjusting the display for your viewing method. The beauty here is accessibility—anyone with a smartphone can start exploring stereoscopic photography immediately.
Web-based viewers have also evolved considerably. Platforms like Kuula and momento360 allow you to share stereoscopic panoramas that viewers can experience directly in their browsers, no special equipment required. While the depth effect is most pronounced with a headset, even viewing these images on a standard screen provides an impressive sense of scale and dimension.
The real game-changer? These accessible options let you share your stereoscopic work with audiences who might never own high-end VR equipment, dramatically expanding who can appreciate your creative vision.
What Photographers Need to Know About the Viewing Experience
Every decision you make behind the camera shapes what your viewer experiences in the headset. Think of stereoscopic photography as a conversation between your shooting choices and their visual perception—understanding this connection is essential for creating compelling VR images.
**Interaxial Distance: The Foundation of Depth**
The distance between your camera lenses (interaxial distance) directly controls how “deep” your scene feels. Most VR cameras default to 65mm—the average human interpupillary distance—but this isn’t always ideal. Shoot a close portrait at 65mm, and your subject might appear uncomfortably giant in the headset. Reduce that distance to 40mm for intimate scenes, or increase it to 100mm for epic landscapes where you want to emphasize vast scale. The rule of thumb: your nearest subject should be at least 25 times your interaxial distance to avoid eye strain.
**Managing Your Depth Budget**
Here’s something most photographers learn the hard way: viewers can only comfortably process about 30 degrees of perceived depth in front of and behind the convergence point. This “depth budget” means you can’t have razor-sharp objects both inches from the viewer’s face and miles in the distance without causing discomfort. Professional VR camera techniques emphasize planning your depth zones during capture, not trying to fix issues in post-production.
**The Comfort Zone Concept**
Viewers experience three depth zones: negative space (objects appearing to float in front of the screen), the convergence plane (where left and right images align), and positive space (receding into the distance). Most comfortable viewing happens when critical subjects sit near the convergence plane, with depth effects used for enhancement rather than shock value. Apply VR composition principles to place your main subject in this sweet spot.
**Anticipating the Experience**
Always preview your work in an actual headset before finalizing. What looks acceptable on a flat monitor often reveals problems in stereoscopic viewing—excessive parallax, misalignment, or uncomfortable depth transitions become immediately obvious. Consider your viewer’s likely viewing duration too. Images meant for quick browsing can handle more aggressive depth effects than content designed for extended contemplation, where comfort becomes paramount.
Testing Your Stereoscopic Images: A Practical Workflow
Creating stereoscopic images is only half the battle—you need to evaluate your work properly to understand what’s working and what needs adjustment. Developing a systematic testing workflow will dramatically improve your capture technique over time.
Start with the simplest method: cross-eyed or parallel viewing of side-by-side images on your computer monitor. While this takes practice, it’s the fastest way to check alignment and depth issues immediately after shooting. Look for ghosting around edges, excessive depth that causes eye strain, or misalignment between the two images. If you can’t quite get the hang of freeviewing, don’t worry—there are other options.
Next, generate an anaglyph preview using free software like StereoPhoto Maker. Those classic red-cyan 3D glasses cost just a few dollars and provide an immediate sense of your image’s depth structure. While anaglyphs sacrifice color accuracy, they’re excellent for spotting vertical misalignment (a critical error in stereoscopic work) and evaluating whether your depth budget feels comfortable.
For side-by-side comparisons, display both images on your monitor and examine them critically. Are the subjects at similar brightness levels? Is the horizon aligned? Small discrepancies that seem minor in 2D become glaring problems in stereoscopic viewing.
Finally, test in your target viewing platform—whether that’s a VR headset, 3D TV, or viewer like the Oculus Quest or Vision Pro. This is non-negotiable. What looks acceptable in anaglyph might reveal uncomfortable convergence issues in a headset. Pay attention to your own physical response: do your eyes strain? Does your head hurt after thirty seconds? These warning signs indicate technical problems you need to address.
Make notes after each viewing session about what worked and what didn’t. This feedback loop between viewing and shooting is how you’ll develop an intuitive sense for stereoscopic composition in the field.
Sharing Stereoscopic Work: Platforms and Considerations
Creating stunning stereoscopic images means little if your audience can’t experience them properly. Fortunately, several platforms cater specifically to VR content, though each has its quirks.
**Facebook 360** remains one of the most accessible options, supporting both 360-degree and 180-degree stereoscopic photos. Upload your images as equirectangular JPEGs with proper XMP metadata embedded—this tells Facebook’s system to enable VR mode. The platform automatically detects stereo pairs when formatted correctly, allowing viewers to experience depth through VR headsets or by moving their phones.
**Flickr’s VR groups** offer a dedicated community of stereoscopic enthusiasts who understand the medium. While Flickr doesn’t natively support VR viewing in all contexts, these groups provide valuable feedback and appreciate the technical craft involved. For true immersive galleries, consider platforms like **Kuula** or **Momento360**, which specialize in VR presentations and offer better quality preservation than social media compression.
File format matters significantly. Always embed proper metadata indicating your image is stereoscopic—specifically the “ProjectionType” and “StereoMode” fields. Export at maximum resolution your platform allows, as VR headsets spread pixels across a wide field of view. Most platforms prefer top-bottom or side-by-side formats at 5760×2880 pixels minimum for 180-degree content.
Here’s a reality check: test your uploads on actual VR headsets before sharing widely. What looks perfect on your computer might have alignment issues in a Quest or Vive. Join platform-specific communities to learn their optimal export settings—each has different compression algorithms that affect your final image.
Consider exploring AI-powered VR photography tools that can optimize your stereoscopic images for various platforms, automatically adjusting metadata and format requirements to ensure maximum compatibility.
Understanding stereoscopic viewing transforms you from someone who simply takes VR photos into a photographer who crafts complete three-dimensional experiences. When you grasp how your viewers will perceive depth, convergence, and spatial relationships, every decision you make during capture becomes more intentional. You’ll naturally adjust your interaxial distance based on subject distance, consider comfortable viewing zones when composing, and avoid problematic elements that break immersion.
The beauty of stereoscopic photography lies in its dual nature—it’s both technically precise and creatively expressive. While the principles of binocular vision remain constant, how you apply them offers endless room for experimentation. Try viewing your work on different platforms to understand how headset optics affect the experience. Pay attention to which scenes work better with narrower or wider stereo bases, and note how your audience responds to various depth presentations.
Here’s where to focus your efforts next: First, calibrate your stereo camera rig or settings using test subjects at multiple distances. Second, establish a consistent workflow for checking alignment and convergence before finalizing images. Third, view your work on the same devices your audience uses—what looks perfect on a high-end headset might cause discomfort on a smartphone viewer. Finally, keep a shooting journal documenting what stereo base distances worked best for different scenarios.
The journey from shutter click to viewer immersion is where stereoscopic magic happens. Master this path, and you’ll create VR photographs that don’t just show depth—they deliver unforgettable dimensional experiences.