Position your umbrella 45 degrees above and to the side of your subject to create flattering, dimensional lighting that mimics natural window light—this three-quarter positioning eliminates harsh shadows while maintaining texture and depth in your mobile photos. Choose white umbrellas for softer, more diffused illumination when photographing portraits or product details, or select silver-lined versions when you need increased contrast and punch for dramatic effect. Mount affordable LED panels or continuous light sources compatible with standard umbrella brackets, ensuring your smartphone camera can properly expose without the complicated sync requirements of traditional flash systems.
Lighting umbrellas transform ordinary smartphone images into professional-quality content by solving the fundamental challenge of mobile photography lighting: controlling both direction and quality of light. These collapsible modifiers, borrowed from professional studio setups, now serve the mobile-first creator who demands polished results without investing thousands in camera equipment. Whether you’re shooting product flat-lays for your online store, creating social media content, or documenting client work, umbrellas provide the controllable, flattering illumination that separates amateur snapshots from compelling visual stories—all while remaining budget-friendly and portable enough to fit in a backpack.
What Makes Photography Umbrellas Different (And Better for Phones)
The Science of Soft Light (Explained Simply)
Here’s the physics behind why umbrellas transform harsh light into something magical: when light spreads across a larger surface area, it approaches your subject from multiple angles simultaneously rather than a single harsh point. Think of the difference between looking directly at a lightbulb versus a softly lit cloudy sky—the umbrella creates that sky effect indoors.
This matters tremendously for smartphone cameras. Mobile sensors have smaller pixels and limited dynamic range compared to full-frame cameras, meaning they struggle to capture detail in both bright highlights and deep shadows simultaneously. When you use a bare LED panel pointed at someone’s face, you’ll get blown-out spots on their forehead and nose while other areas fall into murky shadows. An umbrella diffuses that same light across a broader surface, reducing the contrast ratio between highlights and shadows to something your phone can actually handle.
In practical terms, when incorporating professional mobile photography techniques, soft light from an umbrella means your phone’s computational photography algorithms have better data to work with. You’ll see more natural skin tones, preserved texture in clothing, and that coveted three-dimensional quality that separates amateur snapshots from professional-looking content.
Shoot-Through vs. Reflective: Which Type Works Best
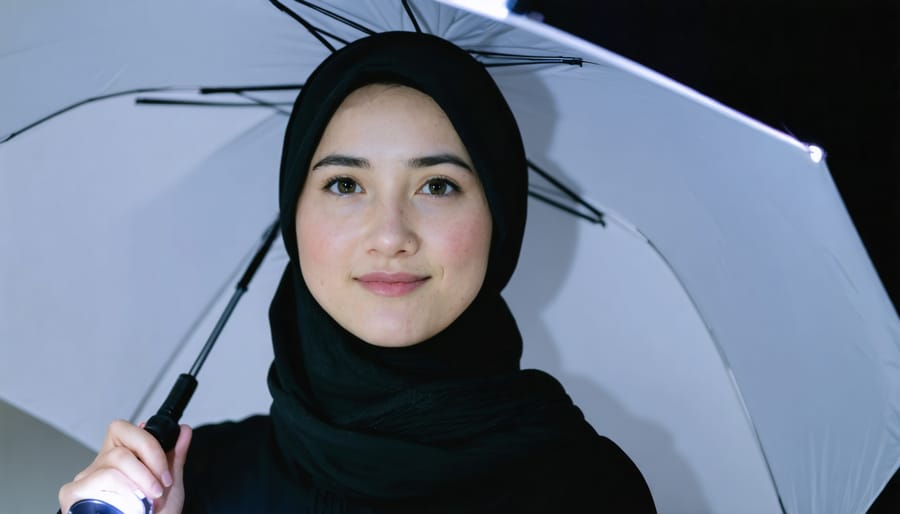
Choosing between shoot-through and reflective umbrellas depends largely on your shooting environment and subject matter. Shoot-through umbrellas work beautifully for mobile portrait sessions where you need soft, wraparound light. Position one about three feet from your subject when photographing people for social media content or small business headshots. The light spreads broadly, which means less precision required when positioning your phone, making them perfect for those still mastering lighting fundamentals.
Reflective umbrellas shine in product photography scenarios. If you’re shooting flat lays for an online store or capturing detailed textures, the increased light output and directional control help you maintain consistent smartphone exposures without cranking up ISO settings. They’re also your go-to option in brightly lit spaces where you need your artificial light to overpower ambient light.
For outdoor mobile photography or cramped indoor locations, shoot-through umbrellas collapse more compactly and set up faster. Reflective umbrellas demand more space behind them but reward you with approximately one full stop more light, crucial when your smartphone sensor needs all the help it can get in challenging conditions. Many mobile photographers keep both types in their kit, switching based on whether they prioritize portability and ease or maximum light control.
Setting Up Your First Mobile Photography Umbrella Kit
The Three Components You Actually Need
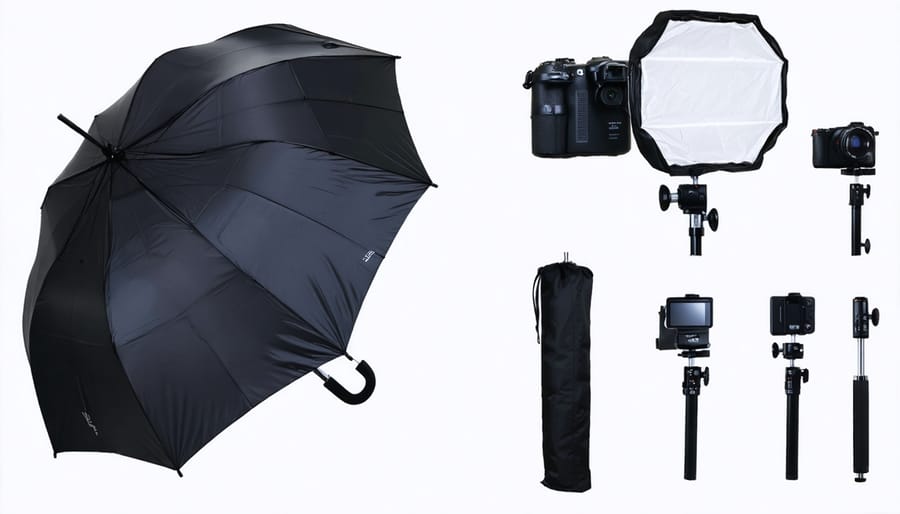
Let’s cut through the confusion. Setting up a lighting umbrella for mobile photography doesn’t require a complicated studio setup. You need just three essential components that work together seamlessly.
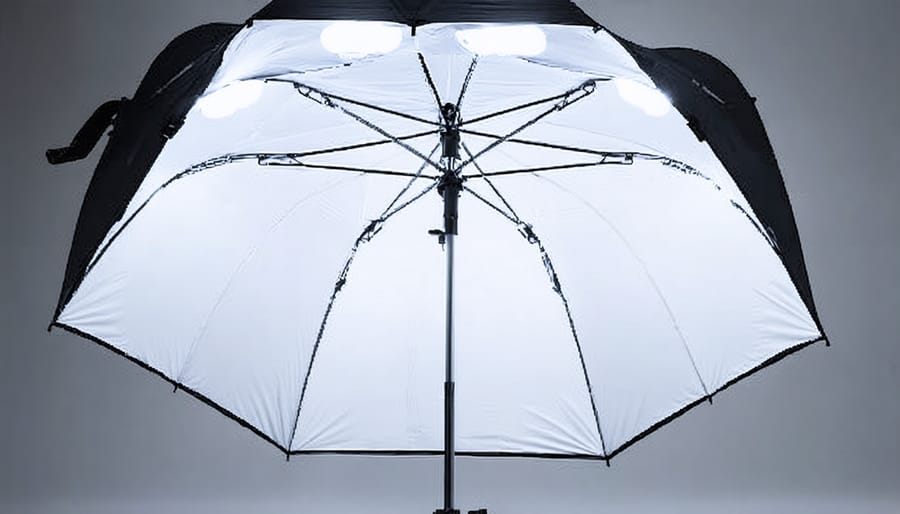
First, the umbrella itself. You’ll want either a shoot-through (translucent white) or reflective umbrella, typically between 32 and 43 inches for mobile work. Shoot-through umbrellas soften light beautifully and work wonderfully for portraits, while reflective umbrellas bounce more intense light back toward your subject, perfect for product shots. Don’t overthink the size—a 33-inch umbrella provides excellent coverage for most smartphone scenarios without becoming unwieldy.
Second, your light source needs careful consideration. LED panels are the mobile photographer’s best friend because they’re battery-powered, lightweight, and provide continuous lighting so you can see exactly what you’re capturing before hitting the shutter. Look for panels with adjustable brightness and color temperature, ideally offering at least 500 lumens. Alternatively, speedlights work brilliantly if you’re comfortable with flash photography, though they require a bit more technical know-how.
Third, mounting solutions tie everything together. A compact light stand that collapses to under 20 inches makes transport realistic. You’ll also need an umbrella bracket or swivel adapter that holds both your light source and umbrella securely. Many photographers overlook this component, but it’s what transforms separate pieces of smartphone photography accessories into a functional lighting system. For true mobility, consider stands with quick-release mechanisms—your future self will thank you when setting up at different locations throughout the day.
Positioning Your Umbrella for Different Phone Shots
For portraits and selfie-style content, position your umbrella about 3-4 feet from your phone at a 45-degree angle to create flattering dimension. This classic setup softens shadows around the face while maintaining natural contours. If you’re filming talking-head videos for social media, keep the umbrella slightly above eye level, angled downward, to mimic natural light patterns your audience finds most appealing.
Product photography demands different positioning. Place your umbrella 2-3 feet directly above the item for overhead flats, which are incredibly popular on platforms like Instagram and Pinterest. For dimension and texture, try positioning the umbrella at a 60-degree angle to the side. Here’s a practical tip I’ve learned from small business owners: keep a second phone nearby with your camera app open in video mode to preview how the light falls before committing to your shot.
Content creators filming demonstrations or unboxing videos should experiment with front-lighting by placing the umbrella behind and slightly above the phone. This floods your scene with even illumination, reducing harsh shadows that can distract viewers. Start at 4 feet and adjust closer if you need more intensity or further for subtler coverage. Remember, phone cameras have smaller sensors than DSLRs, so they’re more forgiving with light placement, but that doesn’t mean being thoughtful about positioning won’t dramatically improve your results.
Working Around the One-Hand Problem
Managing an umbrella setup while shooting on your phone presents a logistical puzzle, but several practical solutions exist. The simplest approach involves investing in a smartphone tripod with a flexible head, allowing you to position your device at various angles while keeping both hands free to adjust your umbrella. Many photographers find success with mini tripods that cost under $20, paired with a basic phone clamp.
Remote triggers transform your workflow entirely. Bluetooth shutter remotes let you fire shots from several feet away, giving you freedom to hold and position your umbrella exactly where needed. Alternatively, your phone’s built-in timer function works perfectly for static subjects like product photography or self-portraits. Set a 3 or 10-second delay, position your umbrella, and let the camera do its job.
For truly hands-free operation, consider a second light stand dedicated to your umbrella, creating a stationary lighting setup. This approach works brilliantly for repeatable shots where your subject stays in one position. You’ll find this method particularly useful when photographing products or creating content that requires consistent lighting across multiple takes.
Five Real-World Scenarios Where Umbrellas Transform Mobile Photos
Portrait Mode That Actually Looks Professional
Your phone’s computational portrait mode creates that artificial, smudgy background blur that screams “smartphone photo.” The solution isn’t a better algorithm—it’s proper lighting that allows you to shoot with a naturally shallow depth of field or simply makes the background less important.
Position an umbrella to create soft, directional light on your subject while keeping the background relatively darker. This contrast naturally draws the eye to what matters. When shooting product photos, a well-lit subject against a slightly underexposed background creates professional separation without relying on software trickery.
Here’s a practical example: photographing jewelry on a smartphone. Place a single umbrella at 45 degrees to your subject, about three feet away. The soft light reveals texture and eliminates harsh shadows, while the natural light falloff creates dimension. Your phone’s camera can now focus on capturing detail rather than trying to artificially separate foreground from background.
The key is remembering that professional-looking portraits come from intentional lighting, not post-processing magic. An umbrella gives you control over light direction and quality, creating images that look polished straight out of your phone.
Product Photos for Your Side Hustle
If you’re selling handmade goods, vintage finds, or reselling products online, your smartphone plus a simple umbrella setup can dramatically boost your marketplace success. The technique is straightforward: position your umbrella light at a 45-degree angle above your product to eliminate harsh shadows that make items look cheap in photos. A white translucent umbrella works beautifully for jewelry, clothing, and small electronics because it wraps light around the item without creating distracting reflections.
Here’s a real-world example: one Etsy seller I know increased her conversion rate by 30% simply by switching from window light to a single umbrella setup. She photographs handmade ceramics on a white poster board sweep, using her iPhone 12 with the umbrella positioned about three feet away. The key is maintaining consistent lighting across all product shots so your online store looks professional and cohesive.
For flat-lay photography of items like cosmetics or accessories, try positioning the umbrella directly overhead. Enable your phone’s grid lines to ensure straight angles, and shoot in your camera app’s manual mode if available to lock exposure settings between shots. This consistency saves enormous editing time when processing dozens of products.
Content Creation Without the Harsh Overhead Light
For anyone creating talking-head videos, tutorials, or Instagram Reels with a smartphone, that unflattering overhead light in your room is probably your biggest enemy. Photography umbrellas solve this problem beautifully. Position a single umbrella light at a 45-degree angle to your face, about three to four feet away, and watch those harsh shadows disappear. The diffused light wraps around your features naturally, eliminating the need for heavy editing later.
Many successful mobile video content creation setups rely on just one umbrella paired with available window light as a fill. If you’re filming product demonstrations or unboxing videos, place your umbrella slightly above and to the side of your smartphone, ensuring the light illuminates both you and your product evenly. The key is consistency. Once you find a setup that works, mark the floor with tape so you can recreate the same professional look every time you shoot, saving hours of frustration.
Food Photography That Makes People Hungry
Food photography responds beautifully to the soft, diffused light that umbrellas provide. Position your umbrella at a 45-degree angle to your plate, slightly above and to the side, creating gentle shadows that add dimension to your dish without harsh contrasts. For overhead shots popular on Instagram, use a single white shoot-through umbrella directly above at about two feet distance, which mimics natural window light perfectly.
Restaurant social media managers shooting quickly between services should try this setup: place your phone on a small tripod, position one umbrella at the 10 o’clock position relative to your plate, and use a white reflector or even a napkin opposite to bounce light back into shadows. This eliminates the yellow cast from overhead restaurant lighting while keeping food looking fresh and appetizing. For drinks with condensation or glossy sauces, position your umbrella further back to reduce hot spots. The key is maintaining texture in your food, something harsh phone flash completely destroys but a properly positioned umbrella preserves beautifully.
Group Photos That Don’t Look Like Mugshots
Group photos taken with phones often suffer from uneven lighting—the person closest to the window looks great while everyone else fades into shadow. The solution is positioning your umbrella to cast broad, even light across all subjects. Place your umbrella at a 45-degree angle about 6-8 feet away from the group’s center, elevated slightly above head height. This distance is crucial for mobile phone cameras, which typically have wider focal lengths (around 26mm equivalent) that capture more of the scene than traditional portrait lenses.
For groups of four or more, consider using two umbrellas positioned on either side at equal distances, creating symmetrical lighting that eliminates harsh shadows between people. Test your setup by taking a photo and checking that faces on both ends have similar brightness. A common mistake is placing the umbrella too close, which creates a hotspot on the nearest person. With proper umbrella placement, your group shots will have that professional quality where everyone is clearly visible and evenly lit, rather than looking like a police lineup with dramatic shadows.
Common Mistakes (And How to Fix Them Fast)
Why Your Photos Look Washed Out
Ever wonder why your beautifully lit setup produces photos that look pale and lifeless? The culprit is often your phone’s automatic exposure system getting overwhelmed by your new lighting umbrella. Mobile cameras are designed to handle everyday lighting situations, and when you suddenly introduce a powerful, diffused light source, the camera’s metering system can panic and overcompensate.
Here’s what’s happening: your phone sees all that lovely soft light flooding your subject and decides the scene is much brighter than it actually needs to be. The result? Your camera automatically reduces exposure, leaving your subject looking washed out and losing those rich colors and details you were after.
The fix is simpler than you’d think. Most camera apps let you manually adjust exposure compensation with a simple tap and swipe. Tap on your subject to set focus, then look for the sun icon or exposure slider that appears. Drag it downward to reduce exposure or upward to add more brightness until your subject looks natural. Professional apps like Halide or ProCamera give you even more granular control, letting you lock exposure independently from focus for consistent results across multiple shots.
Dealing With Color Temperature Mismatches
Color temperature mismatches create that frustrating orange-and-blue look when your umbrella lighting clashes with ambient light. This happens because your continuous LED umbrella might produce cooler 5600K daylight while your room’s tungsten bulbs emit warmer 3200K light. The solution starts in your phone’s camera app settings. Most modern smartphones let you lock white balance rather than leaving it on auto. For example, if you’re shooting product photos near a window, set your white balance to daylight, then use daylight-balanced umbrellas to match. When mixing is unavoidable, choose one light source as your dominant and dim or eliminate the other. iPhone’s Photographic Styles and Android’s manual controls offer surprising flexibility here. Real-world tip: I photograph jewelry using two umbrellas and always turn off overhead lights completely, even if it means working in an otherwise dark room. Post-processing apps like Lightroom Mobile can fix minor mismatches, but getting it right in-camera saves considerable editing time and preserves image quality.
When Bigger Isn’t Actually Better
Sometimes that massive 60-inch umbrella creates more problems than it solves, especially when you’re shooting on location. I learned this the hard way during a street fair when my oversized umbrella caught every breeze like a sail, nearly toppling my entire mobile setup. For outdoor work or cramped indoor spaces, a 32-inch umbrella often delivers better results while maintaining stability.
Large umbrellas also struggle in low-ceilinged rooms, bouncing light off surfaces you didn’t intend to illuminate and creating unwanted color casts. If you’re primarily shooting in your apartment or small studio space, consider a 40-inch maximum diameter. The space you save matters when you’re already juggling tripods, phone mounts, and other accessories.
Another consideration: transport. Lugging a collapsed 60-inch umbrella through subway turnstiles or fitting it in your car alongside other gear gets old quickly. When mobility matters more than maximum softness, choose practicality over theoretical perfection.
Budget Reality Check: What to Spend (And What to Skip)
Let’s talk real numbers. You can find photography umbrellas ranging from $15 to $150, but here’s what actually matters for mobile photography.
For beginners shooting smartphone content, the $20-40 range is your sweet spot. At this price point, you’ll find 33-43 inch white or silver umbrellas that work perfectly well. Brands like Neewer and Fovitec offer budget-friendly options that genuinely perform. The main trade-off? They’re lighter-weight with slightly less durable rods. For occasional use or learning the ropes, this is completely acceptable. Skip the marketing hype about “professional-grade” materials unless you’re planning to pack and transport your gear daily.
The $50-80 mid-range bracket brings improved build quality and often includes convenient features like swivel mounts or carrying cases. This matters if you’re a small business owner who needs reliable, repeated setup for product photography. However, understand that the actual light quality difference between a $30 umbrella and a $70 umbrella is minimal. You’re paying for durability and convenience, not better photos.
Above $100, you’re entering territory designed for studio professionals who need equipment to survive hundreds of shoots. For mobile photography purposes, this is overkill unless you’re running a full-time content creation business.
Here’s what to actually prioritize: spend more money on your light source than the umbrella itself. A quality LED panel or continuous light that pairs with your umbrella matters far more than premium umbrella fabric. Similarly, invest in a sturdy light stand before upgrading your umbrella. A $25 umbrella on a $40 stable stand beats a $80 umbrella that tips over during shoots.
The bottom line? For most mobile photographers, one $30 white shoot-through umbrella plus one $35 reflective silver umbrella covers 90 percent of lighting scenarios.
Photography umbrellas prove that professional-quality lighting isn’t reserved for those with expensive camera gear. Whether you’re shooting on an iPhone or Android device, understanding light fundamentals transforms your images immediately. The beauty of umbrella lighting is that these skills aren’t just for mobile shooters—they translate directly to any camera system you might use in the future. Start simple with a single umbrella setup and notice how it changes your portraits, product shots, or content creation work. Experiment with distances, angles, and diffusion levels until you develop an intuitive feel for light direction. Combine your new lighting knowledge with other smartphone photography tips to maximize your results. Your next step? Set up that umbrella you’ve been considering, place your subject in front of it, and take twenty shots while adjusting only the light position. You’ll quickly discover which angles work best for your style.