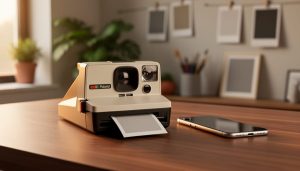
Understand that RA-4 is the chromogenic color process used to print from color negatives onto light-sensitive paper, creating vivid, archival-quality prints in your own darkroom. Unlike black and white printing, RA-4 demands precise temperature control—chemicals must stay within 0.5°F of the target temperature, typically around 95-100°F, making a good thermometer and temperature stabilization system non-negotiable investments. Master your test strip technique by exposing a single strip of paper in incremental time intervals (usually 5-second steps) under your enlarger, which reveals the correct base exposure before you fine-tune color balance with cyan, magenta, and yellow filtration adjustments.
The beauty of RA-4 printing lies in the tangible control it gives you over your film photography workflow. While scanning and digital printing offer convenience, nothing matches the satisfaction of watching an image emerge in the developer tray, knowing you’ve interpreted your negative through hands-on craft rather than software algorithms. The process requires only four chemical baths—developer, bleach-fix, stabilizer, and water—each with specific timing requirements that become second nature with practice.
This guide walks you through everything from setting up your first color darkroom to troubleshooting common issues like color casts and uneven development. Whether you’re expanding from black and white printing or diving straight into color work, you’ll discover that RA-4 printing transforms your negatives into physical objects with a depth and presence that digital outputs rarely achieve.
What Is RA-4 Printing (And Why Should You Care)?
If you’ve spent time in the black-and-white darkroom and are ready to explore color printing, RA-4 is the process you need to know. Short for “Rapid Access 4,” RA-4 is a chromogenic color printing method that produces stunning prints from color negative film or slides. It’s the industry-standard process that’s been used in professional photo labs for decades, and it’s experiencing a notable resurgence among photographers who want complete creative control over their color work.
At its core, RA-4 printing works through chromogenic chemistry, meaning the color dyes form during the development process itself. When you expose color photographic paper to light through your negative or enlarger, you’re creating a latent image. The RA-4 chemicals then develop that image by forming cyan, magenta, and yellow dyes in the paper’s emulsion layers. This chemical reaction produces remarkably vibrant, true-to-life colors with excellent archival stability when processed correctly.
The process differs significantly from black-and-white darkroom work in several important ways. First, RA-4 chemistry operates at higher temperatures, typically between 95-105°F, requiring precise temperature control. Second, you’re working with multiple color layers simultaneously rather than a single emulsion. Third, the chemistry is more time-sensitive and the entire process moves faster, hence the “Rapid Access” name. You can complete an RA-4 print in about four to six minutes from start to finish.
Why should you care about this seemingly technical process? RA-4 prints offer exceptional longevity, often lasting 60-100 years when properly stored. The colors possess a depth and luminosity that inkjet prints struggle to match, particularly in shadow detail and color saturation. Many photographers describe the quality as simply having more life to it.
Professionally, RA-4 has been the gold standard for museum-quality prints and gallery exhibitions since its introduction. Today, as film photography enjoys renewed interest, mastering RA-4 gives you access to a complete analog workflow from camera to finished print.
Essential Equipment You’ll Need to Get Started
The Enlarger and Lens
Your enlarger is the heart of your RA-4 setup, and while you don’t necessarily need to buy new, you do need to ensure color capability. A color enlarger differs from black-and-white models by incorporating a color head with built-in filtration, typically using cyan, magenta, and yellow filters controlled by adjustable dials. These filters let you dial in precise color corrections to match your paper and negative characteristics.
If you’re working with a black-and-white enlarger, you can convert it using color printing filters (CP or CC filters) placed in the filter drawer above the negative carrier, though this method is less convenient and can slightly degrade image sharpness. When shopping used, check that the color head’s dichroic filters move smoothly without scratches or cloudiness, as replacements can be expensive or impossible to find for discontinued models.
Your enlarging lens matters considerably for color work. A sharp, multi-coated lens in the 50mm range (for 35mm negatives) ensures accurate color rendition and edge-to-edge sharpness. Popular choices include Schneider Componon-S and Rodenstock Rodagon lenses. When buying used, inspect the glass for fungus, separation, or coating damage, and test the aperture mechanism for smooth operation. A quality lens from a reputable manufacturer will serve you better than economizing here.
Color Filtration Systems
Color filtration is the heart of RA-4 printing, allowing you to correct color casts and achieve accurate prints from your negatives. You’ll encounter two main filtration systems: dichroic filters and acetate (also called CP) filters.
Dichroic filters are built into higher-end enlargers and use glass filters that you dial in using control knobs, typically adjusting cyan, magenta, and yellow values. They’re incredibly convenient since you can make precise adjustments without touching any physical filters, and they don’t affect exposure times as you change values. Think of them as the premium option—once you experience the workflow, it’s hard to go back.
Acetate filters are individual colored sheets you place in the enlarger’s filter drawer. They’re the budget-friendly option and work perfectly well for beginners. You’ll typically use combinations of yellow and magenta filters (cyan is rarely needed since negatives already contain cyan). The downside is that changing filters between test strips means handling multiple sheets, and stacking filters slightly increases exposure times.
For beginners, I recommend starting with acetate filters if you’re working with a basic enlarger. A starter pack typically includes incremental values from 5 to 50 in both yellow and magenta. This hands-on approach actually helps you understand color relationships better. As you develop your skills and workflow demands efficiency, upgrading to a dichroic head becomes a worthwhile investment.
Trays, Drums, and Processing Equipment
You’ll need to choose between tray processing and drum processing, each offering distinct advantages. Tray processing is the traditional approach where you agitate prints manually through a series of three trays containing developer, bleach-fix, and stabilizer. It’s budget-friendly and intuitive, requiring minimal equipment investment beyond the trays themselves. The hands-on nature gives you complete control, though you’ll need adequate darkroom space and good ventilation since chemistry fumes are more exposed.
Drum processing, by contrast, uses a motorized or hand-cranked cylinder that requires significantly less chemistry per print. You can process under room lights after loading the paper in darkness, making it ideal for smaller spaces. Jobo processors are popular choices here, offering consistent agitation and temperature control. The downside? Higher initial costs and slower throughput when making multiple prints.
Temperature control is critical regardless of method. RA-4 chemistry works optimally at 95-100°F, so invest in a reliable thermometer and consider a water bath or immersion heater for consistency. Store chemistry in accordion-style collapsible bottles to minimize air contact and extend working life. Many printers keep their chemistry in a dedicated temperature-controlled cabinet or cooler between sessions, maintaining stability for weeks rather than days.
Darkroom Essentials and Safety Gear
Beyond your enlarger and processing trays, setting up a darkroom for RA-4 printing requires specific safety and timing equipment. You’ll need an amber or red safelight rated for color paper—typically 13-watt bulbs positioned at least four feet from your working area, since RA-4 paper is more light-sensitive than black-and-white materials. A reliable timer with audible alerts keeps you on track during processing, while an accurate thermometer is essential since RA-4 chemistry demands precise temperature control at 95°F. Chemical-resistant nitrile gloves protect your skin from bleach-fix and stabilizer, which can cause irritation with prolonged contact. Adequate ventilation is crucial—open windows or an exhaust fan minimize fumes from the chemistry. For comprehensive guidance on protective measures, review our darkroom safety protocols before beginning your first print session.
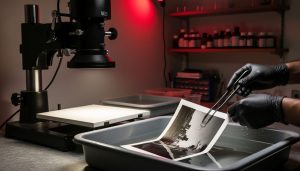
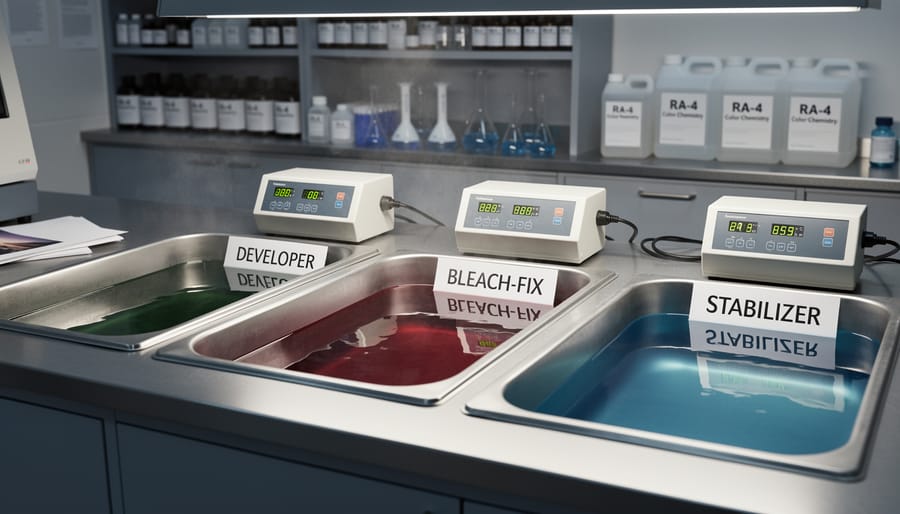
Understanding RA-4 Chemistry: The Three-Step Process
At its heart, RA-4 printing relies on a carefully orchestrated three-step chemical process that transforms exposed photographic paper into a vivid color print. Understanding what happens at each stage not only demystifies the process but also helps you troubleshoot issues and maintain consistent results.
The first step is the developer, where the magic truly begins. When you slide your exposed paper into the developer bath, chromogenic dyes form in direct proportion to the silver halides that were exposed to light. Unlike black and white development where metallic silver creates the image, RA-4 developer catalyzes a reaction that produces cyan, magenta, and yellow dyes. This stage is highly temperature-sensitive, typically requiring a precise 95°F (35°C). Even a degree or two off can shift your colors dramatically. The development time is usually around 45 seconds in a processor or 3.5 minutes for tray processing, though you should always follow your specific chemistry manufacturer’s guidelines.
Next comes the bleach-fix, affectionately called “blix” in darkroom circles. This dual-purpose solution performs two critical functions: it bleaches away the metallic silver that formed during development (which would otherwise obscure your dyes) and fixes the image by removing unexposed silver halides. The blix is generally more forgiving than the developer in terms of temperature, though consistency still matters. This step typically takes 45 seconds to 4.5 minutes depending on your method.
Finally, the stabilizer step protects your finished print from fading and environmental damage. This solution contains surfactants and stabilizing agents that help the dyes maintain their brilliance over time. Some photographers skip the traditional wash before stabilization, as modern RA-4 stabilizers are designed to work with minimal rinsing.
When it comes to practical considerations, always mix chemistry with distilled water to avoid contamination from minerals or chlorine. Store your working solutions in tightly sealed bottles away from light and heat. Most developers last 4-6 weeks once mixed, while blix can often go 8-12 weeks. Watch for exhaustion signs: muddy colors, increased processing times, or prints that won’t fully clear. Many photographers track the square footage of paper processed, replacing chemistry after the manufacturer’s recommended capacity, typically around 50-100 8×10 prints per liter.
Making Your First RA-4 Print: A Step-by-Step Walkthrough
Preparing Your Workspace and Chemistry
Before you make your first RA-4 print, proper preparation is essential. Start by ensuring your darkroom is light-tight and well-ventilated, as color chemistry produces more fumes than black-and-white processes. Set up your workspace with a clear wet and dry side to prevent chemical contamination of your negatives and enlarger.
Temperature control is the single most critical factor in RA-4 printing. Your chemistry needs to operate between 95-105°F, with 100°F being the sweet spot for predictable results. Invest in a reliable thermometer and use a water bath or temperature-controlled processor to maintain consistency. Even a few degrees off can create color shifts or incomplete development. Many experienced printers warm their chemistry the night before to save setup time.
Organization matters tremendously in color printing. Arrange your trays or drum processor in the order you’ll use them: developer, bleach-fix, and wash. Pre-measure your chemistry into graduate cylinders for quick pouring, and keep a timer within easy reach. Since you’ll be working in near-darkness, muscle memory becomes your friend. Practice your workflow with the lights on first, moving through each step until it feels natural and efficient.
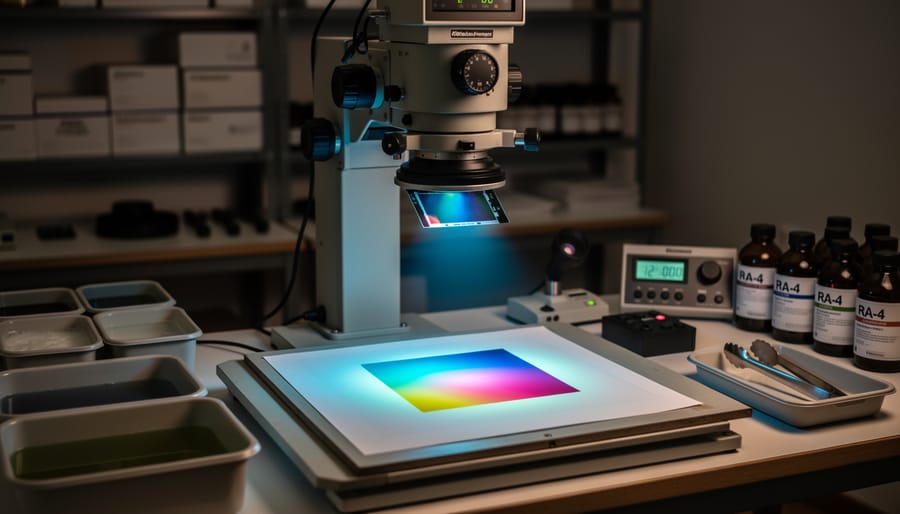
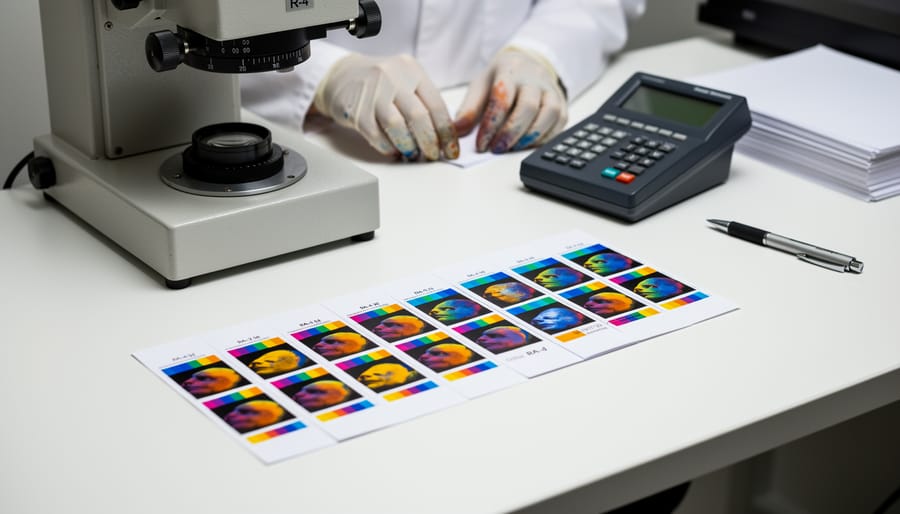
Making Test Strips and Reading Them
Creating effective test strips is fundamental to successful RA-4 printing. Start by cutting a full sheet into manageable strips, typically 2-3 inches wide. Position your strip to cover important tonal areas of the image, particularly those containing skin tones or critical details you need to evaluate properly.
For exposure testing, use increments of 3-5 seconds depending on your enlarger’s intensity. A common approach is to create five segments at 5-second intervals, giving you exposures ranging from 5 to 25 seconds on a single strip. Cover portions of the paper progressively with a piece of cardboard, moving it smoothly to avoid overlap marks.
When your test strip emerges from the processor, evaluate it under proper viewing light (5000K is standard). Look for the segment with the best overall density where highlights retain detail without being blown out and shadows show depth without blocking up. Remember that wet prints appear slightly darker than they will when dry.
For color balance assessment, examine neutral areas like white shirts or gray tones. If everything shifts too magenta, you’ll need to add cyan filtration. Too green means adding magenta. Most printers find that making 10-point filtration adjustments provides noticeable but not drastic changes, letting you fine-tune gradually rather than overshooting your target.
Dialing In Color Balance
Getting your color balance right is where RA-4 printing becomes both challenging and rewarding. The tricky part? Subtractive color theory works opposite to what your intuition might tell you. If your print looks too magenta, you actually add more magenta filtration to compensate. This happens because you’re filtering the light before it hits the paper, removing that color from the exposure rather than adding it to the final image.
Start by making a test strip at your estimated filtration values, typically somewhere around 40M 40Y (40 units of magenta and yellow). Most RA-4 papers don’t require cyan filtration initially. Once processed, examine your test under proper lighting conditions, ideally 5000K daylight-balanced light. Give your eyes a few moments to adjust, as they’ll naturally try to compensate for color casts.
Look for subtle shifts rather than obvious color problems. A warm, orange-red cast means you need more yellow filtration. Blue-cyan tints require more magenta. Greenish prints need both magenta and yellow added equally. Make adjustments in increments of 5 to 10 units at first. As you dial things in, you can fine-tune with smaller 2 to 5 unit changes.
Here’s a practical tip: keep notes on every print session, recording your filtration pack and exposure times. Paper emulsions vary between batches, and having a baseline helps you adapt quickly when you open a fresh box.
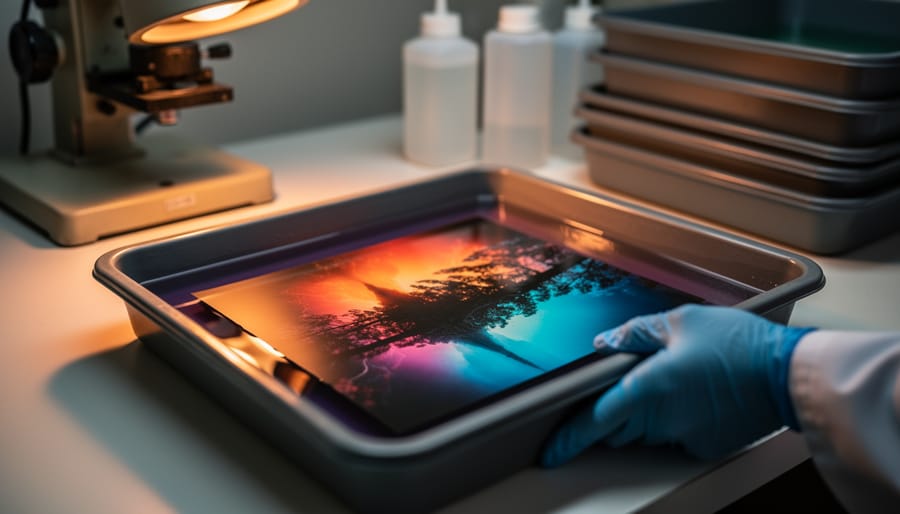
Processing Your Print
Once your paper is exposed, you’ll need to move quickly through the chemistry. Start by sliding the paper into the developer at the recommended temperature—typically 95-100°F—with one smooth motion to avoid uneven development. Agitate continuously by gently rocking the tray or lifting and lowering one corner, maintaining consistent motion for 90 seconds to 3 minutes depending on your chemistry and desired results.
Watch as your image emerges. The colors will look different under safelights, but you’ll see contrast building. When highlights appear sufficiently dense, lift the paper by one corner, let excess chemistry drip back, then move to the bleach-fix. This step removes unexposed silver and stabilizes the dyes—again, maintain gentle agitation for the manufacturer’s specified time, usually 60-90 seconds.
After bleach-fix, transfer to the wash. Running water at the proper temperature for 2-4 minutes removes residual chemicals and prevents future color shifts. Some processors use stabilizer as a final bath for archival stability.
Common pitfalls include inconsistent temperatures causing color shifts, insufficient agitation creating streaks or uneven density, and pulling prints too early resulting in weak colors. If your prints look muddy or off-color, check your thermometer accuracy first. Cyan-heavy results often indicate exhausted chemistry, while magenta casts suggest the developer is too warm. Keep detailed notes on timing and temperatures—they’re your roadmap to consistent, beautiful prints.
Common Challenges and How to Overcome Them
Temperature Control Issues
Temperature fluctuations are one of the most common culprits behind inconsistent RA-4 prints. Chemistry works optimally at 100°F (37.8°C), and even a few degrees of variation can dramatically shift color balance and contrast. For example, if your developer drops to 95°F, you might notice warmer tones and reduced contrast, while temperatures above 105°F can produce cooler images with excessive contrast.
The solution starts with a reliable thermometer and a good water bath system. Place your chemical bottles in a temperature-controlled water bath at least 30 minutes before printing. Many printers use aquarium heaters with thermostats to maintain consistent temps, which typically cost around $20-30 and work remarkably well. During extended printing sessions, check temperatures every 20-30 minutes and adjust as needed.
For home darkrooms without climate control, consider printing during moderate weather or invest in a small space heater to stabilize room temperature. Some photographers pre-warm their processing drums or trays with hot water, then dry them before use. Remember that chemical temperature is more critical than paper temperature, so focus your efforts there first for the most noticeable improvement in print consistency.
Color Shifts and Unpredictable Results
Here’s one of the most frustrating realities in RA-4 printing: you make a perfect test strip, commit to a full print with those exact settings, and the colors come out completely different. Welcome to the temperamental world of color darkroom work.
This maddening inconsistency usually traces back to chemistry temperature fluctuations or paper variability. Even a degree or two of temperature drift between your test strip and final print can shift your color balance noticeably. The developer is especially sensitive—if it’s cooling down as you work through a session, each successive print will get progressively warmer or cooler.
Paper age and storage conditions are equally guilty. Color paper degrades over time, and exposure to heat or humidity accelerates this process. A box stored in your garage through summer will behave very differently than fresh paper kept refrigerated. The individual emulsion layers fade at different rates, creating unpredictable color casts that no amount of filter adjustment can fully correct.
The solution? Keep meticulous notes. Record everything: paper batch numbers, chemistry mix dates, temperatures, filter packs, and exposure times. Date your chemistry bottles and track how many prints you’ve made. When you get consistent results, those notes become your roadmap back to success. Think of it as building your own personal reference library—boring perhaps, but invaluable when you’re trying to recreate that perfect print six months later.
Staining and Contamination Problems
Staining and contamination issues can quickly derail an otherwise perfect RA-4 print, leaving you with mysterious color casts or spots that refuse to disappear. The good news is that most problems trace back to preventable causes.
Water quality matters more than you might think. Hard water containing minerals can create whitish deposits or uneven development, while iron or copper traces introduce color shifts. If your tap water is problematic, consider using distilled water for your final wash or installing an inline filter. One photographer I know spent weeks troubleshooting cyan staining before discovering their old building’s pipes were the culprit.
Chemical contamination between solutions is another common villain. Even tiny amounts of developer carried into the bleach-fix can cause streaking or incomplete fixing. Always use separate sets of tongs for each chemical bath, never reusing them without thorough cleaning. Label everything clearly and keep work areas organized to prevent mix-ups.
Keep your developing drum or trays scrupulously clean between prints. Dried chemistry residue from previous sessions can create spots or uneven development. A quick rinse with hot water and occasional cleaning with dedicated darkroom equipment cleaner prevents buildup. Similarly, maintain clean, dry hands when handling paper, as skin oils and residues transfer easily and create fingerprints that become visible after processing.
Where to Source RA-4 Paper and Chemistry Today
Finding RA-4 paper and chemistry has become more challenging as analog photography occupies a smaller market niche, but dedicated suppliers still serve the community well. The good news is that quality materials remain available if you know where to look.
For paper, Fujifilm Crystal Archive continues production and offers excellent results, available through specialized photo retailers like B&H Photo, Adorama, and Freestyle Photographic Supplies. Kodak Endura paper remains another solid option, though availability fluctuates. In Europe, photographers can access these brands through retailers like Analogue Wonderland and Macodirect. Don’t overlook smaller regional suppliers who often maintain inventory that larger retailers have phased out.
Chemistry kits from manufacturers like Tetenal, Kodak, and Fuji are your primary options. Many photographers find success with Bellini’s chemistry or Kodak’s Ektacolor kits. Online retailers specializing in darkroom supplies typically stock fresh chemistry, though always check manufacturing dates before purchasing.
Shelf life considerations are crucial with RA-4 materials. Unopened paper stored in cool, dry conditions typically remains viable for 18-24 months, while chemistry lasts 6-12 months sealed. Once mixed, working solutions have limited lifespans—developer exhausts quickly while bleach-fix lasts longer. This reality shapes your buying strategy.
For occasional printers, smaller quantities make sense despite higher per-unit costs. Processing a few prints monthly with fresh chemistry yields better results than using partially exhausted solutions from bulk purchases. However, if you’re printing regularly or working on a project, buying larger quantities becomes economical. Consider splitting bulk orders with fellow darkroom enthusiasts to balance cost and freshness.
Store paper in its original packaging away from heat and humidity. Keep unopened chemistry bottles in cool environments, and once mixed, store working solutions in tightly sealed, opaque bottles. Expect to invest roughly seventy-five to one hundred fifty dollars for starter supplies, with ongoing costs depending on your printing volume.
Is RA-4 Printing Worth It in the Digital Age?
Let’s be honest: RA-4 printing in 2024 requires a significant commitment of time, money, and space. But for those willing to make that investment, it offers something genuinely irreplaceable.
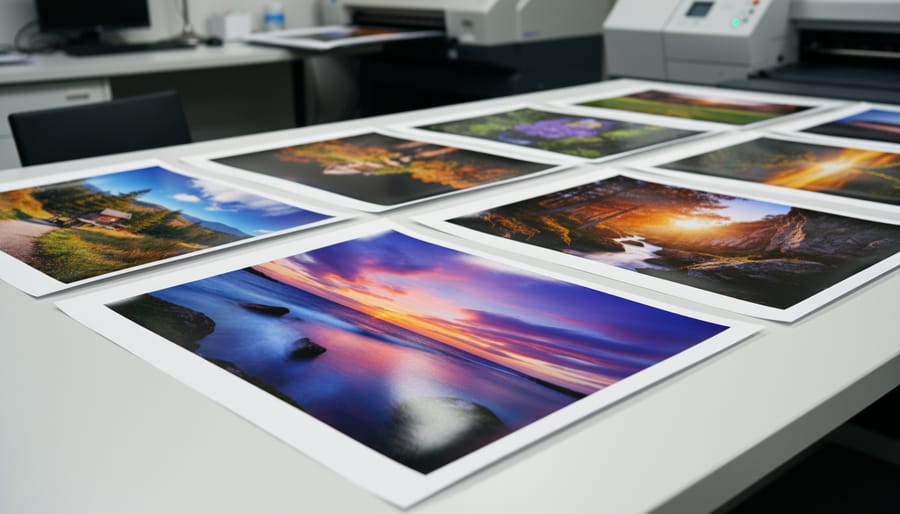
The case for RA-4 starts with the prints themselves. There’s a luminosity and depth to analog color prints that’s difficult to replicate digitally. The way colors blend in the emulsion, the subtle gradations in highlights and shadows, and the tangible quality of a physical print created directly from your negative—these characteristics give RA-4 prints a distinctive presence. Many photographers describe their analog prints as having more “life” than digital output, though this admittedly ventures into subjective territory.
The learning curve is real. Unlike digital printing where you can preview results instantly, RA-4 printing involves chemistry, precise timing, and temperature control. You’ll waste paper and chemistry during the learning phase. Expect to spend several sessions just getting consistent exposures and color balance. The initial equipment investment ranges from a few hundred dollars for a basic setup to several thousand for professional-grade gear.
The ongoing costs matter too. Chemistry has a shelf life, paper is expensive, and you need a dedicated darkroom space. If you’re only printing occasionally, the cost per print becomes quite high compared to sending files to a professional lab.
This process makes sense for photographers who shoot color film regularly and want complete creative control over their final output. It’s particularly rewarding for those who enjoy the meditative, hands-on nature of darkroom work and appreciate the analog versus digital workflow differences. If you’re shooting just a few rolls per year or primarily interested in convenience, professional lab scanning and printing likely makes more economic sense.
RA-4 printing isn’t for everyone, but for dedicated film photographers seeking that direct connection between negative and print, it remains a worthwhile pursuit despite—or perhaps because of—its demanding nature.
RA-4 printing isn’t for everyone, and that’s perfectly okay. It requires patience, upfront investment, and a willingness to work with chemicals in a dedicated space. But if you’re drawn to hands-on processes and the pursuit of exceptional color rendition that you simply can’t replicate digitally, this process offers something truly special. There’s an undeniable connection that forms when you’re physically involved in every step, watching your images emerge in the developer tray exactly as you envisioned them.
If you’re feeling intrigued, start small. You don’t need a fully equipped darkroom right away. Many photographers begin with a simple setup in a bathroom or spare closet, processing prints in trays under safelight conditions. Experiment with a single roll of film, make test prints, and allow yourself to learn from mistakes. The analog photography community is remarkably welcoming, with forums, workshops, and local darkroom collectives eager to share knowledge and troubleshooting advice.
What keeps people returning to RA-4 printing isn’t just nostalgia or stubborn tradition. It’s the tangible magic of creating something physical with your own hands, the richness of color that seems to glow from within the paper, and the satisfaction of mastering a craft that connects you directly to photography’s heritage. That first successful print makes everything worthwhile.