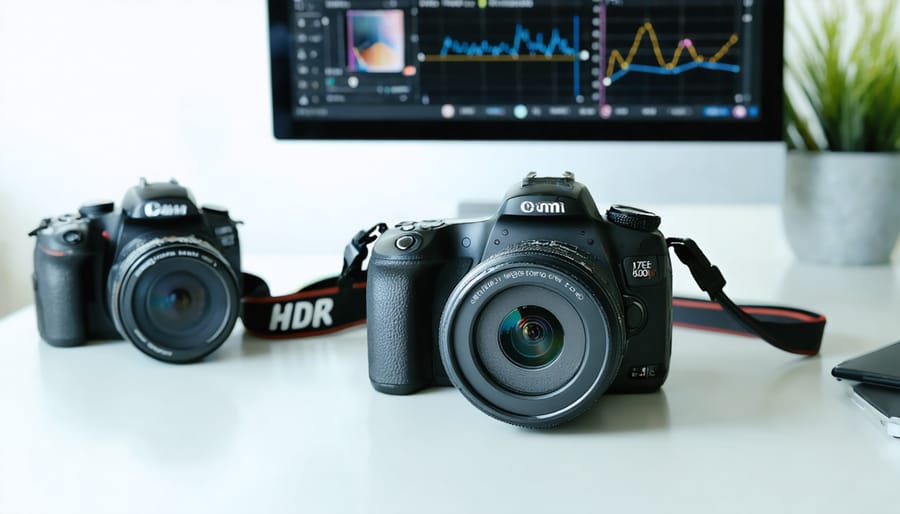
Unlock your camera’s hidden potential by mastering the advanced features that separate amateur shots from professional-grade images. Beyond the basic auto settings lies a world of creative control – from back-button autofocus that revolutionizes your action photography to custom function buttons that transform your workflow. Whether you’re shooting challenging low-light scenes or fast-moving subjects, these sophisticated capabilities empower you to capture exactly what you envision.
Today’s digital cameras pack incredible technological firepower, but many photographers barely scratch the surface of their gear’s true capabilities. Focus stacking for razor-sharp macro shots, exposure bracketing for perfect dynamic range, and advanced metering patterns for tricky lighting conditions – these features aren’t just fancy add-ons. They’re powerful tools that, when properly understood and applied, elevate your photography to new heights.
In this comprehensive guide, we’ll explore the game-changing advanced features that professional photographers rely on daily, with practical examples and step-by-step instructions for implementing them in your own work. Whether you shoot landscapes, portraits, or street photography, mastering these sophisticated controls will transform how you approach every shot.
Advanced Exposure Controls That Pros Actually Use
Back-Button Focus: Why It’s a Game-Changer
Imagine never missing focus on a crucial shot again. Back-button focus separates the autofocus function from your shutter button, moving it to a dedicated button on the back of your camera – typically the AF-ON button. This simple change revolutionizes how you control your camera and dramatically improves your shooting efficiency.
Traditional half-press focusing ties two critical functions together: focus and exposure. By separating these operations, you gain precise control over when your camera focuses, allowing you to maintain focus on your subject without constantly re-engaging the autofocus system. This is particularly valuable when photographing moving subjects, such as in sports or wildlife photography.
The advantages are substantial. You can track moving subjects more effectively, quickly switch between static and moving subjects, and maintain focus lock without keeping your shutter button half-pressed. For portrait photographers, it means you can focus once on your subject’s eyes and freely recompose without the camera trying to refocus.
Setting up back-button focus is straightforward. Navigate to your camera’s custom function menu, locate the button assignment options, and set the AF-ON button to handle focusing while configuring the shutter button for exposure only. While the exact menu location varies by camera brand, most modern cameras support this feature.
The initial adjustment period might feel awkward, but most photographers who make the switch never look back. It’s like learning to drive a manual transmission – challenging at first, but offering superior control once mastered. Give yourself a week of practice, and you’ll likely wonder how you ever shot without it.
Custom Function Buttons Worth Configuring
Customizing your camera’s function buttons can dramatically streamline your shooting workflow and help you capture crucial moments without diving into menus. Here are the most valuable button assignments to consider:
Back-button autofocus is perhaps the most important custom function to set up. By separating focus from your shutter release, you gain better control over when and how your camera focuses. Assign this to the AF-ON button or another easily accessible button near your thumb position.
Exposure compensation is another essential function that deserves quick access. Having it readily available lets you make fast adjustments in challenging lighting conditions without taking your eye from the viewfinder. Many photographers assign this to a dial or custom button near the shutter release.
Consider dedicating a button to switching between different AF modes. Being able to quickly toggle between single-point and zone AF can make the difference between nailing or missing a shot, especially in dynamic situations like wildlife or sports photography.
For portrait photographers, setting a custom button for eye-detection AF activation can be invaluable. Similarly, landscape photographers might want quick access to depth-of-field preview or electronic level display.
One often-overlooked but useful assignment is switching between memory card slots for cameras with dual slots. This lets you quickly change recording destinations without menu diving.
Remember to practice with your custom settings until they become muscle memory. Start with just a few essential functions and gradually add more as you become comfortable with your setup. The goal is to reduce the time spent in menus and keep your attention on the scene in front of you.
Raw Processing Features You’re Not Using (But Should Be)
In-Camera HDR That Actually Looks Natural
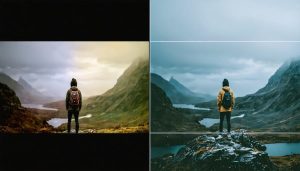
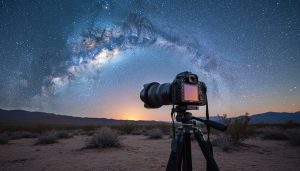
Modern cameras have revolutionized in-camera HDR, moving far beyond the garish, oversaturated results we used to see. Today’s sophisticated algorithms can produce natural-looking results that preserve both highlight and shadow detail while maintaining a realistic appearance. To achieve the best results, start by enabling your camera’s HDR mode in situations with high contrast, such as sunrise landscapes or backlit portraits.
The key to natural-looking HDR lies in subtle adjustments. Most cameras offer multiple HDR strength settings – begin with the lowest setting and increase only if necessary. This approach, combined with proper RAW processing techniques, ensures your images maintain their authenticity while expanding their dynamic range.
For optimal results, use a tripod when possible and enable your camera’s auto-alignment feature for handheld shots. Pay attention to moving subjects, as they can create ghosting effects. Many modern cameras include advanced HDR photography techniques that can handle motion better than earlier versions.
Remember to check your camera’s specific HDR settings. Some models allow you to save both the HDR image and original exposures, giving you flexibility in post-processing. This backup approach ensures you have options if the in-camera HDR doesn’t quite achieve your vision.
Custom Picture Profiles Worth Creating
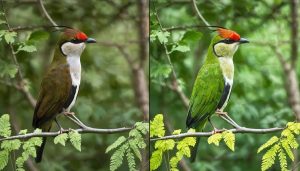
Custom picture profiles can transform your photography by giving you precise control over how your camera processes images. While most cameras come with preset profiles, creating your own allows you to fine-tune settings for specific shooting scenarios.
For landscape photography, consider developing a profile with slightly increased contrast, reduced saturation, and enhanced shadow detail. This combination helps capture the dramatic range of outdoor scenes while maintaining natural-looking colors. Set your color temperature slightly cooler than standard to enhance blue skies and create more impactful images.
Portrait photographers should experiment with a custom profile that softens contrast slightly while maintaining accurate skin tones. Reduce sharpness marginally and boost shadow detail to create more flattering results. A slight increase in color saturation can add vibrancy without making skin tones appear unnatural.
For street photography, try creating a profile with increased contrast and sharpness, combined with slightly muted colors. This setup helps emphasize compelling compositions and textures while maintaining a documentary feel.
One often-overlooked profile worth creating is a high-dynamic-range preset for challenging lighting conditions. Reduce contrast, increase shadow detail, and slightly underexpose to preserve highlight details. This provides more flexibility in post-processing.
Remember to name your custom profiles descriptively and test them thoroughly in various lighting conditions before relying on them for important shoots. Most cameras allow you to save multiple profiles, so experiment with different combinations until you find what works best for your style.
Advanced Autofocus Techniques for Tricky Situations
Subject Recognition and Tracking
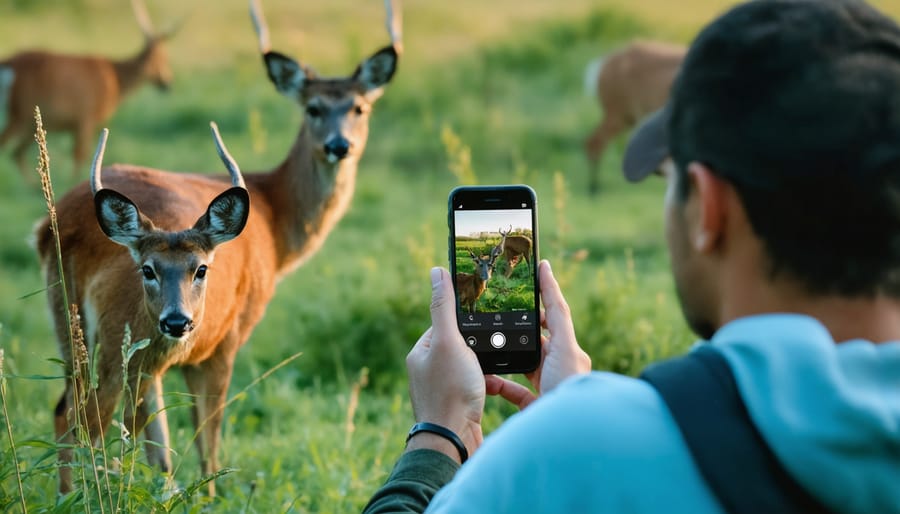
Modern cameras have revolutionized subject recognition and tracking through sophisticated AI algorithms, making it easier than ever to capture sharp, perfectly-focused images of moving subjects. This technology has become particularly invaluable in wildlife photography tracking and sports photography, where split-second timing is crucial.
At the heart of these systems is deep learning technology that can identify and track specific subjects – from human faces and eyes to animals, vehicles, and even birds in flight. The camera continuously analyzes the scene, maintaining focus on your chosen subject even as it moves through the frame or temporarily disappears behind obstacles.
To maximize these features, start by customizing your camera’s subject detection settings. Most advanced cameras allow you to prioritize specific types of subjects and adjust tracking sensitivity. For instance, when photographing sports, you might want to enable “athlete detection” and set a higher tracking sensitivity to maintain focus during rapid movements.
One often-overlooked aspect is the relationship between subject tracking and your camera’s AF points. The more AF points your camera has, the more precisely it can track moving subjects across the frame. Use the appropriate AF area mode – typically a wide or zone AF area for unpredictable movements, or a smaller cluster for more controlled scenarios.
The key to mastering subject recognition lies in understanding its limitations. While these systems are incredibly capable, they can struggle in low light, with partially obscured subjects, or when multiple similar subjects are in frame. In such situations, knowing when to switch to manual focus or alternative AF modes becomes crucial.
Practice different tracking scenarios in controlled environments before attempting challenging shots. This helps you understand how your camera responds to various movement patterns and lighting conditions, ultimately leading to more consistent results in real-world situations.
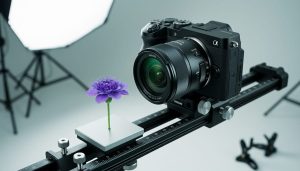
Focus Stacking for Perfect Depth
Focus stacking has revolutionized the way photographers capture stunning macro and landscape images with edge-to-edge sharpness. This advanced technique, now automated in many modern cameras, allows you to overcome the limitations of a single shot’s depth of field by combining multiple images focused at different distances.
Imagine photographing a delicate flower where both the nearest petal and the furthest stamen need to be tack-sharp. Instead of compromising with a narrow aperture that might introduce diffraction, focus stacking lets you take several shots at your lens’s sweet spot, each focused at a different point. Your camera automatically shifts the focus point between frames, ensuring complete coverage of your subject.
To use focus bracketing effectively, start by setting up your camera on a sturdy tripod and composing your shot. Most cameras with this feature allow you to specify three key parameters: the number of shots, the focus step width (how far the focus point moves between shots), and the focus interval timing. For macro work, smaller step sizes and more frames are typically needed, while landscape shots might require fewer frames with larger steps.
The magic happens in post-processing, where specialized software combines these images into a single photo with extended depth of field. Popular options like Helicon Focus or Photoshop’s auto-blend layers can seamlessly merge your bracketed shots, creating an image that appears impossibly sharp throughout.
Some pro tips for better results: Use manual exposure settings to maintain consistency across frames, disable image stabilization when shooting on a tripod, and ensure there’s no movement in your scene during capture. For subjects like insects or flowers that might move with the wind, shoot during calm conditions or create a wind barrier.
While focus stacking requires some extra effort, the resulting images offer a level of detail and clarity that’s simply impossible to achieve with a single exposure. It’s particularly valuable for product photography, scientific documentation, and fine art nature photography where maximum detail is crucial.
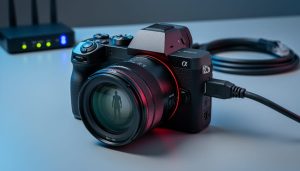
Wi-Fi and Connectivity Features That Make Life Easier
Remote Control Beyond the Basics
Remote shooting has evolved far beyond simple wireless triggers. Today’s advanced remote control capabilities open up creative possibilities that were once impossible. By mastering your camera’s remote features, you can capture wildlife without disturbance, create complex time-lapse sequences, and even control multiple cameras simultaneously.
Most modern cameras offer smartphone connectivity through dedicated apps, providing a live view feed and comprehensive control over settings. This allows you to adjust aperture, shutter speed, and ISO in real-time while monitoring your composition from a distance. For more precise control, consider using interval shooting modes combined with remote access to capture specific moments or sequences.
Advanced remote techniques include focus stacking, where you can remotely adjust focus points across multiple shots, and HDR bracketing, where you can trigger exposure sequences without touching the camera. Some cameras also support geofencing features, automatically activating when you enter a predetermined area – perfect for wildlife photography setups.
For studio work, tethered shooting through dedicated software offers even more control. You can instantly review images on a larger screen, apply presets, and make adjustments on the fly. Many photographers combine this with remote flash control for complete mastery over their lighting setup.
When shooting remotely, always ensure a stable connection and keep backup triggers handy. Remember that different shooting scenarios may require different remote control solutions, from simple infrared triggers to sophisticated wireless systems.
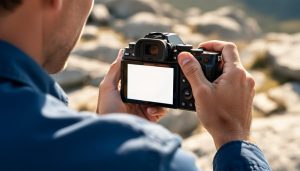
Smart Device Integration Worth Setting Up
Modern cameras’ smart device integration capabilities have revolutionized how we capture, edit, and share images. While some photographers initially dismiss these features as gimmicks, proper setup can significantly streamline your photography workflow.
The ability to instantly transfer images to your smartphone or tablet opens up powerful possibilities. You can quickly review shots on a larger screen, make basic edits in the field, and share compelling images with clients or social media while still on location. This immediate feedback loop can be invaluable for ensuring you’ve captured exactly what you envisioned.
Remote shooting through your device’s screen offers precise composition control, especially for challenging angles or when photographing wildlife. Many camera apps also provide advanced features like focus stacking, intervalometer functions, and real-time exposure simulation.
For maximum benefit, take time to properly configure your camera’s Wi-Fi or Bluetooth settings, and familiarize yourself with your camera manufacturer’s dedicated app. While the initial setup might take 15-20 minutes, the time saved during shoots and the enhanced creative control make it worthwhile. Just remember to keep your camera’s firmware updated to ensure compatibility with the latest app features and security protocols.
Mastering advanced camera features is a journey that opens up endless creative possibilities in your photography. As we’ve explored throughout this article, features like focus stacking, exposure bracketing, and custom function buttons are more than just technical specifications – they’re tools that can transform your creative vision into stunning images.
Remember that these advanced features aren’t just for professional photographers. Whether you’re capturing landscapes, portraits, or street photography, understanding and utilizing these capabilities will give you greater control over your final images and help you develop your unique photographic style.
Start by experimenting with one feature at a time. Practice in different scenarios and lighting conditions until it becomes second nature. Don’t be afraid to make mistakes – they’re valuable learning opportunities that will help you understand how each feature responds in various situations.
Keep your camera manual handy and refer to it often as you explore these features. Many cameras also offer guided modes or built-in tutorials that can help you master complex functions step by step.
Most importantly, let your creativity guide you. These advanced features are meant to enhance your artistic vision, not restrict it. As you become more comfortable with each capability, you’ll find yourself naturally incorporating them into your workflow, ultimately elevating the quality and impact of your photography.
Take what you’ve learned here and start experimenting today. Your camera has so much potential waiting to be unlocked, and now you have the knowledge to begin that exciting journey.