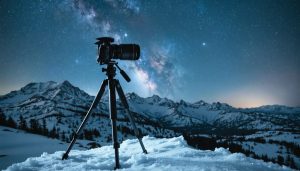
Transform rain-soaked nights into captivating photographs by mastering the delicate balance between water, light, and timing. While extreme weather photography presents unique challenges, nighttime rain creates extraordinary opportunities for moody, atmospheric images that tell compelling stories. Set your camera to manual mode with ISO 1600-3200, aperture f/2.8-4, and shutter speeds between 1/125 and 1/250 to freeze individual raindrops while capturing ambient light. Position external flashes at 45-degree angles behind your subject to illuminate falling rain against the darkness, creating depth and dimension in your compositions. Shield your gear with professional-grade rain covers or DIY solutions using clear plastic bags and rubber bands, ensuring continuous shooting in challenging conditions. Focus on reflective surfaces—wet cobblestones, puddles, and metallic objects—to multiply light sources and add layers of visual interest to your nighttime rain photography.
Essential Gear Protection for Wet Night Shoots
Weather-Sealing Essentials
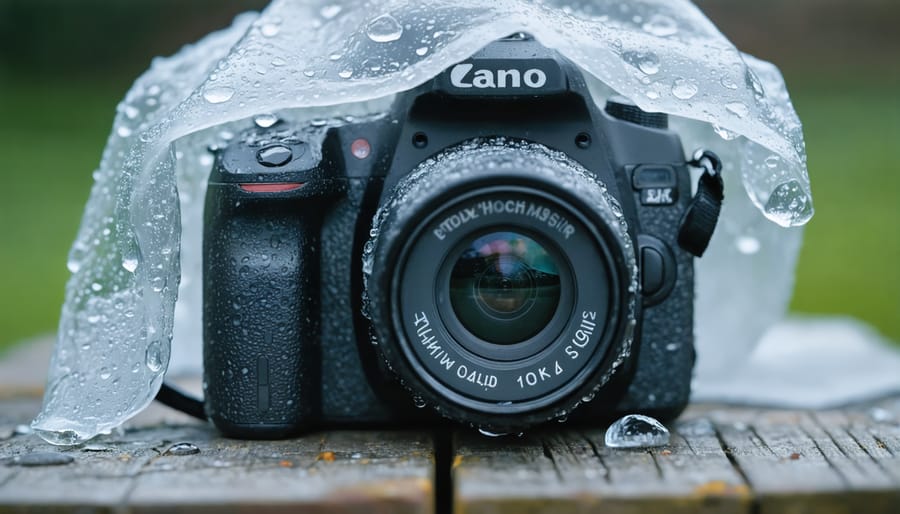
When shooting in rainy conditions at night, protecting equipment in extreme conditions becomes crucial for both your gear’s safety and your shooting success. Start with a high-quality rain cover specifically designed for your camera model. These covers typically feature clear panels for accessing controls and viewing your LCD screen while keeping your equipment dry.
Consider using a lens hood not just for preventing lens flare, but as an additional shield against raindrops hitting your front element. UV or clear protective filters are essential – they’re much cheaper to replace than a damaged lens, and they help keep water off your actual lens glass.
Keep several microfiber cloths in a waterproof pouch; you’ll need them frequently to wipe away water droplets. For longer exposures, consider using an umbrella mount that attaches to your tripod, creating a hands-free shelter for your setup. Some photographers swear by silica gel packets stored in their camera bags to combat humidity.
Don’t forget about protecting your camera bag itself. Many professional camera bags come with built-in rain covers, but you can also use waterproof covers or even heavy-duty trash bags in a pinch. Remember to pack extra batteries in waterproof containers, as cold and wet conditions can drain them more quickly than usual.
Backup Equipment Strategies
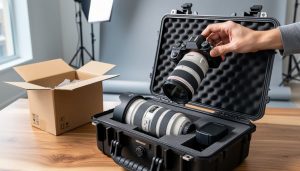
When shooting in rainy conditions at night, having reliable backup strategies for your equipment isn’t just recommended – it’s essential. Start by packing multiple weather-sealed bags, each containing spare batteries, memory cards, and lens cleaning cloths. Keep these distributed across different waterproof compartments in your camera bag to ensure you always have dry backups available.
Consider bringing a second camera body if possible, storing it in a separate waterproof bag with silica gel packets to combat humidity. For lens protection, pack several UV filters – they’re cheaper to replace than a damaged front element and can be quickly swapped out when water spots become problematic.
Always carry multiple microfiber cloths in sealed plastic bags. Once a cloth becomes damp, replace it with a dry one to avoid smearing water across your lens. A small umbrella dedicated to gear protection can be invaluable, as can a few emergency rain covers – even simple plastic bags with holes cut for the lens can work in a pinch.
Store electronic accessories like flash units and triggers in waterproof cases with rubber gaskets. Keep a small battery-powered fan in your kit to help prevent lens fogging, and pack a few disposable hand warmers – they’re excellent for drawing moisture away from sensitive equipment in humid conditions.
Remember to bring extra memory cards in waterproof cases, as changing cards in the rain can expose your camera’s internal components to moisture.
Camera Settings for Rain Photography
Exposure Settings for Rain
Capturing rain at night requires a delicate balance of exposure settings to freeze droplets while maintaining the ambient mood of the scene. Start with an ISO between 800 and 1600 – this provides enough sensitivity for night shooting while keeping noise manageable. In particularly dark conditions, you might need to push to ISO 3200, but be mindful of your camera’s noise performance at higher sensitivities.
Shutter speed is crucial for different rain effects. To freeze individual raindrops, aim for 1/250th second or faster. This creates sharp, distinct droplets in your frame. For a more ethereal effect, slow your shutter to 1/60th or longer, creating elegant streaks of rain that add drama to your composition. When working with artificial lighting like street lamps or building illumination, try 1/125th as a starting point and adjust based on the rain’s intensity.
For aperture selection, consider both light gathering and depth of field. A wide aperture like f/2.8 or f/4 helps collect more light and can create beautiful bokeh effects with distant light sources shining through the rain. However, if you’re trying to capture a broader scene with both near and far elements in focus, stop down to f/8 or f/11, compensating with a higher ISO or longer exposure time.
Use spot metering to handle challenging lighting conditions, particularly when dealing with bright artificial lights against dark backgrounds. This helps prevent overexposed highlights while maintaining detail in the shadows. If your scene includes reflective surfaces like wet pavements or puddles, take a test shot and check your histogram – ensure you’re not clipping highlights in these areas.
Remember that rain reduces contrast and can fool your camera’s meter. Consider dialing in +0.3 to +0.7 exposure compensation to maintain proper brightness levels, especially when shooting darker scenes. For consistent results, shoot in manual mode once you’ve found your ideal settings, as changing rain conditions can confuse your camera’s automatic exposure systems.
Focus Techniques in Wet Conditions
Achieving sharp focus in rainy night conditions presents unique challenges, but with the right techniques, you can capture crisp, stunning images. One of the most reliable methods is using manual focus, as autofocus systems often struggle with raindrops and low light conditions. Switch to manual focus and use your camera’s live view feature, zooming in digitally to fine-tune your focus point.
For stationary subjects, try the focus stacking technique. Take multiple shots at slightly different focus points and combine them later in post-processing. This helps ensure maximum sharpness throughout your image, particularly useful when capturing detailed scenes like wet foliage or architectural elements.
Back-button focus can be your best friend in wet conditions. By separating the focus function from your shutter button, you can lock focus once and concentrate on timing your shots with the falling rain. This is particularly effective when photographing subjects at a consistent distance.
When dealing with water droplets on your lens, keep a microfiber cloth handy and consider using a lens hood. The hood not only prevents direct rain from hitting your lens but also helps reduce lens flare from artificial light sources. Some photographers swear by using a clear filter and regularly wiping it instead of constantly cleaning their actual lens.
For moving subjects in the rain, try pre-focusing on a specific spot where you anticipate action will occur. This technique works well for street photography or wildlife shots, where subjects might suddenly appear in your frame. Set your aperture to f/8 or smaller to increase your depth of field, giving you more room for error in your focus.
Remember that contrast can be lower in wet conditions, making it harder for both you and your camera to identify focus points. Look for areas of high contrast in your scene, such as where light reflects off wet surfaces or where dark subjects meet bright backgrounds, and use these as your focus points.
Creative Techniques for Rainy Night Shots
Using Natural Light Sources
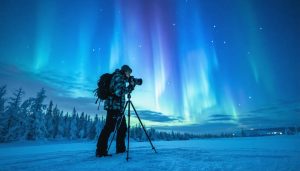
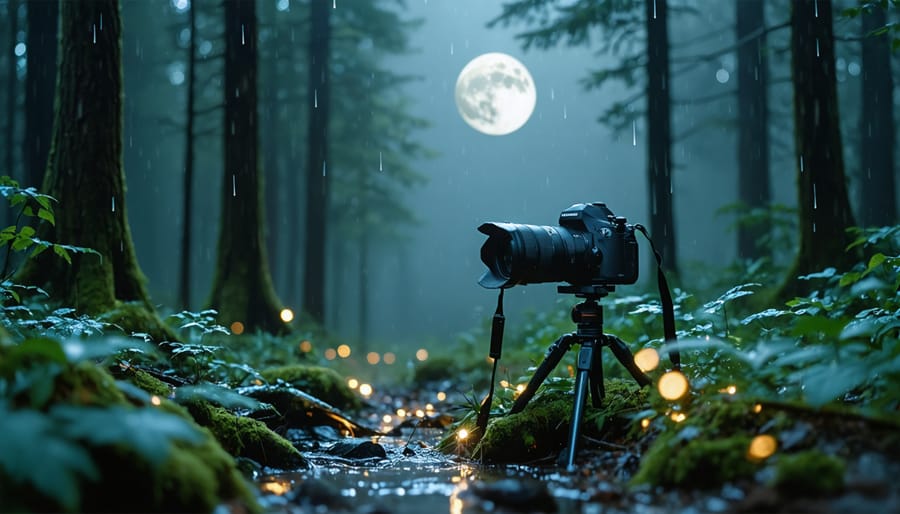
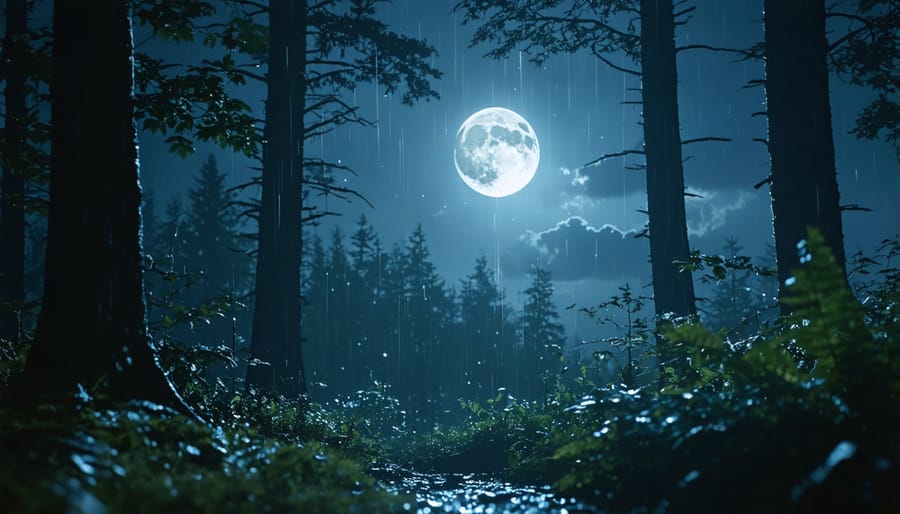
Natural light sources can create stunning effects in rainy night photography, with moonlight and ambient city glow offering unique opportunities for ethereal shots. Moonlight filtering through rain creates a magical atmosphere, especially during a full moon when the light is strong enough to illuminate raindrops and create beautiful bokeh effects.
To make the most of moonlight, position yourself so that the moon is behind or to the side of your subject. This creates a natural rim lighting effect, making raindrops sparkle like diamonds in your frame. Clear nights with a full moon are ideal, but even partial moonlight can add depth and dimension to your rainy night shots.
Urban environments offer another source of natural light through ambient city glow. This soft, diffused illumination can create a moody atmosphere as it reflects off wet surfaces and catches in falling rain. Street lights, building illumination, and even car headlights in the distance can contribute to the overall ambient light, creating layers of depth in your composition.
Consider the color temperature of these natural light sources. Moonlight tends to be cooler, creating blue-tinted shadows, while urban ambient light often has a warmer orange or yellow cast. You can use this contrast creatively, allowing the different color temperatures to add visual interest to your images.
For the best results, scout your location during daylight hours to identify potential light sources and plan your shots accordingly. Remember that rain intensifies these light sources through reflection and refraction, often creating unexpected and beautiful lighting effects that can elevate your nighttime photography.
Capturing Rain Patterns
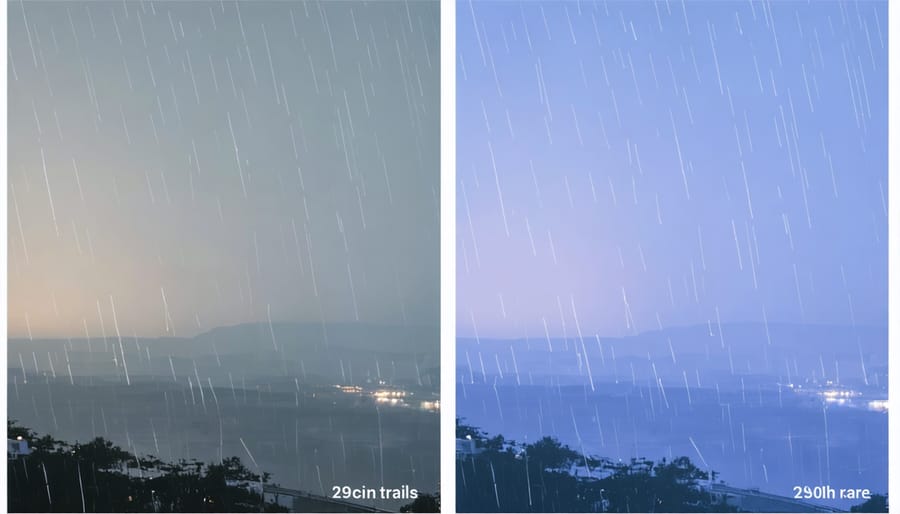
Capturing rain in night photography requires a delicate balance of technique and timing. The key to photographing rain streaks lies in your shutter speed – typically between 1/60 and 1/15 of a second works best. This range allows enough time for the raindrops to create visible trails while maintaining image sharpness.
To enhance the visibility of rain streaks, position your light source behind or to the side of the falling rain. Street lamps, building lights, or even a carefully placed flash can create dramatic backlighting that makes raindrops pop against the dark background. The angle of your light source is crucial – aim for roughly 45 degrees behind your subject for optimal results.
For capturing individual droplets, try using a faster shutter speed (around 1/200 or higher) combined with a flash. This technique freezes the water droplets in mid-air, revealing their unique shapes and the way they scatter light. Experiment with flash power and direction to find the perfect balance for your scene.
One often-overlooked technique is focusing on reflections in puddles. These mirror-like surfaces can create stunning compositions, especially when they reflect city lights or neon signs. Try positioning your camera low to the ground and including both the reflection and the rain in your frame.
Remember that rain intensity affects your approach. Light drizzle requires longer exposures or more powerful lighting to become visible, while heavy rain allows for faster shutter speeds and more dramatic streaking effects. Don’t be afraid to experiment with different combinations of settings as weather conditions change throughout your shoot.
Long Exposure Effects
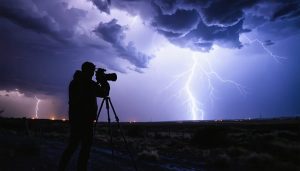
One of the most captivating aspects of rainy night photography is the ability to create ethereal effects through long exposure techniques. When you extend your shutter speed to several seconds or even minutes, raindrops transform from frozen droplets into mesmerizing light streaks, adding a dynamic element to your nighttime scenes.
To achieve this effect, start with shutter speeds between 2-30 seconds, depending on the rain intensity and your creative vision. Heavier rain typically requires shorter exposures (2-5 seconds) to avoid overexposure, while lighter precipitation allows for longer exposures that create more dramatic streaking effects.
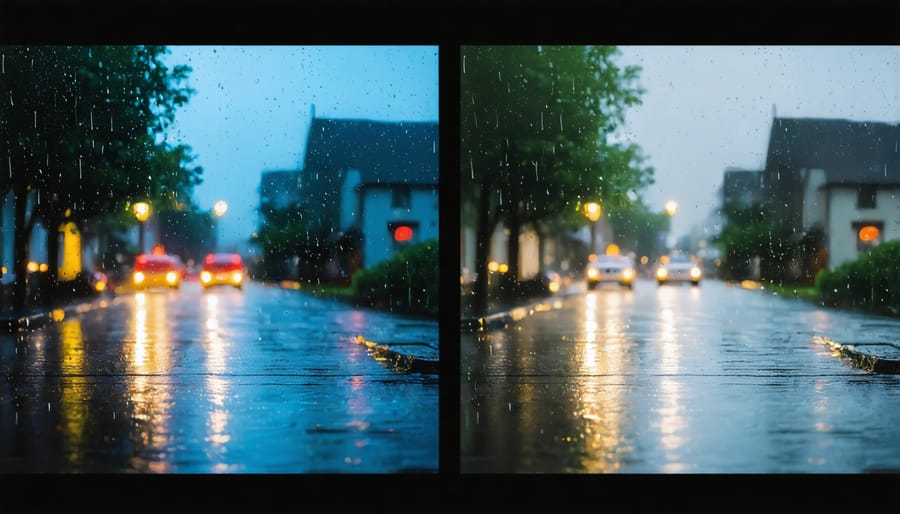
The interaction between artificial light sources and falling rain creates particularly striking results. Street lamps, car headlights, and storefront displays become light anchors, with rain streaks appearing to emanate from these points like celestial rays. Position your camera to capture these light sources in the frame, but be mindful of their intensity to prevent blown-out highlights.
For added atmosphere, try incorporating reflective surfaces like wet pavements or puddles. These elements mirror the light sources and rain streaks, creating symmetrical patterns that add depth to your composition. Experiment with different angles – shooting slightly upward can emphasize the diagonal lines of falling rain, while capturing reflections might require a lower perspective.
Remember that steady support is crucial for these extended exposures. A sturdy tripod is non-negotiable, and using your camera’s self-timer or a remote shutter release will help eliminate any camera shake that could blur your carefully crafted composition.
Post-Processing Wet Night Photos
Enhancing Rain Elements
Post-processing plays a crucial role in bringing out the magic of rainy night photography. Start by adjusting contrast and clarity to make raindrops more visible – subtle increases can dramatically improve the definition of rain streaks without making the image look artificial. Pay special attention to your highlights, as they’re key to making rain particles stand out against darker backgrounds.
Consider selective dodging and burning to enhance the interaction between rain and artificial light sources. This technique can create more depth and dimension in your images, especially where raindrops catch street lights or building illumination. The dehaze tool, when used sparingly, can help separate rain elements from atmospheric fog while maintaining the moody ambiance.
For more dramatic results, experiment with clarity and texture sliders in specific areas using masks or adjustment brushes. Focus on regions where rain is most visible, like areas lit by street lamps or car headlights. You can also enhance the glossy reflections on wet surfaces by carefully adjusting blacks and shadows while preserving highlight details.
Remember that subtlety is key – aim to enhance rather than overpower the natural appearance of rain. Sometimes, reducing contrast in certain areas while increasing it in others can create a more balanced and realistic final image.
Managing Dynamic Range
One of the biggest challenges in rainy night photography is the extreme contrast between bright artificial lights and dark shadows, especially when raindrops catch and reflect light. Successfully managing challenging lighting conditions requires a careful approach to exposure.
Start by shooting in RAW format to preserve maximum detail in both highlights and shadows. Consider using exposure bracketing, taking multiple shots at different exposure values (typically -2, 0, and +2 stops) to capture the full dynamic range of the scene. This gives you flexibility during post-processing to blend the best parts of each exposure.
The histogram is your best friend in these conditions. Pay special attention to the highlights, as blown-out raindrops can create distracting hot spots in your image. If possible, slightly underexpose your base shot to protect the highlights, knowing you can recover shadow detail later.
For scenes with particularly strong contrast, try using spot metering on the most important element of your composition. This could be illuminated raindrops, a wet street surface, or a prominent light source. Then adjust your exposure compensation accordingly, usually between -1 and -2 stops, to maintain detail throughout the frame.
Remember that some contrast can enhance the mood of rainy night scenes, so don’t feel compelled to flatten the dynamic range completely. The goal is to find the sweet spot between preserving detail and maintaining the atmospheric quality of the scene.
Rainy nights may seem daunting at first, but they offer incredible opportunities for creating atmospheric and emotionally compelling photographs. By mastering these fundamental photography techniques and embracing challenging weather conditions, you can capture images that stand out from the crowd.
Remember that proper preparation is key – always protect your gear, plan your shots, and maintain awareness of your surroundings. The combination of rain and artificial lighting creates a unique canvas of reflections, bokeh effects, and ethereal atmospheres that simply can’t be replicated in dry conditions. Don’t let fear of the elements hold you back from exploring these creative possibilities.
Whether you’re capturing city streets gleaming with reflected neon lights or documenting the subtle beauty of rain-soaked wilderness at night, the techniques we’ve discussed will help you create compelling images that tell powerful stories. Start with the basics, experiment with different approaches, and gradually push your creative boundaries.
Most importantly, practice safety while shooting in wet conditions, and always trust your instincts about when to call it a night. With time and patience, you’ll develop your own unique style of rainy night photography that showcases both technical expertise and artistic vision. So grab your rain gear, protect your camera, and head out to discover the magical world of nighttime rain photography – your next masterpiece awaits in those glistening droplets and shimmering reflections.