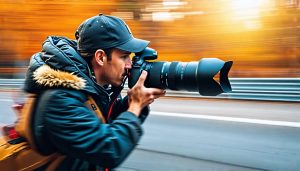
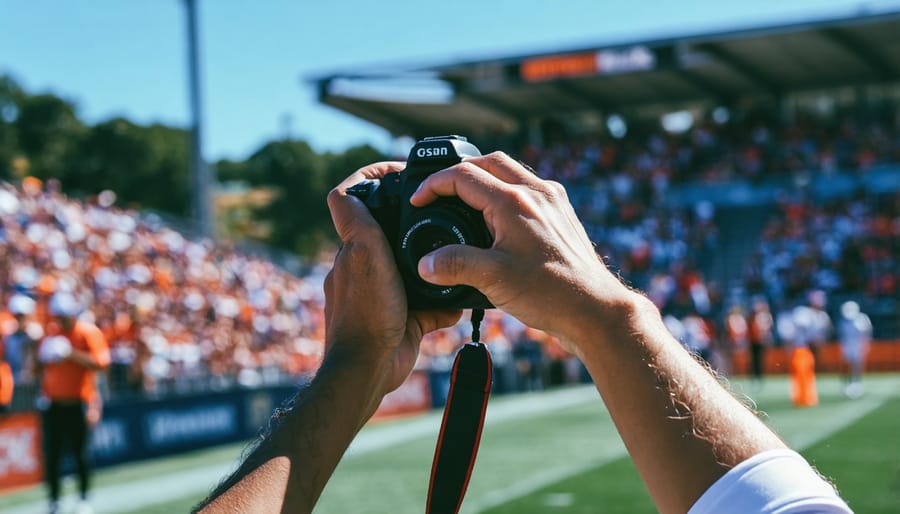
Freeze split-second moments by mastering your camera’s shutter priority mode and maintaining speeds above 1/1000th for fast-moving subjects. Position yourself strategically to capture stunning motion shots by anticipating your subject’s path and establishing a clear background that emphasizes movement. Pre-focus on key areas where action will unfold, using continuous autofocus (AI Servo for Canon, AF-C for Nikon) to track moving subjects with precision. Combine these technical fundamentals with creative elements like motion blur, panning techniques, and dramatic angles to transform ordinary action sequences into compelling visual stories that convey both power and grace.
Action photography demands split-second decisions and intimate knowledge of your gear. Whether you’re shooting sports, wildlife, or street photography, success lies in the delicate balance between technical precision and artistic vision. Master these foundational techniques, then push beyond conventional boundaries to develop your unique style in capturing movement’s decisive moments.
Essential Camera Settings for Action Shots
Shutter Speed Mastery
Mastering shutter speed is crucial for capturing sharp, dynamic action shots. When photographing moving subjects, your choice of shutter speed can mean the difference between a blurry mess and a crystal-clear moment frozen in time. Understanding how to adjust your optimal camera settings for different scenarios is essential.
For fast-moving subjects like sports or wildlife, start with shutter speeds of 1/1000th of a second or faster. This will freeze even rapid movement, capturing every detail with remarkable clarity. Race cars and birds in flight typically require speeds of 1/2000th or higher to eliminate motion blur completely.
However, sometimes you might want to convey a sense of movement in your images. Try experimenting with slower shutter speeds between 1/60th and 1/250th of a second while panning with your subject. This technique creates a sharp subject against a beautifully blurred background, suggesting speed and motion.
For creative effects, don’t be afraid to go even slower. Shutter speeds of 1/15th or longer can transform waterfalls into silky streams or turn carnival rides into spectacular light trails. The key is matching your shutter speed to your creative vision and the type of movement you’re capturing.
Remember to consider your available light – faster shutter speeds require more light, so you might need to adjust your ISO or aperture accordingly. Practice with different speeds to develop an intuitive understanding of how they affect your action shots.
Autofocus Modes and Settings
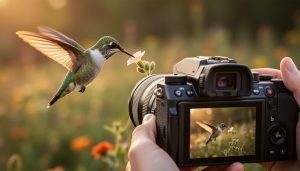
Modern cameras offer sophisticated autofocus systems that excel at tracking moving subjects, but choosing the right AF mode is crucial for sharp action shots. For most action scenarios, Continuous AF (AI Servo for Canon, AF-C for Nikon) is your best bet, as it constantly adjusts focus while your subject moves.
The key to success lies in selecting the appropriate AF area mode. Dynamic-area AF works well when following a single subject against a clean background, while 3D-tracking can handle more complex movements. For sports with predictable paths, like racing or cycling, consider using Zone AF to maintain focus within a specific area of your frame.
Don’t forget to customize your AF sensitivity settings. A higher sensitivity works better for erratic movements, while lower sensitivity helps maintain focus on your intended subject when other objects pass through the frame. For consistently sharp results, try back-button focus, which separates autofocus activation from your shutter release, giving you more control over when to engage or lock focus.
Remember to practice these settings before any important shoot – different scenarios may require different combinations for optimal results.
Drive Modes and Burst Shooting
Your camera’s drive mode settings are crucial for capturing the perfect action shot. Most modern cameras offer various continuous shooting modes, often referred to as burst modes, which allow you to capture multiple frames per second. Entry-level DSLRs typically shoot 3-5 frames per second, while professional sports cameras can capture up to 20 frames or more.
To use burst mode effectively, first select the appropriate continuous shooting setting. Many cameras offer both “low” and “high” speed continuous options. High speed is ideal for fast-moving subjects like sports, while low speed can work well for slower action sequences while conserving memory card space.
Consider your buffer capacity when shooting in burst mode. This is how many consecutive shots your camera can take before it needs to pause and process the images. RAW files fill the buffer faster than JPEGs, so adjust your file format based on your specific needs.
Pre-focusing on a specific spot where you anticipate action can help your camera maintain a faster burst rate, as it doesn’t need to continuously adjust focus between shots. Remember that while burst mode increases your chances of capturing the perfect moment, it also means more images to sort through later, so use it strategically rather than continuously.
Positioning and Anticipation
Finding the Right Angle
Position is everything in action photography, and finding the right angle can make the difference between a mediocre shot and a spectacular one. Start by considering your subject’s movement pattern and anticipating where the peak action will occur. For sports like basketball or volleyball, positioning yourself at court level rather than in the stands can create more dynamic compositions with powerful upward angles.
When photographing racing events, corners often provide the most dramatic opportunities. Position yourself on the inside of a turn to capture vehicles or athletes leaning into the curve, creating a sense of speed and tension. For straight-line action, try shooting from a low angle to emphasize power and momentum – this works particularly well for running events and motorsports.
Don’t forget about the background when choosing your position. Look for clean, uncluttered backgrounds that won’t compete with your subject. Sometimes, moving just a few feet left or right can eliminate distracting elements while maintaining your ideal shooting angle.
For aerial sports or activities with vertical movement, consider shooting from directly below or at a steep upward angle. This perspective can create unique compositions that highlight the relationship between the subject and the sky or ceiling.
Remember to prioritize safety when selecting your position. Always respect venue restrictions, maintain a safe distance from the action, and be aware of other photographers or spectators around you.
Anticipating Peak Action
The key to capturing stunning action shots lies in your ability to anticipate the decisive moment. Think of yourself as a sports predictor – knowing where the action will unfold before it happens. For example, in soccer, experienced photographers know that sliding tackles often occur near the penalty box, so they position themselves accordingly.
To develop this sixth sense, study your subject matter thoroughly. If you’re shooting sports, learn the rules and common plays. For wildlife photography, understand animal behavior patterns and habitats. This knowledge becomes your roadmap to positioning yourself in the right place at the right time.
Watch for telltale signs that telegraph upcoming action. A baseball pitcher’s wind-up, a bird’s pre-flight head bob, or a dancer’s preparatory stance can all signal imminent movement. Practice tracking these indicators and prepare to shoot a fraction of a second before the peak action occurs.
Consider the environment and lighting conditions as well. Position yourself where the action will be well-lit and where your background won’t distract from the subject. Sometimes, the best shots come from anticipating where your subject will pause or transition, rather than during their fastest movement.
Remember to remain patient and observant. The more time you spend watching and learning your subject’s patterns, the better you’ll become at predicting those split-second opportunities that make for memorable action photographs.
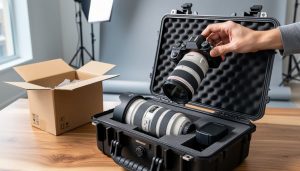
Lens Selection and Usage
Telephoto vs Wide-Angle
When it comes to capturing action, your choice between telephoto and wide-angle lenses can dramatically impact the final result. Choosing the right telephoto lens is crucial for sports and wildlife photography, where getting physically close to the subject isn’t possible or safe. Telephoto lenses allow you to maintain a comfortable distance while filling the frame with your subject, creating that professional-looking compression effect that makes action shots pop.
Wide-angle lenses, on the other hand, excel at capturing environmental action shots where you want to show the subject in context with their surroundings. Think skateboarding photography, where showing the entire ramp or urban setting adds crucial context to the story. They’re also perfect for capturing dynamic shots when you can get close to the action, like concert photography from the pit or indoor sports from courtside.
Consider your shooting environment and subject matter when deciding between the two. For fast-moving subjects at a distance, like birds in flight or race cars, a telephoto lens in the 200-600mm range will serve you well. For action happening right in front of you, like dance performances or street sports, a wide-angle lens between 16-35mm can create more immersive and dramatic perspectives that put viewers right in the middle of the action.
Remember that each lens type requires different techniques: telephoto lenses demand faster shutter speeds to prevent camera shake, while wide-angles allow more creative freedom with slower speeds and motion blur effects.
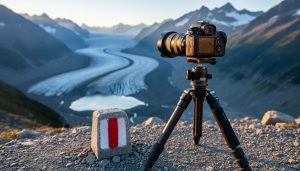
Stabilization Techniques
Achieving sharp action shots requires solid stabilization techniques, especially when dealing with longer lenses that magnify camera shake. The classic “reciprocal rule” suggests your shutter speed should be at least 1/focal length – so with a 200mm lens, aim for at least 1/200 second. However, with today’s high-resolution sensors, you might want to double or triple that speed for optimal sharpness.
For handheld shooting, maintain a stable stance with your feet shoulder-width apart, elbows tucked close to your body. Grip your camera firmly but not tensely, using your left hand to cradle the lens from underneath. When possible, lean against a stable surface like a wall or tree for added support.
Image stabilization (IS) technology, whether in-lens or in-body, can be invaluable for action photography. Most modern systems provide 4-5 stops of compensation, allowing you to shoot at slower shutter speeds than normally possible. However, remember to disable IS when using a tripod, as it can actually introduce blur.
For ultimate stability, a monopod offers an excellent balance between mobility and support – perfect for sports photography where you need to move quickly between positions. When using longer telephoto lenses, consider a gimbal head on your tripod, which allows smooth tracking of moving subjects while maintaining perfect balance.
Advanced Techniques
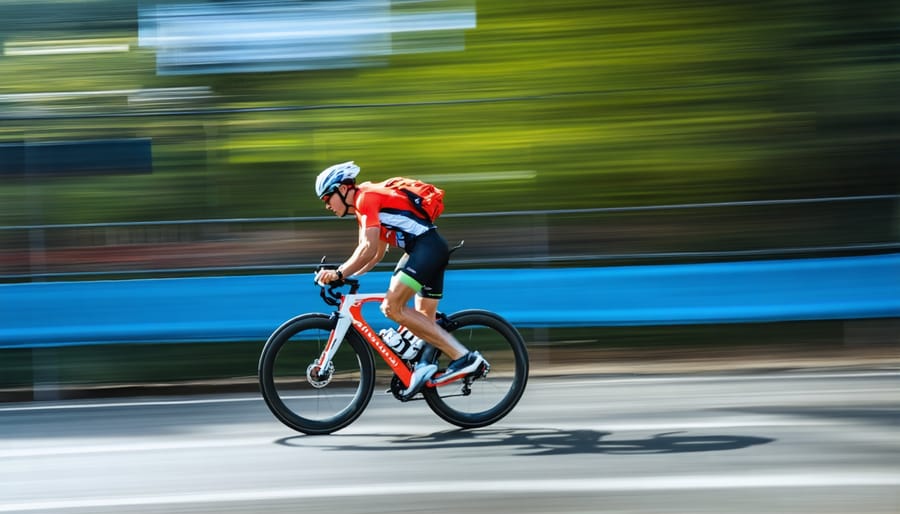
Panning for Motion
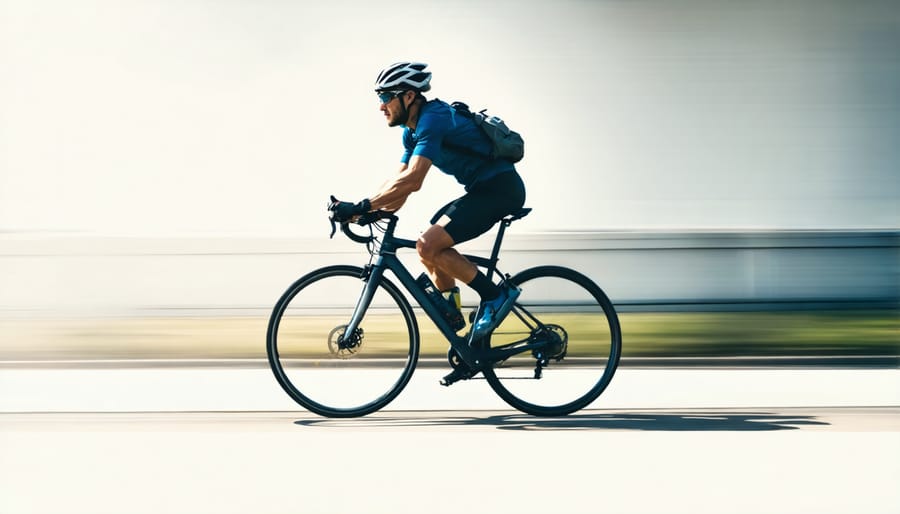
Panning is a dynamic technique that creates a sense of speed and motion by following your subject while using a slower shutter speed. Instead of freezing the action, you’ll blur the background while keeping your subject relatively sharp, resulting in an artistic representation of movement.
To master panning, start by selecting a shutter speed between 1/15 and 1/60 of a second, depending on your subject’s speed. Faster subjects like race cars might need faster speeds, while cyclists or runners can be captured with slower speeds. Position yourself parallel to your subject’s path of movement, and plant your feet firmly for stability.
As your subject approaches, start tracking them through your viewfinder before pressing the shutter. The key is to match your camera’s movement speed with your subject’s motion, maintaining a smooth, steady sweep. Continue the motion even after you’ve released the shutter – this follow-through is crucial for achieving sharp results.
Practice is essential for panning shots. Start with predictable subjects like cyclists on a dedicated path or cars at a specific intersection. Keep your arms tucked close to your body, pivot from the hips, and use continuous autofocus mode to track your subject. Don’t get discouraged if your first attempts aren’t perfect – even experienced photographers typically keep only a small percentage of their panning shots.
Creative Blur Effects
While freezing action can create stunning shots, intentionally introducing motion blur can transform your action photography into artistic masterpieces. Motion blur, when used creatively, conveys a powerful sense of movement and energy that perfectly captured moments sometimes can’t achieve.
One popular technique is panning, where you follow your subject’s movement while using a slower shutter speed (typically 1/15 to 1/60 second). This creates a sharp subject against a beautifully blurred background, emphasizing speed and direction. Try this with runners, cyclists, or racing cars for dramatic results.
Another approach is to deliberately slow down your shutter speed while keeping your camera stationary. This works beautifully with flowing water, creating that silk-like effect in waterfalls, or with busy street scenes where moving subjects become ethereal streaks of color and light.
For more experimental effects, try zoom burst photography. During a longer exposure, smoothly zoom your lens in or out to create dynamic radiating blur patterns. This technique works particularly well with colorful subjects or city lights at night.
Don’t be afraid to combine techniques. For instance, try a slight camera movement with a slow shutter speed while photographing athletes in motion. The resulting images might show both directional blur and motion trails, creating a unique interpretation of the action that tells a more compelling story than a perfectly sharp image.
Remember, creative blur isn’t about technical perfection – it’s about artistic expression and capturing the essence of movement in your own unique way.
Multiple Exposure Techniques
Multiple exposure techniques offer a creative way to showcase action sequences in a single frame, telling a complete story of movement through time. This approach involves combining several shots of the same scene into one compelling image that displays the progression of motion.
To create multiple exposure shots, you have two main methods. The first is in-camera multiple exposure, where your camera combines several shots automatically. Many modern digital cameras offer this feature, allowing you to set the number of exposures and interval between shots. For best results, use a tripod to keep your camera perfectly still and ensure your background remains consistent.
The second method involves post-processing in editing software like Photoshop, where you layer multiple images taken in sequence. This technique offers more control over the final composition and allows you to adjust the opacity and blending of each frame. When shooting for this method, remember to maintain consistent exposure settings and composition throughout the sequence.
For either approach, planning is crucial. Consider the subject’s path of movement and ensure there’s enough space in your frame to capture the entire sequence. The background should be relatively simple to avoid visual clutter. Try to space your subject’s positions evenly throughout the frame to create a natural flow of movement.
Success with multiple exposures often comes from experimentation. Start with simple movements and gradually progress to more complex sequences as you become comfortable with the technique.
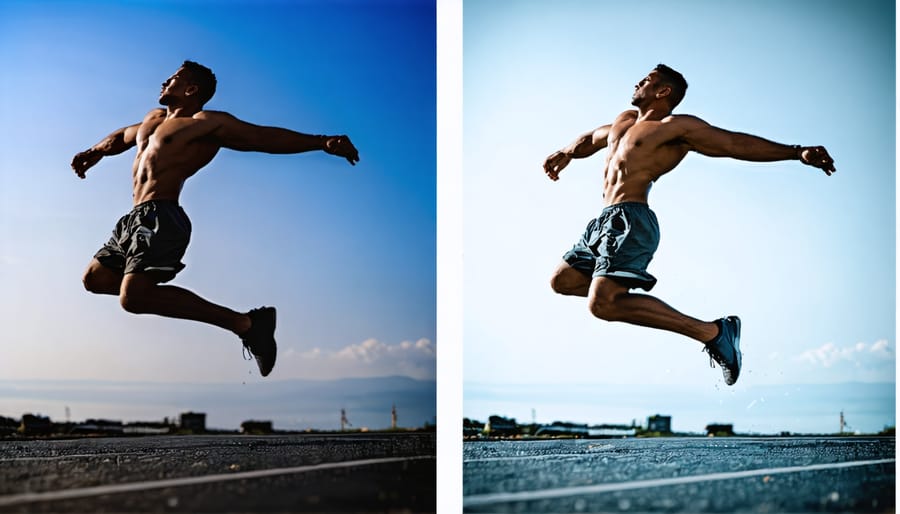
Post-Processing Action Shots
Capturing the perfect action shot is just the beginning – the magic often happens in post-processing. With modern post-processing techniques, you can enhance the drama and impact of your action photographs while maintaining their authenticity.
Start by adjusting your exposure and contrast to make your subject pop. Action shots often benefit from slightly higher contrast to emphasize movement and create visual impact. Pay special attention to highlights and shadows – you’ll want to retain detail in both areas while maintaining the dynamic feel of the image.
Sharpening is crucial for action photography, but apply it selectively. Focus on your main subject while keeping background blur natural. Use masking tools to sharpen only the areas that matter most, like an athlete’s face or the ball in mid-flight.
Color treatment can dramatically affect the mood of your action shots. Consider boosting vibrance slightly to make team colors more prominent, or experiment with selective color adjustments to draw attention to specific elements. For sports photography, ensure skin tones remain natural while enhancing the vibrancy of uniforms or equipment.
Cropping can make or break an action shot. Don’t be afraid to crop tightly around your subject, but remember to leave space in the direction of movement. This creates a sense of motion and helps viewers’ eyes follow the action naturally.
For sequences or burst shots, consider creating composite images that show the progression of movement. Many editing software packages offer tools specifically designed for this purpose, allowing you to combine multiple frames into one dynamic image.
Finally, save your editing steps as presets or actions for consistency across similar shots. This not only saves time when processing large batches of action photos but also helps maintain a cohesive look throughout your portfolio.
Mastering action photography is an ongoing journey that rewards patience and practice. As we’ve explored, successful action shots depend on a combination of technical skills, creative vision, and proper preparation. Remember to start with the fundamentals: fast shutter speeds, continuous autofocus, and appropriate camera settings for your subject. Position yourself strategically, anticipate the action, and don’t be afraid to experiment with different angles and perspectives.
Keep practicing these techniques in various situations – from sporting events to wildlife encounters – and you’ll see your skills improve with each session. Start with easier subjects and gradually challenge yourself with more complex scenarios. Review your images critically, learn from both successes and failures, and continue refining your approach.
Most importantly, enjoy the process. There’s something truly exhilarating about capturing that perfect moment of motion, freezing time in a way that tells a compelling story. Now grab your camera and get out there – your next great action shot awaits!