Transform ordinary scenes into compelling visual stories through timeless black and white techniques that strip away color’s distractions and reveal the raw essence of your subject. Black and white photography demands a fundamental shift in perspective – training your eye to see contrast, texture, and form rather than hues and saturation. By mastering the interplay of shadows and highlights, you’ll create images that speak with a distinctive voice that color simply cannot match.
Understanding tonal relationships becomes your new language, where the graceful transition from pure white to deep black tells stories more powerful than any rainbow. Whether you’re shooting architecture against moody skies or capturing the subtle expressions in a portrait, this guide will equip you with both technical precision and artistic vision to craft meaningful monochromatic images. From in-camera techniques to post-processing workflows, we’ll explore how to see and capture the world in shades of gray while maintaining the emotional impact that makes black and white photography eternally captivating.
Why Some Photos Work Better in Black and White
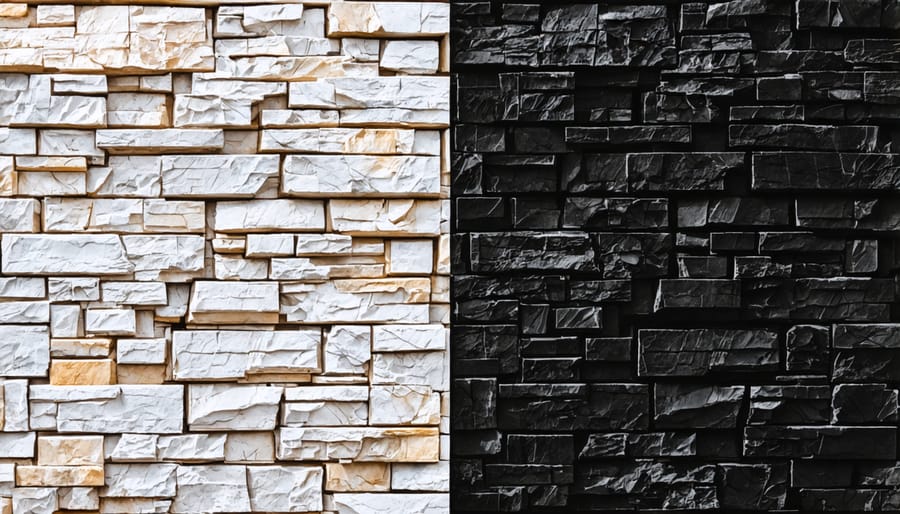
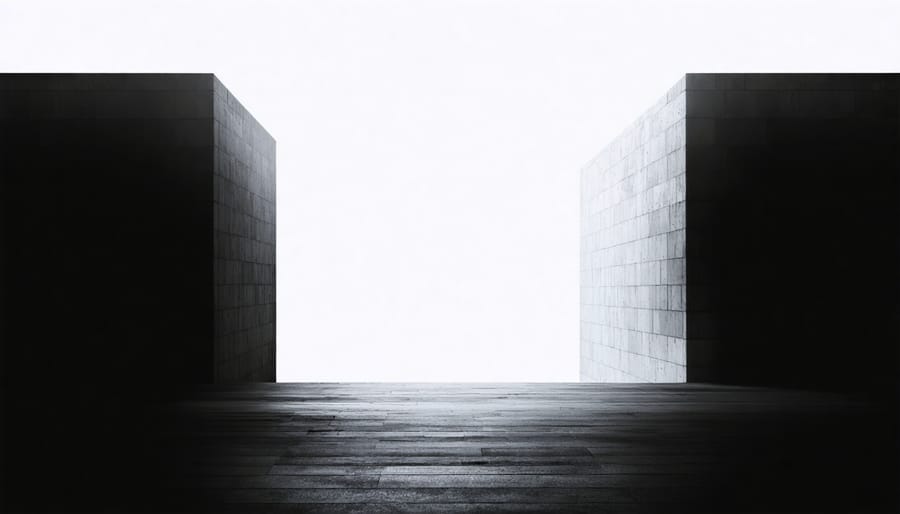
The Power of Form and Texture
One of the most compelling aspects of black and white photography is its unique ability to emphasize form and texture in ways that color images cannot. When you strip away color, your eye naturally gravitates toward the fundamental elements of composition – shapes, patterns, and surface details that might otherwise go unnoticed. This principle is particularly powerful when applying landscape composition techniques, where the interplay of light and shadow can transform ordinary scenes into dramatic statements.
Consider how rough bark on a tree becomes more pronounced, how the ripples in sand dunes take on new depth, or how architectural details pop with enhanced clarity. In black and white, texture becomes a storytelling element – whether it’s the smooth surface of weathered stone, the intricate patterns of leaves, or the contrast between sharp and soft elements in your frame.
To maximize these effects, look for subjects with strong textural elements and experiment with side lighting to create shadows that emphasize surface details. Pay particular attention to how different textures interact within your composition, using them to create visual interest and guide your viewer’s eye through the image.
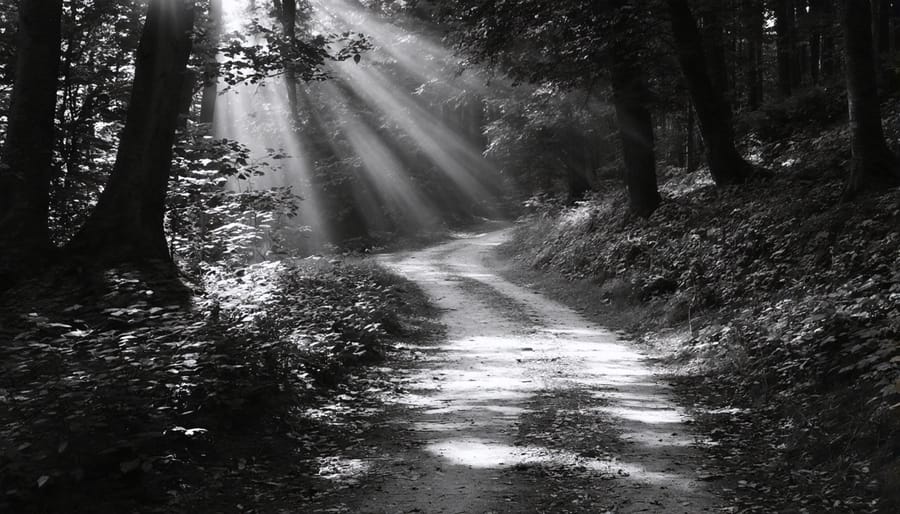
Light and Shadow Mastery
In black and white photography, mastering light and shadow is crucial for creating compelling images. Without color to rely on, the interplay between highlights and shadows becomes your primary tool for visual storytelling. Understanding dramatic lighting techniques helps you create depth and dimension in your monochrome images.
Think of tonal range as your palette, stretching from pure black to crisp white, with countless gray values in between. The key is learning to see these variations in the field. Try squinting at your subject – this simple trick helps you visualize how the scene will appear in black and white by reducing your color perception.
Contrast plays a vital role in creating impact. High contrast scenes, where deep shadows meet bright highlights, often result in striking images with strong visual punch. Conversely, low contrast scenes with subtle tonal gradations can convey mood and atmosphere. The secret lies in matching your contrast approach to your subject matter and creative vision.
Remember, the direction and quality of light dramatically affect your image’s tonal range. Side lighting emphasizes texture, while front lighting tends to flatten subjects. Experiment with different lighting angles to discover how they influence your black and white compositions.
Essential Camera Settings for Black and White
RAW vs. JPEG Considerations
When it comes to black and white photography, shooting in RAW format gives you unprecedented control over your final image. Unlike JPEG, which compresses and processes the image in-camera, RAW files preserve all the original data captured by your sensor. This becomes especially crucial when working with low light or high-contrast scenes, common scenarios in black and white photography.
RAW files retain more detail in both highlights and shadows, allowing you to recover seemingly lost details during post-processing. This flexibility is particularly valuable when converting to black and white, as you’ll have more latitude to adjust contrast, tone mapping, and individual color channel responses. For instance, you can dramatically alter how different colors translate to various shades of grey, something that would be severely limited with JPEG files.
While RAW files require more storage space and processing time, the creative freedom they provide is worth the trade-off. You can experiment with different black and white conversions from the same RAW file, essentially giving you multiple interpretations of a single moment without quality loss.
Using Your Camera’s Monochrome Mode
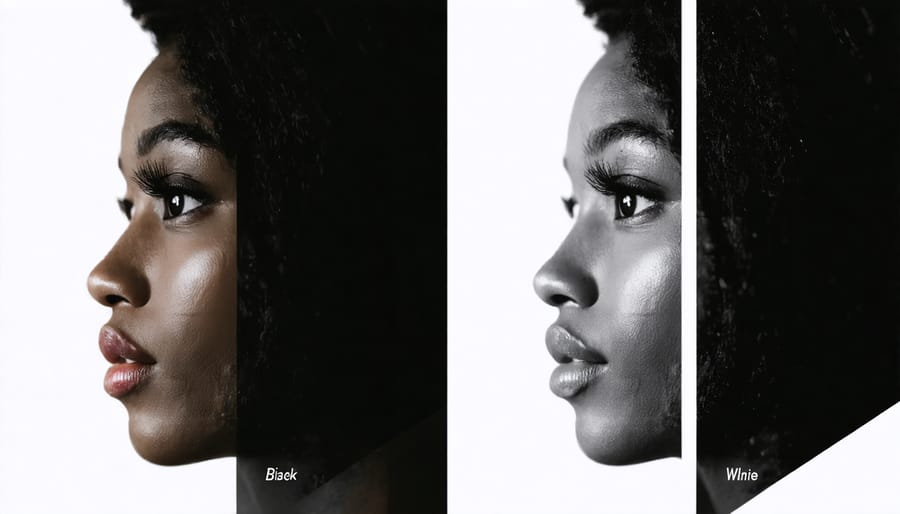
Most modern digital cameras offer a monochrome or black and white mode, which can be an invaluable tool for visualizing your final image before pressing the shutter. When enabled, your camera’s LCD screen or electronic viewfinder displays the scene in black and white, helping you focus on shapes, textures, and tonal relationships without the distraction of color.
This preview capability is particularly useful for developing your eye for black and white composition. You’ll immediately see how different elements in your scene translate to grayscale, allowing you to make real-time adjustments to your composition and exposure. For instance, a vibrant red flower that commands attention in color might appear quite subdued in black and white, prompting you to reconsider your composition.
However, it’s important to understand that shooting in your camera’s monochrome mode has limitations. While the preview is in black and white, if you’re shooting in RAW format, your camera still captures all color information. This is actually advantageous, as it gives you maximum flexibility during post-processing. If you’re shooting JPEG, however, the black and white conversion is permanent, so choose this option only when you’re absolutely certain about your creative direction.
Many cameras also offer built-in filters and contrast adjustments in monochrome mode. While these can be helpful for visualization, remember that you’ll have far more control over these aspects in post-processing software. Consider the in-camera preview as a compositional aid rather than a final rendering of your image.
Post-Processing Your Black and White Images
Color Channel Adjustments
Color channel adjustments are one of the most powerful tools in your black and white conversion arsenal. Think of each color channel as a separate control knob that affects how different colors translate into various shades of gray. By adjusting these channels individually, you can dramatically alter the contrast and mood of your image.
The red channel primarily affects skin tones, brick buildings, and autumn foliage. Increasing this channel will brighten these elements while darkening blue skies, creating striking landscape photographs. The green channel influences most vegetation and can help separate different plant species in nature photography. It’s particularly useful when you want to emphasize texture in grass or leaves.
The blue channel affects sky tones and water, making it crucial for landscape photography. Darkening this channel can transform a pale sky into a dramatic backdrop with deep, moody tones. However, be cautious with the blue channel, as extreme adjustments can introduce unwanted noise in your images.
For optimal results, start by identifying the key elements in your image and their corresponding colors. Then, adjust each channel deliberately to achieve your desired contrast. For instance, if you’re photographing a red brick building against a blue sky, try darkening the blue channel while lifting the red channel to create a striking architectural shot.
Remember that subtle adjustments often yield the most natural-looking results. Pay attention to how the channels interact with each other, and don’t be afraid to fine-tune your adjustments several times until you achieve the perfect balance of tones.
Dodging and Burning Techniques
Dodging and burning, techniques borrowed from darkroom days, remain powerful tools in modern black and white photography. These localized adjustments allow you to selectively lighten (dodge) or darken (burn) specific areas of your image, creating depth and drawing attention to key elements in your composition.
To effectively dodge and burn, start by identifying your image’s focal points and the areas that need enhancement. Think of these adjustments as a way to guide your viewer’s eye through the photograph. For instance, you might want to dodge (lighten) your subject’s face while burning (darkening) the surrounding areas to create separation and dimension.
In digital editing software like Lightroom or Photoshop, you have several methods to achieve these effects. The most precise approach is using adjustment brushes with decreased or increased exposure settings. For more natural results, work with low opacity (around 10-15%) and build up the effect gradually with multiple passes.
A professional tip is to create a new layer filled with 50% gray and set to Soft Light blending mode. Paint with black to burn and white to dodge – this non-destructive method gives you complete control over the intensity of your adjustments.
When combined with lighting for dramatic effects, dodging and burning can transform a flat black and white image into a compelling photograph with remarkable depth. Pay particular attention to natural light patterns and enhance them through selective adjustment.
Remember to step away from your image periodically and view it at different sizes to ensure your adjustments look natural. The goal isn’t to create obvious effects but to subtly enhance the natural dimensionality of your photograph. With practice, these techniques will become intuitive tools in your black and white editing workflow.
Fine-Tuning Contrast and Tone
Fine-tuning contrast and tone in black and white photography is where your images truly come to life. Think of contrast as the dynamic range between your darkest blacks and brightest whites, while tone refers to the subtle gradations of gray in between. The key to mastering both lies in understanding the relationship between these elements.
Start by identifying your image’s key tonal zones. A well-balanced black and white photograph typically includes true blacks, deep shadows, mid-tones, bright highlights, and pure whites. However, not every image needs to contain the full spectrum – sometimes limiting your tonal range can create more dramatic results.
When adjusting contrast, begin with global adjustments before moving to local corrections. The classic S-curve adjustment in your editing software is your best friend here. By gently pulling up the highlights and pushing down the shadows, you create a natural-looking contrast that maintains detail in both areas. Be careful not to push too far – blown-out highlights or blocked-up shadows can ruin an otherwise perfect image.
For more precise control, use selective adjustments. Tools like dodging and burning allow you to enhance specific areas of your image. Try darkening the edges of your frame slightly to draw attention to your subject, or brightening key elements to create visual hierarchy.
Pay special attention to texture and form. In black and white photography, these elements become more prominent without color to compete for attention. Increase local contrast in areas with interesting textures, but maintain softer contrast in smoother areas like skin or sky to achieve a balanced final image.
Remember, the goal isn’t to create the most contrast possible, but rather to find the perfect balance that serves your creative vision.
Common Black and White Conversion Mistakes
Poor Tonal Range
Poor tonal range is one of the most common pitfalls in black and white photography, often resulting in images that appear flat and lifeless. To avoid this, you’ll need to train your eye to see the world in terms of luminance rather than color. Start by looking for scenes with a wide range of brightness levels, from deep shadows to bright highlights.
The key to achieving rich tonal range lies in proper exposure and understanding the histogram. When shooting, aim to capture details in both the shadows and highlights – this gives you more flexibility during post-processing. Consider using bracketing techniques in high-contrast scenes to ensure you capture the full range of tones.
Contrast plays a crucial role in creating depth and dimension. Look for naturally contrasting elements in your composition, such as light breaking through dark clouds or shadows cast by strong sunlight. The interplay between light and dark areas creates visual interest and prevents the dreaded “muddy” middle tones that can make images appear dull.
During post-processing, use tools like curves and levels adjustments to fine-tune your tonal range. Pay special attention to the darkest and lightest areas of your image, ensuring they maintain detail while still providing impact. Remember, the goal isn’t to create extreme contrast in every image, but rather to develop a rich palette of grays that effectively conveys your subject’s form and texture.
Over-Processing
While the allure of dramatic black and white imagery can be tempting, over-processing is a common pitfall that can quickly diminish the impact of your photographs. The key to creating compelling monochrome images lies in maintaining a natural look while enhancing the inherent qualities of your composition.
A well-processed black and white photograph should retain detail in both highlights and shadows. Avoid pushing the contrast too far, as this can lead to harsh, unrealistic results with blown-out whites and blocked-up shadows. Instead, aim for smooth tonal transitions that preserve the subtle nuances in your image.
Watch out for telltale signs of over-processing, such as haloing around high-contrast edges, excessive grain, or unnatural-looking skin tones in portraits. These artifacts can make your images appear artificial and dated. When adjusting clarity or structure, use a light touch – these tools can quickly create an HDR-like effect that detracts from the classic appeal of black and white photography.
Remember that less is often more. Start with subtle adjustments and gradually build up the effect you’re looking for. Step away from your editing work periodically and return with fresh eyes. If your image looks obviously processed at first glance, consider scaling back your adjustments. The goal is to enhance the natural qualities of your photograph while maintaining its authenticity and emotional impact.
Black and white photography is a timeless art form that continues to captivate viewers and challenge photographers. Throughout this tutorial, we’ve explored the essential elements that make monochrome images truly compelling – from understanding how different colors translate to grayscale tones to mastering contrast and composition. Remember that successful black and white photography isn’t just about removing color; it’s about seeing and capturing the world in terms of light, shadow, texture, and form.
As you begin your journey in black and white photography, start by training your eye to see potential subjects in monochrome. Take time to experiment with different camera settings, particularly paying attention to your exposure and contrast controls. Don’t be afraid to push the boundaries of high contrast or explore the subtle beauty of muted tones.
Post-processing is equally important, but remember that the strongest black and white images usually start with thoughtful in-camera work. Practice both aspects regularly, and keep a mental checklist of what works best for different subjects and lighting conditions.
Most importantly, don’t get discouraged if your early attempts don’t match your vision. Like any artistic pursuit, black and white photography requires patience and practice. Start with the techniques we’ve covered, but don’t be afraid to develop your own style and preferences. The beauty of black and white photography lies in its ability to reveal the essence of your subject while reflecting your unique creative perspective.