Transform ordinary images into compelling visual stories by mastering the fundamental principles of photographic composition. Frame your subject using the rule of thirds, placing key elements along intersecting gridlines to create natural focal points and visual balance. Harness leading lines – roads, fences, or architectural features – to draw viewers’ eyes through the frame and establish a sense of depth and movement. Create visual hierarchy through strategic use of foreground, middle ground, and background elements, much like the layered approach used in VR camera techniques. Control negative space deliberately, using emptiness to emphasize your subject and create breathing room within the frame. Understanding these composition basics unlocks endless creative possibilities, allowing photographers to craft images that not only capture moments but tell powerful stories through thoughtful visual arrangement.
The 360-Degree Canvas: Rethinking Traditional Composition Rules
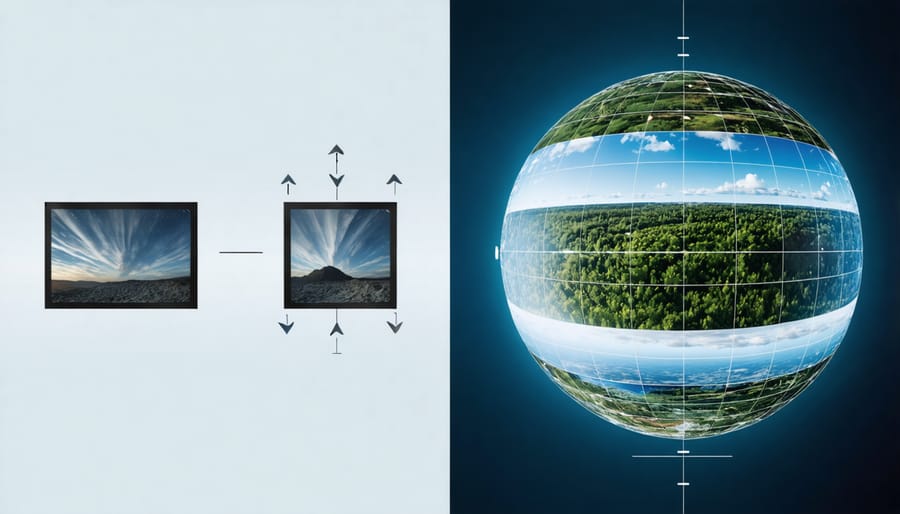
The Rule of Thirds in Spherical Space
While the traditional rule of thirds divides an image into a 3×3 grid, applying this principle to 360-degree photography requires thinking in spherical terms. Imagine wrapping that grid around a sphere, creating multiple sweet spots for composition that can engage viewers as they explore your immersive scene.
In spherical space, you’ll want to consider both horizontal and vertical thirds as they curve around your composition. Think of your scene as having three main bands: lower, middle, and upper spherical sections. The intersecting points of these bands create natural focal points that work particularly well for key subjects or points of interest.
The key difference is that viewers can look in any direction, so you’ll need to create multiple points of interest around the sphere. Consider placing your main subject at one of these intersecting points, then use secondary subjects at other third-points to guide the viewer’s journey through the scene.
A practical approach is to start by identifying your primary subject and positioning it at a traditional third-point from your main viewing angle. Then, work your way around the sphere, placing complementary elements at other third-points to maintain visual interest throughout the 360-degree space. This creates a balanced composition that works from multiple viewing angles while maintaining the classic principles of good photographic design.
Leading Lines in VR
Leading lines take on a fascinating new dimension in virtual reality photography, where viewers can explore a scene from multiple angles. Unlike traditional photography, VR environments allow these directional elements to work dynamically, guiding viewers through an immersive 360-degree space.
When composing VR shots, consider both horizontal and vertical leading lines that can draw attention to key points of interest. Natural elements like pathways, roads, or architectural features can create powerful directional cues. For example, a winding mountain trail can guide viewers’ eyes from the foreground to a dramatic peak, while building corridors can create compelling perspectives that work from various viewing angles.
The key is to think spherically rather than in a flat frame. Position yourself so that leading lines converge at important elements in your scene, regardless of where the viewer might be looking. In urban environments, try using repeating elements like street lights, building edges, or subway platforms to create natural flow throughout the space.
Remember that in VR, viewers have agency over their perspective. Use this to your advantage by creating multiple leading line compositions within the same scene. A well-composed VR photograph might use the lines of a bridge to direct attention to a sunset, while simultaneously employing riverside railings to highlight interesting architectural elements in another direction.
Consider the viewing height when placing leading lines, as this affects how these elements guide the viewer’s experience through your virtual space.
Viewer Orientation and Point of Interest
Initial View Planning
When starting your VR photography journey, one of the most crucial first steps in VR content creation is determining your initial view – the direction your audience sees first when entering your virtual space. Think of it as your photograph’s “front door,” welcoming viewers into your 360-degree world.
Consider what element in your scene tells the strongest story or creates the most impact. This could be a dramatic landscape feature, an architectural focal point, or a compelling human element. Position this as your default view, ensuring it captures attention immediately and encourages exploration of the wider scene.
Remember that while viewers can look anywhere in your 360-degree image, they’ll naturally begin where you point them. Use this to your advantage by creating a visual hierarchy that guides them through your composition. Start with your strongest element, then arrange secondary points of interest at natural viewing angles – typically 45 to 90 degrees from the initial view.
A helpful technique is to imagine your viewer standing in the physical space. Where would they naturally look first? What would draw their eye next? This human-centric approach helps create more intuitive and engaging compositions that feel natural to explore.
Always test your initial view across different devices and platforms to ensure consistency in how your image first appears to viewers.
Multiple Points of Interest
While the rule of thirds and single focal points are powerful composition tools, sometimes a scene calls for multiple points of interest to tell a more complex story. Working with multiple focal points requires careful balance and intention to avoid overwhelming your viewer or creating visual chaos.
Start by identifying your primary and secondary points of interest. Your primary focal point should still command the most attention, while secondary elements support and enhance the overall composition. Think of it like a theatrical performance – you have your main actor and supporting cast, each playing vital roles but not competing for the spotlight.
Consider using leading lines, patterns, or natural frames to create visual pathways between your points of interest. This helps guide the viewer’s eye through the image in a deliberate way. For example, in a cityscape, you might use a winding road to connect a striking building in the foreground with an illuminated bridge in the background.
Pay special attention to spatial relationships and visual weight. Elements should feel balanced across the frame, even if they’re not symmetrical. The distance between points of interest is crucial – too close, and they compete; too far apart, and the viewer’s eye gets lost.
Color and contrast can help establish hierarchy among your focal points. Use brighter colors or stronger contrast for your primary subject, with subtler tones for supporting elements. Remember that negative space remains important – don’t feel compelled to fill every part of the frame just because you’re working with multiple points of interest.
Finally, always consider your composition through your viewer’s eyes. Ask yourself if the relationship between elements is clear and if the visual journey through your image feels natural and engaging.

Managing Depth in VR Photography
Foreground Elements
Foreground elements play a crucial role in creating depth and immersion in your photographs. By incorporating objects in the immediate foreground, you can guide viewers through the image and create a more engaging visual experience. Think of foreground elements as your scene’s opening act – they set the stage for what’s to come.
When selecting foreground elements, look for objects that complement your main subject rather than compete with it. Natural frames like tree branches, archways, or rock formations can draw attention to your focal point while adding layers to your composition. In landscape photography, elements like flowers, rocks, or fallen logs can create a sense of scale and provide context for the broader scene.
The key is to position these elements thoughtfully. Try placing them off-center, using the rule of thirds as your guide. This creates a natural flow that leads the viewer’s eye through the frame. Pay attention to how foreground elements interact with your background – they should create harmony rather than confusion.
Consider the height of your camera position when working with foreground elements. Getting low to the ground can dramatically emphasize objects in the foreground, making even small elements appear more prominent and impactful. This technique is particularly effective in landscape and architectural photography, where you want to establish a strong sense of place and perspective.
Remember that less is often more. A single well-placed foreground element can be more effective than multiple competing objects. The goal is to enhance your composition, not overwhelm it.
Layer Stacking
Layer stacking is a powerful composition technique that adds depth and visual interest to your photographs by incorporating multiple planes of focus. Think of your image as a theater stage, with distinct foreground, middle ground, and background elements working together to create a three-dimensional feel.
To effectively use layer stacking, start by identifying strong elements at different distances from your camera. A classic example might be colorful flowers in the foreground, a rustic fence in the middle ground, and mountains in the background. Each layer should complement the others while maintaining its own visual identity.
When executing this technique, consider your aperture choice carefully. A wider aperture (lower f-number) can help separate layers through selective focus, while a smaller aperture keeps everything sharp, allowing texture and detail to create the separation. The key is ensuring each layer contributes to the story you’re telling without competing for attention.
Movement through these layers can guide viewers’ eyes naturally through your composition. Leading lines, such as a winding path or river, can connect different planes while creating a sense of journey through the image. Remember that successful layer stacking often requires careful positioning – sometimes just a few steps forward or backward can dramatically improve how your layers interact.
Experiment with different perspectives and angles to find the most effective arrangement of your layers. The goal is to create a photograph that invites viewers to explore the scene, discovering new details as their eyes move from one plane to the next.
Technical Considerations
Camera Positioning
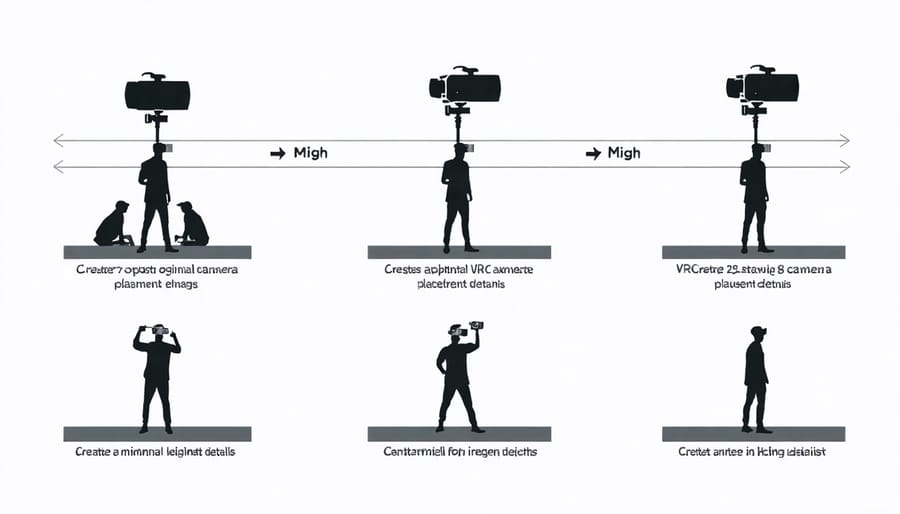
Camera positioning in VR photography requires a different approach compared to traditional photography, as your camera becomes the viewer’s eyes in the virtual space. The optimal height for VR camera placement typically mirrors the average human eye level, which is approximately 5’7″ (1.7 meters) from the ground. This creates a natural, immersive perspective that helps viewers feel present in the scene.
However, don’t feel constrained by this standard height. Varying your camera position can create dramatic effects and unique storytelling opportunities. Placing the camera lower can make architecture appear more imposing, while elevated positions can provide sweeping overviews of landscapes or cityscapes.
When positioning your VR camera, consider these key factors:
First, ensure your camera is perfectly level with the horizon. Even slight tilts can create disorientation for viewers in the final VR experience. Use a bubble level or digital level indicator to achieve precise alignment.
Second, maintain adequate distance from nearby objects. A good rule of thumb is to keep at least 3-4 feet (1-1.2 meters) between the camera and the closest subject. This prevents distortion and provides comfortable viewing in the final VR experience.
Finally, consider the movement paths in your scene. Position your camera where people would naturally stand or pause to observe their surroundings. Avoid placing the camera in spots that feel unnatural or uncomfortable, such as too close to walls or in the middle of walkways.
Remember that in VR photography, your camera placement doesn’t just frame a shot – it defines the entire viewer experience. Choose positions that tell your story while maintaining viewer comfort and spatial awareness.
Avoiding Stitch Lines
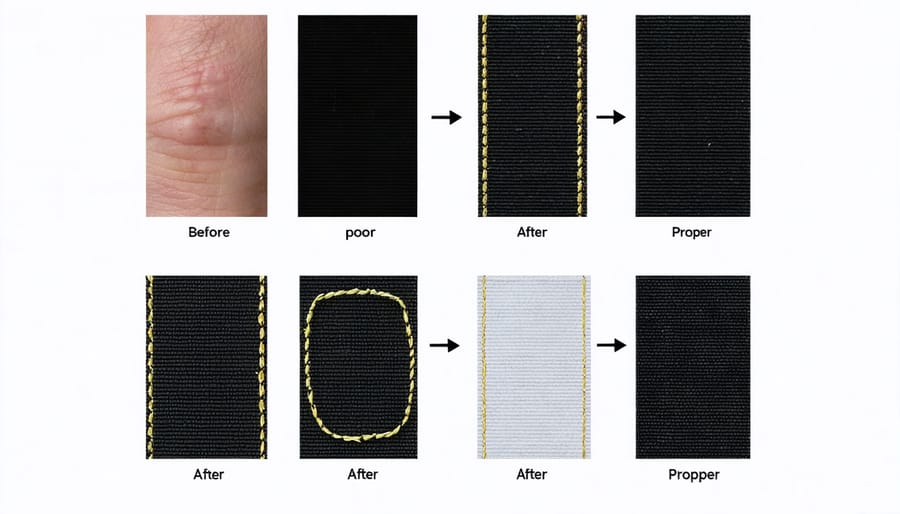
One of the most challenging aspects of VR photography is managing stitch lines – those visible seams where multiple images merge together. To create seamless 360-degree photos, start by using a proper nodal point setup, ensuring your camera rotates around its optical center. This minimizes parallax errors that can make stitching more difficult.
When composing your shot, avoid placing important subjects near potential stitch lines. These typically occur at regular intervals around your sphere, depending on how many images you’re capturing. For example, in an eight-image sequence, stitch lines will appear every 45 degrees. Plan your composition so key elements fall well within these segments rather than across them.
Lighting plays a crucial role in avoiding visible seams. Try to shoot under consistent lighting conditions, as dramatic changes in brightness between frames can create obvious transition lines. When shooting indoors, avoid placing bright light sources directly on stitch lines, as this can create challenging exposure differences.
Modern AI-enhanced VR photography tools have made dealing with stitch lines easier, but good composition remains essential. Consider using natural elements like tree trunks, doorways, or architectural features to mask potential stitch areas. These objects can create natural transitions between frames while adding depth to your composition.
Movement near stitch lines can also cause problems. When photographing scenes with moving elements like crowds or vehicles, time your shots carefully to avoid subjects crossing frame boundaries during capture. If possible, position yourself so that high-traffic areas fall within individual frames rather than across multiple ones.
Common Composition Mistakes
Even experienced photographers can stumble when first entering the world of VR photography. Let’s explore some common composition mistakes and their solutions to help you create more compelling 360-degree images.
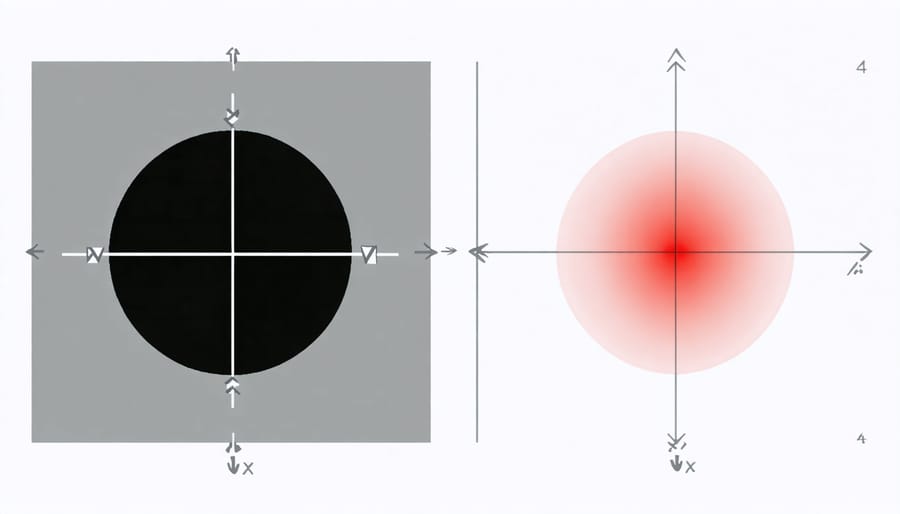
One frequent error is neglecting the nadir (bottom) and zenith (top) of the frame. These areas are crucial in VR photography and shouldn’t be treated as afterthoughts. Always plan how these areas will contribute to your overall composition, whether through creative editing or careful positioning of your camera.
Another mistake is creating unintentional distortion by placing key subjects too close to the camera. In VR photography, objects near the lens can appear stretched and unnatural. Maintain at least a 3-foot distance from your main subjects to preserve their natural proportions and avoid this warping effect.
Many photographers also fall into the trap of including themselves or their shadow in the shot. While this might work for some creative concepts, it’s usually undesirable. Use remote triggering options or carefully plan your exit from the scene to maintain the immersive experience.
Failing to consider multiple viewing angles is a classic newcomer mistake. Remember, your viewers can look around freely in VR, so every direction needs to be intentionally composed. Don’t focus solely on one “perfect” angle while leaving other viewpoints lacking in interest or poorly composed.
Inconsistent lighting across the sphere is another common issue. When shooting in challenging lighting conditions, ensure your exposure settings can handle the full dynamic range of the scene. Consider shooting at different times of day or using additional lighting to achieve more balanced illumination.
Lastly, many photographers overlook the importance of level horizons in VR. A tilted horizon becomes much more noticeable and disorienting in 360-degree viewing. Always use a leveling tool and take extra care during both shooting and post-processing to maintain straight horizontal lines.
Mastering photography composition is a journey that never truly ends, and that’s what makes it so exciting. We’ve explored the fundamental principles that can transform your images from simple snapshots to compelling visual stories. From the rule of thirds to leading lines, negative space to symmetry, each element serves as a powerful tool in your creative arsenal.
Remember, while these rules provide a solid foundation, they’re meant to be guidelines rather than strict restrictions. The most memorable photographs often come from knowing when to follow these principles and when to break them intentionally. As you continue developing your photographic eye, experiment with different combinations of these techniques and observe how they affect your images’ impact.
Start by consciously applying one principle at a time in your photography. Once you’re comfortable with that, try combining multiple elements to create more complex and engaging compositions. Pay attention to how different compositional choices influence the mood and message of your images.
Most importantly, don’t be afraid to make mistakes. Every experienced photographer has taken countless photos that didn’t work out, but each attempt teaches valuable lessons. Take time to analyze both your successful and unsuccessful shots to understand what makes them work or fall short.
Keep practicing, stay curious, and let your creative vision guide you. The true joy of photography lies not just in mastering the rules, but in discovering your unique visual voice through thoughtful composition.