Transform your indoor photography from dim and dull to studio-quality with just three essential lighting principles. Position your main light source at a 45-degree angle to your subject, creating depth and dimension while minimizing harsh shadows. Master the fundamentals of light diffusion by bouncing flash off white walls or using simple household items like white sheets as makeshift softboxes. Control your camera’s exposure settings to balance artificial lighting with any available natural light, starting with an ISO of 400 and adjusting your aperture to f/4 for that professional depth-of-field effect.
Indoor photography intimidates many beginners, but understanding light is simpler than you might think. Whether you’re shooting portraits in your living room or product photos for an online store, the same core lighting techniques apply. This guide breaks down everything you need to know about indoor lighting – from basic equipment choices to advanced setup techniques – helping you create professional-looking photos without investing thousands in expensive studio gear.
The secret to stunning indoor photography isn’t just about having the right equipment; it’s about understanding how to manipulate light to your advantage. We’ll explore how to work with natural window light, basic artificial lighting setups, and creative DIY solutions that deliver professional results on a budget. By the end of this guide, you’ll have the confidence to tackle any indoor shooting situation with the tools and knowledge to create beautiful, well-lit images.
Essential Indoor Lighting Equipment for Beginners
Natural vs. Artificial Light Sources
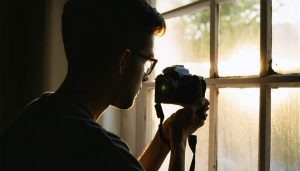
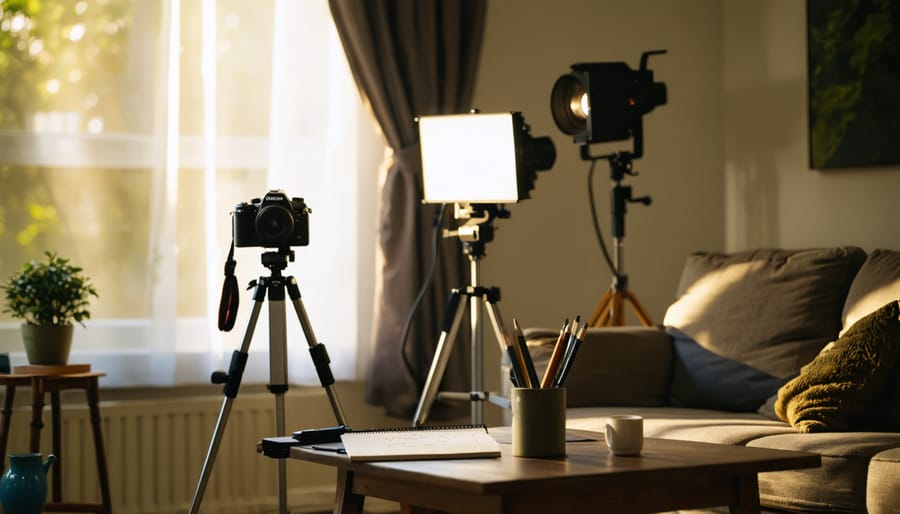
When setting up your indoor photography studio, you’ll encounter two main categories of light: natural and artificial. Working with natural light from windows can create beautiful, soft illumination that’s perfect for portraits and still life photography. Window light tends to be most flattering during the golden hours (early morning and late afternoon) and can be easily modified using sheer curtains or reflectors.
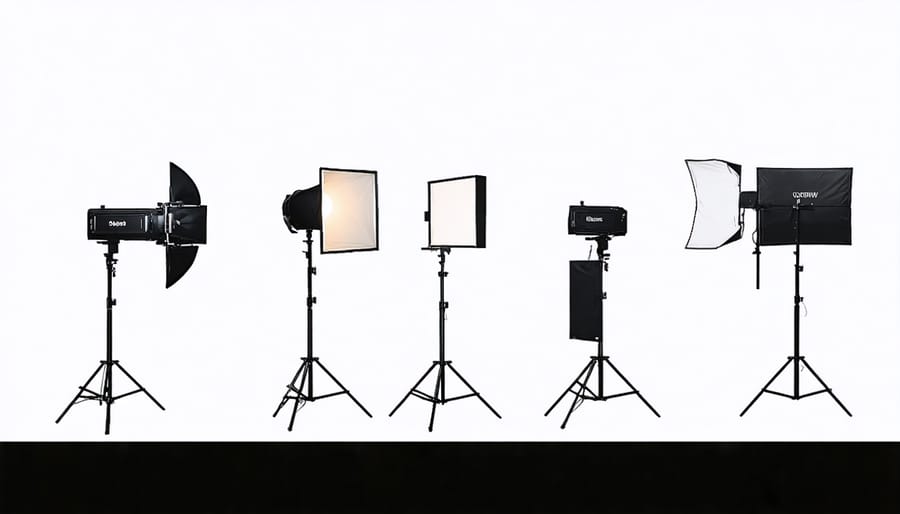
However, natural light has its limitations. It changes throughout the day, can be unpredictable, and isn’t always available when you need it. This is where artificial light sources come into play. The most common artificial lights include:
Continuous Lights:
– LED panels: Produce minimal heat, offer adjustable color temperature
– Fluorescent softboxes: Provide soft, even illumination
– Tungsten lights: Traditional option, but run hot and affect white balance
Flash/Strobe Lights:
– Speedlights: Portable, battery-powered units perfect for beginners
– Studio strobes: More powerful, consistent output for professional work
Each light source has its unique characteristics and best-use scenarios. For instance, LED panels are excellent for video work and allow you to see exactly how your lighting looks before shooting. Speedlights offer more power and freeze motion but require practice to visualize the final result. Understanding these differences helps you choose the right tool for your specific photography needs.
Budget-Friendly Lighting Solutions
Getting started with indoor photography lighting doesn’t have to break the bank. One of the most cost-effective solutions is to work with household lamps you already own. Floor lamps, desk lamps, and even clip-on reading lights can serve as adjustable light sources when paired with daylight-balanced bulbs.
Consider investing in affordable LED panels, which have become increasingly budget-friendly in recent years. Basic LED panels starting around $30-40 can provide reliable continuous lighting for portrait and product photography. Look for models with adjustable brightness and color temperature for maximum versatility.
DIY solutions can be remarkably effective. A simple white foam board ($5-10) can serve as both a reflector and diffuser. Create your own softbox using a cardboard box, white tissue paper, and aluminum foil – total cost under $15. White bed sheets or shower curtains make excellent diffusion materials when placed between your light source and subject.
For those willing to spend a bit more, speedlights (external flash units) offer excellent value, with many third-party options available under $100. Pair these with affordable light modifiers like umbrellas or softboxes in the $20-30 range to achieve professional-looking results.
Remember, creative positioning and proper technique often matter more than expensive equipment. Even a single well-placed light source, combined with DIY reflectors, can produce stunning results when used skillfully.
Understanding Light Positioning
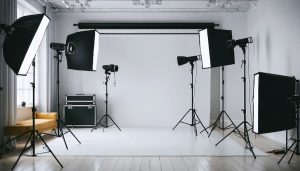
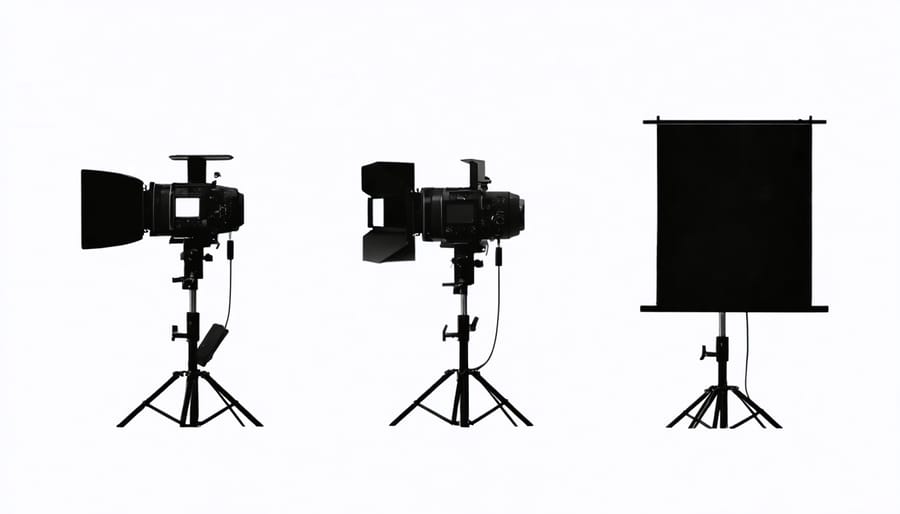
Three-Point Lighting Setup
The foundation of professional indoor photography lies in mastering the three-point lighting setup, a versatile arrangement that creates depth, dimension, and professional-looking results. This classic technique uses three distinct light sources: the key light, fill light, and back light.
Your key light serves as the primary illumination source, typically positioned at a 45-degree angle to your subject. Think of it as the sun in your indoor studio – it’s the strongest light that creates the main shadows and defines the overall look of your image. For portraits, place it slightly above eye level; for products, experiment with different heights to highlight specific features.
The fill light, positioned opposite the key light, softens shadows and reveals details in darker areas. It should be less intense than your key light – about half the power works well for most situations. If you’re just starting out, a simple reflector can serve as your fill light, bouncing the key light’s output back onto your subject.
Your back light (also called rim light) separates the subject from the background by creating a subtle glow around their edges. Position it behind and slightly above your subject, pointing forward. This light adds that professional touch that makes your subject pop from the background.
Start with this basic setup, then adjust each light’s intensity and position to achieve your desired look. Remember, these are guidelines rather than strict rules – feel free to experiment and develop your own style as you become more comfortable with the basics.
Common Lighting Patterns
Understanding common lighting patterns is essential for creating professional-looking indoor photos. Let’s explore the five most popular patterns that will help you create stunning portraits and still life images.
Loop lighting is perhaps the most versatile pattern, created by positioning your light source slightly above and to the side of your subject. This creates a small shadow under the nose that loops down toward the corner of the mouth. It’s flattering for most face shapes and perfect for everyday portraits.
Rembrandt lighting, named after the famous painter, features a distinctive triangle of light on the cheek opposite to the main light source. Position your light about 45 degrees to the side and above your subject. This dramatic pattern works wonderfully for moody portraits and character studies.
Butterfly lighting places the light source directly above and in front of your subject, creating a symmetrical shadow under the nose that resembles a butterfly. This glamour-style lighting is particularly flattering for subjects with defined cheekbones and is popular in fashion photography.
Split lighting divides the face into equal halves of light and shadow by placing the light source at 90 degrees to your subject’s face. This creates a dramatic, mysterious mood and works well for creative portraits or when you want to emphasize texture and form.
Broad lighting illuminates the side of the face that’s closer to the camera, while the far side falls into shadow. This pattern can make faces appear fuller and works well for subjects with narrow faces. For a slimming effect, try short lighting instead, where you light the side of the face turned away from the camera.
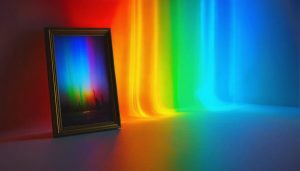
Managing Light Temperature and Color
White Balance Basics
White balance is one of those settings that can make or break your indoor photos, yet many beginners overlook its importance. Think of white balance as your camera’s way of interpreting what “true white” should look like under different lighting conditions.
When shooting indoors, you’ll encounter various light sources – warm tungsten bulbs, cool fluorescent lights, or mixed lighting from multiple sources. Each of these creates a different color cast that can make your photos look unnaturally orange or blue if not corrected properly.
Your camera’s auto white balance (AWB) setting works well in many situations, but it can get confused when dealing with mixed lighting or strong color casts. That’s why understanding how to set custom white balance is crucial for indoor photography.
Here’s a quick guide to common white balance presets:
– Tungsten (around 3200K): Use for traditional household bulbs
– Fluorescent (around 4000K): Perfect for office lighting
– Daylight (around 5500K): Best for natural window light
– Custom: Use a gray card or white surface to set precise white balance
Pro tip: If you’re shooting in RAW format, you have the flexibility to adjust white balance during post-processing without losing image quality. However, getting it right in-camera will save you time and help you visualize the final result while shooting.
When in doubt, take a test shot and check your camera’s LCD screen. If skin tones look unnatural or whites appear yellowish or bluish, adjust your white balance accordingly.
Mixed Lighting Solutions
Working with mixed lighting can be one of the trickiest aspects of indoor photography, but understanding how to handle different light sources is a valuable skill. When you’re shooting indoors, you’ll often encounter a combination of natural light streaming through windows, artificial overhead lighting, and your photography lights – each with its own color temperature.
The key to managing mixed lighting is to first identify your dominant light source and adjust your other lights accordingly. For example, if you’re working in a room with large windows during daylight hours, consider making natural light your primary source and adjusting your artificial lights to match its cooler temperature.
Color temperature gels are your best friends when dealing with mixed lighting. These transparent colored sheets can be placed over your artificial lights to match their output with existing ambient light. A CTO (Color Temperature Orange) gel can warm up your flash to match tungsten bulbs, while a CTB (Color Temperature Blue) can cool it down to match daylight.
To maintain consistency, you might also want to consider eliminating certain light sources altogether. This could mean drawing curtains to block natural light or turning off overhead fluorescent lights that can cast an unflattering green tinge. Remember, it’s often better to have complete control over fewer light sources than to struggle with multiple competing ones.
When shooting, take test shots and check your white balance carefully. Mixed lighting can trick your camera’s auto white balance, so consider using a gray card or setting a custom white balance for more accurate results.
Troubleshooting Common Lighting Problems
Dealing with Harsh Shadows
Harsh shadows can make or break your indoor photos, but don’t worry – there are several effective techniques to manage them. The key lies in understanding how to soften and control these shadows to create more flattering images.
One of the simplest methods is to bounce your light off walls or ceilings. This technique diffuses the light, creating softer shadows that are more pleasing to the eye. Think of it like turning your entire room into a giant softbox! White walls work best, but any light-colored surface will do.
Using lighting modifiers like diffusers, umbrellas, or softboxes can dramatically improve your shadow control. These tools spread the light across a larger surface area, resulting in gentler transitions between light and shadow.
Another effective approach is using fill light. Position a second, less powerful light source opposite your main light to gently illuminate the shadows. This doesn’t eliminate shadows completely (which you don’t want anyway), but rather makes them more manageable and natural-looking.
Don’t forget about reflectors! A simple white foam board can work wonders in bouncing light back into shadowy areas. Position it opposite your light source and experiment with angles until you achieve the desired effect. Even a white sheet or piece of paper can serve as an impromptu reflector in a pinch.
Remember, the goal isn’t to eliminate shadows entirely – they add depth and dimension to your images. Instead, aim to control and soften them to enhance your subject’s features and create more professional-looking photographs.
Fixing Uneven Lighting
Uneven lighting can make or break your indoor photos, creating harsh shadows or overexposed areas that distract from your subject. Fortunately, there are several effective methods to balance lighting and achieve more professional results.
Start by identifying the main light source and any problematic shadows or bright spots. If you’re working with natural light from windows, use a white reflector on the opposite side to bounce light back onto your subject. This simple technique can fill in shadows and create more balanced illumination. For those without a professional reflector, a white foam board or even a white sheet can work surprisingly well.
When using artificial lighting, position your main light at a 45-degree angle to your subject, then add a fill light at about half the intensity on the opposite side. This creates a pleasing ratio that maintains dimensionality while preventing harsh shadows. If you notice hot spots on your subject, diffuse your light source using a softbox or even a semi-transparent white curtain.
For larger spaces, consider using multiple light sources at different heights and angles. Remember to test your setup by taking sample shots and adjusting accordingly. Pay special attention to your subject’s face – if photographing people, ensure their eyes are well-lit and that shadows don’t create unflattering shapes.
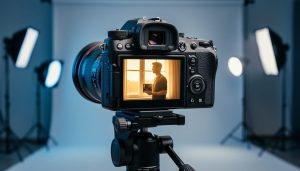
Digital cameras’ histogram feature can be invaluable for identifying lighting imbalances. Check it frequently as you adjust your lighting setup to ensure you’re maintaining detail in both highlights and shadows.
Real-World Practice Scenarios
Let’s dive into some real-world scenarios you can practice with to sharpen your indoor photography skills. Start in your living room with a simple portrait setup: position your subject near a window during mid-morning or afternoon, when soft natural light streams in. Experiment by having your subject face the window, then turn 45 degrees, noting how the light shapes their features differently.
For product photography practice, set up a small table near a window and photograph a coffee mug or piece of jewelry. Use a white foam board on the shadow side to bounce light back onto your subject. Try moving the board closer and farther to understand how it affects shadow intensity.
Create a cozy indoor food photography scene in your kitchen. During golden hour, place your dish on a table about 45 degrees from the window. Practice using different backgrounds – try dark surfaces for light-colored foods and vice versa. Add depth by incorporating props like scattered ingredients or cooking utensils in the background.
Challenge yourself with low-light situations in the evening. Set up a reading scene with someone holding a book near a lamp. Practice balancing the warm artificial light with your camera settings, then try adding a small LED light from different angles to fill shadows.
For indoor event practice, gather friends for a dinner party. This scenario helps you master multiple light sources – overhead lights, candles, and perhaps string lights. Practice moving around the space, capturing both candid moments and staged shots while dealing with mixed lighting.
Turn your bathroom into a studio by practicing with the typically harsh overhead lighting. Experiment with shower curtains as diffusers, or bounce your flash off white walls to create softer light. This exercise helps you problem-solve in challenging lighting conditions.
Finally, create a home office setup for professional headshots. Position your subject facing a window, then modify the light with curtains or blinds. Add a reflector on the opposite side and practice achieving professional-looking results with minimal equipment.
Remember to document your results and settings for each scenario, creating your own reference guide for future shoots.
Mastering indoor photography lighting doesn’t happen overnight, but with the knowledge and techniques we’ve explored, you’re well-equipped to start creating stunning indoor photographs. Remember that the key principles – understanding your light sources, manipulating direction and intensity, and choosing the right equipment for your needs – form the foundation of great indoor photography.
Start small by practicing with a single light source and gradually incorporate more complex setups as your confidence grows. Don’t be afraid to experiment with different combinations of natural and artificial light, and always pay attention to how shadows and highlights interact in your frame. Keep in mind that even professional photographers spent countless hours perfecting their lighting techniques.
Make it a habit to analyze the lighting in photos you admire, and try to recreate those effects in your own work. Take notes of what works and what doesn’t, and maintain a portfolio of your progress. The beauty of digital photography is that you can instantly see your results and make adjustments accordingly.
Most importantly, don’t let perfectionism hold you back. Every photographer started exactly where you are now. With consistent practice and application of these fundamental lighting principles, you’ll soon develop an intuitive understanding of how to create the perfect lighting for any indoor situation. Your journey to mastering indoor photography lighting begins now – so grab your camera and start experimenting!