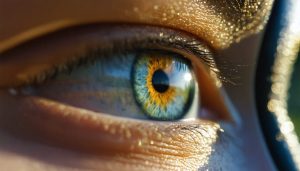
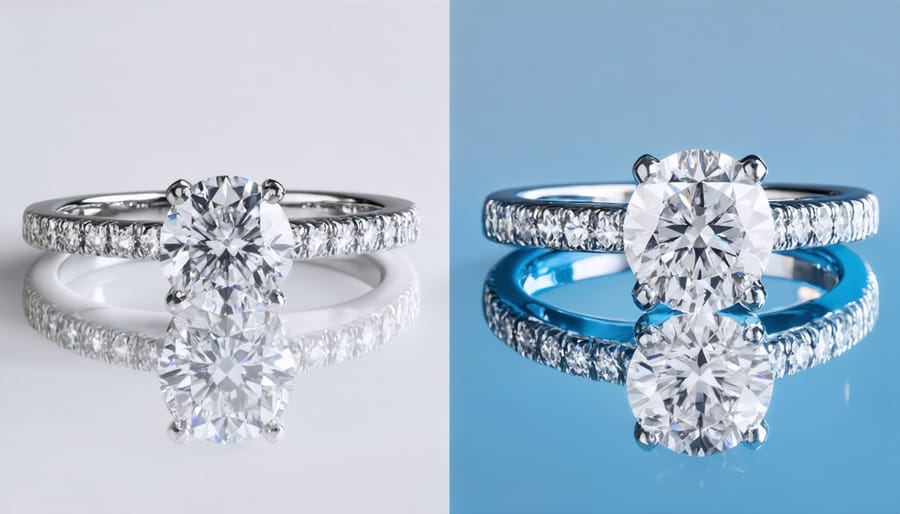
Master jewelry photography’s camera settings fundamentals by starting with an aperture between f/8 and f/16 to capture every facet’s intricate detail. Position your camera in manual mode with ISO 100 for maximum clarity and minimal noise, essential for capturing the pristine surfaces of precious metals and gemstones. Set your shutter speed between 1/125 and 1/160 second when using studio lighting to eliminate motion blur and ensure tack-sharp images that showcase every curve and reflection. Maximize detail retention by shooting in RAW format, allowing precise control over white balance and exposure during post-processing – critical for accurately representing metal tones and diamond brilliance. Professional jewelry photography demands technical precision, but mastering these foundational settings transforms challenging metallic surfaces and sparkling gems into stunning commercial-quality images.
Essential Camera Gear for Jewelry Photography
Recommended Camera Bodies
For jewelry photography, a full-frame mirrorless or DSLR camera is ideal due to its superior image quality and flexibility. The Sony A7R series, particularly the A7R IV, excels with its high resolution and excellent detail reproduction. Canon’s EOS R5 and Nikon Z7 II are also outstanding choices, offering exceptional autofocus capabilities and image stabilization that prove invaluable during close-up shots.
Mid-range options like the Canon EOS R6 or Sony A7 III provide excellent value while maintaining professional-grade features. These cameras offer good low-light performance and accurate color reproduction, which are crucial for capturing jewelry’s subtle details and reflections.
For those just starting, the Canon EOS RP or Nikon Z5 offer full-frame capabilities at a more accessible price point. While crop-sensor cameras can work, full-frame sensors generally provide better depth-of-field control and superior image quality in challenging lighting conditions typical in jewelry photography.
Macro Lens Selection
For jewelry photography, choosing the right lens is crucial for capturing those intricate details that make each piece special. A macro lens is your best friend here, with the 100mm macro being particularly popular among professionals. This focal length provides the perfect working distance, allowing enough space for lighting while maintaining stunning detail.
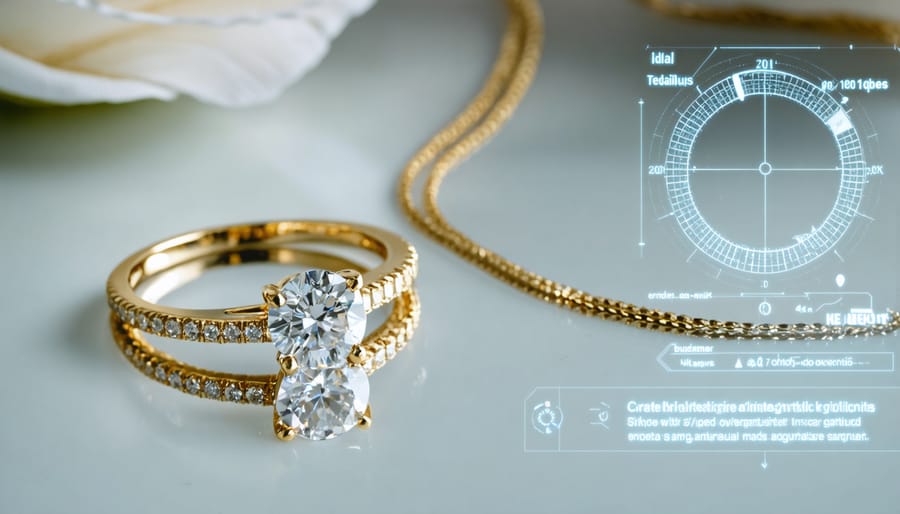
The ideal macro lens should offer at least a 1:1 magnification ratio, meaning your subject appears life-size on the camera’s sensor. For smaller pieces like earrings or delicate chains, you might even want to consider lenses capable of greater magnification.
While dedicated macro lenses can be pricey, they’re worth the investment if you’re serious about jewelry photography. The Canon EF 100mm f/2.8L IS USM and Nikon AF-S VR Micro-NIKKOR 105mm f/2.8G IF-ED are excellent choices that deliver exceptional sharpness and beautiful bokeh. If you’re on a budget, extension tubes paired with a standard 50mm lens can serve as a good starting point, though they won’t match the optical quality of a true macro lens.
Core Camera Settings for Jewelry Photography
Aperture Settings for Optimal Depth of Field
Selecting the right aperture is crucial for jewelry photography, as it directly affects how much of your piece remains in sharp focus. For most jewelry shots, you’ll want to work with smaller apertures (higher f-numbers) to achieve greater depth of field, ensuring the entire piece appears crisp and detailed.
A good starting point is f/11 to f/16, which provides excellent depth of field while maintaining image quality. For flat pieces like pendants or earrings, you might get away with f/8, especially when shooting them straight-on. However, for complex pieces with significant depth, such as elaborate rings or layered necklaces, consider stopping down to f/22 to keep everything in focus.
Be cautious when going beyond f/22, though. While it might be tempting to use the smallest aperture possible, diffraction can become an issue, potentially reducing overall image sharpness. If you’re shooting very intricate pieces with multiple elements at different distances, consider focus stacking instead of relying solely on a tiny aperture.
Remember that your working distance also affects depth of field. The closer you are to the jewelry, the shallower your depth of field becomes. When shooting macro shots of gemstone details, you might need to combine a small aperture with focus stacking techniques to achieve optimal results.
For creative shots where you want to highlight specific elements, don’t be afraid to open up to f/4 or f/5.6, letting certain parts of the piece fall softly out of focus while maintaining sharpness on your main subject.
ISO Selection for Maximum Detail
When photographing jewelry, choosing the right ISO setting is crucial for achieving crisp, detailed images that showcase every facet and surface. As a general rule, stick to the lowest possible ISO setting your camera offers (typically ISO 100 or 200) to minimize digital noise and maintain maximum image quality.
Higher ISO settings, while useful in low-light situations, can introduce unwanted grain and reduce the sharpness of fine details – exactly what you don’t want when capturing the intricate elements of jewelry. Even slight noise can detract from the sparkle of diamonds or the subtle textures of metalwork.
However, there may be times when you need to increase your ISO, such as when shooting handheld or working with limited light. In these cases, modern cameras can usually handle ISO settings up to 400-800 without significant quality loss. Test your camera’s capabilities by taking sample shots at different ISO values to determine your acceptable upper limit.
Remember that ISO is part of the exposure triangle – if you need more light, consider adjusting your aperture or shutter speed first, or adding more light to your setup. Using a tripod allows you to maintain those lower ISO values even in challenging lighting conditions, as you can compensate with longer shutter speeds without introducing camera shake.
The key is finding the sweet spot where you have enough light sensitivity without compromising the pristine detail that makes jewelry photography stand out.
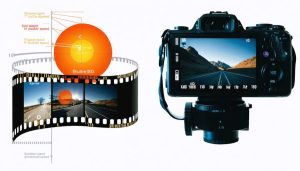
Shutter Speed Considerations
When photographing jewelry, selecting the right shutter speed is crucial for capturing every intricate detail with crystal clarity. While mastering lighting techniques is essential, your shutter speed choice can make or break the final image.
For studio setups with controlled lighting, start with a shutter speed between 1/125 and 1/200 second. This range typically provides enough speed to eliminate camera shake while allowing adequate light exposure. If you’re using a tripod (highly recommended), you can experiment with slower speeds, but be mindful of any environmental vibrations that might affect sharpness.
When working with natural light, you’ll need to adjust accordingly. Bright daylight might allow faster shutter speeds of 1/250 or higher, which can help freeze any minimal movements. However, if you’re shooting in lower light conditions, consider these alternatives:
– Use a tripod and remote shutter release for speeds below 1/60
– Enable your camera’s mirror lock-up feature to minimize vibration
– Consider using flash to freeze motion and maintain detail
– Implement image stabilization if available on your lens
Remember that highly reflective surfaces like diamonds and polished metals can create challenging exposure situations. In these cases, it’s better to err on the side of a faster shutter speed and adjust your ISO or aperture to compensate, rather than risk motion blur that could diminish the jewelry’s sparkle and definition.
Advanced Settings for Different Jewelry Types
Settings for Gemstones and Diamonds
When photographing gemstones and diamonds, the key is to capture their fire, brilliance, and scintillation. Start with an aperture between f/8 and f/11 to ensure optimal depth of field while maintaining sharpness across the entire stone. For diamonds specifically, use a slightly higher f-stop (f/11 to f/16) to capture every facet in crisp detail.
ISO should be kept as low as possible, ideally at 100 or 200, to minimize noise and maintain the clean, sparkling appearance of the stones. Your shutter speed will depend on your lighting setup, but typically ranges from 1/125 to 1/250 second when using studio lights.
To capture the stone’s natural fire, experiment with different lighting angles. Position your main light at approximately 45 degrees to the stone, then add a second light at the opposite angle to create balanced highlights. For diamonds, try using a small LED light to create additional sparkle points.
White balance is crucial for accurate color representation. Use a custom white balance setting with a gray card to ensure your whites are truly white and your colored stones appear natural. For maximum control, shoot in RAW format to fine-tune the white balance in post-processing.
Focus stacking can be particularly effective for larger stones or pieces with significant depth. Take multiple shots at slightly different focus points and combine them in post-processing for complete sharpness throughout the piece.
Metal Jewelry Photography Settings
Photographing metal jewelry presents unique challenges due to its highly reflective nature. To minimize unwanted glare and capture the true brilliance of metallic pieces, start by setting your camera to a lower ISO, ideally between 100-200, to reduce noise and maintain image clarity.
For shutter speed, stick to 1/125 or faster when shooting handheld to ensure sharp images. If you’re using a tripod (highly recommended for jewelry), you can slow this down to capture more light without compromising quality. Aperture settings between f/8 and f/11 typically provide the sweet spot for metal jewelry, offering enough depth of field to keep the entire piece in focus while maintaining optimal sharpness.
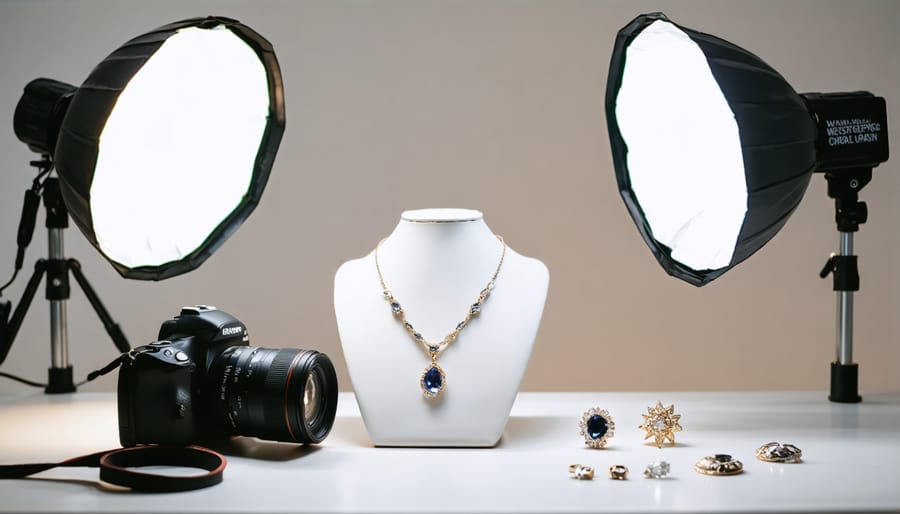
To combat reflections, position your lights at 45-degree angles to the jewelry, and use diffusion materials like softboxes or white umbrellas. For particularly troublesome pieces, consider using polarizing filters on both your lights and camera lens to control specular highlights.
White balance is crucial when photographing metals – use a custom white balance setting with a gray card to ensure accurate color reproduction. This is especially important for capturing the true tones of different metals like silver, gold, or platinum.
For exposure, slightly underexpose your shot by about -0.3 to -0.7 EV to preserve highlight detail in the metal’s surface. You can always recover shadow detail in post-processing, but blown-out highlights are impossible to retrieve.
Settings for Mixed Material Pieces
Mixed material jewelry pieces present unique challenges, requiring careful attention to camera settings to capture each element’s distinct characteristics. When photographing pieces that combine metals, gemstones, and pearls, start with aperture settings between f/8 and f/11 to maintain adequate depth of field while ensuring all materials remain sharp and detailed.
For pieces combining reflective metals with transparent gemstones, use a slightly higher ISO (around 400-800) to capture more light detail while keeping noise levels manageable. This helps balance the exposure between bright metal reflections and subtle stone transparency. Adjust your shutter speed accordingly, typically ranging from 1/60 to 1/125 second when using studio lighting.
White balance becomes particularly crucial with mixed materials. Use a custom white balance setting by photographing a gray card under your lighting setup. This ensures accurate color representation across different materials – vital when capturing the warm tones of gold alongside the cool sparkle of diamonds or the organic luster of pearls.
Consider using bracketing techniques, taking multiple shots at different exposures (usually ±1 stop). This provides options for post-processing and helps capture both the brilliant highlights in metalwork and the subtle details in darker stones. For pieces with dramatic contrast, like oxidized silver with bright diamonds, spot metering on a mid-tone area helps achieve balanced exposure across all materials.
Remember to position your lighting to complement each material’s unique properties. A combination of diffused main light and targeted accent lights often works best for mixed material pieces, helping to highlight the distinct characteristics of each component while maintaining overall harmony in the image.
Troubleshooting Common Issues
Even with the perfect camera settings, you might encounter some common challenges in jewelry photography. Here’s how to address these issues effectively:
Blurry Images: If you’re struggling with achieving sharp images, first check your shutter speed. For handheld shots, maintain at least 1/125 second. Use a tripod and remote shutter release for slower speeds. Also, ensure your autofocus is locked on the most important detail of the jewelry piece.
Unwanted Reflections: Bright spots and reflections can be frustrating. Try adjusting your light positioning at 45-degree angles. Using diffusion material or a light tent can help create softer, more controlled lighting. For metallic pieces, consider using polarizing filters on both your lights and lens.
Incorrect White Balance: Jewelry colors appearing too warm or cool? Custom white balance is your friend. Use a gray card to set accurate colors, especially when mixing different light sources. If shooting in RAW, you can fine-tune white balance in post-processing.
Poor Depth of Field: When details appear soft, check your aperture setting. For full jewelry pieces, f/8 to f/11 usually provides adequate depth. For macro shots of specific details, you might need to focus stack multiple images at f/16 or higher.
Exposure Issues: Jewelry can trick your camera’s meter due to its reflective nature. Use spot metering and bracket your exposures. Take test shots and adjust exposure compensation as needed. Remember, it’s better to slightly underexpose and recover details than to blow out highlights.
Keep a troubleshooting checklist handy and methodically work through these solutions when issues arise. With practice, you’ll develop an intuitive understanding of how to quickly resolve common problems.
Mastering jewelry photography settings isn’t something that happens overnight, but with the knowledge you’ve gained from this guide, you’re well-equipped to start creating stunning jewelry images. Remember that the key to success lies in finding the right balance between aperture, shutter speed, and ISO while maintaining proper white balance and focus.
Don’t be discouraged if your first attempts aren’t perfect. Start by practicing with the recommended settings we’ve discussed – using apertures between f/8 and f/16, keeping ISO low, and maintaining stable shutter speeds with proper lighting. Pay particular attention to your camera’s depth of field preview, and always check your images at 100% zoom to ensure every detail is tack-sharp.
Make it a habit to experiment with different combinations of settings while taking detailed notes of what works and what doesn’t. Each piece of jewelry presents unique challenges, and through practice, you’ll develop an intuitive understanding of which settings work best for different situations.
Remember that these settings are starting points – feel free to adjust them based on your specific needs, equipment, and creative vision. With patience and consistent practice, you’ll soon develop your signature style in jewelry photography.