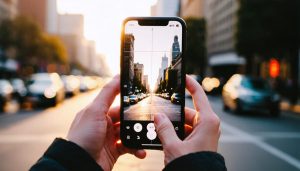
Mastering light transforms ordinary photos into captivating visual stories. Whether you’re exploring smartphone photography secrets or wielding professional equipment, three fundamental types of lighting shape every memorable image: natural, artificial, and mixed lighting. Natural light streams through windows, paints landscapes at golden hour, and creates dramatic shadows on overcast days. Artificial light, from studio strobes to LED panels, offers precise control over every shadow and highlight. Mixed lighting combines both worlds, letting photographers craft unique moods by balancing daylight with artificial sources. Understanding these lighting types doesn’t just improve technical skills—it unlocks creative possibilities that transform good photos into unforgettable ones.
By mastering these three lighting categories, photographers gain the power to shape their visual narrative, whether shooting portraits in a sun-drenched studio or capturing street scenes under city lights. Each type offers distinct advantages and creative possibilities, making them essential tools in any photographer’s arsenal. The key lies not just in knowing which light to use, but in understanding how to harness its unique characteristics to tell your story effectively.
Natural Lighting: Mastering the Sun’s Power
Golden Hour and Blue Hour Magic
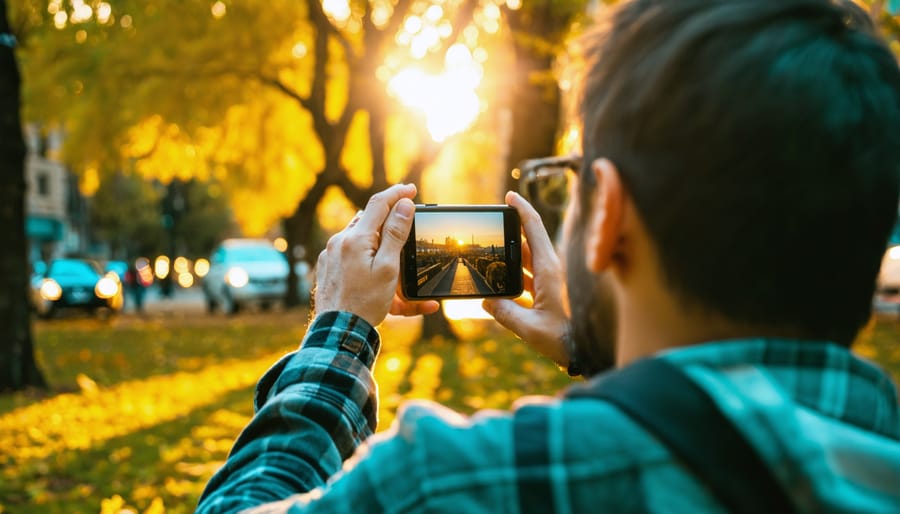
Nature provides photographers with two magical windows of opportunity each day: the golden hour and the blue hour. These periods offer uniquely beautiful lighting conditions that can transform ordinary scenes into extraordinary photographs.
The golden hour occurs during the first hour after sunrise and the last hour before sunset. During this time, the sun’s position creates warm, soft light with a golden hue that photographers prize for its flattering effects. To make the most of golden hour lighting, position your subjects so the sun acts as a backlight or side light. This creates beautiful rim lighting and helps highlight textures while minimizing harsh shadows. Using expert camera techniques like spot metering can help you capture the perfect exposure during this fleeting period.
The blue hour arrives just before sunrise and after sunset, when the sky takes on deep blue tones and artificial lights begin to shine. This period is shorter than the golden hour but offers dramatic opportunities for urban and landscape photography. During the blue hour, try capturing cityscapes where artificial lighting balances with the natural ambient light. Use a tripod for longer exposures, and experiment with white balance settings to enhance or cool the overall mood of your images.
For both periods, arrive early to scout locations and set up your equipment. Weather apps and golden hour calculators can help you plan the perfect timing for your shoots.
Handling Harsh Daylight
Harsh midday sunlight is often considered a photographer’s nemesis, but with the right techniques, you can turn this challenging lighting situation into an opportunity for striking images. When shooting between 10 AM and 2 PM, look for natural diffusers like thin clouds or tree canopies to soften the light. If these aren’t available, create your own shade using a diffuser or even a simple white bed sheet.
For portraits, position your subject in open shade, such as under an awning or beside a building. This provides even lighting while maintaining natural color temperature. When shooting landscapes, embrace the contrast by incorporating the strong shadows into your composition, or use a polarizing filter to manage reflections and deepen the sky’s blue tones.
Another effective strategy is to backlight your subject, placing the sun behind them to create a rim lighting effect. Combined with spot metering on your subject’s face, this technique can transform harsh lighting into a dramatic golden outline. For close-up shots, consider using a reflector to bounce light back onto your subject, effectively filling in those harsh shadows while maintaining the natural quality of daylight.
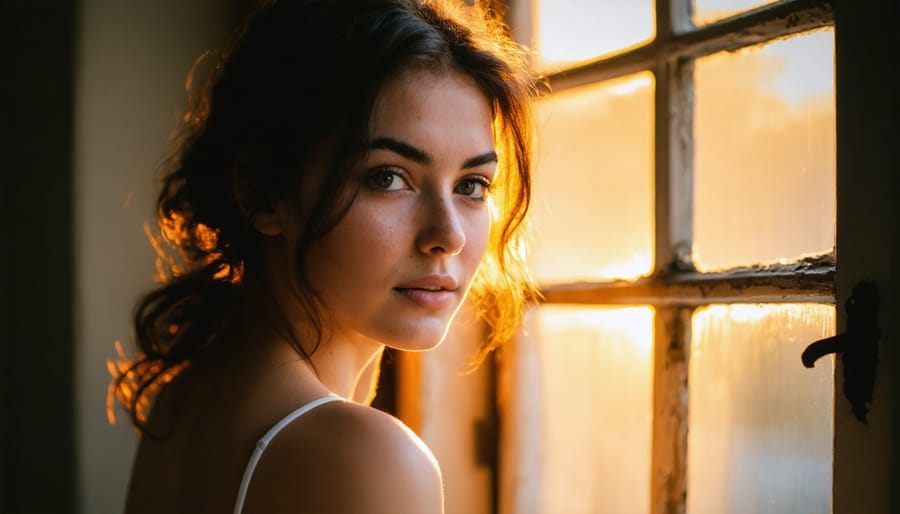
Window Light Portraits
Window light is often called the photographer’s best friend, and for good reason. This readily available natural light source can create stunning portraits with minimal equipment. The key to mastering window light portraits lies in understanding how to position your subject relative to the window.
For soft, flattering light, position your subject about 3-4 feet away from a large window, facing it at a 45-degree angle. This creates gentle shadows that define facial features while maintaining an even illumination. The larger the window, the softer the light will be, making it ideal for portraits.
Time of day significantly impacts your results. Morning and late afternoon light tends to be warmer and more directional, while midday light is cooler and more diffused when coming through windows. If the sunlight is too harsh, use sheer curtains as natural diffusers to soften the light.
Don’t be afraid to experiment with backlighting by placing your subject between the camera and the window. This creates beautiful rim lighting and dramatic silhouettes. For more balanced exposure, use a reflector or white foam board opposite the window to bounce light back onto your subject’s face.
Remember that cloudy days often provide the most consistent and flattering window light, as the clouds act as a giant softbox, creating even illumination throughout your shooting session.
Artificial Lighting: Creating Your Perfect Shot
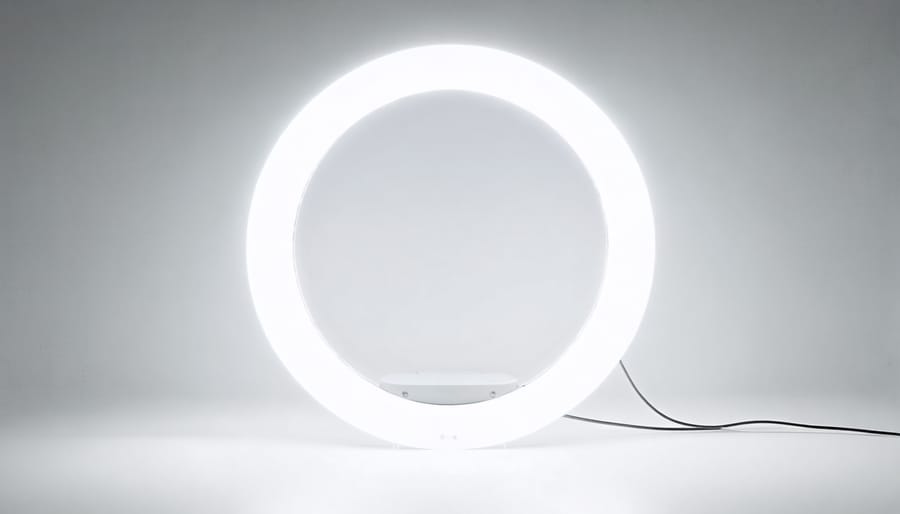
LED Panels and Ring Lights
LED panels and ring lights have revolutionized modern photography, offering photographers flexible and precise control over their lighting setups. These clever lighting accessories are particularly popular among content creators and portrait photographers for their versatility and ease of use.
LED panels provide even, diffused illumination that’s perfect for both photo and video work. Their main advantage lies in their adjustable brightness and color temperature settings, allowing you to match ambient lighting conditions or create specific moods. For food photography or product shots, LED panels can create beautiful, soft shadows while maintaining consistent lighting throughout longer shooting sessions.
Ring lights, on the other hand, have become synonymous with beauty and portrait photography. Their circular design creates that distinctive catchlight in subjects’ eyes while minimizing unflattering shadows. What makes ring lights particularly special is their ability to produce nearly shadowless illumination, perfect for close-up beauty shots and macro photography.
Both tools offer distinct advantages in different scenarios. LED panels excel in situations requiring broad, even lighting, while ring lights shine in portrait and macro work. When choosing between the two, consider your primary photography needs – LED panels offer more versatility for general use, while ring lights are specialists in their niche.
Remember that these lights can be used together to create more complex lighting setups, offering endless creative possibilities for your photography projects.
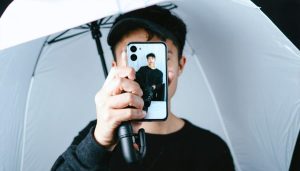
Phone Flash Techniques
While phone flashes often get a bad rap, understanding how to use them effectively can significantly improve your mobile photography. The key is knowing when and how to leverage your phone’s built-in flash to enhance rather than detract from your images.
For optimal results, use your phone’s flash in situations where you need to fill in harsh shadows or illuminate nearby subjects in low light. The flash works best when your subject is within 3-6 feet of your camera. Beyond this range, the light becomes too weak to make a meaningful difference.
Try using your flash during daylight hours as a fill light to soften shadows on faces, particularly when shooting against bright backgrounds. Many phones now offer adjustable flash intensity – experiment with different power levels to find the sweet spot for your scene.
Pro tip: In very dark environments, try bouncing your phone’s flash off a nearby white surface, like a wall or ceiling, to create softer, more flattering light. You can also diffuse the flash by placing a small piece of white tissue paper over it, though be careful not to block the camera lens.
Remember that your phone’s flash is most effective when combined with good composition and steady handling techniques.
Continuous vs. Strobe Lighting
When choosing artificial lighting for your mobile photography, you’ll primarily encounter two options: continuous lights and strobe lights. Each has its unique advantages and best-use scenarios.
Continuous lighting, as the name suggests, provides a constant light source. Think of LED panels or ring lights that stay on throughout your shoot. This type of lighting allows you to see exactly how your final image will look before taking the shot, making it ideal for beginners. It’s particularly useful for video work and situations where you need to maintain consistent lighting for extended periods.
Strobe lighting, on the other hand, produces powerful bursts of light when triggered. These flash units can overpower ambient light and freeze motion more effectively than continuous lights. While they require more practice to master, strobes offer superior power efficiency and can create dramatic effects that are difficult to achieve with constant lighting.
For mobile photography specifically, continuous lighting often proves more practical. Many affordable LED options are portable and USB-rechargeable, making them perfect companions for smartphone photographers. However, if you’re shooting action or need to balance bright daylight, a compact strobe might be worth considering.
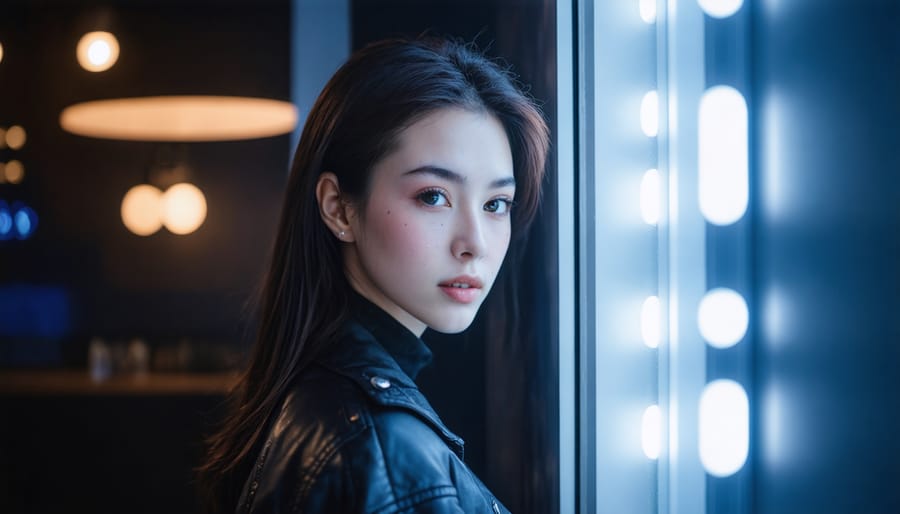
Mixed Lighting: Blending Light Sources
Balancing Natural and Artificial Light
Mastering the balance between natural and artificial light is like conducting an orchestra – each light source plays its unique role in creating the perfect composition. When combining different light sources, start by identifying your main light (usually the stronger or more dominant source) and then complement it with secondary lighting to achieve your desired effect.
One effective technique is using artificial light to fill in shadows created by natural light. For example, when photographing a portrait near a window, position a softbox or reflector on the opposite side to gently illuminate shadows, creating more balanced lighting across your subject’s face.
Color temperature is crucial when mixing light sources. Natural daylight typically measures around 5500K, while indoor lighting often runs warmer at about 2700-3000K. To maintain consistency, use color-correcting gels on your artificial lights or adjust your white balance settings accordingly. Many photographers also leverage the creative possibilities of contrasting temperatures, using cooler natural light with warmer artificial sources to add depth and mood to their images.
Remember that timing matters when working with natural light. During golden hour, you might only need subtle artificial fill light, while midday sun might require stronger artificial sources to balance harsh shadows. The key is to experiment and observe how different light sources interact, always keeping your creative vision in mind.
Color Temperature Management
Understanding color temperature is crucial when dealing with mixed lighting sources in mobile photography. Different light sources emit varying color temperatures, which can create challenging situations for your smartphone’s camera. For instance, indoor scenes often combine warm artificial lighting with cooler natural light from windows, resulting in uneven color casts across your image.
To transform your mobile photos from amateur to professional-looking, start by identifying the dominant light source. Most smartphone cameras automatically adjust white balance, but mixed lighting can confuse them. In these situations, try tapping different areas of your screen to set the white balance for specific parts of the scene.
Many modern phones offer advanced white balance controls in their Pro or Manual modes. Use these features to dial in specific color temperatures, measured in Kelvin (K). As a reference, candlelight sits around 2000K (very warm), while midday sunlight measures about 5500K (neutral daylight).
When shooting in mixed lighting, consider using your phone’s HDR mode, which can help balance extreme color temperature differences. Alternatively, position your subject to favor one light source over others, creating intentional warm or cool effects that enhance your creative vision rather than fighting against mixed lighting conditions.
Understanding and mastering the three types of lighting – natural, artificial, and mixed – is fundamental to elevating your photography skills. Each lighting type offers unique creative possibilities and challenges, helping you develop a more versatile and confident approach to capturing images.
Remember that natural lighting provides a soft, organic feel that’s perfect for landscapes and portraits, while artificial lighting gives you precise control over your shots, especially in studio settings. Mixed lighting combines the best of both worlds, allowing for creative expression and problem-solving in challenging environments.
Don’t be afraid to experiment with different lighting techniques and combinations. Start with basic setups and gradually incorporate more complex arrangements as your confidence grows. Practice observing how light behaves in various situations – notice how it falls on subjects, creates shadows, and influences mood. Keep a photography journal to document your lighting experiments and their results.
Consider investing in basic lighting equipment like a speedlight or LED panel, but don’t feel pressured to buy expensive gear right away. Many stunning photos are created using simple window light or a single artificial source. The key is understanding how to work with whatever lighting conditions you have available.
Most importantly, remember that mastering lighting is a journey. Every photographer has their own style and preferences, so use these lighting types as building blocks to develop your unique visual voice. Keep practicing, stay curious, and don’t be afraid to break the rules once you understand them.