Position your smartphone behind a simple white shower curtain while shooting near a window, and you’ve just created a professional-grade softbox that transforms harsh sunlight into flattering, wraparound illumination. Tape white poster board at a 45-degree angle beside your subject to bounce light into shadows, eliminating the unflattering contrast that plagues most mobile portraits. Hold a black foam board opposite your light source to add depth and dimension by preventing unwanted fill light from washing out your subject’s features.
These techniques represent the foundation of lighting modification—the art of controlling, shaping, and directing light to match your creative vision. While mastering mobile lighting begins with understanding available light sources, modifiers give you the power to sculpt that light with precision.
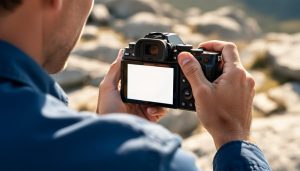
The smartphone revolution has democratized photography, but one challenge remains: phone cameras capture whatever light exists in a scene without the optical advantages of larger sensors and faster lenses. This limitation actually becomes your greatest opportunity. By introducing simple modifiers into your mobile workflow, you can create studio-quality lighting in any environment, often spending less than twenty dollars on materials.
Whether you’re shooting product photos for your online store, creating content for social media, or simply wanting your family portraits to look their best, understanding how different modifiers affect light quality will separate your images from the millions of snapshots flooding the internet daily. The gap between amateur and professional mobile photography isn’t equipment cost—it’s lighting knowledge.
Why Mobile Photography Needs Light Modifiers
Here’s a truth that might surprise you: your smartphone camera, impressive as it is, struggles more than you’d think. While modern mobile sensors have come remarkably far, they still face significant limitations that even the most sophisticated computational photography can’t entirely overcome.
The primary challenge lies in dynamic range. When you’re shooting a sunset portrait or trying to capture detail in both bright windows and darker room interiors, your phone’s sensor simply can’t capture the full range of light that your eyes perceive naturally. This is where the misconception begins. Many believe that mastering smartphone photography fundamentals alone will guarantee professional results, but lighting quality remains the deciding factor between good and exceptional images.
Consider a real-world scenario: you’re photographing products for your small business in your living room. The overhead lighting creates harsh shadows, your phone’s automatic HDR processing makes everything look artificially flat, and colors appear washed out. No amount of editing can fully resurrect poorly lit source material.
This is precisely where light modifiers become game-changers. A simple diffuser softens that harsh overhead light, eliminating unflattering shadows. A reflector bounces light into dark areas, reducing the contrast your sensor struggles to handle. Suddenly, your phone isn’t fighting against impossible lighting conditions but working with light that’s already been shaped to suit its capabilities.
The key insight is this: light modifiers don’t compensate for your phone’s weaknesses; they create optimal conditions where your mobile camera can truly excel. They transform challenging lighting scenarios into manageable ones, allowing your smartphone’s impressive technology to shine rather than struggle.
Understanding Light Modifier Basics for Mobile Photography
At its core, a light modifier does exactly what its name suggests: it changes the quality, direction, or intensity of light before it reaches your subject. Whether you’re shooting with your smartphone in golden hour sunlight or using a portable LED panel, understanding these fundamental principles will transform how you approach mobile photography.
Think of light modifiers as falling into three main categories based on how they interact with light. Diffusion softens harsh light by spreading it across a larger surface area. Imagine the difference between standing in direct sunlight versus the gentle light filtering through a white curtain. That curtain is acting as a diffuser, creating softer shadows and more flattering illumination. Reflection bounces light from its source toward your subject, often filling in shadows or redirecting light to exactly where you need it. Finally, direction control uses flags, grids, or barndoors to channel light precisely where you want it while keeping other areas in shadow.
For mobile photographers, the beauty of light modifiers lies in their versatility with both natural and artificial sources. When working with natural light, modifiers help you tame the sun’s intensity or redirect window light. A simple reflector can bounce sunlight to illuminate a shadowed face, while a diffusion panel placed between your subject and harsh midday sun creates that coveted soft-light look that usually requires cloud cover.
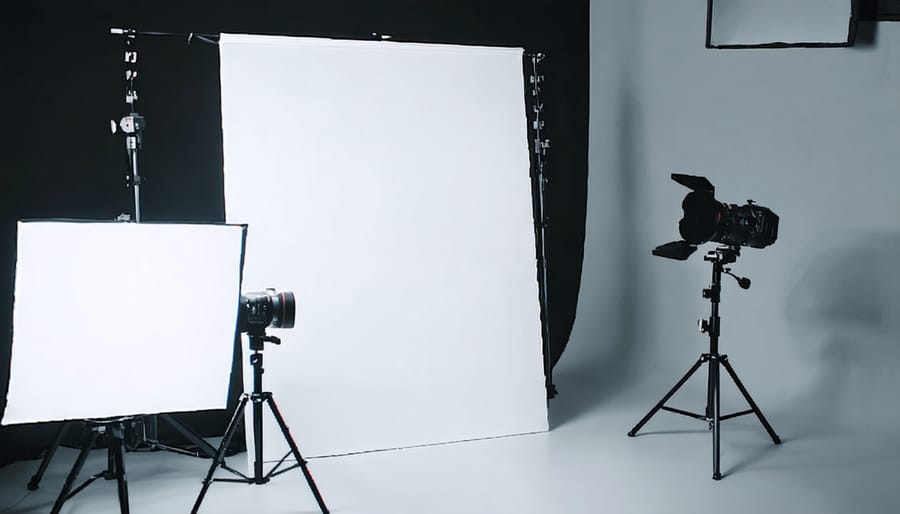
Artificial light sources like portable LED panels or small strobes give you more control but require different modifier considerations. Since these lights are typically smaller and closer to your subject in mobile setups, you’ll need compact modifiers that attach easily and don’t require elaborate rigging. The principles remain the same, but the scale changes. A small softbox on a portable LED creates the same quality of light as a larger studio softbox, just with a more limited spread.
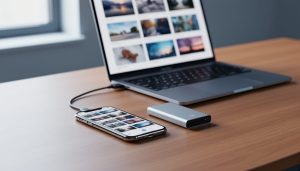
The key advantage for mobile shooters is portability. Your smartphone’s compact size means your entire lighting setup, modifiers included, can fit in a backpack, enabling professional-quality lighting practically anywhere.
Portable Reflectors and Diffusers
Collapsible Reflectors
Collapsible reflectors are the Swiss Army knives of smartphone photography lighting, offering incredible versatility at a fraction of the cost of artificial lighting equipment. These lightweight, foldable discs typically come in five-in-one sets, providing multiple surface options that dramatically transform natural light.
White reflectors create the softest, most natural fill light, perfect for smartphone portraiture when you want to gently brighten shadows without altering the existing color temperature. I use white surfaces most frequently for outdoor portraits, positioning them just outside the frame to bounce sunlight back onto my subject’s face, eliminating harsh shadow lines under the eyes and chin.
Silver reflectors deliver more punch, amplifying available light with a cool, neutral tone. They’re ideal when you need stronger fill light or when working with overcast conditions that produce flat, uninspiring illumination. The increased reflectivity makes them particularly useful for product photography with your smartphone.
Gold reflectors add warmth while reflecting light, creating that coveted golden-hour glow even at midday. Real-world tip: use gold sparingly, as it can quickly overwhelm skin tones and create an unnatural orange cast. I typically hold gold reflectors farther from my subject than silver or white ones.
Translucent panels function differently, acting as diffusers rather than reflectors. Position them between harsh sunlight and your subject to soften the light beautifully, transforming direct overhead sun into flattering illumination.
Budget-conscious photographers can create effective DIY reflectors using white poster board, aluminum foil crumpled and smoothed over cardboard for silver, or gold wrapping paper for warm tones. Professional collapsible reflectors, however, start around fifteen dollars and offer superior portability and durability for serious smartphone photographers.
Portable Diffusion Panels
Portable diffusion panels are game-changers when you’re shooting on location and need to tame harsh sunlight or create softer, more flattering illumination. These lightweight modifiers work by spreading light across a larger surface area, reducing contrast and eliminating those unflattering shadows that plague outdoor portraits.
The most common options include collapsible 5-in-1 reflector sets, which typically include a white translucent diffusion panel along with reflective surfaces. For mobile photography, a 32-inch panel strikes the perfect balance between portability and effective coverage. Position the diffusion panel between your subject and the sun, and you’ll instantly notice how it transforms harsh overhead light into a beautiful, wraparound glow that’s ideal for headshots and product shots.
Window light shooting benefits tremendously from diffusion panels too. If you’re photographing products or doing indoor portraits, placing a diffusion panel against a bright window softens the light dramatically while maintaining directionality. This technique is particularly useful during midday when direct sunlight creates overly contrasty conditions.
Here’s a practical tip: when shooting outdoors, use a stand or have an assistant hold the panel at roughly 45 degrees between your subject and the light source. For product photography, experiment with distances—moving the panel closer creates softer shadows, while pulling it back maintains more definition. The beauty of diffusion panels is their versatility across various shooting scenarios without requiring any power source.
Working Solo with Reflectors
Shooting solo with reflectors and a mobile device requires some creative problem-solving, but inexpensive tools make it manageable. Spring clamps from hardware stores (typically under $5) are invaluable for securing reflectors to chair backs, door frames, or shelving units. For more flexibility, consider basic light stands with reflector holder arms, which start around $20-30 and provide adjustable positioning at various angles and heights.
When working alone, position your reflector first, then frame your shot. Many photographers use their phone’s self-timer or voice commands to trigger the shutter, allowing time to adjust the reflector angle before the photo captures. Small tabletop reflectors work particularly well for product photography, as they can lean against books or boxes positioned around your subject.
A practical technique is the “test and adjust” method: take a quick shot, review how the light falls, reposition the reflector, and shoot again. This iterative approach helps you understand how small adjustments create dramatic changes in your lighting. For outdoor portraits, positioning a reflector against a backpack or camera bag creates stable, hands-free fill light that dramatically improves your mobile photography results.
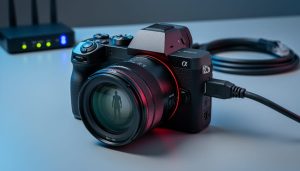
Smartphone-Compatible LED Light Modifiers
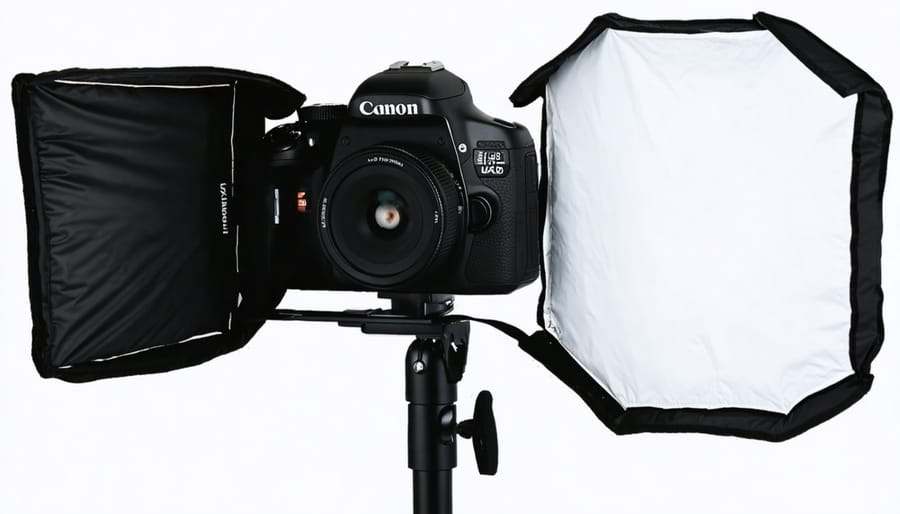
Softboxes and Diffusion Domes
Compact softboxes designed for pocket LED lights have become surprisingly effective tools for smartphone photographers. These miniature versions of studio softboxes typically measure between 4 to 8 inches and attach directly to small LED panels through hook-and-loop fasteners or magnetic mounts. The difference they make is immediately noticeable: instead of harsh, unflattering shadows under the eyes and nose, you get the same quality of soft, even illumination that professional portrait photographers rely on.
Magnetic diffusion domes offer an even simpler approach. These translucent plastic or silicone covers snap onto compact LED lights and spread the beam into a broader, gentler pattern. I tested several brands while photographing products for an online shop, and the results were striking. Without diffusion, reflective surfaces showed obvious hot spots and glare. With a simple dome attachment, those same items displayed smooth, professional gradients.
The practical impact on smartphone image quality centers on shadow transitions. Your phone’s camera sensor captures a limited dynamic range compared to professional equipment, so harsh lighting creates problems with blown highlights and blocked shadows. A mini softbox or diffusion dome helps your smartphone work within its capabilities by reducing contrast at the source rather than asking the sensor to handle extreme lighting ratios.
For portrait work, position your diffused LED about 45 degrees from your subject at eye level. The resulting catchlights in the eyes appear larger and more flattering than bare LED points.
Grids and Snoots for Directional Control
When you need laser-focused light that creates high drama and dimension, grids and snoots are your secret weapons. These modifiers work by restricting where light travels, giving you precise control over what gets illuminated in your frame.
A grid attaches to the front of your compact LED panel and functions like a honeycomb, allowing light to pass straight through while blocking spill to the sides. This creates a focused beam without hard edges. Think of product photography where you want to highlight a watch face without lighting the entire scene, or portrait work where you’re adding a hair light that won’t flare into your lens. Grids typically come in different degrees—40-degree grids spread light wider, while 10-degree grids create tight, concentrated beams.
Snoots take this concept further by funneling light into an even more defined circle or spot. Picture a lifestyle shot where you’re photographing a coffee cup on a table and want a spotlight effect on just that subject while the background falls into shadow. That’s snoot territory.
For mobile photographers shooting in small spaces or creating editorial-style content for social media, these modifiers help separate subjects from busy backgrounds. They’re particularly valuable when you can’t control ambient light but want to add dramatic accent lighting. Many affordable magnetic attachment systems now make swapping between grids and snoots on compact LED panels remarkably quick during shoots.
Color Gels for Creative Effects
Color gels are thin, translucent sheets that transform ordinary light into creative tools. For mobile photographers, they’re incredibly affordable and can dramatically change your image’s mood. To correct color temperature, use CTB (Color Temperature Blue) gels to cool warm tungsten light, or CTO (Color Temperature Orange) to warm harsh daylight. For creative effects, try gelling your background light with deep blue while keeping your subject naturally lit—this creates instant drama in portraits. You can tape gels directly over LED panels or flashlights, making them perfect for mobile setups. Real-world example: gel a small LED with amber during golden hour to intensify that warm, sunset glow on your subject’s face. Start with a basic correction pack and a creative color set—you’ll find endless possibilities for just a few dollars.
DIY and Budget-Friendly Modifier Solutions
Household Materials as Modifiers
You don’t need expensive equipment to shape light beautifully with your smartphone. Your kitchen and craft supplies likely contain excellent modifiers that professionals regularly use on commercial shoots.
White foam boards, available at any craft store for a few dollars, make outstanding reflectors and bounce cards. Position one opposite your light source to fill in harsh shadows on portrait subjects. For product photography, create a makeshift light tent by arranging foam boards in a U-shape around your subject, instantly achieving that soft, even lighting you see in professional catalogs.
Parchment paper transforms harsh direct light into a gentle, diffused glow. Tape it over a lamp or window, and you’ve created an instant softbox effect. This works exceptionally well for food photography when you need to tame bright overhead lighting without losing detail.
Aluminum foil becomes a powerful modifier when crumpled and then smoothed out slightly. The textured surface creates a sparkly, directional light that adds drama to portraits or highlights texture in product shots. Attach it to cardboard backing for easier positioning.
A white bedsheet stretched across a frame creates professional-grade diffusion for larger scenes, while black poster board serves as a flag to block unwanted light or add dramatic shadows. These simple materials let you experiment with light shaping techniques before investing in commercial modifiers, and many photographers continue using them even after building professional kits.
Building Simple Light Tents and Boxes
Creating a light tent for your mobile photography setup is surprisingly straightforward and requires minimal investment. Start with a simple cardboard box that’s roughly 12-18 inches on all sides, perfect for small products and food photography. Cut out three sides, leaving the bottom, back, and top intact. Cover these openings with white tissue paper or parchment paper using tape, creating diffused light panels that soften harsh shadows.
For the interior, line the remaining cardboard surfaces with white poster board or attach white fabric using clips. This creates a seamless backdrop and maximizes light reflection. Position your smartphone on a small tripod facing into the box, then place LED desk lamps or smartphone flashlights outside the tissue paper panels. The diffused light wraps around your subject beautifully, eliminating those distracting hotspots you’d get with direct lighting.
If you’re shooting jewelry or watches, scale down to a shoebox-sized version. The principle remains identical, but the compact size makes it portable for on-location shoots. For even better results, experiment with colored tissue paper to add warmth or coolness to your images. The total cost typically runs under fifteen dollars, yet the image quality rivals setups costing hundreds.
Real-World Mobile Photography Scenarios
Portrait Photography with Mobile Devices
Mobile portrait photography benefits tremendously from simple lighting modifiers that complement your phone’s capabilities. Outdoors, a 5-in-1 reflector becomes your best friend—position the white side to bounce natural light into your subject’s face, filling shadows while maintaining soft, flattering illumination. For backlit situations, use the silver side to add pop and contrast. In harsh midday sun, hold the translucent diffuser panel between your subject and the sun to create instant flattering light.
Indoors, pair continuous LED panels with small softboxes for control. Position one modified light at 45 degrees from your subject for classic portrait lighting, keeping it close (within two feet) to maximize softness from your phone’s sensor. A simple white foam board opposite your main light acts as a fill reflector. These setups integrate seamlessly with professional mobile techniques like portrait mode, enhancing depth and dimension in your final images without overwhelming your compact setup.
Product and Food Photography
When shooting products or food with your smartphone, controlling light quality becomes essential for achieving professional-looking results. Small softboxes, measuring around 12 to 24 inches, work beautifully for this type of work because they create soft, directional light that minimizes harsh shadows while remaining portable enough for client locations or restaurant shoots.
Consider collapsible diffusion panels as your secret weapon for on-location product photography. These lightweight modifiers fold down to pocket size and can transform harsh window light or bright LED panels into beautifully diffused illumination. For food photography specifically, a white reflector positioned opposite your main light source will bounce fill light into shadow areas, revealing texture and detail without creating competing highlights.
Small honeycomb grids deserve special mention here. Attaching one to a compact LED light gives you precise control over light spill, allowing you to highlight specific product features or create dramatic accent lighting on food presentations. Many smartphone photographers overlook this modifier, but it’s invaluable when shooting in tight spaces where stray light could reflect off unwanted surfaces.
The beauty of these modifiers lies in their versatility. That same softbox you use for jewelry photography works equally well for capturing entrees at dimly lit restaurants, making them smart investments for mobile creators building their commercial portfolios.
Content Creation and Social Media
If you’re creating content for Instagram, TikTok, or YouTube, you need lighting solutions that set up in seconds and work seamlessly with your phone. Ring lights remain the go-to choice for social media creators, offering that signature catchlight in your eyes while delivering flattering, shadowless illumination perfect for talking-head videos and product shots. Look for models with adjustable color temperature (typically 3000K-6000K) and brightness control, allowing you to match different environments and times of day.
Collapsible LED panels have become incredibly popular among vloggers because they’re lightweight, USB-rechargeable, and fit easily in a backpack. Many attach directly to your phone or tripod, eliminating the need for complex setups. For product photography and flatlays, small tabletop softboxes provide professional-looking results without occupying your entire workspace. These compact modifiers diffuse harsh LED light beautifully, preventing unwanted reflections on glossy surfaces.
The key advantage for content creators is consistency. When your audience expects daily posts, having reliable lighting modifiers means you can shoot anytime, anywhere, without waiting for golden hour or hunting for window light. Many successful influencers invest in portable modifier kits specifically designed for mobile workflows, ensuring their content maintains a professional polish regardless of location.
Choosing the Right Modifiers for Your Mobile Kit
Building a modifier collection for mobile photography doesn’t mean buying everything at once. Start by honestly assessing your shooting style and the types of content you create most often. Portrait photographers will prioritize differently than product photographers or food content creators.
For beginners just starting with intentional lighting, I recommend the “rule of three” approach. Begin with a basic diffusion solution like a white shoot-through umbrella or a simple softbox that works with affordable LED panels. These soften harsh light and create flattering results across most scenarios. Next, add a reflector disc set with silver, gold, and white surfaces. At around twenty dollars, reflectors offer tremendous versatility for bouncing and filling light. Your third investment should be a small lighting flag or some black foam core boards to control where light doesn’t go, which is equally important as where it does.
Intermediate photographers ready to expand should consider modular systems. Grid attachments for your existing softboxes add control without requiring new lights. A small beauty dish creates distinctive catchlights for portraits, while colored gels open creative possibilities. Think about modifiers that solve specific problems you’ve encountered rather than collecting items that look impressive but sit unused.
Advanced users building comprehensive mobile kits should focus on portability without sacrificing quality. Collapsible modifiers with quick-release mechanisms save precious setup time on location shoots. Magnetic mounting systems designed for compact LED lights streamline modifier changes mid-shoot. Consider investing in essential mobile photography gear that integrates seamlessly, like smartphone cages with cold shoe mounts for attaching mini softboxes directly to your mobile rig.
Remember that budget-friendly DIY solutions often perform identically to expensive alternatives. That grocery store parchment paper? It’s basically professional diffusion material. Test inexpensive options first before upgrading to premium versions.
Here’s the truth that experienced photographers understand: lighting modifiers are the secret handshake that separates casual smartphone snapshots from intentional, professional-looking mobile photography. You’ve likely seen images on social media that made you wonder, “How did they get that look?” More often than not, the answer isn’t an expensive camera or fancy editing software—it’s thoughtful light modification.
The beauty of working with modifiers in mobile photography is that you don’t need to invest thousands of dollars to see dramatic improvements. A simple white bedsheet hung near a window, a piece of white foam board from the craft store, or even a homemade cardboard reflector can transform harsh, unflattering light into something that rivals professional studio setups. Start experimenting with what you have around the house, and you’ll quickly develop an eye for how light behaves and responds to different surfaces and materials.
Remember, understanding light itself matters far more than the gear you use to shape it. The most expensive softbox won’t help if you don’t grasp the fundamentals of light direction, quality, and intensity. Pay attention to how natural light changes throughout the day, observe shadows and highlights in your everyday environment, and practice controlling one light source at a time. Your smartphone is already an incredibly capable tool—lighting modifiers simply help you use it with greater intention and artistry.