Invest in continuous LED panels over speedlights when you’re starting out—they let you see exactly how light falls on your food in real-time, eliminating the frustrating guess-and-check cycle that wastes ingredients and shooting time. A single 50-watt LED panel positioned at a 45-degree angle with a simple white reflector opposite will dramatically improve your results more than any expensive camera upgrade.
Stop buying lighting kits marketed specifically for photography. The markup is often 200-300% compared to video or studio lights with identical specifications. Look for adjustable color temperature (3200K-5600K minimum), a CRI rating above 95 to accurately render food colors, and dimming capabilities—these three features matter more than brand names or bundled accessories you’ll never use.
Your lighting budget should match your commitment level, not your aspiration. If you’re shooting food as a hobby or building a portfolio, $100-300 gets you professional-quality results with a versatile LED panel and basic modifiers. Professional photographers earning from food work typically invest $800-1500 in a flexible lighting system, but that’s because they’ve already identified their specific needs through experience, not because expensive gear creates better images automatically.
Window light remains the gold standard for food photography, so your first “equipment purchase” should actually be understanding how to control and shape natural light with inexpensive diffusers and reflectors. Master these principles before investing in artificial lighting—the techniques transfer directly, and you’ll make smarter purchasing decisions when you understand what you’re actually trying to replicate or improve upon.
Why Food Photography Demands Different Lighting
Food photography presents a distinct set of lighting challenges that set it apart from other genres. While portrait photographers focus on flattering skin tones and landscape shooters chase golden hour, food photographers need to solve a more complex puzzle—one that happens in a much smaller space.
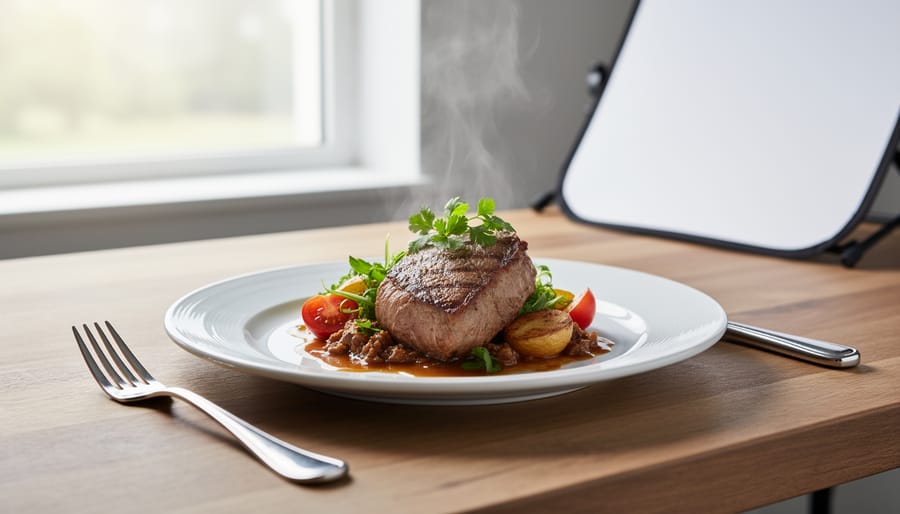
The first hurdle is texture. A perfectly grilled steak needs lighting that reveals those beautiful char marks without creating harsh shadows. Fresh bread should show its airy crumb structure, while soup needs to look steaming hot rather than flat and lifeless. Unlike portraits where slight softness can be flattering, food demands edge-to-edge sharpness with deliberate textural emphasis. You’re essentially highlighting the physical qualities that make food appealing, which requires precise light placement and control.
Color accuracy becomes critical when photographing food. A slight color cast that might work artistically in a portrait can make a salmon look spoiled or a salad appear wilted. Restaurant clients expect their signature dishes to look exactly as they appear in person. This demand for accurate color reproduction means understanding color temperature and how different light sources affect various ingredients.
Then there’s the reflection problem. Food is often wet, glossy, or served on reflective surfaces. That gorgeous chocolate ganache can turn into a mirror showing your softbox, or wine glasses can create distracting hot spots. While product photography lighting techniques share some overlap here, food adds the complexity of organic, irregular surfaces.
Creating depth on a flat surface matters tremendously. A portrait naturally has dimensional depth, but a plate of pasta photographed from above can look two-dimensional without careful lighting. You need to create shadows and highlights that suggest volume and separate elements from their background.
Finally, space constraints change everything. Unlike landscape or even portrait work, you’re often lighting a subject just inches across, working around tables, shooting in cramped restaurant kitchens, or setting up in residential spaces. This intimate scale demands compact, controllable lighting solutions that can shape light precisely without overwhelming your tiny set.
Natural Light Modifiers: Your Foundation Kit
Reflectors and Bounce Boards
Reflectors and bounce boards are the unsung heroes of food photography, offering an incredibly cost-effective way to control light and eliminate harsh shadows. When you’re mastering natural light or working with artificial sources, these simple tools can transform your results dramatically.
Let’s break down your options. White reflectors provide the most natural, subtle fill light—perfect for maintaining the delicate textures of pastries or the nuanced highlights on soup surfaces. Silver reflectors bounce light more aggressively, creating brighter fills that work beautifully for high-contrast setups or darker food subjects like chocolate desserts or espresso. Gold reflectors add warmth to your images, which can enhance comfort foods like fresh-baked bread or autumn-themed dishes, though they can sometimes introduce unrealistic color casts.
For food photography, size matters more than you might think. A 22-inch round reflector offers excellent maneuverability in tight spaces around your set, while 32×48-inch rectangular boards provide broader, more even coverage for larger spreads.
Here’s a real-world example: imagine photographing a dark chocolate cake by a window. Without a reflector, the side opposite your light source falls into murky shadows, losing detail. Position a white reflector on that shadow side, and suddenly you see texture in the frosting, definition in the layers, and a professional-looking gradient of light.
Don’t overlook DIY alternatives. White foam core boards from craft stores work brilliantly and cost just a few dollars. Aluminum foil crumpled and smoothed over cardboard creates an effective silver reflector, while gold wrapping paper mimics pricier gold reflectors surprisingly well.
Diffusion Panels and Scrims
Natural window light can be gorgeous for food photography, but it often comes with harsh shadows and uneven contrast. That’s where diffusion panels and scrims become invaluable. These tools soften direct sunlight, transforming it into that beautiful, even glow you see in magazine spreads.
For overhead setups, I recommend starting with a 42×72-inch diffusion panel. This size gives you enough coverage for most tabletop scenes without overwhelming a small workspace. When working with side lighting near a window, a 42×42-inch square scrim works perfectly and is easier to position in tight quarters.
The practical challenge most photographers face is mounting these panels without a studio full of expensive grip equipment. Here’s what actually works: lightweight clamp stands with adjustable arms can hold smaller diffusers securely, while larger overhead panels can be suspended using photography backdrop stands with horizontal crossbars. For apartment shooters with limited floor space, spring-loaded tension rods fitted between walls or inside window frames provide excellent mounting points without damaging surfaces.
Look for panels with white translucent fabric rather than silver or gold reflective surfaces, which can add unwanted color casts to your food. Many affordable options include interchangeable fabrics, letting you control the degree of diffusion based on how strong your light source is. A single-stop diffusion works for cloudy days, while double-stop fabric tames bright afternoon sun beautifully.
Black Flags and Negative Fill
Sometimes the best lighting tool isn’t about adding more light—it’s about strategically taking it away. Black flags, which are simply pieces of black fabric, foam core, or specialized panels, absorb light rather than reflect it. This technique, called negative fill, creates depth and mood by preventing unwanted light from bouncing into shadow areas.
In food photography, negative fill is your secret weapon for drama. When photographing a dark chocolate cake or a richly sauced dish, placing a black flag opposite your main light source deepens the shadows and creates that coveted moody, editorial look. Without negative fill, ambient light bounces around your shooting space, filling in shadows and flattening your subject.
Here’s a practical example: imagine photographing a bowl of pasta with window light from the left. Naturally, light bounces off your white walls and fills the right side. Place a black flag on the right, and suddenly you’ve got sculptural depth that makes the dish pop off the screen.
You don’t need expensive gear to start. Black foam core boards from craft stores cost just a few dollars and work beautifully for tabletop setups. For more flexibility, consider dedicated photography flags with adjustable arms, which typically run thirty to sixty dollars and let you position negative fill precisely where you need it.
Continuous Lighting Solutions
LED Panel Lights
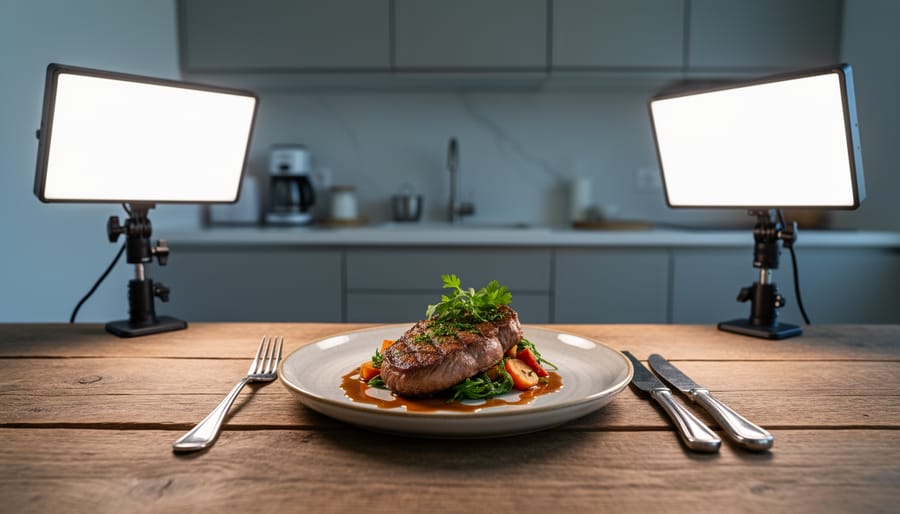
LED panel lights have become the workhorse of food photography studios, and for good reason. They’re energy-efficient, run cool to the touch (important when you’re working with chocolate or ice cream), and provide consistent, flicker-free light that won’t mess with your camera settings.
When shopping for LED panels, start by looking at power output measured in lux. For most food photography setups, you’ll want panels that deliver at least 1000 lux at three feet. This gives you enough flexibility to shoot at lower ISOs and faster shutter speeds. If you’re working in larger spaces or need to overpower ambient light, look for panels pushing 3000 lux or higher.
Color temperature is where many photographers get tripped up. The sweet spot for food photography is 5500K, which mimics natural daylight and makes everything from vibrant salads to golden pastries look true to life. Many LED panels offer adjustable color temperature, which sounds great in theory, but I’ve found that dedicated daylight-balanced panels often provide more consistent results than those trying to do everything.
Here’s something crucial that doesn’t get talked about enough: CRI ratings. Food photography demands a CRI (Color Rendering Index) of at least 95. Anything lower and you risk those gorgeous reds in strawberries looking muddy or that caramelized crust appearing dull. Professional-grade panels with CRI 97 or higher are worth the investment if color accuracy matters to your work.
Size matters depending on your shooting style. For overhead shots, larger panels (like 1×1 foot or bigger) create beautiful, even illumination across your entire scene. For side lighting or accent work, smaller panels give you more control and precision, letting you sculpt shadows and highlight specific elements of your dish.
Ring Lights and Specialty LED Options
Ring lights have a polarizing reputation in food photography—some photographers swear by them for flat lay shots, while others find them too limiting. The truth lies somewhere in between. Ring lights create a distinctive circular catchlight and eliminate shadows directly beneath the subject, which works beautifully for overhead shots of circular plates, bowls of soup, or symmetrical arrangements. I’ve used them successfully for top-down breakfast spreads and cake photography where that even, shadowless look enhances the composition.
However, ring lights struggle with dimensional food photography. That flat, even illumination that works overhead can make hero shots of burgers or layered dishes look lifeless and two-dimensional. The circular catchlight also appears unnatural in reflective surfaces like coffee or sauces when shooting from angles other than directly above.
For more versatility, consider tube lights or flexible LED mats instead. Tube lights offer adjustable color temperature and can be positioned at creative angles or used as accent lighting. Flexible LED mats are game-changers for overhead setups—you can mount them on boom arms or suspend them from C-stands, creating large, soft light sources that wrap beautifully around food while maintaining control over shadow direction.
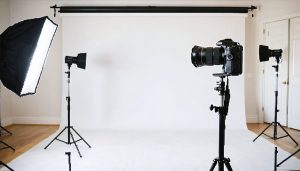
Light Stands and Positioning Gear
Even the most beautiful lighting setup falls apart without proper support equipment, and food photography presents unique challenges that standard light stands struggle to address. When you’re shooting directly overhead—arguably the most popular angle in food photography—you’ll quickly realize that traditional stands just can’t get your lights where you need them without casting shadows or cluttering your limited workspace.
C-stands are the workhorse of professional food photography studios. Unlike flimsy tripod-style stands, C-stands feature a sturdy base with adjustable legs that can slide under tables and props, keeping them out of your frame while providing rock-solid support. The real magic happens when you add a boom arm, which extends horizontally over your scene, allowing you to position lights, reflectors, or diffusion materials directly above your food without any stand legs intruding into your shooting space.
For smaller setups or when you need to attach modifiers at unusual angles, magic arms are indispensable. These flexible articulating arms can clamp onto your C-stand, table edge, or even shelving, giving you virtually unlimited positioning options. I’ve used magic arms to hold small reflectors just inches from my subject or to position accent lights at precise angles that would be impossible with conventional mounting.
Budget-conscious photographers can start with one quality C-stand and boom arm combination, then add magic arms as specific needs arise. This support gear might seem like an afterthought, but it’s what transforms frustrating shooting sessions into controlled, repeatable setups.
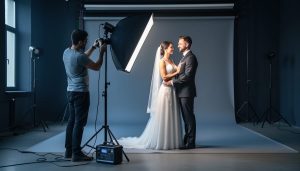
Strobe and Flash Equipment
When to Choose Strobes Over Continuous Light
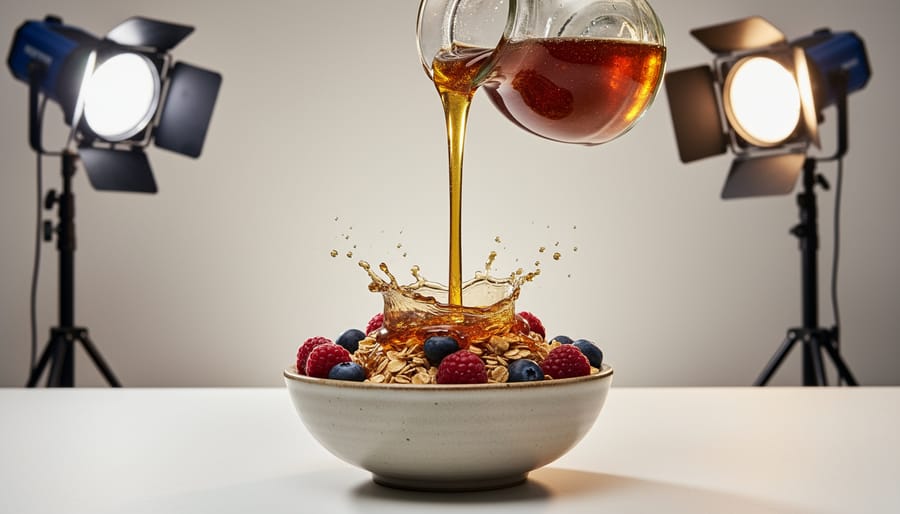
Strobes truly shine when you’re shooting dynamic food scenes. If you’re photographing honey dripping onto pancakes, cream splashing into coffee, or pasta being tossed in a pan, continuous lights simply can’t freeze that motion sharply. Strobes fire at speeds around 1/1000th of a second or faster, capturing those spectacular split-second moments with crisp clarity.
They also pack significantly more power than continuous lights, which becomes essential when you need to stop down to f/8 or f/11 for greater depth of field. This is particularly important for overhead flat lays where you want everything from front to back in sharp focus. Additionally, strobes work beautifully alongside window light. Because cameras can’t detect strobe light until it fires, you can balance your exposure between ambient daylight and artificial light without the two competing visually during composition.
Now, let’s be honest about the learning curve. Strobes require understanding concepts like sync speed, flash duration, and power ratios. You can’t see exactly what you’re getting until after you shoot, which means more test shots and adjustments. But here’s the good news: modern strobes often include modeling lights that approximate the effect, and once you grasp the fundamentals, the creative possibilities expand dramatically. Most photographers find the initial frustration worthwhile for the professional results strobes deliver.
Speedlights vs. Studio Strobes
When you’re building a professional lighting setup for food photography, one of your first decisions is choosing between speedlights and studio strobes. Both have their place in food photography, but understanding their differences will help you invest wisely.
Speedlights are those compact flashes that mount on your camera’s hot shoe, though you’ll typically use them off-camera for food work. They’re incredibly portable, battery-powered, and significantly more affordable, with quality units ranging from $100 to $500. The main limitation is power output, measured in guide numbers rather than watt-seconds. This means you might struggle with larger setups or when shooting through multiple diffusion layers. Speedlights also lack modeling lights, making it harder to visualize how your light will fall across your dish before you shoot.
Studio strobes, or monolights, are self-contained units that plug into wall outlets and offer substantially more power, typically 200 to 500 watt-seconds. That extra power gives you faster recycle times when shooting multiple frames and the ability to overpower ambient light or work with smaller apertures for greater depth of field. Most importantly, they include modeling lights that stay on continuously, letting you see exactly where shadows and highlights will appear on your subject.
For beginners or photographers working in small spaces, speedlights offer an accessible entry point. But if you’re shooting professionally or want consistent results with complex setups, studio strobes become worth the investment, typically starting around $300 per head.
Triggers and Sync Systems
Getting your lights to fire reliably might sound like a basic concern, but when you’re photographing that perfect honey drizzle or capturing steam rising from a hot dish, missed triggers mean missed shots. Most modern lighting setups use wireless triggers—small transmitters that attach to your camera’s hot shoe and communicate with receivers on your strobes or speedlights.
You’ll encounter two main control modes: TTL (Through The Lens) and manual. TTL automatically calculates flash power based on your camera’s metering, which sounds convenient but can be inconsistent with food photography’s precise requirements. Manual mode gives you complete control over each light’s output, letting you dial in exact ratios between your key light, fill, and accent lights. For static food shots, manual wins every time—your lighting stays consistent across an entire shoot, crucial when you’re making subtle styling adjustments.
However, TTL shines (pun intended) when shooting action shots like pouring chocolate sauce or tossing salad. The automatic adjustments help you maintain proper exposure as subjects move through different distances from your lights.
When choosing triggers, prioritize reliability over features. Budget options like Yongnuo work fine for single-light setups, but professional systems from Godox or Profoto offer better range, faster recycle times, and the ability to control multiple lights independently from your camera position—invaluable when you’re working quickly with melting ingredients.
Light Shaping Tools That Transform Your Results
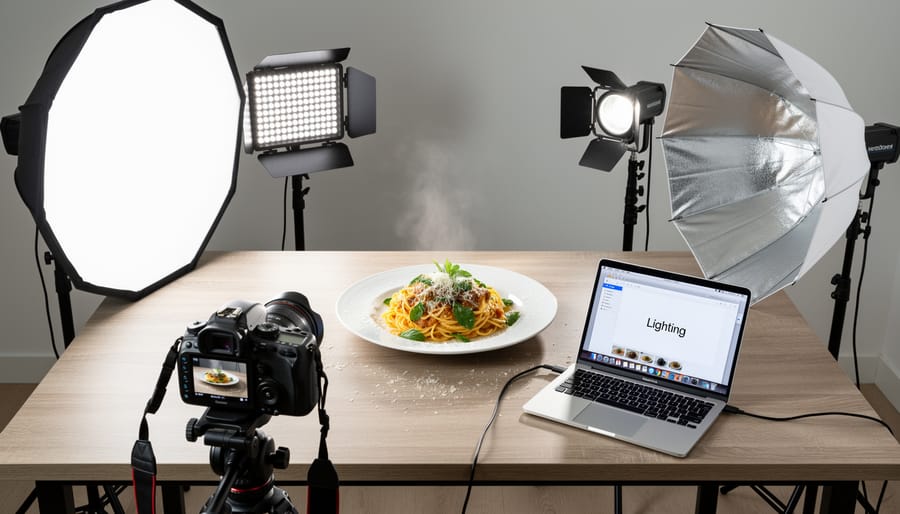
Softboxes and Their Sizes
Softbox selection dramatically changes how your food images feel, and size matters more than you might think. Here’s the practical breakdown that’ll help you choose wisely.
Rectangular softboxes, particularly strip boxes (typically 12×36 inches or 12×48 inches), excel at side lighting—they’re my go-to for creating those beautiful edge highlights on glassware or adding dimension to stacked burgers. The narrow shape gives you controlled directional light that doesn’t spill everywhere, perfect when you want dramatic shadows that define texture without going completely moody.
Square softboxes in the 24×24 to 36×36 inch range work beautifully for overhead shots, which have become essential in food photography. They create even, wraparound light that mimics natural window light falling onto your scene. I often position a square softbox directly above when shooting flat lays or when I need that clean, editorial look you see in cookbooks.
Here’s the relationship that changed my lighting game: larger softboxes create softer, more gradual shadows because they act as bigger light sources relative to your subject. A 36-inch softbox placed close to a bowl of pasta produces that gorgeous, gentle falloff that makes food look appetizing. Smaller softboxes (under 20 inches) create harder, more defined shadows—useful for graphic looks but less forgiving on most dishes.
For most food photographers starting out, a 24×24 inch square softbox offers the best versatility. It’s large enough to create beautiful soft light but manageable in tight spaces. Add a strip box later when you’re ready to experiment with more dimensional lighting setups.
Umbrellas: Simple and Effective
Umbrellas remain one of the most practical choices for food photographers working with a tight budget, and honestly, they punch well above their price point. You’ll encounter two main types: shoot-through umbrellas, which work like translucent diffusers that you fire your light directly through, and reflective umbrellas, which bounce light back toward your subject using a silver, white, or gold interior surface.
Shoot-through umbrellas create softer, more wraparound light that’s particularly flattering for overhead shots and minimalist food styling. Reflective umbrellas generate slightly more punch and contrast, which works beautifully when you need to bring out texture in crusty bread or glistening sauces. Both options are incredibly portable and set up in seconds, making them perfect for photographers shooting in different locations or tight spaces.
The budget-friendly aspect here is real. A quality umbrella costs a fraction of what you’d spend on a softbox, yet delivers genuinely professional results for many food photography scenarios.
Here’s the catch: umbrellas are light spill machines. They scatter illumination everywhere, which means less control over where your light lands. If you’re shooting in a small kitchen or trying to create dramatic, moody food scenes with precise light placement, that spill becomes problematic. You’ll find yourself constantly flagging off unwanted light or repositioning your setup to avoid washing out your carefully crafted shadows.
Grids, Snoots, and Precision Modifiers
Once you’ve nailed your main lighting, precision modifiers become invaluable for adding those final touches that separate good food photos from stunning ones. Grids, snoots, and similar tools let you control exactly where light falls, preventing unwanted spill and allowing you to highlight specific areas of your composition.
Grids attach to the front of softboxes or reflectors, narrowing the light beam into a focused column. They’re perfect for creating a spotlight effect on your hero dish while keeping the background darker for separation. Snoots work similarly but create an even tighter, more dramatic pool of light. I frequently use a gridded strip box positioned behind and slightly to the side of my subject to create an elegant rim light on glassware or to make steam more visible rising from a hot dish.
For example, when photographing a chocolate tart with raspberry garnish, your main softbox provides overall illumination, but a small gridded speedlight positioned at table level can add a subtle glow to just the raspberries, making them pop without washing out the rich chocolate tones. This level of control is what creates depth and dimension in your final image.
Start with inexpensive honeycomb grids for your existing lights before investing in dedicated accent fixtures. Many photographers fashion DIY snoots from black foam board with excellent results.
Building Your Kit by Budget and Skill Level
The Starter Setup (Under $200)
You don’t need expensive gear to start capturing mouthwatering food photos. In fact, some of the most beautiful images I’ve seen came from photographers working with basic natural light setups. The key is understanding light behavior before throwing money at equipment you may not need.
Start with a simple 5-in-1 reflector kit (typically $15-30). These fold-flat discs include white, silver, gold, black, and translucent surfaces. The white side fills in shadows gently, while the black side deepens them for dramatic contrast. The translucent center becomes a diffuser when placed between your window and subject, softening harsh sunlight into that dreamy, even glow you see in magazine spreads. I still grab mine regularly, even with a studio full of professional gear.
Next, invest in white foam boards or poster boards from an office supply store (under $10 total). Position these opposite your main light source to bounce light back onto your food, eliminating unflattering shadows without looking artificial. They’re lightweight, versatile, and won’t break if you accidentally spill soup on them.
For those occasional evening shoots or darker spaces, consider the Neewer 660 LED panel (around $50-80). It offers adjustable brightness and color temperature, giving you consistent results regardless of available daylight. Unlike strobes, continuous lights let you see exactly how shadows fall before clicking the shutter, which accelerates learning considerably.
This modest setup teaches fundamental lighting principles covered in our beginner’s guide to lighting equipment, preparing you to make informed decisions when you’re ready to expand.
The Enthusiast Kit ($200-$800)
At this budget level, you’re making a real investment in your food photography capabilities, and the difference in your results will be dramatic. This is where you move beyond ambient window light into complete control over your lighting environment, regardless of time of day or weather conditions.
The centerpiece of your enthusiast kit should be either quality LED panels or entry-level strobes. LED panels in the $150-$300 range offer adjustable color temperature, consistent output, and the massive advantage of seeing exactly how your light falls before you click the shutter. Brands like Aputure and Godox offer excellent options here. Alternatively, entry-level strobes like the Godox AD200 give you more power and sharper light, which is particularly useful when shooting dishes with texture you want to emphasize, like a crusty sourdough or seared steak with visible char marks.
Professional light stands are essential at this level because they’re stable enough to support heavier modifiers without tipping, and they adjust smoothly when you’re making fine-tuning adjustments during a shoot. Expect to spend $30-$50 per stand for decent quality.
This budget also lets you invest in key modifiers. A quality softbox creates beautiful, wraparound light that makes soups look inviting and reduces harsh shadows. A gridded beauty dish gives you more directional control, perfect for hero shots where you want drama. I particularly love using a small octabox for pasta dishes because it creates natural-looking catchlights in sauce without washing out the texture.
With this setup, you can shoot restaurant-quality images at midnight if inspiration strikes, maintain consistency across multiple dishes for a cookbook project, or handle commercial work for local restaurants.
The Professional Arsenal ($800+)
When you’re shooting food professionally several times a week or running a dedicated home photography studio, investing in premium lighting equipment becomes not just justifiable but essential for maintaining consistency and meeting client expectations.
High-CRI (Color Rendering Index) LED panels rated 95+ are game-changers for food work. While they cost $300-600 per unit, they reproduce colors with scientific accuracy, meaning that vibrant tomato red or delicate salmon pink appears exactly as it should. This eliminates the frustrating color correction work that eats into your billable hours.
Professional-grade strobes like the Profoto B10 or Godox AD400 Pro deliver powerful, consistent output that budget strobes simply can’t match. They recycle faster, allowing you to shoot more frames during those critical moments when steam is rising from a dish or chocolate is at the perfect melting point. Their color temperature remains stable across power settings, which matters tremendously when matching multiple shots for a restaurant menu or cookbook.
Specialized modifiers including beauty dishes, gridded softboxes, and optical snoots give you surgical control over light placement. A quality parabolic reflector, for instance, creates that coveted wraparound light that makes pastries glow without harsh shadows.
Backup equipment is non-negotiable at this level. When a client is paying premium rates, having a redundant strobe or LED panel prevents a technical failure from derailing an entire shoot. If you’re billing over $1,000 per session consistently, this tier makes complete financial sense.
What Actually Matters (And What’s Just Marketing)
Let me be honest with you: the lighting industry loves throwing around impressive-sounding numbers that mean very little when you’re actually photographing a bowl of pasta. I’ve watched photographers agonize over color rendering index differences of 2-3 points while completely overlooking features that would genuinely transform their work.
Here’s what genuinely matters. Color accuracy is non-negotiable for food photography. That vibrant red tomato sauce needs to look appetizing, not orange or purple. Look for lights with a CRI (Color Rendering Index) of at least 90, but here’s the thing: the jump from 95 to 98 CRI won’t make or break your images. A solid 95 CRI light with better modifiers will outperform a 98 CRI light with poor light shaping every single time.
Power output matters, but probably not how you think. You don’t need stadium-level brightness for food photography. Most of my work happens between f/5.6 and f/11, and a moderately powered continuous light or a single strobe at half power handles this beautifully. The marketing materials showing 1000-watt monsters? That’s for lighting entire rooms or shooting at f/22 for extreme depth of field, which rarely serves food photography well.
Adjustability trumps raw power. The ability to dim your lights smoothly without color shifts is far more valuable than maximum output you’ll rarely use. I’ve seen beginners buy the brightest light available, then struggle because they can’t dial it down enough for close-up shots without changing their entire setup.
Temperature control is genuinely useful, but don’t obsess over having 2700K to 6500K range. Food photography typically lives between 4500K and 5500K. That fancy bicolor feature? Nice to have, but not essential if you’re choosing between that and better build quality or additional modifiers.
Here’s what’s mostly marketing noise: fancy app controls, Bluetooth connectivity, and special effects modes. Sure, they’re convenient, but they don’t improve your images. Battery life specifications can also be misleading since manufacturer testing rarely reflects real-world shooting patterns.
The biggest misconception? That expensive automatically means better results. I’ve produced commercial work with $150 lights that clients loved. The difference between a $300 light and a $1200 light often comes down to build quality, brand reputation, and convenience features, not image quality. Invest your budget wisely: a decent light with excellent modifiers will always beat an excellent light with poor modifiers.
The right lighting equipment absolutely transforms food photography, but here’s the truth that often gets lost in equipment discussions: understanding light quality matters infinitely more than owning every piece of gear available. I’ve seen photographers create stunning food images with nothing but a reflector and window light, while others struggle despite owning thousands of dollars in equipment. The difference isn’t the gear itself, but the knowledge of how to shape, control, and manipulate light effectively.
Start with the basics. A reflector, diffusion material, and perhaps one affordable continuous light or speedlight will teach you more about lighting fundamentals than immediately investing in an expensive strobe system. Practice with what you have. Experiment with different light positions, observe how shadows fall across your subject, and learn to see the subtle differences between hard and soft light. These skills translate regardless of which equipment you eventually add to your kit.
As your work evolves, expand your lighting arsenal based on actual shooting needs rather than perceived requirements or what other photographers recommend. Shoot mostly in a home studio? Perhaps that softbox setup makes sense. Work on location frequently? Portable battery-powered lights become essential. Let your real-world challenges guide your purchasing decisions.
Here’s the reassuring part: great food photography is genuinely achievable at any budget level. I’ve judged photography competitions where winning images were shot with basic equipment, and I’ve seen professionally published work created with minimal gear. Your understanding of light, composition, and storytelling will always outweigh your equipment list. Focus on developing those skills first, and the right equipment choices will become obvious along the way.