You’ve probably heard whispers about ACES in forums or seen it mentioned in YouTube tutorials, wondering if it’s the secret ingredient missing from your color workflow. The Academy Color Encoding System isn’t just another buzzword—it’s a standardized color management framework developed by the Academy of Motion Picture Arts and Sciences that promises consistent color across different cameras, monitors, and delivery formats.
Here’s what matters for your work: ACES creates a common language for color data, functioning as an intermediary color space that preserves maximum image information from capture through final delivery. Think of it as a universal translator that prevents the color shifts and clipping that happen when moving footage between different color spaces like Rec. 709, DCI-P3, or Rec. 2020.
The connection to LUTs is straightforward. Traditional LUTs transform colors directly from your camera’s color space to your display, often baking in creative looks that limit flexibility. ACES separates this into two stages: Input Device Transforms (IDTs) convert camera footage to ACES, then Output Device Transforms (ODTs) handle display-specific conversion, with creative LUTs applied in between for maximum control.
But should you actually use it? That depends on your projects, software capabilities, and whether the added complexity serves your needs—something we’ll explore throughout this guide.
What Is ACES Color Space (And Why Should You Care)?
The Problem ACES Was Built to Solve
Picture this: You’ve just wrapped an incredible outdoor shoot. The footage looks stunning on your camera’s LCD. But when you import it into your editing software, the colors look… off. The vibrant sunset you captured seems muted. You export a preview, send it to your colorist, and they call you confused—on their monitor, everything looks oversaturated.
Welcome to the color management nightmare that filmmakers and photographers have battled for decades.
The problem isn’t your camera or your monitor—it’s that every device speaks a slightly different “color language.” Your camera captures color in one space, your editing software interprets it in another, and different monitors display it in yet another. When working with RAW footage workflows, these differences multiply exponentially.
Consider a typical multi-software workflow: You shoot in LOG on your camera, edit in Premiere Pro, grade in DaVinci Resolve, then deliver for both theatrical projection and YouTube. At each handoff, color information gets interpreted differently. That carefully crafted grade? It might look completely different when your client views the final export on their laptop.
Studios experienced this chaos on massive scales—imagine juggling footage from multiple camera brands, visual effects houses working in different software, and trying to maintain color consistency across international facilities. Colors would shift unpredictably, requiring expensive fixes and endless revisions. The industry desperately needed a universal translator for color, one standardized language everyone could speak.
How ACES Differs from sRGB, Adobe RGB, and ProPhoto RGB
If you’ve worked with color spaces before, you’ve probably used sRGB for web images, Adobe RGB for prints, or maybe even ProPhoto RGB for maximum editing flexibility. ACES operates differently from all three in some fundamental ways that affect how you approach color work.
The most obvious difference is gamut size. Think of color gamut as a container holding all the colors you can work with. sRGB is a small container, covering roughly what most monitors and web browsers can display. Adobe RGB is larger, encompassing more printable colors. ProPhoto RGB is enormous, containing colors that don’t even exist in nature. ACES sits somewhere between Adobe RGB and ProPhoto RGB in practical terms, but here’s the key distinction: it’s designed to hold all colors a camera can capture from real-world scenes.
This brings us to the biggest conceptual shift. sRGB, Adobe RGB, and ProPhoto RGB are display-referred color spaces. They’re designed around how images look on screens or prints. When you open a RAW file in one of these spaces, your software immediately applies tone curves and adjustments to make it look good on your display.
ACES is scene-referred, meaning it preserves the actual light values your camera recorded before any display adjustments happen. Imagine the difference between storing temperature readings in raw sensor data versus immediately converting them to “feels like” temperature. The raw data gives you more accurate information to work with.
Regarding bit depth, those traditional color spaces typically work in 8-bit or 16-bit. ACES uses floating-point mathematics, which handles extreme brightness ranges without banding or clipping. This matters when you’re recovering highlights or lifting shadows dramatically during editing.
Understanding Color Management Basics
Scene-Referred vs. Display-Referred Workflows
Understanding the difference between scene-referred and display-referred workflows is essential to grasping why ACES represents such a significant shift in color management.
Think of it this way: traditional display-referred workflows are like painting directly onto your final canvas. When you shoot in standard color spaces like sRGB or Rec. 709, your camera immediately converts the light it captures into values designed for a specific display device. The problem? Once that conversion happens, you’re locked into those limitations. It’s like compressing a high-resolution photo into a JPEG—information gets permanently discarded to fit the smaller container.
Scene-referred workflows, which ACES uses, take a fundamentally different approach. Instead of immediately converting to display values, ACES preserves the actual light information from the scene as it was captured. Imagine keeping your original high-bit-depth raw file instead of converting to JPEG right away. This scene-referred data maintains the full range of brightness and color your camera or scanner recorded, without squeezing it into display constraints.
Here’s a practical example: suppose you’re photographing a sunset with extremely bright highlights and deep shadows. A display-referred workflow might clip those highlights immediately because they exceed what a standard monitor can show. With ACES’s scene-referred approach, that highlight information remains intact throughout your editing process. You can adjust exposure, apply creative grades, and then choose how those highlights appear on different outputs—perhaps softer on a standard monitor but taking full advantage of brightness on an HDR display.
This flexibility is why colorists and photographers working with high-dynamic-range content find ACES invaluable. You’re making creative decisions with complete information rather than working around limitations baked in from the start.
The Role of Color Spaces in Your Workflow
Think of color spaces as translators between devices that speak different languages. Your camera captures light in one dialect, your editing software interprets it in another, and your monitor displays it in yet another. Without a common framework, this game of telephone inevitably distorts your colors along the way.
Here’s a scenario you’ve probably experienced: you import images from your camera, edit them to perfection on your monitor, then send them to a client who views them on their phone. Suddenly, your carefully crafted sunset looks oversaturated and garish. What happened? Each device interpreted your color information through its own color space, applying different assumptions about how to translate those numerical values into actual colors.
This is where color spaces become critical workflow tools rather than abstract concepts. When you shoot in your camera’s native color space, perhaps Adobe RGB, then import into editing software set to sRGB, and finally export for a display that uses DCI-P3, you’re asking your image to pass through multiple translation layers. Each transition offers opportunities for colors to shift, clip, or lose their original intent.
ACES attempts to solve this by providing a single, standardized reference point. Instead of translating directly from Camera A to Monitor B, you translate from Camera A to ACES, then from ACES to Monitor B. The advantage? Every major device manufacturer knows how to translate to and from this common language, ensuring your colors remain consistent regardless of where they’re viewed.
What Are LUTs and How Do They Work with ACES?
Transform LUTs vs. Creative LUTs
Understanding the difference between transform LUTs and creative LUTs is essential when working with ACES, and honestly, it’s simpler than it sounds.
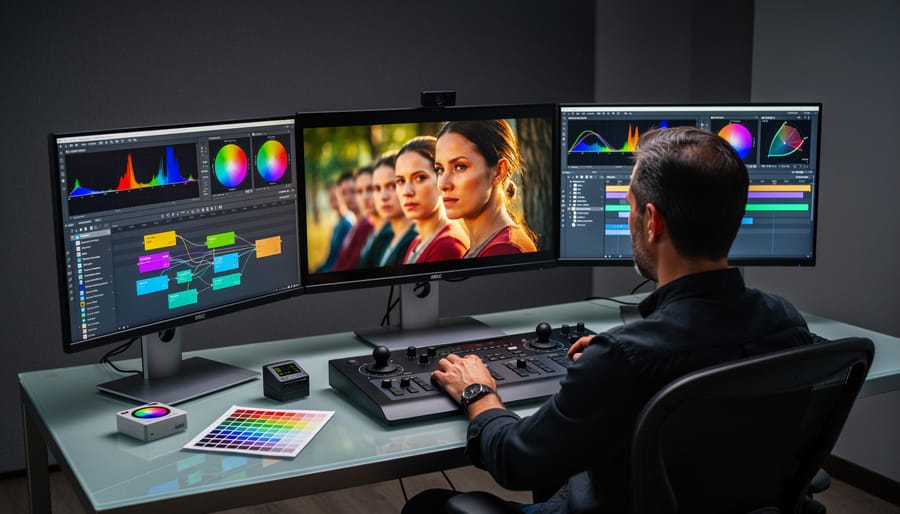
Transform LUTs are technical workhorses. They handle mathematical color space conversions without changing the creative intent of your image. Think of them as translators. When you import Sony S-Log3 footage or Canon RAW files into your ACES workflow, you’ll apply an Input Transform LUT (IDT) that converts that specific camera’s color science into ACES color space. Similarly, when you’re ready to export, an Output Transform LUT (ODT) converts from ACES to your delivery format, whether that’s Rec.709 for standard displays or P3 for cinema screens. These transforms preserve color accuracy and ensure consistency across different devices.
Creative LUTs, on the other hand, are about aesthetics. They apply a specific look or mood to your images—think vintage film emulations, high-contrast blockbuster grades, or desaturated documentary styles. You’d apply these after your technical transforms are in place.
Here’s a practical example: You’re editing a wedding video shot on multiple cameras. First, you’d apply the appropriate Input Transform LUT for each camera (Sony, Canon, whatever you used) to get everything into ACES. Now all your footage speaks the same color language. Next, you might apply a creative LUT that gives everything a warm, romantic feel. Finally, you’d use an Output Transform to convert to Rec.709 for online delivery. The transform LUTs handle accuracy; the creative LUT handles artistry.
Input Device Transforms (IDTs) and Output Transforms (ODTs)
Think of ACES as a universal translator for color, but it needs two essential components to work: a way to get your footage in (IDT) and a way to display it properly (ODT). These transforms are what make ACES practical rather than theoretical.
Input Device Transforms (IDTs) are camera-specific LUTs that convert your footage from its native color space into the standardized ACES color space. When you shoot on a Sony A7S III in S-Log3, for example, you’d apply the corresponding Sony S-Log3 IDT. This tells ACES exactly how to interpret those flat-looking colors your camera recorded. Major camera manufacturers like ARRI, RED, Sony, Canon, and Blackmagic Design all have official IDTs available. The key here is accuracy—using the correct IDT ensures your colors translate properly into ACES, preserving the full dynamic range and color information your sensor captured.
Output Transforms (ODTs) work on the opposite end. They prepare your ACES footage for specific display devices or delivery formats. The most common ODT you’ll encounter is Rec.709, which targets standard HD displays and computer monitors. If you’re delivering content for HDR television, you’d use the Rec.2020 ST.2084 (PQ) ODT. For theatrical projection, there’s the P3-D60 ODT. Think of ODTs as the final translation that makes your carefully managed colors actually visible on screens.
Here’s a real-world scenario: You shoot a wedding on a Canon R5 in Canon Log 2. You’d apply the Canon Log 2 IDT to bring that footage into ACES, grade it within that standardized environment, then apply a Rec.709 ODT for the couple’s Blu-ray and an sRGB ODT for web delivery. If they’re viewing on a reference monitor during your color session, the ODT ensures what you see is what they’ll get.
ACES Compatibility: What Works and What Doesn’t
Software Support for ACES
If you’re wondering whether your favorite software supports ACES, the good news is that most professional applications now offer some level of integration, though the implementation varies considerably.
DaVinci Resolve stands as the gold standard for ACES support. Blackmagic Design built native ACES workflows directly into Resolve, allowing you to set your entire project to ACES color management with a few clicks. You can choose your Input Device Transform, work in the ACEScct color space, and output with various ODTs without any plugins or workarounds. It’s genuinely seamless, which is one reason colorists gravitate toward Resolve for ACES projects.
Adobe Premiere Pro and After Effects also support ACES, but the implementation isn’t quite as elegant. You’ll need to enable ACES through the project settings and may need to import ACES transform LUTs for certain functions. Adobe’s approach works reliably once configured, though it requires a bit more manual setup compared to Resolve’s streamlined system.
Final Cut Pro presents more challenges. Apple doesn’t provide native ACES support, so you’ll need third-party plugins like Color Finale or workarounds using custom LUTs to approximate an ACES workflow. It’s functional but definitely not ideal for serious ACES work.
For photographers, the landscape differs. Photoshop can work with ACES through OpenColorIO configuration files, though this requires technical setup that many photographers find daunting. Capture One doesn’t offer native ACES support at all, which reflects the reality that ACES remains primarily video-centric.
The practical takeaway? If ACES matters to your workflow, your software choice matters significantly.
Camera Compatibility and IDT Availability
Good news for camera users: many professional cinema and video cameras have official ACES Input Device Transforms (IDTs) built right into their workflows. Major manufacturers like ARRI, RED, Sony, Canon, Panasonic, and Blackmagic Design have developed IDTs for their professional camera lines. For example, ARRI’s ALEXA cameras are deeply integrated with ACES, while RED provides IDTs for their entire camera lineup. This means if you’re shooting on these systems, you can confidently convert your footage into ACES color space with manufacturer-approved transforms.
For still photographers, the situation gets a bit trickier. Traditional DSLRs and mirrorless cameras from Canon, Nikon, Sony, and Fujifilm don’t typically have official IDTs. This doesn’t mean you can’t use ACES with still images—it just requires a different approach. You’ll generally start by processing your RAW files through your preferred software (like Lightroom or Capture One) and then apply ACES transforms later in the workflow, or work with color-managed DNG files in ACES-compatible applications.
If your camera lacks official support, don’t worry. The photography and cinematography community has created unofficial IDTs for various cameras, though these should be tested thoroughly before relying on them for critical work. Alternatively, you can work in a scene-referred workflow without strict ACES compliance, using the ACES principles as guidance for color management. The practical reality is that for most photographers working on individual images rather than complex multi-camera projects, starting with well-calibrated RAW processing and standard color spaces may be more efficient than forcing ACES into every situation.

Should You Actually Use ACES in Your Photography Workflow?
When ACES Solves Real Problems
ACES truly proves its worth when color consistency becomes critical. Imagine a commercial shoot where you’re juggling footage from a Canon cinema camera, a Sony mirrorless, and a RED—all capturing different color science. Without ACES, color grading becomes a nightmare of trying to match disparate footage. With ACES, all three cameras are transformed into the same wide color space, giving you a unified starting point. This is why professional workflows increasingly rely on it.
For high-end commercial work destined for both cinema screens and YouTube, ACES handles multiple deliverables gracefully. You grade once in ACES, then output to Rec.709 for web, P3 for theatrical, and Rec.2020 for HDR broadcasts—all maintaining proper color relationships.
VFX integration is where ACES becomes nearly essential. When CGI elements need to blend seamlessly with live footage, having everything in a standardized color space prevents the telltale mismatch that screams “fake.” Studios like Industrial Light & Magic adopted ACES specifically for this reason.
HDR delivery also benefits enormously. Since ACES preserves the full range of your camera’s sensor data, you can extract both shadow detail and highlight information when mastering for HDR displays without introducing artifacts.
Finally, archival value matters. That commercial you’re shooting today might need remastering in ten years for whatever display technology exists then. ACES files preserve maximum color information, future-proofing your work against tomorrow’s delivery requirements.
When Simpler Color Management Works Just Fine
Let’s be honest: if you’re shooting stills for social media, local clients, or personal projects, you probably don’t need ACES. The same goes for straightforward video projects destined for a single platform like YouTube or Instagram.
Most modern cameras capture excellent color information, and standard color spaces like sRGB for web delivery or Adobe RGB for print work handle the vast majority of photography situations beautifully. Your camera’s profile combined with basic adjustments in Lightroom or Capture One will give you gorgeous results without the learning curve.
ACES truly shines when you’re juggling multiple cameras with different color science, delivering to various output formats simultaneously, or working on projects that require extensive compositing and VFX work. Think feature films, high-end commercials, or complex editorial projects with team collaboration.
If you’re a wedding photographer editing in a single application, or a landscape photographer creating prints and web galleries, stick with your current workflow. There’s absolutely no shame in this—professional work doesn’t require ACES certification. The best color management system is the one you understand thoroughly and can execute consistently. Save yourself the headache unless your specific project requirements genuinely demand ACES-level complexity.
Getting Started with ACES: A Practical Approach
Setting Up Your First ACES Project
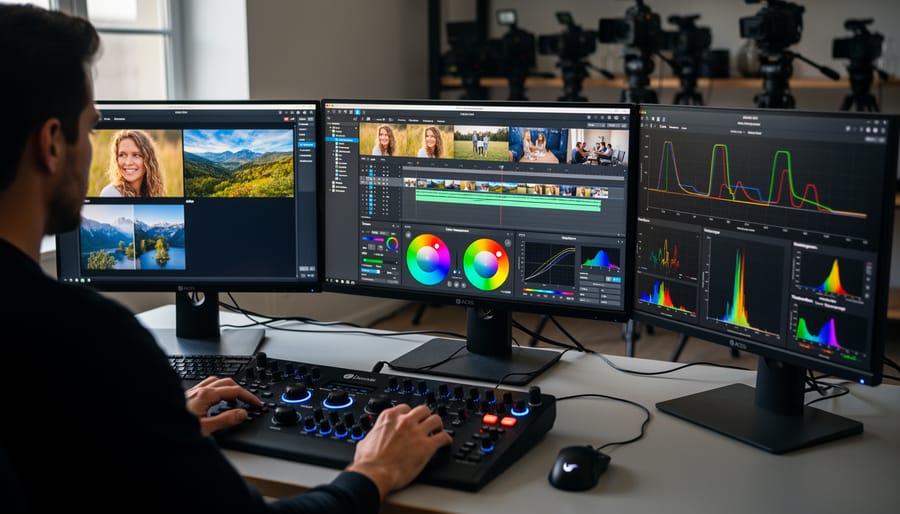
Let’s walk through setting up your first ACES project in DaVinci Resolve, which offers one of the most accessible entry points for photographers wanting to explore this color management system.
Start by launching DaVinci Resolve and creating a new project. Before importing any footage or images, head to the project settings by clicking the gear icon in the lower right corner. Navigate to the Color Management tab. Here’s where the magic happens: change the Color Science dropdown from DaVinci YRGB to ACEScct. This sets your entire project to work within the ACES color space.
Next, you’ll need to tell ACES what kind of camera or source material you’re working with by selecting an Input Device Transform, commonly called an IDT. If you’re working with Sony A7 series RAW files, for example, you’d select the Sony IDT that matches your camera model. For standard Rec.709 footage or JPEGs, the Rec.709 IDT works perfectly fine. Think of the IDT as a translator that converts your camera’s native color language into ACES.
Now for the Output Device Transform, or ODT. This determines how your image will look on your target display. For most photographers editing on standard computer monitors, select the Rec.709 ODT. If you’re preparing images for HDR displays or print, you’ll choose different ODTs accordingly.
To verify everything’s working correctly, import a test image with known color values, like a color checker chart you’ve photographed. The colors should look natural and consistent. If something appears drastically off, double-check that your IDT matches your source material.
One practical tip: save this configuration as a preset in Resolve’s project settings. This way, future ACES projects start with your preferred setup, saving you time and ensuring consistency across different editing sessions.
ACES represents a powerful, industry-standard approach to color management, but that doesn’t automatically make it the right choice for your work. Think of it like owning a professional cinema camera—impressive and capable, but overkill if you’re mainly shooting family portraits or wedding receptions.
For photographers working in high-end commercial spaces, collaborating with colorists, or bridging photography and video production, ACES delivers genuine benefits. The color consistency across devices and the scene-referred workflow can solve real problems you’re likely encountering. If you’re sending files to post-production houses or working on projects destined for multiple distribution formats, investing time to learn ACES makes practical sense.
However, if you’re primarily creating final images yourself using Lightroom or Capture One, your existing color-managed workflow probably serves you well. ACES adds complexity—new terminology, different tools, additional rendering steps—without necessarily improving your end results for typical photography projects.
Before diving into ACES, ask yourself: Am I actually experiencing color management problems that my current workflow can’t solve? Will my clients or collaborators benefit from ACES compatibility? Be honest about your needs rather than chasing what sounds cutting-edge. Photography already offers enough genuine challenges to master without adopting solutions searching for problems you don’t have.


