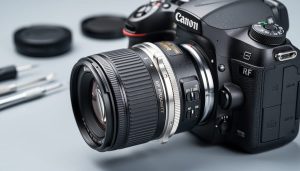
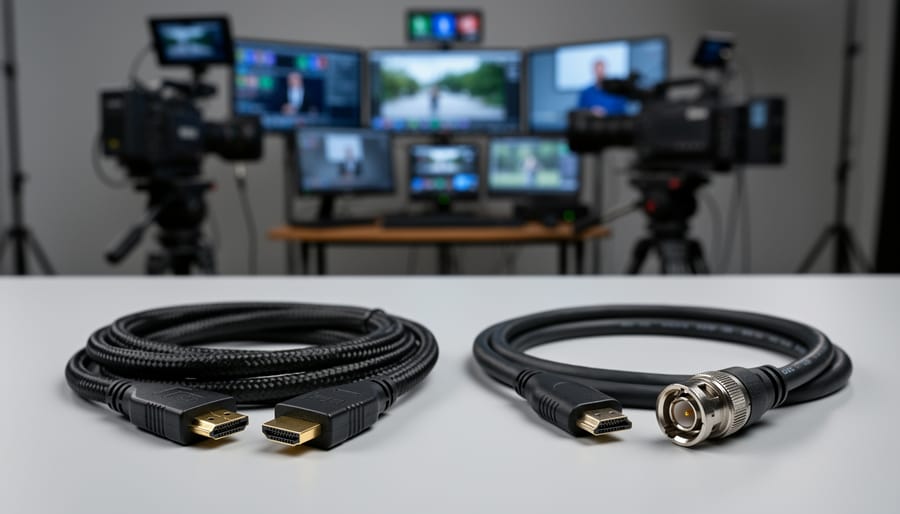
Match your camera’s output signal to your monitor’s input capabilities before purchasing any equipment—shooting with an older DSLR that only outputs HDMI won’t work with a broadcast-grade SDI-only monitor, no matter how many adapters you try. Check your camera’s specifications menu or manual to identify whether it provides clean HDMI output (without on-screen display information), and verify the resolution and frame rate it can transmit, since many cameras limit external output to 1080p even when recording 4K internally.
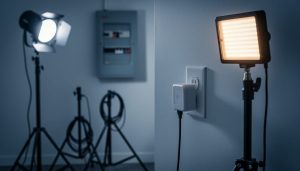
Test your connections in real shooting conditions before critical projects, because HDMI cables are notoriously unreliable beyond 15 feet and can disconnect from vibration or accidental bumps, while SDI cables maintain signal integrity up to 300 feet and lock securely into place. Professional cinematographers and video producers prefer SDI for this durability, but photographers monitoring compositions during studio shoots often find HDMI perfectly adequate for shorter cable runs.
Consider signal converters only as a last resort when mixing HDMI and SDI equipment, since they introduce latency, potential signal degradation, and additional power requirements that complicate your setup. Instead, choose monitors that match your existing camera ecosystem, or explore wireless tethering solutions that eliminate cable compatibility issues entirely for certain applications.
Understanding the fundamental differences between these connection standards prevents costly equipment mismatches and ensures reliable monitoring whether you’re shooting commercial photography, documentary video, or live events where technical failures simply aren’t acceptable.
What Makes HDMI and SDI Different (And Why It Matters for Your Workflow)
HDMI: The Consumer Standard That Went Pro
HDMI has become the ubiquitous connection standard in consumer electronics, and for good reason. When you’re setting up an external monitor for photography work, there’s a strong chance you’ve already encountered HDMI cables with your television, computer, or gaming console. This familiarity is one of HDMI’s greatest strengths in the production world.
The technology offers several compelling advantages. Cost-effectiveness tops the list since HDMI cables and compatible monitors are mass-produced for the consumer market, making them significantly cheaper than professional alternatives. You’ll find HDMI monitors at every price point, from budget-friendly options under $200 to premium displays. Audio embedding is another benefit, allowing both video and audio signals to travel through a single cable, which simplifies your setup when you need to monitor sound alongside your images.
However, HDMI wasn’t originally designed for the demands of professional photography or video production. Cable length presents the most immediate limitation. Standard HDMI cables begin experiencing signal degradation beyond 15 feet, which can be problematic in studio environments. While signal boosters and fiber optic HDMI cables exist, they add complexity and cost.
Durability is another concern. The consumer-grade connectors aren’t built for frequent plugging and unplugging like you’d experience on location shoots. Those small retention clips can break easily, leading to loose connections that interrupt your workflow at the worst possible moments.
SDI: The Broadcast Industry’s Workhorse
While HDMI dominates the consumer market, Serial Digital Interface (SDI) remains the backbone of professional broadcast and cinema production for good reason. If you’ve ever wondered why production crews use those thick coaxial cables with chunky connectors instead of sleek HDMI cables, the answer lies in SDI’s robust design.
SDI was specifically engineered for professional environments where reliability isn’t optional. The technology excels at transmitting uncompressed video over much longer distances—up to 300 feet for HD-SDI and even further with 12G-SDI, compared to HDMI’s typical 15-25 foot limit. Those distinctive BNC locking connectors provide a secure connection that won’t accidentally pull loose during a critical shoot, unlike HDMI’s friction-fit design.
For photographers and videographers, SDI becomes essential when you’re working in studio environments, live event coverage, or multi-camera setups where you need rock-solid reliability and extended cable runs. If you’re shooting weddings, corporate videos, or live streams where a dropped signal could mean missing unrepeatable moments, SDI’s dependability justifies the higher equipment cost.
The technology also supports embedded audio, timecode, and metadata—features that streamline professional workflows. While your mirrorless camera might only have HDMI output, many cinema cameras and professional video cameras include SDI specifically because serious productions demand that level of performance and flexibility.
The Compatibility Puzzle: Why Your Gear Might Not Play Nice Together
Resolution and Frame Rate Mismatches
Here’s where things can get frustrating in the field. Your camera might output a signal that your monitor simply wasn’t designed to handle, leaving you staring at a blank screen when you should be reviewing footage.
Different HDMI and SDI versions support varying maximum resolutions and frame rates. For instance, HDMI 1.4 maxes out at 4K30p, meaning if your camera is shooting 4K60p, you’ll need at least HDMI 2.0 to view that signal. Similarly, older 3G-SDI connections handle up to 1080p60, while 6G-SDI is required for 4K30p, and 12G-SDI supports 4K60p and beyond.
When there’s a mismatch, your monitor typically displays nothing at all—no error message, just darkness. I’ve seen photographers on set troubleshooting cables and connections for twenty minutes before realizing their monitor simply couldn’t accept the camera’s output format.
High frame rate shooting presents particular challenges. If you’re capturing slow-motion footage at 120fps in 1080p, many standard monitors won’t display the live feed, even though they handle regular frame rates perfectly. You’ll need to check your monitor’s specifications for supported frame rates, not just resolution.
The practical solution? Before a shoot, verify that your entire signal chain—camera output, cable standard, and monitor input—all support your intended recording format. Many cameras offer “HDMI output settings” where you can downscale the monitoring signal to match your display’s capabilities. This means you might record 4K60p internally while sending a 1080p60 preview to your monitor, ensuring you maintain visual feedback throughout your shoot.
HDMI Version Confusion (1.4 vs 2.0 vs 2.1)
HDMI versions can feel like alphabet soup, but understanding the differences helps you avoid frustrating limitations when connecting your camera to monitors or recorders.
HDMI 1.4, which appeared in 2009, supports 1080p at 60fps and introduced 4K capability, though only at 30fps. This version works fine for basic monitoring needs, but you’ll hit a wall if you’re shooting high-frame-rate 4K. Many budget monitors and older equipment still use HDMI 1.4, which explains why your 4K60p footage might not display properly on certain screens.
HDMI 2.0, released in 2013, doubled the bandwidth and brought 4K at 60fps into the mainstream. This version handles most professional photography and videography workflows comfortably. If you’re shooting 4K timelapse sequences or standard video work, HDMI 2.0 equipment serves you well without breaking the bank.
HDMI 2.1, the current standard since 2017, supports up to 8K resolution and 4K at 120fps. While that sounds impressive, here’s the practical reality: most photographers don’t need these capabilities yet. However, if you’re investing in new equipment today, choosing HDMI 2.1 provides future-proofing.
Here’s a real-world example: a photographer recently complained their new mirrorless camera wouldn’t output 4K60p to their monitor. The culprit? An HDMI 1.4 cable connecting two HDMI 2.0 devices. The solution cost fifteen dollars and arrived the next day.
SDI Formats: 3G, 6G, and 12G Explained
SDI standards have evolved significantly to keep pace with increasing video resolutions and frame rates. Understanding these different formats helps you choose equipment that matches your production needs without overspending on unnecessary bandwidth.
3G-SDI, the most common standard you’ll encounter, handles resolutions up to 1080p at 60fps with a bandwidth of 3 Gbps. This format works beautifully for most broadcast and documentary work where Full HD is sufficient. If you’re shooting interviews or events in 1080p, 3G-SDI equipment offers excellent value and widespread compatibility across monitors and recorders.
When you step up to 4K production, you’ll need either 6G-SDI or 12G-SDI. Here’s where it gets practical: 6G-SDI supports 4K at up to 30fps, which works fine for cinematic projects where you’re shooting at 24 or 25fps. Many filmmakers find this sweet spot perfect for narrative work without breaking the bank on cables and converters.
12G-SDI represents the current top tier, delivering 4K at 60fps and even supporting 8K at lower frame rates. This format future-proofs your setup and proves essential for sports, wildlife, or any high-frame-rate work where smooth motion matters. The catch? 12G-SDI equipment commands premium pricing, so consider whether your projects genuinely require this capability before investing.
One important consideration: while cables might look identical, higher bandwidth formats require quality cables to maintain signal integrity over longer distances.
Common Signal Issues You’ll Actually Encounter on Set
No Signal or Intermittent Connection
There’s nothing quite as frustrating as connecting your camera to a monitor and seeing absolutely nothing happen. I’ve been there on set, watching precious shooting time tick away while troubleshooting a blank screen. Let’s walk through the most common culprits and their fixes.
First, check the obvious: is everything actually powered on? I know it sounds simple, but you’d be surprised how often a monitor’s standby mode masquerades as a connection problem. Next, verify that your monitor is set to the correct input source. Many monitors have multiple HDMI or SDI inputs, and if you’re plugged into HDMI 2 while the monitor is displaying HDMI 1, you’ll see nothing but darkness.
Cable issues cause more headaches than almost anything else. HDMI cables, especially longer ones, can be finicky. Try a different cable if you have one available, or test with a shorter length. For SDI connections, ensure you’re using the correct cable type for your signal format. A regular HD-SDI cable won’t reliably carry 6G-SDI signals, for example.
Camera settings matter too. Check that your camera’s HDMI or SDI output is actually enabled in the menu system. Some cameras disable external output when recording internally, or require you to manually activate it. Also verify that your camera’s output resolution matches what your monitor can accept. If your camera outputs 4K but your monitor only supports 1080p, you might get no signal at all rather than a downscaled image.
Picture Quality Problems and Artifacts
Even with a perfect physical connection, you might encounter picture quality issues that make you question your entire setup. Signal degradation becomes especially noticeable on larger monitors, where banding, blockiness, or color inconsistencies can suddenly appear in what looked fine on your camera’s LCD.
Compression artifacts often originate from your camera’s processing rather than the cable itself. When shooting high-bitrate video through HDMI, some cameras apply additional compression to the monitoring output, creating visible artifacts that don’t exist in your recorded files. This becomes particularly frustrating when you’re trying to judge critical focus or exposure.
Color space mismatches represent another common headache. Your camera might output in Rec. 709 while your monitor expects Rec. 2020, resulting in washed-out or oversaturated images. Professional monitors usually offer color space settings, but budget displays may automatically interpret the signal incorrectly.
Cable quality matters more than many photographers realize. Inexpensive HDMI cables can introduce signal noise over distances beyond six feet, causing sparkles, dropouts, or intermittent blackouts. SDI’s differential signaling provides much better resistance to interference, which explains why professional productions consistently choose it for critical monitoring applications.
Audio Embedding and Sync Issues
Video and audio travel together through both HDMI and SDI connections, but they take different technical paths, which sometimes leads to synchronization headaches. HDMI embeds audio digitally within the video signal, while SDI can carry multiple embedded audio channels—up to 16 in HD-SDI and even more in 3G-SDI and 12G-SDI formats.
The most common frustration you’ll encounter is lip-sync issues, where the audio and video fall out of step with each other. This often happens when using HDMI converters or when signals pass through multiple devices like routers or switchers. Each piece of equipment in your signal chain adds processing delay, and if your monitor processes video faster than audio (or vice versa), you’ll notice that annoying lag.
Missing audio channels present another frequent problem. Perhaps you’re monitoring a camera feed and suddenly realize you’re only hearing the left channel, or no audio at all. With SDI, this typically happens when audio mapping settings don’t match between your camera and monitor. Your camera might be sending audio on channels 1 and 2, but your monitor is listening to channels 3 and 4.
When shooting on location for a corporate interview recently, a colleague discovered their wireless microphone audio wasn’t appearing on their external monitor, even though the camera was recording it perfectly. The culprit? The monitor was set to accept only the first stereo pair, while the wireless receiver fed into channels 3 and 4. A quick dive into the monitor’s audio settings menu solved the issue within seconds.
Matching Your Camera to the Right Monitor
What to Check on Your Camera’s Specs
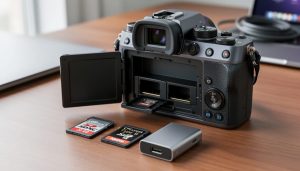
Before investing in cables and monitors, you’ll want to confirm exactly what your camera offers. Start by checking your camera’s physical outputs—look for labeled ports on the side or back of the body. Most modern cameras clearly mark HDMI ports (often as “HDMI mini” or “HDMI micro”), while SDI outputs are primarily found on professional cinema cameras and high-end video bodies.
Your camera manual is your best friend here. Search the PDF version (usually available on the manufacturer’s website) for terms like “external monitor,” “video output,” or “HDMI specifications.” You’re looking for specific details: Does it output clean HDMI (without on-screen data)? What resolution and frame rates are supported? Can it output 4K, or is it limited to 1080p?
Don’t overlook your camera’s menu system either. Navigate to the settings related to HDMI or external display—you’ll often find options to toggle features like clean output, resolution limits, or whether the camera screen turns off when an external monitor is connected. For example, some cameras default to mirroring all overlay information to external displays, which isn’t ideal for monitoring.
If you’re considering a monitor purchase, write down these specs first. Real-world scenario: a photographer recently discovered their camera only outputs 1080p via HDMI despite shooting 4K internally—knowing this beforehand would have influenced their monitor choice significantly.
Choosing a Monitor That Actually Works
Before handing over your hard-earned money, you’ll want to verify a few critical specifications to ensure your new monitor actually plays nicely with your camera. Think of it like cross-brand compatibility issues – just because two pieces of gear exist doesn’t mean they’ll work together seamlessly.
Start by checking the monitor’s supported resolutions and frame rates. If you’re shooting 4K at 60fps, your monitor needs to handle that signal. Many budget monitors cap out at 1080p or lower frame rates, which creates a frustrating bottleneck. Look for specifications that match or exceed your camera’s output capabilities.
Pay close attention to loop-through functionality if you plan to use multiple monitors or external recorders simultaneously. Not all monitors pass the signal cleanly to another device, and some degrade quality in the process. This feature matters more than you might initially think, especially on complex productions.
Consider the monitor’s power options too. Some run on Sony NP-F batteries, others use proprietary power solutions, and many offer DC input. Real-world example: I once spent an entire morning troubleshooting signal issues, only to discover my monitor was underpowered and couldn’t properly process the HDMI signal it was receiving.
Finally, look for monitors with firmware update capabilities. Technology evolves quickly, and a monitor that can receive updates gives you better long-term value and compatibility with future camera bodies you might acquire.
Solutions When Your Gear Doesn’t Match
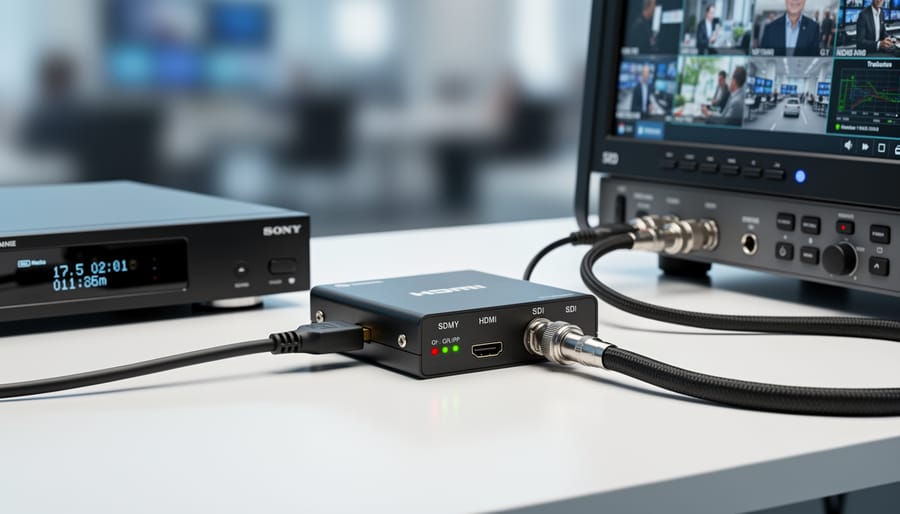
HDMI to SDI Converters (And Vice Versa)
Sometimes you’ll find yourself needing to connect an HDMI camera to an SDI monitor, or vice versa. This is where signal converters become essential tools in your kit. These devices bridge the gap between the two formats, though they’re not always a perfect solution.
When shopping for a quality converter, prioritize active converters over passive adapters. Active converters actually process and convert the signal properly, while passive adapters simply won’t work between these fundamentally different technologies. Look for converters that support your required resolution and frame rate specifications. A converter that handles 1080p60 may not support 4K signals, so check the specs carefully before purchasing.
Quality converters from brands like Blackmagic Design, Decimator, or AJA typically range from $150 to $500. While cheaper options exist, they often introduce latency, signal degradation, or compatibility issues. In a professional environment, these problems can cost you critical moments during a shoot.
One common pitfall is assuming all converters handle embedded audio correctly. Some budget converters strip audio entirely or require separate audio connections. Always verify audio passthrough capabilities if you need synchronized sound.
Another consideration is power. Some converters require external power supplies, which can complicate your setup. Battery-powered or bus-powered options offer more flexibility on location shoots. Remember that converters add another potential failure point in your signal chain, so investing in reliable equipment pays dividends when deadlines matter.
Cable Quality and Length Considerations
Not all cables are created equal, and this becomes particularly apparent when you’re working with video signals. For HDMI connections under 6 feet, standard certified cables work perfectly fine for most applications. The digital nature of HDMI means your signal either works or it doesn’t—there’s minimal benefit to expensive premium cables at shorter distances.
However, once you exceed 15 feet with HDMI, signal degradation becomes a real concern. I learned this the hard way on a studio shoot when my 25-foot bargain cable caused intermittent signal drops. Investing in active HDMI cables (which have built-in signal boosting) becomes essential for runs over 20 feet, or consider HDMI-to-fiber converters for distances beyond 50 feet.
SDI cables are more forgiving with length. Quality SDI cables can reliably transmit HD signals up to 300 feet, and 4K signals around 150 feet. The key difference here is cable construction—look for cables with proper 75-ohm impedance and good shielding. While you don’t need the most expensive option, avoid the cheapest cables as they often lack adequate shielding, leading to interference issues.
Here’s a practical rule: for permanent installations or professional work, invest in quality cables with good connectors. For occasional home use under 10 feet, certified standard cables are perfectly adequate.
Real-World Setup Scenarios and Solutions
Let’s walk through some real-world scenarios where understanding HDMI and SDI connections makes all the difference in your workflow.
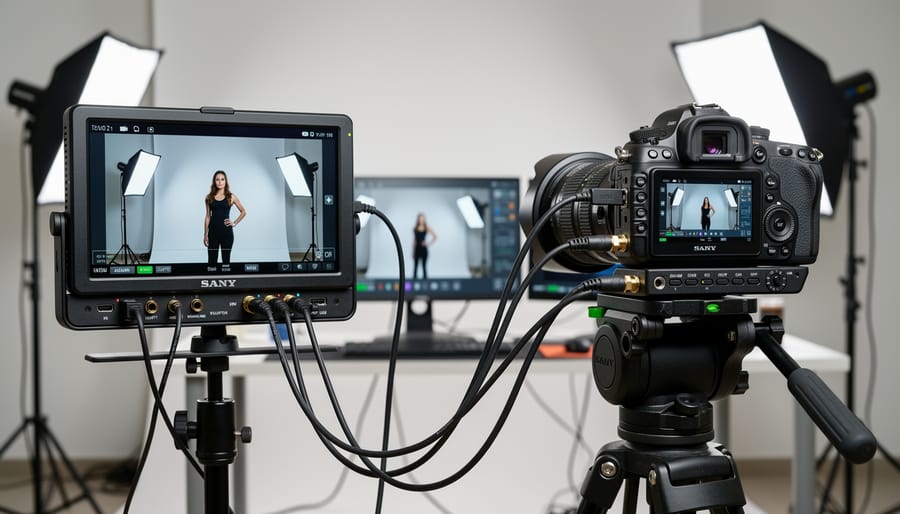
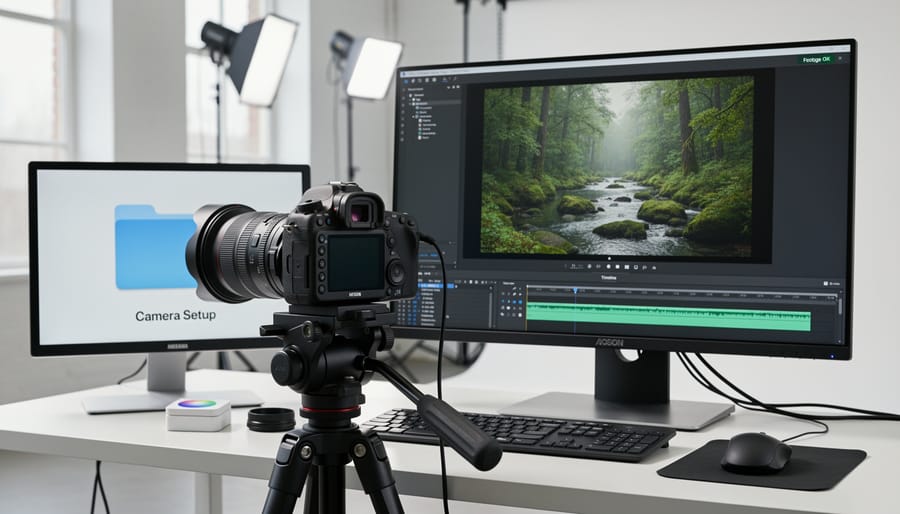
For a typical studio portrait session, most photographers work with a simple HDMI setup. A mirrorless camera like the Sony A7 IV connected to a 7-inch HDMI monitor via a short 3-foot cable provides reliable client preview capabilities. The key here is using a cable with locking mechanisms, like an HDMI micro to full HDMI with a cage-mounted clamp, preventing accidental disconnections during shoots. Many photographers position the monitor on a swivel arm mount, allowing clients to see themselves while maintaining the camera’s mobility.
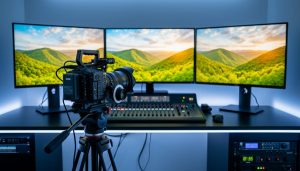
On-location wedding videographers face different challenges. Here’s where cable length becomes critical. If you’re running a monitor to a director’s station 25 feet from your camera, SDI is your friend. A setup using a Blackmagic Pocket Cinema Camera 6K with SDI output connected to a 17-inch production monitor ensures zero signal degradation across that distance. This configuration allows the videographer freedom to move while a second operator monitors focus and composition remotely.
Multi-camera productions require careful planning of your camera setup configurations. For a three-camera corporate interview shoot, consider this approach: Camera A (main angle) uses a 50-foot SDI cable to a switcher, Camera B (close-up) runs another SDI line, while Camera C (wide shot) feeds HDMI to a nearby recording monitor. Your switcher, positioned at a production desk, receives all SDI feeds and outputs a program feed to client monitors via HDMI converters.
Budget considerations matter too. Starting out with event videography? Begin with HDMI equipment and invest in quality short cables. As your business grows and productions become more complex, gradually transition critical long-run connections to SDI while maintaining HDMI for shorter, less demanding applications. This hybrid approach maximizes both reliability and cost-effectiveness throughout your career progression.
Navigating HDMI and SDI compatibility doesn’t have to be overwhelming. While the technical landscape can seem complex at first glance, understanding a few fundamental principles will prevent the vast majority of connection headaches you might encounter in the field.
The key takeaway is simple: always verify specifications before any critical shoot. Check your camera’s output capabilities against your monitor’s input requirements. Does your camera output 4K at 60fps via HDMI 2.0, but your monitor only supports HDMI 1.4? You’ll need to adjust your settings or upgrade your equipment. Planning to use a 50-foot cable run? SDI is your friend for that distance.
I’ve learned this lesson the hard way during a wedding shoot when a brand-new monitor refused to display anything from my camera. The issue? My camera defaulted to 4K output while the monitor maxed out at 1080p. A quick settings adjustment solved everything, but those five minutes of troubleshooting felt like an eternity with guests waiting.
Here’s my strongest recommendation: test your complete setup at least a day before any important shoot. Connect every cable, power everything on, and run through your typical workflow. Try different resolutions and frame rates. This simple practice has saved me countless times.
Remember, compatibility challenges are normal and manageable. Most issues stem from mismatched resolutions, refresh rates, or cable limitations, all easily resolved once identified. With the knowledge you’ve gained about signal types, connection standards, and troubleshooting approaches, you’re well-equipped to handle whatever connectivity challenges come your way. Trust your preparation, and you’ll shoot with confidence.