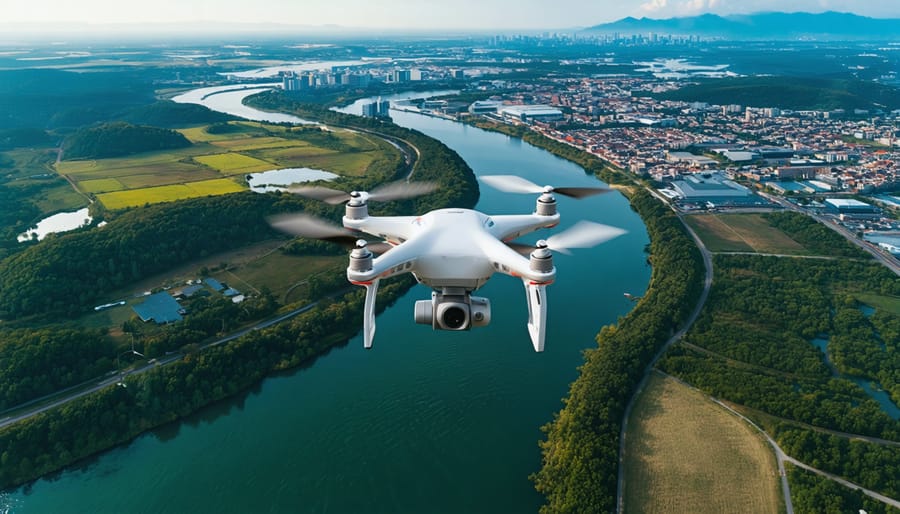
Master the art of aerial imagery through immersive drone photography classes that transform everyday photographers into skilled aerial cinematographers. Learn to capture breathtaking perspectives while mastering essential drone photography tips in a structured, hands-on environment. Whether you’re framing cityscapes from 400 feet or documenting events from above, professional instruction bridges the gap between ground-based photography and dynamic aerial composition.
These specialized courses combine technical drone operation with creative visualization techniques, ensuring you’ll develop both the mechanical expertise and artistic vision needed for compelling aerial photography. From understanding FAA regulations to mastering advanced flight maneuvers, comprehensive drone photography education provides the foundation for safe, legal, and visually striking aerial imagery. Navigate complex weather conditions, master camera settings mid-flight, and discover how to leverage natural light for dramatic aerial compositions that stand out in today’s competitive visual marketplace.
Essential Drone Controls and Safety Protocols
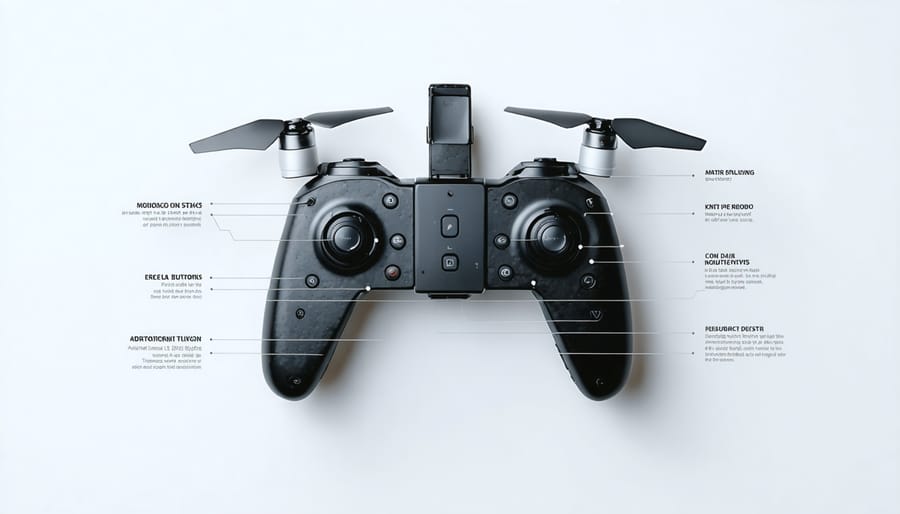
Basic Flight Controls
Mastering basic flight controls is your foundation for successful drone photography. Think of your drone controller as having four essential movements, each playing a crucial role in positioning your camera for the perfect shot.
The throttle control, typically the left stick’s vertical movement, determines your drone’s altitude. Push up to ascend, down to descend – imagine it as an elevator for your aerial camera platform. This control is essential for achieving different shooting heights and perspectives.
Yaw, controlled by moving the left stick horizontally, rotates your drone left or right while maintaining its position. This movement is particularly useful for panoramic shots and tracking moving subjects without changing your drone’s location.
The right stick controls pitch and roll. Pitch (forward and backward movement) helps you track subjects or create dramatic reveal shots. Roll (left and right movement) allows lateral tracking and positioning. These controls work together to create smooth, cinematic movements.
A helpful way to practice is the “hover challenge”: maintain a steady position about 10 feet off the ground for 30 seconds. This exercise helps you develop muscle memory for all four controls working in harmony. Start in an open area with minimal wind, and gradually increase difficulty by practicing at different heights and in varying conditions.
Remember, smooth control inputs result in smoother footage. Take your time mastering these basics before attempting more complex maneuvers.
Safety Regulations and Pre-flight Checks
Before taking flight with your drone camera, understanding and following drone photography regulations is absolutely essential. Start by registering your drone with local aviation authorities and obtaining necessary certifications if required in your area. For most regions, this includes passing a basic knowledge test and acquiring appropriate licenses.
Your pre-flight checklist should begin with a thorough weather assessment. Check wind speeds, precipitation forecasts, and visibility conditions. Ideal conditions include wind speeds below 15mph and clear skies. Next, inspect your drone’s physical condition – check propellers for damage, ensure batteries are fully charged, and verify all control surfaces move freely.
Always maintain a clear line of sight with your drone and stay away from restricted areas such as airports, government facilities, and crowded spaces. Most countries require keeping your drone below 400 feet altitude and maintaining a safe distance from people and buildings.
Before each flight session, calibrate your compass and GPS systems. Set your return-to-home point and ensure your controller batteries are charged. Remember to check your camera settings and memory card capacity – there’s nothing worse than missing the perfect shot due to a full card!
Keep your drone’s firmware updated and maintain a flight log to track your operations. This not only helps with maintenance but is often required by regulations.
Camera Settings for Aerial Photography
Exposure and Light Management
Mastering exposure in drone photography presents unique challenges due to constantly changing light conditions and the dynamic nature of aerial shots. Understanding how to adjust your camera sensor settings becomes crucial when shooting from above, where lighting can shift dramatically with altitude and angle.
Start by learning to read your drone’s histogram, which provides real-time feedback about your exposure levels. This tool becomes your best friend when shooting in bright daylight, where screen glare might make it difficult to judge exposure accurately from your controller’s display.
Most modern drones offer various exposure modes, including aperture priority, shutter priority, and manual mode. In bright conditions, prioritize faster shutter speeds (1/500th or higher) to maintain sharp images and combat drone movement. When shooting during golden hour or in dimmer conditions, consider using slower shutter speeds, but be mindful of motion blur.
One common challenge in drone photography is dealing with harsh sunlight and shadows. Using exposure bracketing can help capture details in both highlights and shadows, especially when photographing landscapes or architecture from above. Take multiple shots at different exposure values and blend them later in post-processing.
Auto exposure lock (AE lock) becomes particularly valuable when creating panoramas or maintaining consistent exposure across a series of shots. Learn to use this feature when tracking moving subjects or creating cinematic reveal shots where consistent exposure is crucial.
For sunset or sunrise shoots, consider using graduated neutral density filters or adjusting your drone’s angle to manage the extreme contrast between the bright sky and darker ground. Remember that shooting in RAW format gives you more flexibility to adjust exposure in post-processing without compromising image quality.
Practice exposure compensation techniques for challenging scenarios like snow, water, or highly reflective surfaces, which can often trick your drone’s light meter. Start with slight underexposure for bright scenes and adjust based on your histogram readings.
Focus and Composition Techniques
Mastering focus and composition in drone photography requires a unique approach compared to traditional ground-based photography. When shooting from above, your drone’s camera needs to be precisely configured to capture sharp, well-composed images that tell compelling visual stories.
Most modern drones offer multiple focus modes, with autofocus being the most commonly used. However, understanding when to switch to manual focus can be crucial, especially when shooting in challenging lighting conditions or when dealing with complex subjects. Start by practicing with your drone’s tap-to-focus feature, which allows you to select specific focus points directly on your controller’s screen.
The key to exceptional aerial imagery lies in mastering fundamental aerial composition techniques. The rule of thirds takes on new meaning when shooting from above – try positioning interesting elements along the grid lines to create dynamic top-down perspectives. Leading lines become particularly powerful in drone photography, as roads, rivers, and shadows can guide viewers through your frame in unexpected ways.
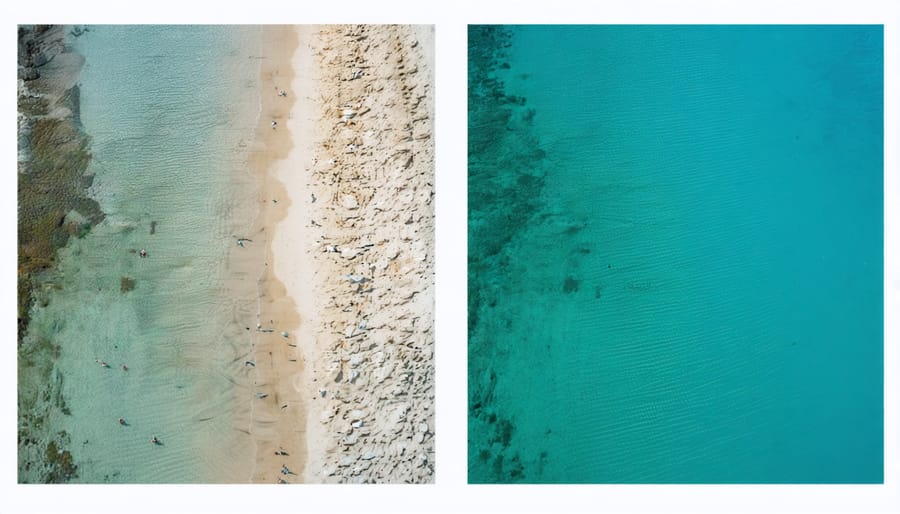
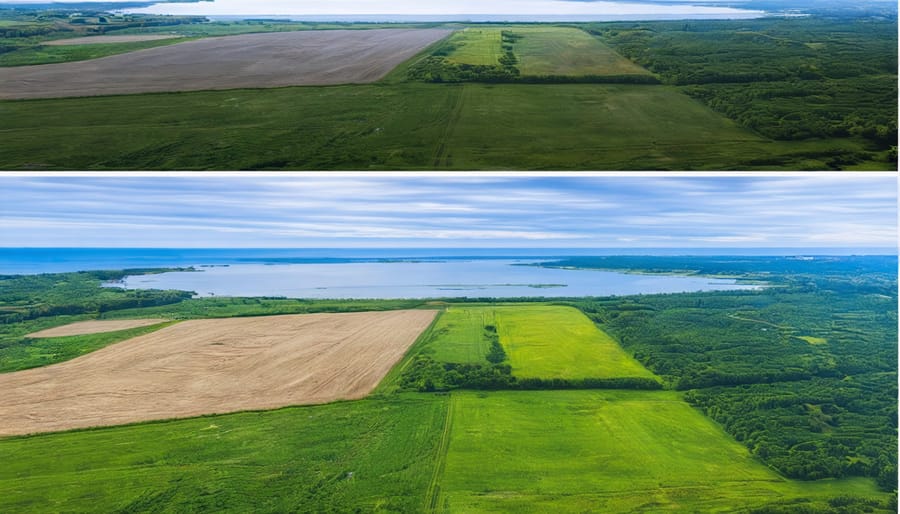
Pattern recognition is another essential skill to develop. From above, seemingly ordinary landscapes transform into abstract compositions of shapes, textures, and colors. Look for repetitive elements, symmetry, or contrasting patterns that might go unnoticed from ground level.
Consider the altitude’s impact on your composition. Lower heights emphasize depth and dimension, while higher altitudes can flatten the scene into graphic patterns. Experiment with different angles – not every drone shot needs to be taken from directly above. Sometimes, a slight tilt can add drama and maintain perspective while still capturing the unique vantage point that drones offer.
Remember to maintain a clean horizon line when shooting at an angle, and pay attention to the drone’s position relative to the sun to avoid unwanted shadows or lens flare. These technical considerations, combined with creative composition choices, will help you develop a distinctive style in your aerial photography.
Advanced Flight Maneuvers for Creative Shots
Orbit and Reveal Shots
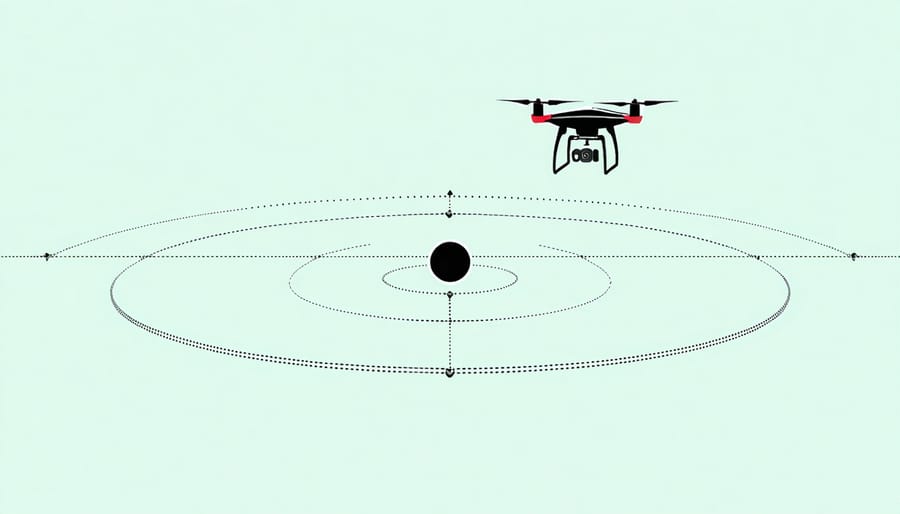
Orbit and reveal shots are among the most captivating techniques in drone photography, creating dynamic perspectives that simply weren’t possible before aerial imaging. The orbit shot, where your drone circles smoothly around a subject, requires precise control and understanding of your drone’s point-of-interest (POI) mode. Start by positioning your drone at a comfortable distance from your subject, typically 30-50 feet away, and set your altitude to capture the most flattering angle.
When executing an orbit, maintain a consistent speed and radius throughout the movement. Think of your drone as drawing a perfect circle in the sky. Most modern drones offer automated orbit functions, but learning to perform this manually gives you more creative control. Practice varying your altitude during the orbit to add vertical dimension to your shots.
Reveal shots, on the other hand, build anticipation by gradually exposing your subject to the viewer. A classic reveal might start with your drone behind an obstacle, like a tree line or building, then slowly rising or moving forward to uncover a breathtaking landscape or structure. The key is smooth, deliberate movement – aim for a duration of 10-15 seconds for maximum impact.
Try combining these techniques for more dramatic results. For example, start with a reveal that transitions into an orbit, or experiment with different angles and heights during your orbit to create varying perspectives. Remember to consider lighting conditions and time of day – golden hour can add particular magic to orbit and reveal shots, creating long shadows and warm, dimensional lighting that enhances the three-dimensional effect of your movements.
Dynamic Height Changes
One of the most powerful techniques in drone photography is mastering dynamic height changes to create compelling visual narratives. By varying your drone’s altitude strategically, you can transform ordinary scenes into extraordinary compositions that captivate viewers and add depth to your storytelling.
Starting low, around 10-20 feet off the ground, allows you to capture intimate details and establish a strong foreground presence. As you gradually increase altitude, you’ll notice how the perspective shifts, revealing new patterns and relationships between elements in your frame. The sweet spot often lies between 100-200 feet, where you can balance detail and context while maintaining visual interest.
Consider the “reveal shot” technique – starting close to your subject and slowly ascending to unveil the broader landscape. This approach works particularly well for architectural photography, where you can begin with detailed façade shots before revealing the building’s relationship with its surroundings.
Altitude variations also play a crucial role in creating emotional impact. Lower heights can convey intimacy and connection, while higher elevations often evoke feelings of awe and contemplation. For instance, when photographing a beach at sunrise, try starting at eye level with beachgoers, then gradually rise to reveal the sweeping coastline.
Remember to maintain smooth transitions between height changes. Practice your ascent and descent speeds until they become fluid movements. This control is essential for both still photography and video work, ensuring your audience experiences the intended emotional journey through your visual narrative.
For safety and legal compliance, always monitor your altitude readings and maintain visual line of sight while executing these maneuvers. The dramatic effects you achieve should never compromise safety protocols.
Post-Processing Drone Photography
Color Correction and Enhancement
Color correction is a crucial skill in drone photography, as aerial shots often face unique challenges with exposure and color balance. The high altitude and varying lighting conditions can create issues that need addressing in post-processing to achieve professional-looking results.
One common challenge is the atmospheric haze that appears in drone photos, especially when shooting from higher altitudes. Learning to adjust clarity and dehaze settings in your editing software can help combat this issue, bringing back the vibrant colors and crisp details of your landscape shots.
White balance adjustment is particularly important in aerial photography, as the color temperature can shift dramatically depending on your altitude and the time of day. Many drone photographers start by setting a custom white balance in-camera, then fine-tune it during post-processing to ensure natural-looking colors.
Exposure bracketing and HDR techniques are valuable tools for dealing with high-contrast scenes, which are common in aerial photography. By combining multiple exposures, you can capture detail in both bright skies and shadowed areas, creating balanced and dynamic images.
When enhancing colors, it’s essential to maintain a natural look while bringing out the best in your scenes. Start with basic adjustments to contrast, saturation, and vibrance before moving on to selective color adjustments. Pay particular attention to blues and greens, as these are dominant colors in aerial photography and can easily become oversaturated.
For sunset or golden hour shots, careful adjustment of highlights and shadows can help preserve the warm tones while maintaining detail in darker areas. Split toning can also enhance the mood of your images by adding subtle color tints to highlights and shadows.
Remember to use adjustment layers and masks when editing, allowing for non-destructive changes that can be fine-tuned later. This approach gives you the flexibility to experiment while preserving your original image data.
Perspective and Distortion Correction
When shooting from above, drone photography presents unique challenges in maintaining proper perspective and avoiding distortion. One of the most common issues you’ll encounter is the keystone effect, where vertical structures appear to lean or converge towards the top of the frame. This is particularly noticeable when photographing tall buildings or monuments from an angle.
To correct these perspective issues, you’ll learn several essential techniques both during capture and in post-processing. While shooting, maintaining a perfectly level camera position can significantly reduce perspective distortion. Most modern drones include built-in horizon indicators and stabilization systems to help achieve this, but understanding how to use them effectively is crucial.
In post-processing, you’ll discover how to use transform tools in editing software to correct remaining perspective issues. This includes adjusting vertical and horizontal perspective independently, as well as using guided upright corrections to align architectural elements properly. You’ll also learn about lens corrections specific to your drone’s camera, which can help eliminate barrel or pincushion distortion common in aerial photography.
Another important aspect is managing scale distortion, which occurs when objects at different distances appear disproportionate to each other. You’ll learn techniques for choosing the right altitude and angle to maintain natural-looking proportions in your compositions. This includes understanding how different shooting heights affect the relationship between foreground and background elements.
Color distortion can also be an issue when shooting from above, particularly due to atmospheric haze and changing light conditions at different altitudes. The course covers methods for compensating for these effects using polarizing filters during capture and selective color adjustments in post-processing.
Through practical exercises, you’ll develop the skills to identify and correct these common perspective issues, ensuring your aerial photographs maintain professional quality and visual accuracy while preserving their creative impact.
Mastering drone photography is an exciting journey that combines technical skill with creative vision. Throughout this course, you’ve learned essential elements from basic flight controls to advanced composition techniques that will set you on the path to capturing stunning aerial imagery. Remember that becoming proficient in drone photography requires consistent practice and patience – every flight is an opportunity to refine your skills and develop your unique perspective from above.
Don’t be afraid to experiment with different angles, heights, and lighting conditions. The techniques we’ve covered, from managing your drone’s camera settings to planning the perfect shot, will serve as your foundation. However, it’s through regular practice and pushing your creative boundaries that you’ll truly develop your signature style.
For those considering a professional aerial photography career, remember that the skills you’ve learned here are just the beginning. Continue to build your portfolio, stay updated with regulations, and network within the drone photography community.
Whether you’re capturing landscapes, real estate, or events, always prioritize safety and follow local regulations. Keep practicing in various conditions, review your work critically, and don’t hesitate to return to these lessons as needed. The sky truly is the limit when it comes to drone photography – now it’s time to take flight and create your own stunning aerial masterpieces.