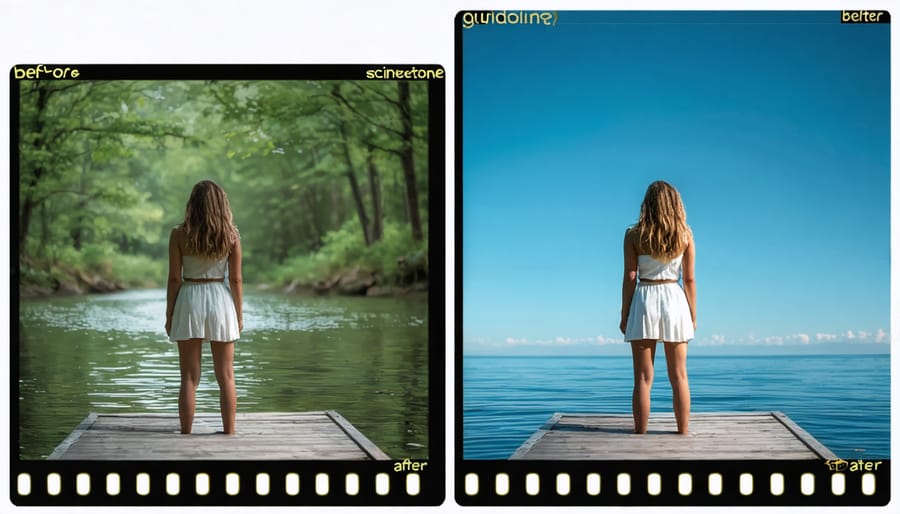
Master the distinctive Scinetone look in DaVinci Resolve by leveraging its powerful cinematic color grading techniques and precision tools. This sought-after aesthetic, characterized by its balanced skin tones and film-like contrast, transforms ordinary footage into compelling visual narratives. Professional colorists prize Scinetone for its ability to deliver consistent, repeatable results while maintaining natural-looking highlights and shadows. Whether you’re color grading commercial projects or independent films, understanding how to implement Scinetone effectively in DaVinci Resolve opens up new creative possibilities while ensuring your work meets industry standards. This guide breaks down the essential steps, node structures, and color science principles needed to achieve authentic Scinetone results, moving beyond basic presets to create truly customized looks that serve your story.
Understanding Scinetone Color Grading
The Science Behind Scinetone
At its core, Scinetone is built on sophisticated color science that emulates the characteristics of professional cinema cameras. This innovative color profile creates film-like aesthetics by carefully manipulating color response curves, particularly in how it handles skin tones and highlights.
The magic happens through precise adjustments to the gamma curve, which creates that characteristic roll-off in highlights that cinematographers love. Scinetone also employs intelligent color mapping that prioritizes natural skin rendition while maintaining vibrant yet controlled saturation in other areas of the image.
What sets Scinetone apart is its foundation in S-Log color science, originally developed for high-end cinema cameras. It preserves shadow detail while preventing highlight clipping, creating that sought-after organic look. The profile also includes subtle adjustments to color cross-talk, where different color channels influence each other in ways that mimic how film stock responds to light.
Understanding these principles helps editors make more informed decisions when fine-tuning their Scinetone grades in DaVinci Resolve, leading to more purposeful and refined results.
Why Filmmakers Choose Scinetone
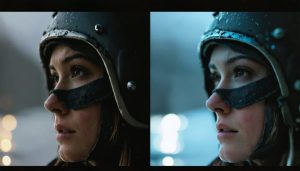
Filmmakers gravitate towards Scinetone for its ability to instantly deliver that coveted cinematic look that traditionally required hours of meticulous color grading. The color science behind Scinetone closely mirrors the aesthetic of high-end cinema cameras, offering rich, natural skin tones and balanced highlights that resonate with modern audiences.
Documentary filmmakers particularly appreciate Scinetone’s capability to maintain natural-looking footage while adding a subtle professional polish. Music video directors love how it handles vibrant colors without appearing oversaturated, striking the perfect balance between impact and authenticity.
Perhaps most importantly, Scinetone serves as an excellent starting point for further creative adjustments. Whether working on corporate videos, short films, or feature-length productions, creators can achieve consistency across different camera sources while maintaining efficient workflows. The look is particularly effective for projects requiring quick turnaround times without compromising on quality.
The preset’s versatility shines in various lighting conditions, from bright daylight to moody interior scenes, making it a reliable choice for productions with diverse shooting environments. This adaptability, combined with its sophisticated yet natural appearance, has made Scinetone a go-to choice for filmmakers seeking that elusive professional cinema aesthetic.
Setting Up Scinetone in DaVinci Resolve
Essential Tools and Nodes
To achieve the perfect S-Cinetone look in DaVinci Resolve, you’ll need to familiarize yourself with several essential tools and nodes. The primary workspace you’ll be using is the Color page, where the Qualifier and Curves tools become your best friends for precise color manipulation.
Start with the Primary Wheels, which allow you to adjust your lift, gamma, and gain – crucial for establishing the base S-Cinetone feel. The RGB Mixer is particularly important for fine-tuning the red channel, which is characteristic of the S-Cinetone look.
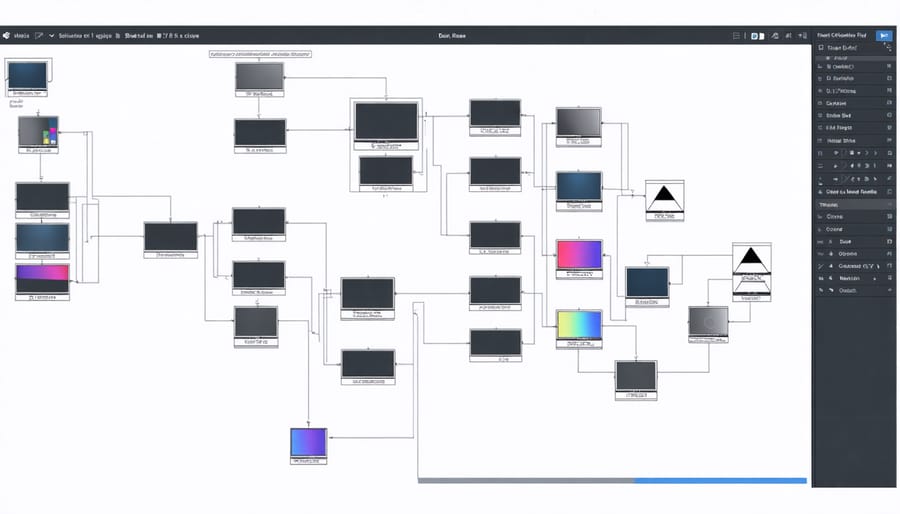
The node tree is where the magic happens. You’ll want to create at least three main nodes: one for initial exposure adjustments, another for the signature S-Cinetone color balance, and a third for fine-tuning skin tones. The Power Windows tool helps isolate specific areas of your image for targeted adjustments.
Don’t overlook the importance of the Custom Curves panel, especially the Hue vs. Sat curve, which is essential for controlling the subtle color variations that make S-Cinetone so distinctive. The Qualifier tool comes in handy when you need to isolate and adjust specific color ranges, particularly useful for skin tone refinements.
Finally, make sure to utilize the Gallery feature to save your favorite S-Cinetone looks as stills for future reference and consistency across projects.
Creating Your First Scinetone Look
Let’s create your first Scinetone look in DaVinci Resolve with this step-by-step process. Start by creating a new project and importing your footage to the timeline. In the Color page, select your clip and create a new node by pressing Alt+S.
Begin with the foundation by adjusting your exposure and contrast. Pull your shadows slightly up and highlights down to create that characteristic Scinetone soft contrast. For the crucial cinematic color effects, add a subtle warm tint to your midtones using the Color Wheels.
In the Curves panel, create a gentle S-curve in your RGB curve, then slightly raise the red channel in highlights and blues in shadows. This creates the signature Scinetone color separation. Next, use the Qualifier to select and soften skin tones, giving them that natural, pleasing look that Scinetone is known for.
Fine-tune your grade by adjusting saturation to around 45-50 – Scinetone isn’t about heavy color. Add a touch of film grain (around 2-3%) in a new node for authentic texture. Finally, use a Power Window to add a subtle vignette, helping direct viewer attention while maintaining that cinematic feel.
Remember to save this as a preset so you can quickly apply it to other clips while maintaining consistency throughout your project.
Advanced Scinetone Techniques
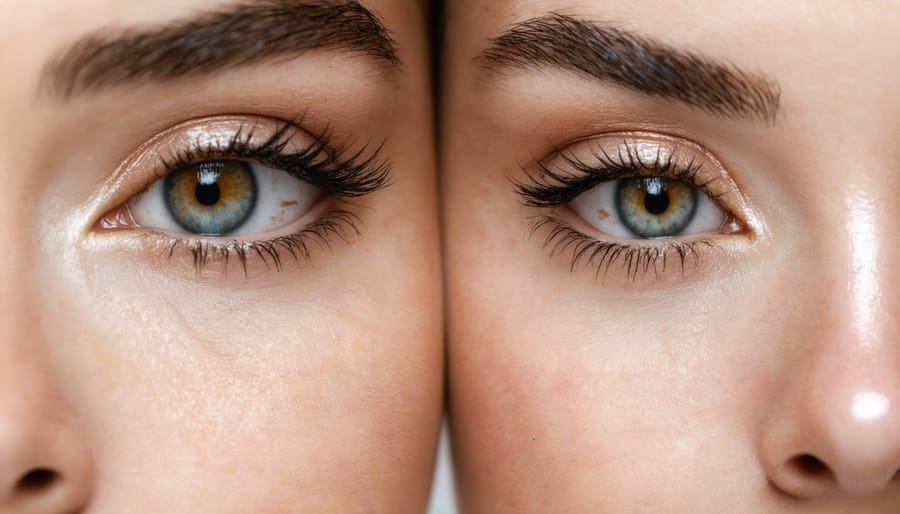
Fine-Tuning Skin Tones
When working with S-Cinetone in DaVinci Resolve, achieving natural-looking skin tones requires a delicate balance of adjustments. Start by isolating skin tones using the qualifier tool, creating a precise mask that targets only the subject’s skin. For best results, adjust the softness of your qualification to avoid harsh edges that could make the effect look artificial.
In the curves panel, pay special attention to the red and yellow channels, as these primarily affect skin tone reproduction. A subtle S-curve in these channels can add depth while maintaining natural-looking results. For darker skin tones, you might need to adjust the green channel slightly to prevent unwanted color casts.
The key to S-Cinetone’s signature look lies in its treatment of mid-tones. Use the midtone detail control to fine-tune skin texture without introducing noise. A value between 25-35 usually works well for most footage. Remember to check your adjustments across different lighting conditions in your timeline, as skin tones can shift dramatically between indoor and outdoor scenes.
For precision adjustments, utilize the skin tone reference line in the vectorscope. Healthy skin tones typically fall along this line, regardless of ethnicity. If your skin tones deviate significantly, use the hue vs. hue curve to gently nudge them back toward this reference.
Finally, use the face refinement tool to make subtle adjustments to shine, texture, and color variation. Keep these adjustments minimal – the goal is to enhance natural skin tones, not create an artificial look. A touch of blur (usually 0.5-1.0) can help smooth any remaining imperfections while maintaining the cinematic quality S-Cinetone is known for.
Creating Custom Scinetone Looks
While Scinetone provides excellent default options, creating your own unique look can set your work apart. Start by analyzing your favorite films’ color palettes and consider how they align with professional filmmaking techniques. In DaVinci Resolve, begin with a clean Scinetone base and make subtle adjustments to the core parameters.
Try experimenting with the highlight rolloff by adjusting the highlight soft clip. This creates that characteristic film-like transition in bright areas. For skin tones, fine-tune the midtone detail while keeping an eye on the vectorscope to maintain natural flesh tones. A subtle push toward orange in the highlights can add warmth without looking artificial.
Consider creating multiple versions of your custom Scinetone look for different scenarios. For example, develop variations for indoor versus outdoor scenes, or day versus night shots. Save these as dedicated nodes or power grades for quick access in future projects.
Pay special attention to the shadow response curve. Many cinematographers prefer slightly lifted blacks for a more filmic look. Try bringing up the lift while maintaining contrast in the midtones. This creates depth without crushing the shadows.
Remember to test your custom looks across different types of footage and lighting conditions. What works for one scene might not translate well to another. Create a test sequence with varied footage to ensure your grade maintains consistency while remaining versatile enough for different shooting situations.
Common Pitfalls and Solutions
Avoiding Over-Processing
While S-Cinetone can create beautiful cinematic looks, it’s essential to maintain a natural appearance and avoid over-processing your footage. A common pitfall is pushing the grade too far, resulting in an artificial or overly stylized look that detracts from your story.
Start with subtle adjustments to your S-Cinetone parameters. Pay particular attention to the saturation levels – it’s tempting to boost colors dramatically, but this can quickly lead to an unrealistic appearance. Instead, focus on making incremental changes and frequently comparing your adjustments to the original footage.
Monitor your skin tones closely, as they’re often the first indicator of over-processing. S-Cinetone is designed to enhance skin tones naturally, so if they begin to look orange or unnatural, you’ve likely gone too far. Use DaVinci Resolve’s scopes, particularly the vectorscope, to ensure skin tones stay within acceptable ranges.
Consider using layer nodes to blend your S-Cinetone grade with the original footage. This technique allows you to dial back the intensity of your grade while maintaining the cinematic qualities you’re aiming for. A mix of 70-80% often provides the sweet spot between enhancement and naturalism.
Remember, S-Cinetone’s strength lies in its ability to create subtle, sophisticated looks. When in doubt, less is more. Take regular breaks during your grading session to view your work with fresh eyes, and don’t hesitate to pull back if the grade feels heavy-handed.
Optimizing Performance
To maximize your S-Cinetone color grading workflow in DaVinci Resolve, start by creating a dedicated project preset specifically for S-Cinetone work. This allows you to maintain consistent settings across multiple projects and saves valuable time during setup.
Consider using proxy files when working with high-resolution footage to ensure smooth playback and faster rendering. Set your proxy resolution to 1/2 or 1/4 of the original, depending on your system’s capabilities. Remember to switch back to full resolution for final rendering.
Organize your nodes systematically – keep your S-Cinetone base look in the first node, followed by exposure adjustments, and finally your creative tweaks. This structured approach makes it easier to troubleshoot and adjust specific elements of your grade without affecting others.
Take advantage of DaVinci Resolve’s smart cache feature, particularly for complex S-Cinetone grades. Enable smart cache for your most processor-intensive nodes to improve real-time playback performance.
Save your frequently used S-Cinetone grades as PowerGrades for quick access across different projects. Create separate versions for different lighting conditions (daylight, tungsten, mixed) to speed up your workflow.
Finally, consider using DaVinci Resolve’s render cache for timeline segments with heavy grades. This creates temporary rendered files of your timeline, allowing for smoother playback during editing and review sessions.
Mastering S-Cinetone color grading in DaVinci Resolve opens up a world of cinematic possibilities for your videos. Throughout this guide, we’ve explored how this powerful color science can transform your footage into professional-looking content that rivals high-end productions. Remember that achieving the perfect S-Cinetone look isn’t just about following preset formulas – it’s about understanding the principles behind the grade and adapting them to your creative vision.
Start with the basic adjustments we’ve covered, like tweaking exposure, contrast, and color temperature, before moving on to the more advanced techniques of power windows and custom curves. Don’t be afraid to experiment with different combinations of settings while keeping the signature S-Cinetone characteristics in mind: natural skin tones, balanced highlights, and that distinctive cinematic feel.
Practice is key to mastering these techniques. Begin with simple projects and gradually work your way up to more complex grades. Save your favorite looks as power grades for future use, and remember to maintain consistency across your entire project. Most importantly, trust your creative instincts while staying true to the S-Cinetone philosophy of natural, film-like imagery.
Whether you’re working on commercial projects, short films, or personal content, the S-Cinetone look in DaVinci Resolve can help elevate your work to new heights. Keep experimenting, refining your approach, and developing your unique style within the S-Cinetone framework.