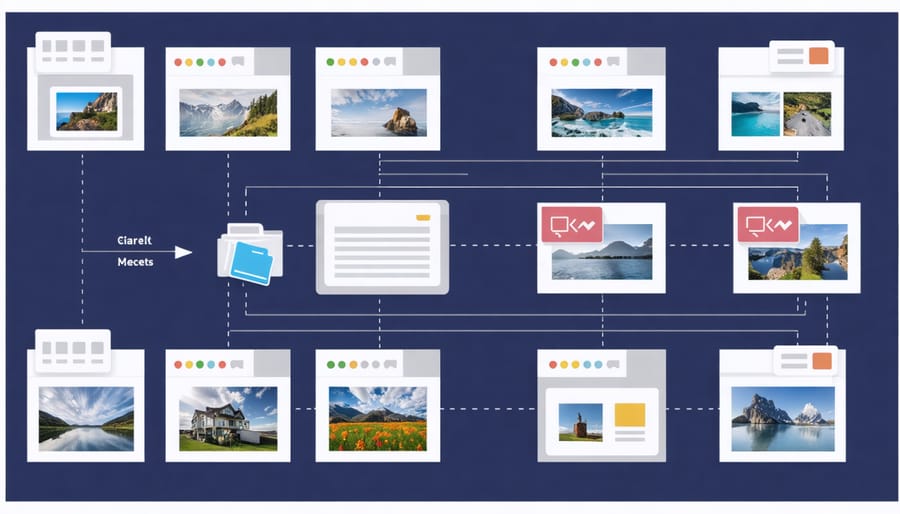
Create a centralized digital asset management system today by establishing clear folder hierarchies, implementing consistent file naming conventions, and automating repetitive organization tasks. Developing a clutter-free workflow starts with separating active projects from archived content, using descriptive tags and metadata for quick retrieval, and maintaining redundant backups across multiple storage solutions. Professional photographers who master electronic file management save countless hours searching for assets, eliminate duplicate files, and protect their valuable image collections from loss or corruption. Modern digital workflows demand robust organization systems that scale with growing collections while remaining flexible enough to adapt to changing technology and creative needs.
Building Your Digital Asset Foundation
Folder Structure That Makes Sense
A well-organized folder structure is the foundation of efficient photo management. Start with a root folder for all your photography work, then create main categories based on your primary shooting activities. For professional photographers, consider organizing by client name or project type. For enthusiasts, organizing by year and then by event or subject matter often works best.
Here’s a practical approach: Create a hierarchy starting with the year, followed by month, and then specific events or sessions. For example:
2024
└── January
├── Smith Wedding
├── Winter Landscapes
└── Product Shoot – Nike
Keep your structure consistent and avoid creating too many nested levels – aim for no more than 3-4 levels deep to maintain easy navigation. For client work, consider this structure:
Clients
└── Client Name
├── Project Date
└── Project Type
For personal photography:
Personal Projects
└── Year
├── Season or Month
└── Event/Location
Create separate folders for different stages of your workflow: RAW files, edited images, and final selections. This separation helps maintain clarity and prevents accidental deletions or modifications of original files.
Remember to use clear, descriptive folder names and avoid special characters that might cause issues across different operating systems. Consider adding a prefix like “01_,” “02_” to force folders into a specific order when needed.
File Naming Conventions That Work
Establishing a consistent file naming system is crucial for managing your photo library efficiently. Start with the date in YYYY-MM-DD format, followed by a descriptive element and any necessary sequence numbers. For example: “2024-01-15_WeddingSmith_001.RAF” instantly tells you when the photo was taken and what it contains.
Include relevant keywords that make sense to you, but keep them concise. For event photography, consider including the client’s name or event type: “2024-01-15_Johnson-Wedding_Reception_086.RAF”. For landscape photography, location names work well: “2024-01-20_YosemiteValley_Sunset_042.RAF”.
Avoid special characters, spaces, or symbols that might cause issues across different operating systems. Use hyphens or underscores instead of spaces, and stick to letters, numbers, and these basic separators. This ensures your files remain accessible regardless of where you transfer them.
For series or sequences, use consistent padding in your numbers (001, 002, etc., rather than 1, 2) to maintain proper sorting order. When working with multiple cameras, consider adding camera identifiers: “2024-01-15_Portrait_A7III_254.RAF”.
Remember to apply your naming convention consistently across all your work. It might take extra time initially, but the ability to quickly locate specific images later makes it worthwhile. Consider using batch renaming tools to speed up the process when handling multiple files.

Smart Storage Solutions
Primary Storage Setup
Your primary storage setup forms the foundation of your digital photo management system. Start by selecting a reliable external hard drive or NAS (Network Attached Storage) device with ample capacity for your current collection plus room for growth. For most photographers, a 4-8TB drive provides sufficient space to begin with.
Create a logical main folder structure that suits your workflow. A common approach is organizing by year, then by month or project within each year. For example:
Photography
├── 2024
│ ├── 01_January
│ ├── 02_February
│ └── Client_Projects
└── 2023
├── 12_December
└── Personal_Projects
Within these folders, maintain consistent subfolder organization. Consider creating separate directories for RAW files, edited versions, and final exports. This separation helps prevent accidental overwrites and makes it easier to locate specific versions of your work.
Keep your primary storage device in a safe, temperature-controlled environment, and ensure it’s properly connected to your editing workstation. If using a NAS, configure it for optimal read/write speeds over your network to prevent workflow bottlenecks.
Remember to keep your working directory (where you store current projects) relatively clean. Once you’ve completed a project, move the files to their permanent home in your organized folder structure. This approach helps maintain system performance and prevents your active workspace from becoming cluttered.
For day-to-day efficiency, create shortcuts or favorites to frequently accessed folders, allowing quick navigation to your most-used directories without diving through multiple levels of folders.
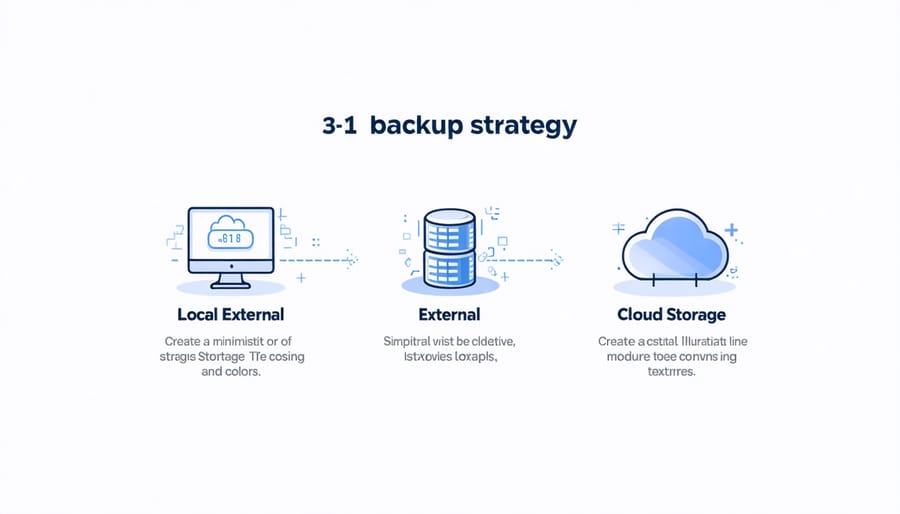
Backup Strategies That Save Time
When it comes to protecting your precious photo collection, having a robust backup strategy isn’t just recommended—it’s essential. The 3-2-1 backup rule serves as an excellent foundation: maintain three copies of your files, store them on two different types of media, and keep one copy off-site.
Start by setting up an automated backup system that runs daily or weekly, depending on how frequently you shoot. Time Machine for Mac users or Windows Backup for PC users can handle your primary backup to an external drive seamlessly. For your second backup, consider using a Network Attached Storage (NAS) device, which can automatically mirror your primary backup while providing convenient access to your files across your local network.
Cloud storage serves as an excellent off-site backup solution. Services like Backblaze or Amazon Photos can automatically upload your files whenever you’re connected to the internet. While the initial backup might take several days, subsequent backups only transfer changed files, making the process much more efficient.
To save time and ensure consistency, create automated backup schedules during off-hours—perhaps overnight when you’re not actively working on files. Most backup solutions allow you to set specific folders for monitoring, so you can prioritize your most important photo directories.
Remember to test your backup system regularly by attempting to restore files. There’s nothing worse than discovering your backup failed when you actually need it. Consider scheduling monthly test restores of random files to verify your backup integrity.
For critical client work, implement immediate redundancy by using cameras with dual card slots or instantly copying files to a portable SSD during shoots.
Metadata Magic
Essential Metadata Fields
Metadata is your digital filing system’s secret weapon, helping you quickly locate specific images among thousands. Here are the essential metadata fields you should consistently populate for effective file management:
Title/Caption: Give each image a descriptive title that clearly identifies its subject matter. For example, “Sunrise at Mount Rainier – September 2023” is more useful than just “DSC_0123.”
Keywords/Tags: Include relevant descriptive terms that help categorize your images. Think about both broad categories (landscape, portrait, wildlife) and specific details (mountain, sunset, wedding).
Date Information: Always preserve the capture date and consider adding relevant dates like when the image was edited or delivered to clients. This helps track image versions and maintain chronological organization.
Location Data: Whether through GPS coordinates or manual entry, location information helps create geographical context for your images. Include both broad locations (country, state) and specific spots (park name, landmark).
Copyright Information: Embed your copyright details, including your name and usage rights. This protects your work when images are shared or published.
Technical Details: While cameras automatically record settings like aperture and shutter speed, consider adding your own notes about specific techniques or equipment used.
Project/Client Information: For professional work, include client names, project references, or shoot identifiers to quickly filter images by assignment.
Rating/Color Labels: Implement a consistent rating system (stars or colors) to mark your favorites, client selects, or images requiring further editing.
Remember to apply these metadata fields consistently across your library. While it might seem time-consuming initially, this investment pays off tremendously when searching for specific images later.
Automated Tagging Techniques
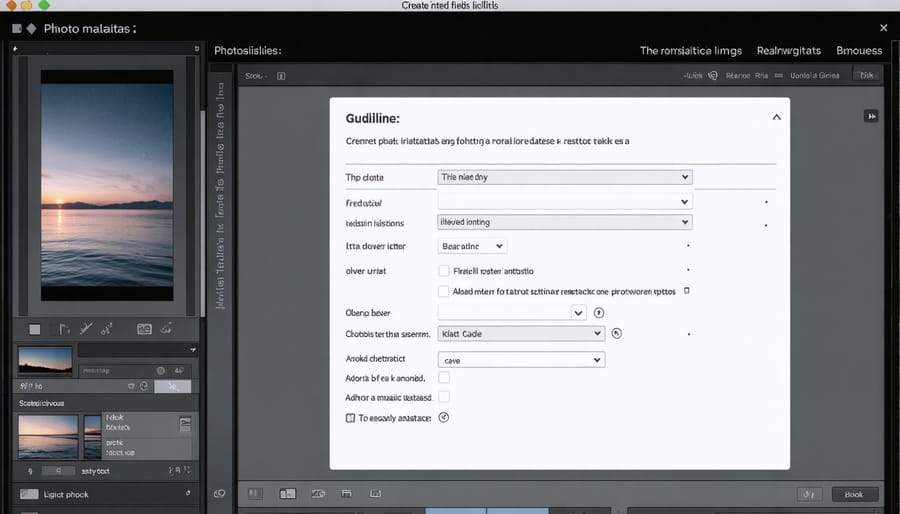
Modern photography workflows benefit greatly from automated tagging techniques that streamline the tedious process of applying metadata. Adobe Lightroom’s AI-powered auto-tagging feature can recognize common subjects, colors, and compositions, automatically generating relevant keywords. This becomes particularly valuable when organizing large photoshoots or maintaining consistency in your post-processing workflow.
Photo Mechanic and DigiKam offer batch tagging capabilities, allowing you to apply predetermined sets of keywords to multiple images simultaneously. Create custom presets for different types of shoots – weddings, landscapes, or portraits – and apply them with a single click. These tools can also extract EXIF data to automatically populate fields like camera settings and capture date.
For Mac users, the native Photos app includes facial recognition that automatically identifies and groups people across your library. Windows Photo app offers similar capabilities, making it easier to organize family photos and client galleries.
Consider implementing tools like ExifTool for advanced metadata management. It can read and write metadata across multiple file formats and even synchronize metadata between different versions of the same image. When combined with command-line scripts, you can create powerful automated workflows that maintain consistent tagging across your entire photo library.
Workflow Automation
Software Solutions
Managing your digital photo library effectively requires the right software tools. While basic file management can be done through your operating system, specialized applications can help you streamline your workflow and maintain better organization.
Adobe Lightroom remains an industry standard, offering robust cataloging features, facial recognition, and GPS tagging capabilities. Its folder synchronization and smart collections make it easier to maintain consistent organization across multiple devices. For those seeking essential photography software alternatives, Capture One provides excellent file management tools with superior tethering capabilities, while ACDSee offers a more budget-friendly option with powerful batch processing features.
For automated organization, consider PhotoMove or Adobe Bridge, which can automatically sort photos by date, camera model, or custom parameters. Modern AI-powered automation tools can now analyze image content and suggest tags, making metadata management more efficient than ever.
Don’t overlook backup solutions like Backblaze or Carbonite, which can automatically maintain copies of your photo library in the cloud. For local backup management, SyncBack or GoodSync excel at creating automated backup routines for your entire photo collection.
Remember that the best software solution depends on your specific needs and workflow. Consider factors like library size, required features, and budget when choosing your tools. Most applications offer free trials, so test several options before committing to ensure they align with your organizational strategy.
Batch Processing Tips
When you’re dealing with hundreds or thousands of photos from a shoot, batch processing becomes your best friend. Let’s explore some efficient techniques that will save you countless hours of repetitive work.
First, learn to leverage your software’s batch renaming capabilities. Whether you’re using Lightroom, Bridge, or other photo management tools, you can rename multiple files simultaneously using patterns like date, shoot name, and sequential numbers. For instance, “Wedding_20240215_001” can be automatically applied to an entire folder of images.
Take advantage of batch editing features for common adjustments. Apply basic corrections like white balance, exposure, or even your signature preset to multiple images at once. This works particularly well for photos shot under consistent lighting conditions. Just remember to review the results, as some images might need individual fine-tuning.
For file organization, move or copy multiple files in groups based on criteria like capture date, camera model, or rating. Many programs allow you to filter files and perform bulk operations, making it easy to sort hundreds of images into appropriate folders in seconds.
Consider using batch export presets for different purposes. Create templates for web uploads, client deliveries, and archive copies, each with appropriate size, format, and quality settings. This ensures consistency across your deliverables while saving time.
Don’t forget about metadata. Apply copyright information, contact details, and keywords to multiple images simultaneously. This not only protects your work but also makes your entire collection more searchable and manageable in the long run.
For more complex operations, explore automation tools like Photoshop Actions or command-line utilities. These can handle sophisticated batch processes like watermarking, resizing, or format conversion across entire directories.
Mastering electronic file management is a journey that pays dividends in both time saved and peace of mind. Throughout this guide, we’ve explored essential practices that will transform your digital photography workflow from chaotic to streamlined. By implementing a consistent folder structure, adopting clear naming conventions, and leveraging metadata effectively, you’ll never again waste precious creative time searching for that perfect shot from last summer’s wildlife expedition.
Remember that successful file management isn’t about following rules blindly – it’s about creating a system that works for your specific needs while maintaining organization and accessibility. Whether you’re managing a few hundred family photos or thousands of professional shots, the principles we’ve discussed can scale to meet your requirements.
Start small by implementing one practice at a time. Perhaps begin with organizing your existing folders, then move on to establishing naming conventions. As you become comfortable with these basics, incorporate backup strategies and metadata management into your workflow. The key is consistency and persistence.
Take advantage of the automation tools we’ve discussed to reduce manual work and maintain your system effortlessly. Regular maintenance might seem tedious at first, but it becomes second nature with time and prevents the overwhelming task of organizing years of accumulated files.
Your future self will thank you for taking these steps today. Well-organized files mean more time behind the camera and less time in front of file browsers. Now, it’s time to put these practices into action and transform your digital asset management approach.