Transform your blurry night sky shots into stunning celestial portraits by mastering image stacking – the secret weapon of professional astrophotographers. While getting started with astrophotography might seem daunting, combining multiple exposures of the same scene dramatically reduces noise, reveals faint details, and produces images with remarkable clarity that single shots simply cannot achieve.
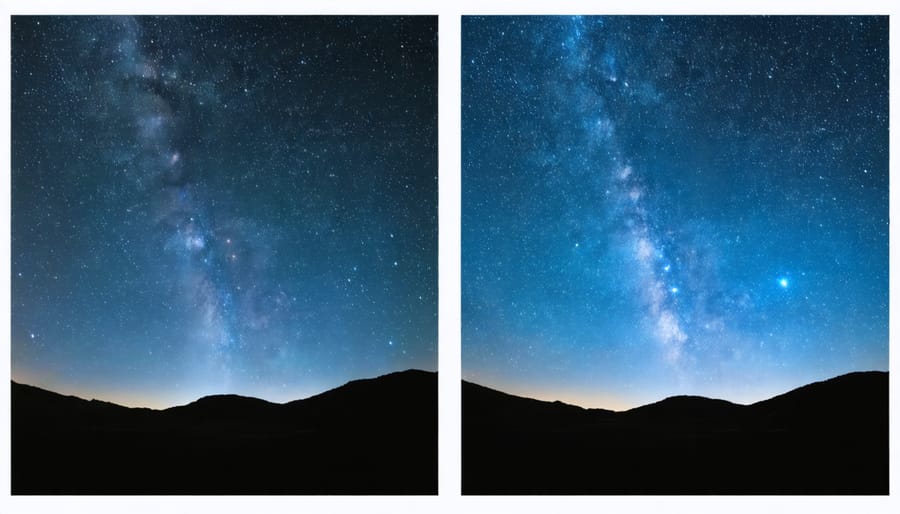
Stack 20-30 exposures of deep-sky objects to eliminate random noise patterns, increase signal-to-noise ratio, and reveal subtle nebulosity details invisible in individual frames. Capture light frames at consistent ISO and exposure settings, then supplement with dark frames shot with the lens cap on to map sensor noise patterns. Process these combined images through specialized stacking software like DeepSkyStacker or Sequator to unlock the true potential of your night sky photographs.
Modern digital cameras excel at low-light performance, but even the best sensors struggle with the extreme darkness of space. Image stacking overcomes these limitations, allowing enthusiast photographers to produce professional-quality astrophotography with standard DSLR and mirrorless cameras. Master this technique to elevate your night sky photography from simple star trails to stunning portraits of galaxies, nebulae, and star clusters.
Why Image Stacking Matters for Natural Environment Astrophotography
Combating Light Pollution
Light pollution poses a significant challenge for astrophotographers, especially those shooting near urban areas. Image stacking proves to be a powerful tool in combating this issue, working alongside other low-light photography secrets to produce cleaner, more detailed night sky images.
When you stack multiple exposures, you’re essentially averaging out the random noise patterns caused by light pollution while preserving the consistent stellar details. This process helps distinguish between unwanted artificial light and the actual celestial objects you’re trying to capture. The more frames you stack, the more effectively you can reduce the orange or yellow glow that often plagues urban astrophotography.
Think of it like looking through multiple layers of slightly dirty glass – while a single layer might show obvious smudges, when you align many layers, the consistent elements (stars) become more prominent while the random elements (light pollution) get averaged out and become less noticeable. Most stacking software also includes specific light pollution reduction algorithms that can identify and subtract common urban sky glow patterns from your final image.
Dealing with Environmental Challenges
Environmental factors can make or break your astrophotography session, but image stacking helps overcome many of these challenges. Wind is a common nemesis, causing camera shake and star trailing, but by taking multiple shorter exposures instead of one long shot, you can discard frames affected by sudden gusts while preserving the good ones.
Humidity poses another significant challenge, often causing lens condensation and reducing image clarity. While stacking won’t eliminate moisture problems completely, it allows you to capture usable data before dew becomes too problematic. Keep a microfiber cloth handy and consider using dew heaters for longer sessions.
Perhaps the most frustrating obstacle is atmospheric turbulence, also known as “seeing conditions.” This phenomenon causes stars to appear to twinkle and can blur fine details in your images. Stacking multiple frames helps average out these atmospheric distortions, resulting in sharper, clearer final images. The key is to take more frames than you think you’ll need – experienced astrophotographers often capture hundreds of images to ensure they have enough quality data to work with.
Modern stacking software can automatically analyze and rate your frames, helping you identify and remove those affected by environmental issues, saving you time and ensuring better final results.
Essential Equipment and Setup
Camera and Mount Requirements
For successful astrophotography stacking, you’ll need a camera capable of shooting in manual mode and capturing RAW images. While a full-frame DSLR or mirrorless camera will give you the best results due to their superior low-light performance, crop-sensor cameras can also produce excellent stacked images. The key is having full control over your exposure settings.
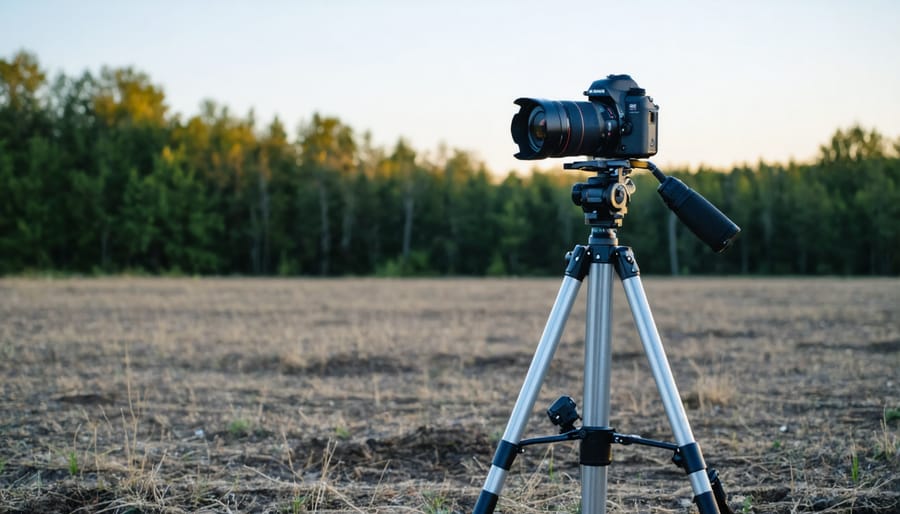
Your mount is equally crucial. While a basic tripod can work for shorter exposures, a star tracker will dramatically improve your results by compensating for Earth’s rotation. For beginners, an entry-level star tracker like the Sky-Watcher Star Adventurer or iOptron SkyGuider Pro offers a good balance of performance and affordability. If you’re on a tighter budget, you can still achieve decent results with a sturdy tripod and shorter exposure times, though you’ll need to capture more frames to compensate.
Make sure your tripod is stable and can support your camera setup’s weight. For those shooting without a tracker, a remote shutter release or intervalometer will help minimize camera shake and automate the capture process.
Location Setup Tips
Choosing the right location and setting up properly are crucial for successful astrophotography stacking. While landscape photography fundamentals apply here too, night shooting requires extra consideration. First, scout your location during daylight hours to identify potential hazards and composition elements. Look for spots away from light pollution – typically 30-40 miles from major cities works best.
Ensure your tripod is on stable ground; even slight movement can ruin your image sequence. On soft surfaces like sand or grass, push the tripod legs firmly into the ground. In windy conditions, hang your camera bag from the tripod’s center column for added stability, and use your body as a windbreak when necessary.
Consider accessibility and safety – bring a headlamp with a red light mode to preserve your night vision, and always inform someone of your location. Pack essential items like extra batteries, lens cleaning supplies, and warm clothing, as temperatures can drop significantly during long shooting sessions. If possible, arrive at least 30 minutes before sunset to set up your equipment while there’s still natural light.
Capture Techniques for Stackable Images
Camera Settings for Success
Success in astrophotography stacking begins with capturing high-quality source images, and that means getting your optimal night photography settings dialed in from the start. Set your camera to manual mode and shoot in RAW format to preserve maximum detail for processing later.
Start with your ISO setting – while it might be tempting to crank it up for brighter images, keep it between 1600 and 3200 to minimize noise. Your aperture should be wide open (lowest f-number) to gather as much light as possible, typically f/2.8 or lower if your lens allows it.
For exposure time, use the “500 rule” as a starting point: divide 500 by your lens’s focal length to find your maximum exposure time before star trails appear. For example, with a 24mm lens, you shouldn’t exceed 20 seconds (500/24 = 20.8). If you’re using a crop sensor camera, remember to factor in the crop multiplier.
Focus is crucial – switch to manual focus and use your camera’s live view mode, zoomed in on a bright star, to achieve precise focus. Once focused, tape down your focus ring to prevent accidental changes between shots.
Enable your camera’s built-in noise reduction if available, but be aware this will double your capture time for each frame. Set your white balance to a fixed value (around 3200K-4000K) rather than auto to maintain consistency across all frames.
Shot Sequencing and Timing
Successful astrophotography stacking begins with careful planning of your shooting sequence. Start by taking 20-30 light frames of your target, ensuring your camera settings remain consistent throughout. These are your primary images that capture the celestial object and will form the foundation of your final photograph.
Between your light frames, capture 10-15 dark frames by covering your lens with the lens cap while maintaining the same exposure settings. This helps eliminate hot pixels and sensor noise. For optimal results, take these dark frames at approximately the same temperature as your light frames.
Next, shoot 10-15 bias frames using your camera’s fastest shutter speed with the lens cap on. These help remove read noise from your final image. Finally, capture 10-15 flat frames by photographing an evenly illuminated white surface or the dawn sky, which will help correct for vignetting and dust spots.
For deep-sky objects, aim for exposure times between 30 seconds and 3 minutes per frame, depending on your equipment and light pollution levels. Keep in mind that longer individual exposures aren’t always better – multiple shorter exposures can often yield superior results when stacked.
Space your shots consistently, allowing 2-3 seconds between frames to ensure your camera’s buffer doesn’t overflow. Consider using an intervalometer to automate the process and maintain precise timing throughout your shooting session. Remember that patience is key – a thorough shooting sequence might take 1-2 hours, but the resulting image quality is worth the investment.
Processing Your Stacked Images
Software Options and Workflow
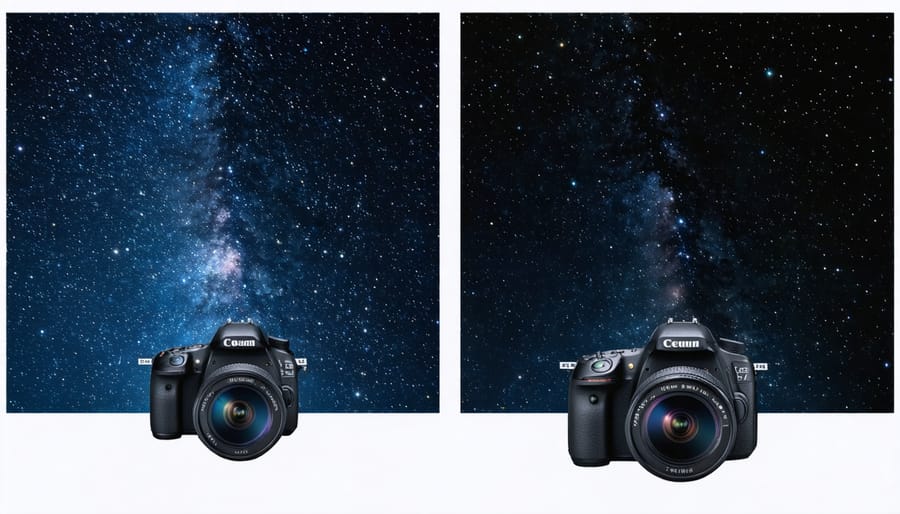
Several powerful software options are available for stacking astrophotography images, each with its unique strengths. DeepSkyStacker (DSS) remains a popular free choice among beginners, offering an intuitive interface and reliable results. For more advanced users, PixInsight provides comprehensive tools but comes with a steeper learning curve and price tag. Sequator is another excellent option, particularly for Windows users processing nightscape images.
The basic workflow typically follows these steps: First, import your light frames (main images), dark frames (shots with lens cap on), flat frames (uniform light source), and bias frames (shortest possible exposure with cap on). Quality software will automatically detect and align stars across your images.
Next, the stacking process begins by analyzing each frame’s quality. The software discards poor frames and combines the remaining images, using dark, flat, and bias frames to reduce noise and correct optical irregularities. This process can take anywhere from a few minutes to several hours, depending on your image quantity and computer specifications.
After stacking, you’ll get a final image that requires post-processing. Most photographers export their stacked image to editing software like Photoshop or Lightroom for final adjustments to contrast, color balance, and noise reduction. Some advanced stacking programs offer built-in post-processing tools, though many prefer the flexibility of dedicated editing software.

Common Problems and Solutions
Even with careful planning, you might encounter several common challenges during the image stacking process. Here’s how to address them effectively:
Star trails in individual frames often occur due to too-long exposures. Keep your shutter speed within the “500 rule” for your focal length, or use a star tracker for longer exposures. If you notice trailing after capturing, you may need to discard affected frames to maintain sharp details.
Misalignment between frames is another frequent issue, usually caused by slight telescope or camera movement. Most stacking software includes automatic alignment features, but you might need to manually select alignment stars if the automatic process fails. Choose bright, distinct stars as reference points.
Hot pixels and aircraft trails can corrupt your final image. Modern stacking software usually identifies and removes these automatically through “sigma clipping,” but double-check the rejection settings if artifacts persist. For airplane trails, simply remove affected frames from your stack.
Color balance inconsistencies between frames might occur due to changing sky conditions or light pollution. Stack your images first, then adjust the color balance of the final result rather than trying to match individual frames. This approach provides more consistent results and saves time.
If your final stacked image appears noisy despite using multiple frames, you might need more light frames or better dark frame calibration. Consider increasing your ISO slightly and capturing more frames rather than pushing exposure times too far.
Advanced Techniques for Natural Environments
When shooting in natural environments, you’ll face unique challenges that require specific techniques to overcome. Wind movement is one of the biggest hurdles, as it can cause star trailing and blur even with short exposures. Combat this by increasing your ISO and shooting shorter exposures – aim for 1-2 seconds instead of longer intervals. You’ll need more frames to compensate, but the sharper results are worth the extra processing time.
Light pollution presents another common challenge. When stacking images taken under light-polluted skies, consider using a light pollution filter and shooting more dark frames than usual. These additional dark frames help neutralize the orange glow that often plagues urban and suburban shooting locations.
Humidity can be particularly troublesome, causing lens condensation that creates soft spots in your images. Pack silica gel packets and use dew heaters or hand warmers around your lens to prevent moisture buildup. If you’re shooting in high humidity conditions, take calibration frames more frequently as condensation can change throughout your shooting session.
For mountain or coastal locations, atmospheric turbulence can reduce image sharpness. Counter this by shooting more frames than usual – aim for at least 50-100 light frames instead of the typical 20-30. During the stacking process, use stricter rejection parameters to eliminate frames affected by atmospheric distortion.
Temperature variations can cause your camera’s sensor to behave differently throughout the night. Take dark frames at regular intervals rather than all at once at the end of your session. This ensures your calibration frames accurately reflect the changing conditions during your shoot.
Remember to check your histogram frequently and adjust exposure settings as necessary, especially during long shooting sessions where conditions can change dramatically.
Image stacking is a game-changing technique that can transform your astrophotography from good to spectacular. By combining multiple exposures, you can achieve incredible detail, reduced noise, and stunning clarity that single shots simply can’t match. As we’ve explored throughout this guide, the process might seem technical at first, but with practice and patience, it becomes second nature.
Remember that success in astrophotography stacking comes down to proper planning, careful shooting technique, and methodical post-processing. Start with simple subjects like the moon or bright star clusters before moving on to more challenging deep-sky objects. Don’t be discouraged if your first attempts aren’t perfect – every astrophotographer started somewhere, and each session is an opportunity to learn and improve.
The tools and software available today make image stacking more accessible than ever before. Whether you’re using a basic DSLR or advanced astronomy camera, the principles remain the same. So grab your camera, find a dark location, and give it a try. The universe is waiting to be photographed, and with image stacking, you have the power to reveal its hidden beauty in ways that will amaze both you and your viewers.