Mountain landscape photography demands mastery of both technical precision and artistic vision, where dramatic peaks, ever-changing weather conditions, and breathtaking vistas create uniquely challenging yet rewarding opportunities. As first light breaks over jagged ridgelines or storm clouds gather around snow-capped summits, photographers face a delicate balance of capturing both grand scenes and intimate details while battling extreme conditions and rapidly shifting light.
The art of photographing mountains extends far beyond simply pointing a camera at impressive peaks. It requires understanding how morning alpenglow transforms harsh rock into glowing beacons, how atmospheric conditions affect image clarity at different elevations, and how seasonal changes create entirely new compositional possibilities. Whether you’re scaling remote peaks before dawn or setting up a tripod along an accessible viewpoint, successful mountain photography combines careful planning, technical expertise, and the patience to wait for those fleeting moments when light, landscape, and atmosphere align perfectly.
From mastering hyperfocal distance for front-to-back sharpness to choosing the right filters for managing extreme dynamic range, mountain photography challenges photographers to expand their technical and creative boundaries while working in some of nature’s most awe-inspiring environments.
The High-Altitude Photography Challenge
Weather and Light Conditions
Mountain landscapes present unique challenges when it comes to weather and lighting conditions. The atmosphere at high altitudes can shift dramatically within minutes, creating both obstacles and opportunities for photographers. Understanding how to work with these extreme weather conditions is crucial for capturing compelling images.
The harsh mountain light, particularly during midday, can create excessive contrast between bright peaks and shadowed valleys. To manage this, consider using graduated neutral density filters to balance exposure between sky and foreground. Alternatively, bracketing your shots (taking multiple exposures of the same scene) allows you to blend them later in post-processing.
Early morning and late afternoon present the best lighting conditions, with the golden hour casting warm, directional light across the landscape. However, don’t dismiss overcast days – diffused light can reveal subtle textures and details in the terrain that might be lost in harsh sunlight.
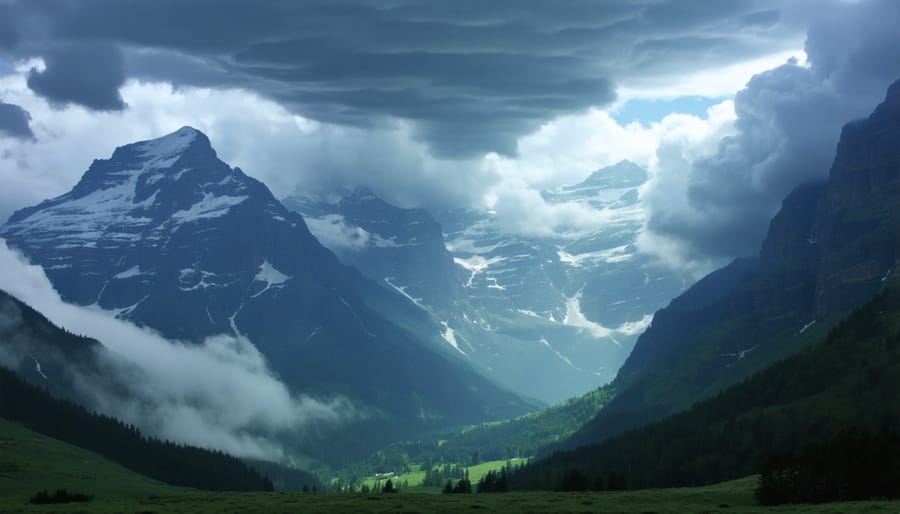
Weather changes can transform your composition in seconds. Clouds rolling through valleys, sudden storm fronts, or clearing mist can add drama and atmosphere to your images. Keep your camera ready and protected from the elements, and always watch for approaching weather systems that might affect your shoot.
When dealing with rapidly changing conditions, speed is essential. Pre-visualize your shots and have your camera settings ready before the perfect moment arrives. Consider using your camera’s weather-sealing capabilities, and always carry appropriate protective gear for both yourself and your equipment.
Remember that challenging weather often produces the most memorable images. A storm clearing over a mountain peak or fog lifting from a valley can create atmospheric conditions that elevate your photograph from good to extraordinary.
Physical and Technical Limitations
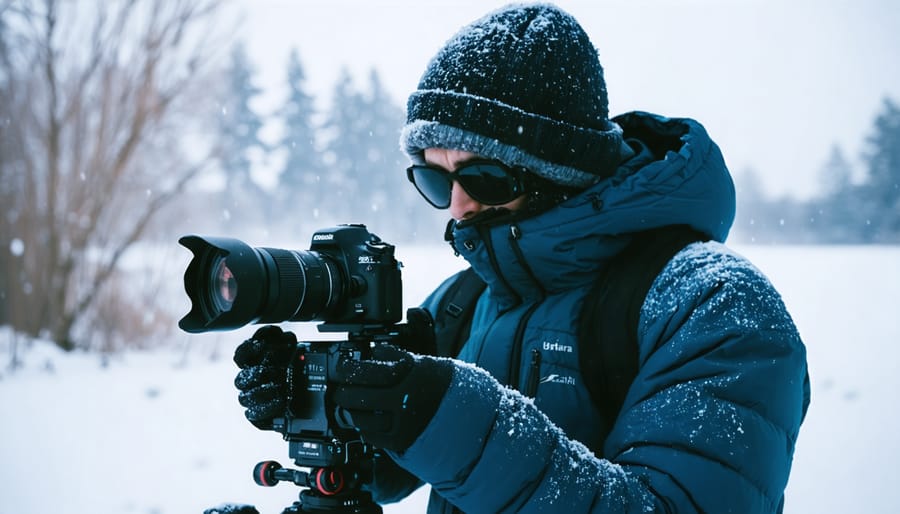
Mountain photography presents unique physical and technical challenges that every photographer must navigate. When shooting in extreme environments like high-altitude locations, both you and your equipment face significant demands.
Cold temperatures can dramatically affect your gear’s performance. Batteries drain faster in cold conditions, often reducing their life by 50% or more. Always carry spare batteries close to your body to keep them warm. Your camera’s LCD screen may also respond more slowly, and lens focusing mechanisms can become sluggish. Consider using silicon-based lubricants on moving parts and insulating your camera with a protective cover.
Altitude presents another set of challenges. The thinner air at high elevations can cause your camera’s memory cards to behave erratically, and some cameras may experience unexpected shutdowns. Modern weather-sealed cameras handle these conditions better, but it’s wise to store memory cards in protective cases and allow your equipment to acclimatize gradually.
Condensation becomes a serious concern when moving between temperature extremes. When bringing your camera from cold mountain air into a warm cabin or tent, seal it in an airtight bag before entering. This allows the equipment to warm up slowly, preventing moisture from forming on sensitive electronics.
Weather conditions can change rapidly in mountain environments, putting your gear at risk. Always pack weather-sealed bags and quick-access rain covers. A lightweight microfiber cloth is essential for wiping moisture from lenses and filters, while silica gel packets help manage humidity in your camera bag. Remember that even weather-sealed equipment has limits – know your gear’s capabilities and protect it accordingly.
Essential Gear for Mountain Photography
Camera Protection Systems
When photographing in mountain environments, protecting your camera gear from the elements is crucial. Mountains present unique challenges with rapid weather changes, moisture, and extreme temperatures that can damage sensitive equipment.
Start with a reliable weather-sealed camera bag that offers both protection and easy access. Look for bags with reinforced waterproof materials and sturdy zippers. Consider using silica gel packets inside your bag to combat moisture buildup, especially when moving between different temperature zones.
For your camera body and lenses, invest in quality rain covers or camera sleeves. These lightweight solutions can be quickly deployed when weather turns harsh. Clear filters on your lenses serve dual purposes – protecting against scratches and shielding from wind-blown debris common at high altitudes.
Temperature fluctuations can cause condensation inside your equipment. Allow your gear to acclimate gradually when moving between temperatures by keeping it in your sealed camera bag. In extreme cold, store spare batteries close to your body to maintain their charge, and consider using chemical hand warmers near (but not directly on) your gear.
Don’t forget about protecting yourself while shooting. Cold-weather photography gloves with removable fingertips allow you to operate camera controls while keeping warm. A microfiber cloth stored in an easily accessible pocket helps manage unexpected moisture on your lens or viewfinder.
Remember, the best protection system is one you’ll actually use consistently. Choose solutions that balance protection with practicality for your shooting style.
Must-Have Accessories
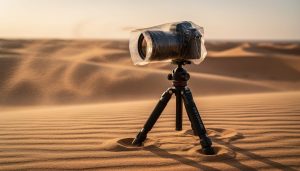
When photographing mountain landscapes, having the right accessories can make the difference between a good shot and a spectacular one. A sturdy tripod is absolutely essential – opt for a carbon fiber model that’s both lightweight and stable in windy conditions. Make sure it has spiked feet for secure placement on rocky terrain.
Filters are another crucial component of your kit. A circular polarizing filter helps manage glare from snow and water while enhancing the deep blues of mountain skies. Neutral density (ND) filters are invaluable for creating those silky-smooth water effects in mountain streams and waterfalls. Consider carrying a graduated ND filter to balance bright skies with darker foregrounds.
A reliable camera bag designed for outdoor conditions is vital. Look for one with weather-sealing and comfortable straps – you’ll appreciate this during long hikes. Include a rain cover for both your bag and camera, as mountain weather can change rapidly.
Other essential accessories include:
– Extra batteries (cold temperatures drain them faster)
– Lens cleaning kit (mountain environments can be dusty)
– Remote shutter release for sharp long exposures
– Bubble level for perfect horizons
– Microfiber cloths for managing condensation
– UV filter for lens protection at high altitudes
Don’t forget practical items like a headlamp for dawn/dusk shoots and hand warmers to keep your batteries functioning in cold conditions.
Composition Techniques for Mountain Landscapes
Using Scale and Perspective
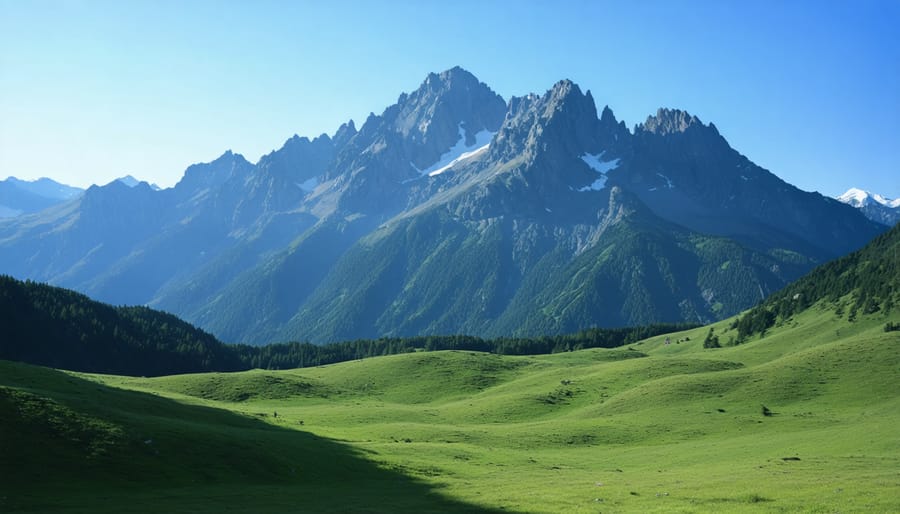
Scale and perspective are crucial elements in mountain landscape photography that can transform a good shot into a breathtaking image. To effectively convey the massive scale of mountains, include foreground elements that viewers can easily relate to. A lone hiker, a cluster of trees, or even a mountain cabin can provide an instant sense of proportion that highlights the mountain’s grandeur.
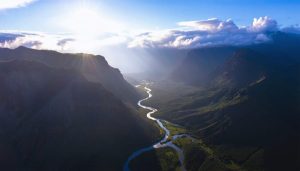
One powerful technique is to use leading lines that draw the viewer’s eye from the foreground to the distant peaks. A winding trail, river, or row of trees can create depth and guide the viewer through the frame. Position these elements strategically in your composition to establish a clear visual pathway from near to far.
Working with different focal lengths can dramatically affect how you portray scale. Wide-angle lenses (16-35mm) emphasize the foreground while still capturing the entire mountain scene, creating a sense of depth and immersion. Alternatively, telephoto lenses can compress perspective, making distant ridges appear to stack dramatically against each other.
Consider shooting from varying elevations and angles. Photographing from a lower vantage point can make mountains appear more imposing, while shooting from an adjacent peak can reveal interesting patterns and textures in the landscape. Early morning or late afternoon light casting long shadows across the terrain can further enhance the perception of depth and dimensionality in your mountain photographs.
Remember that atmospheric conditions like fog or mist can add layers of depth, creating a natural separation between foreground, middle ground, and background elements.
Working with Natural Elements
Natural elements can transform an ordinary mountain scene into a breathtaking masterpiece, and mastering natural light is just the beginning. Clouds add drama and depth to your compositions, creating layers that guide the viewer’s eye through the frame. Look for dramatic cloud formations, particularly during sunrise and sunset, when they catch golden light and create striking contrasts against mountain peaks.
Snow presents both challenges and opportunities. Fresh powder can simplify complex landscapes, creating clean lines and minimalist compositions. Capture the texture of wind-blown snow or use it to highlight mountain ridges. In winter conditions, expose slightly to the right to maintain detail in the bright snow while preserving shadow information.
Atmospheric conditions like fog and mist can add mystery and mood to your mountain photographs. Morning fog in valleys creates ethereal scenes, while storm clouds brewing around peaks add intensity and drama. Watch for alpenglow – the reddish glow on mountains just before sunrise or after sunset – which can transform an ordinary scene into something magical.
Pay attention to weather forecasts, but don’t shy away from “bad” weather. Some of the most compelling mountain images emerge during or after storms when dramatic light breaks through clouds. Temperature inversions, where clouds settle below mountain peaks, can create stunning opportunities for photographs that show mountains appearing to float above cloud seas.
Camera Settings for High-Altitude Success
Mastering your camera settings is crucial for capturing stunning mountain landscapes, especially given the unique challenges of high-altitude photography. Start with your base settings: shoot in RAW format to maximize post-processing flexibility and maintain your ISO as low as possible (typically 100-200) to minimize noise in those crisp mountain shots.
For sharp mountain landscapes, aperture selection is critical. Use f/8 to f/11 for optimal sharpness across your frame while maintaining reasonable depth of field. When dealing with expansive vistas, consider focus stacking – take multiple shots focused at different distances and blend them in post-processing.
Understanding exposure in challenging conditions is essential in mountain environments. The bright snow and harsh sunlight can fool your camera’s meter, so consider bracketing your exposures (±1-2 stops) to ensure you capture all detail in both highlights and shadows.
For moving elements like clouds or waterfalls, mastering long exposure techniques can add dramatic effect to your mountain shots. Use neutral density filters to extend exposure times, even in bright daylight conditions.
Don’t forget about white balance – mountain light tends to be cooler and clearer due to the altitude, so consider warming up your white balance slightly or shooting in auto white balance and adjusting in post. Using your camera’s histogram is crucial; check it frequently as the mountain light can change rapidly with weather conditions.
For sharper images, enable your camera’s mirror lock-up feature when using a tripod, and use a remote shutter release or 2-second timer to minimize camera shake. If your camera has built-in image stabilization, turn it off when shooting from a tripod to prevent unnecessary movement compensation.
Mountain landscape photography presents unique challenges, but with the techniques and approaches we’ve explored, you’re now equipped to capture breathtaking images that tell compelling stories of these majestic environments. Remember that successful mountain photography combines technical expertise with artistic vision and careful planning.
The key to exceptional mountain landscapes lies in understanding the interplay between light, weather, and timing. Whether you’re shooting at golden hour, capturing dramatic storm clouds, or showcasing the stark beauty of alpine environments, your preparation and patience will be rewarded with powerful images that resonate with viewers.
Don’t forget the fundamental principles we discussed: use leading lines created by ridges and valleys, incorporate foreground elements for depth, and leverage weather conditions to add drama to your compositions. Your choice of filters, careful exposure settings, and thorough understanding of your camera’s capabilities will help you overcome the technical challenges of mountain environments.
Most importantly, stay safe while pursuing your creative vision. Mountain conditions can change rapidly, so always prioritize your safety over getting the perfect shot. Start with accessible locations as you build your skills, and gradually challenge yourself with more advanced techniques and remote locations.
Remember that developing your mountain photography skills is a journey. Each expedition offers new learning opportunities and chances to refine your craft. Keep experimenting, stay patient, and don’t be afraid to return to the same location multiple times – the mountains never look quite the same twice.