Master your camera’s shutter speed settings for video by switching from fractions to frame rate multiples—shoot at 1/50th second for 25fps or 1/60th for 30fps to achieve natural motion blur that mimics what our eyes perceive. This “180-degree shutter rule” instantly separates amateur footage from professional-looking video, preventing the jarring, stuttery motion that occurs with faster shutter speeds.
Embrace continuous lighting instead of relying on strobes, since video requires constant illumination throughout the capture. LED panels offer adjustable color temperature and intensity, letting you shape light just as you would for stills, but with the added control of seeing exactly how shadows and highlights affect your moving subject in real-time.
Stabilize your footage through deliberate movement techniques rather than handheld shooting alone. A simple shoulder rig or gimbal transforms shaky clips into smooth, cinematic sequences, while understanding when to lock down on a tripod versus adding intentional camera motion gives your videos the professional polish viewers expect.
Record clean audio from the start using an external microphone—your camera’s built-in mic captures everything except what you actually want to hear. A shotgun mic or wireless lavalier system ensures dialogue and ambient sound complement your visuals rather than distract from them.
Think in sequences rather than single shots. Capture establishing shots, medium framings, close-ups, and cutaways of the same scene to give yourself editing flexibility. This videographic storytelling approach, borrowed from cinematography, transforms disconnected clips into compelling narratives that hold viewer attention from start to finish.
Why Your Photography Skills Already Make You Better at Video
If you’ve been photographing for any length of time, you’re already halfway to becoming a capable videographer. Seriously. The fundamentals that help you capture stunning stills translate directly to motion work, giving you a significant head start over someone picking up a camera for the first time.
Let’s start with composition. Those rule-of-thirds guidelines, leading lines, and negative space principles you’ve internalized? They work identically in video. The same compositional choices that create visual interest in a photograph do the exact same thing in every frame of your footage. You’ve already trained your eye to see scenes in a compelling way—that doesn’t change when you hit record instead of pressing the shutter.
Your understanding of light is equally valuable. You already know how to read a scene, identify your light source, and recognize the quality of light—whether it’s harsh midday sun or the soft glow of golden hour. While video requires continuous lighting rather than a brief flash exposure, your ability to evaluate and work with available light transfers completely.
Then there’s exposure control. Aperture, shutter speed, and ISO still form the exposure triangle in video. You’re comfortable balancing these three elements, which means you can properly expose footage from day one.
The key difference? Video adds the dimension of time. Instead of capturing a single moment, you’re recording continuous moments that must maintain consistent exposure and focus throughout. Your photography foundation is solid—now you’re simply extending those skills across duration rather than freezing them in an instant.
Frame Rate and Shutter Speed: The Motion Foundation
The 180-Degree Rule That Changes Everything
If you’re transitioning from photography to video, here’s a golden rule that’ll instantly improve your footage: set your shutter speed to double your frame rate. Shooting at 24fps? Use 1/50 shutter speed. Recording at 60fps? Go with 1/125. This “180-degree rule” creates natural motion blur that mirrors how our eyes perceive movement.
Why does this matter? In photography, you’re freezing a single moment, so faster shutter speeds eliminate blur. But video is different—it’s a sequence of still images played rapidly. That slight motion blur between frames creates smooth, cinematic movement. Without it, your footage looks choppy and unnatural, almost strobe-like.
Here’s a practical example: film someone walking across the frame at 1/1000 shutter speed, and their movement will appear stuttery and unpleasant. Drop to 1/50 (at 24fps), and suddenly the motion flows beautifully.
Of course, there are exceptions. Action sequences sometimes use faster shutter speeds (like 1/200 at 24fps) for that intense, gritty look you’ve seen in battle scenes. Conversely, some filmmakers break this rule deliberately for creative effect. But master the 180-degree rule first—it’s your foundation for professional-looking video.
When to Break the Rules for Creative Effect
While the 180-degree shutter rule provides a solid foundation, some of your most memorable footage will come from intentionally breaking it. Think of it as your creative license to experiment.
For high-energy action sequences—sports, dance performances, or fight choreography—try increasing your shutter speed to 1/500 or even 1/1000. This creates crisp, staccato movements that emphasize speed and intensity. You’ll notice each frame becomes sharper, making fast motion feel more explosive and dynamic. It’s the same technique used in saving Private Ryan’s intense battle scenes.
Conversely, slowing your shutter speed to 1/50 or 1/30 introduces dreamy motion blur that works beautifully for romantic montages, nostalgic sequences, or surreal storytelling. The additional blur softens movements and creates an ethereal quality that standard settings can’t achieve.
Music videos frequently embrace these creative departures—watch how directors alternate between razor-sharp club scenes and blurred, flowing transitions. The key is intentionality: break the rule when it serves your story, not because you forgot to adjust your settings. Start by shooting test footage at various shutter speeds in similar lighting conditions, then review how each affects the emotional impact of your scene.
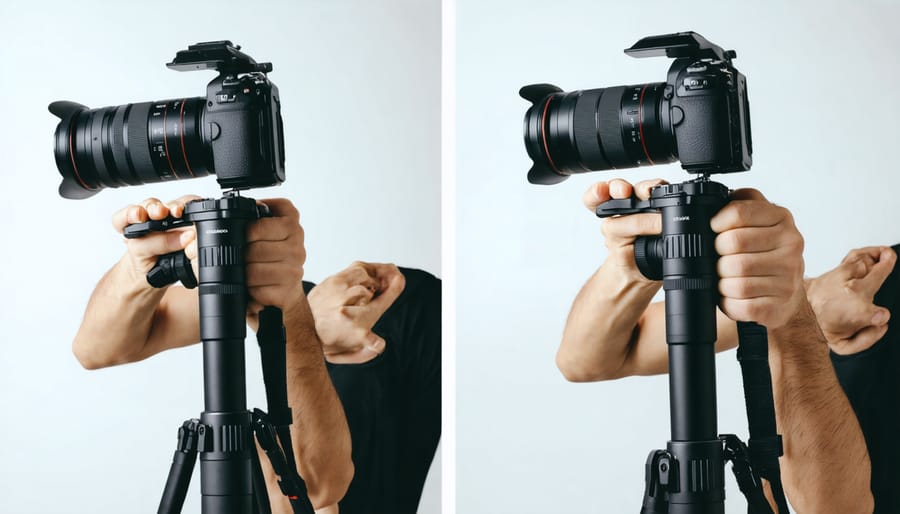
Mastering Camera Movement Without Expensive Gear
Handheld Techniques That Actually Work
Great handheld footage starts with your foundation—literally. Stand with feet shoulder-width apart, knees slightly bent to act as natural shock absorbers. Tuck your elbows tight against your ribs, creating a stable triangle between your body and the camera. This proper camera holding technique becomes even more critical for video, where every micro-movement translates to visible shake.
Breathing matters more than you’d think. Take a breath before starting your shot, then breathe slowly and steadily through your nose while recording—never hold your breath, as this creates tension and eventual shake. For walking shots, step heel-to-toe rather than flat-footed, which creates a gliding motion instead of bouncing. Think of yourself as a human gimbal, bending at the knees to absorb vertical movement.
When panning or tilting, move from your core, not your arms. Rotate your entire torso as one unit, keeping your arms locked in position relative to your body. Practice these movements without recording first—smooth handheld work is about muscle memory and intentional control.
Stabilization Options at Every Budget Level
Smooth footage doesn’t require a Hollywood budget—you just need the right tool for your shooting situation. **Gimbals** have become the go-to stabilizer for run-and-gun videography, offering fluid motion while walking or tracking subjects. Entry-level options start around $100, though professional three-axis gimbals cost considerably more. They’re perfect for documentary-style work and events where you’re constantly moving.
**Monopods** provide an affordable middle ground between handheld and tripod work. They reduce fatigue during long shoots while adding just enough stabilization for static or slow-panning shots. Think of them as your best friend for wedding ceremonies or interviews where you need mobility with minimal shake.
**Sliders** create those cinematic horizontal or vertical moves that elevate production value instantly. A basic 24-inch slider runs under $150 and works beautifully for product videos, interviews, or B-roll. The limitation? You’re confined to short, repeatable movements rather than following action.
**Shoulder rigs** distribute camera weight across your body, making them ideal for longer handheld takes with heavier camera setups. They’re particularly useful when shooting with cinema lenses or external monitors. While they won’t eliminate shake like gimbals do, they provide natural, documentary-style movement that often feels more authentic than perfectly stabilized footage.
Static Shots That Tell Dynamic Stories
A locked-down camera doesn’t mean static storytelling. Your photography skills with composition techniques translate directly to compelling video—you just need to think in motion.
Position subjects so they move through your frame’s natural leading lines. A person walking from background to foreground creates depth and scale without any camera movement. Similarly, use shallow depth of field to separate your subject from the environment, letting their motion tell the story against a beautifully blurred backdrop.
Layer your shots with foreground, middle ground, and background elements. When your subject moves between these layers, you create visual interest and three-dimensionality. A chef’s hands working in the foreground while kitchen activity continues behind them feels alive and engaging.
The rule of thirds becomes even more powerful in video—leave space for your subject to move into, not out of. This anticipates action and keeps viewers engaged. Remember, in static videography, every element within your frame should contribute to the narrative through position, movement, or context.
Lighting Video Like a Cinematographer
The Crucial Difference Between Flash and Continuous Light
One of the most fundamental shifts when moving from photography to video is understanding that your trusty speedlights and studio strobes won’t help you here. Video cameras need continuous light throughout the entire recording—not just a split-second burst of illumination. This single difference reshapes your entire lighting approach.
Think about it: a flash fires for perhaps 1/1000th of a second, freezing a moment in time. Video, however, captures 24, 30, or even 60 frames every second, and each of those frames needs consistent, even lighting. This means investing in LED panels, tungsten lights, or fluorescent fixtures that can maintain steady output for extended periods.
This shift has real budget implications. While you might own several powerful flashes that cost a few hundred dollars each, continuous lights capable of matching that output typically cost significantly more and consume more power. You’ll also notice they generate heat—sometimes considerable amounts—which affects both your subjects’ comfort and your shooting environment.
The practical upside? What you see is truly what you get. There’s no more guessing about how your flash will render the scene. You can observe shadows, highlights, and color temperature in real-time, making adjustments before you even press record.
Building Your First Video Lighting Kit
Starting your video lighting journey doesn’t require breaking the bank, but it does mean thinking differently than you might for still photography. Your camera flash won’t help you here—video demands continuous light sources that let you see exactly what you’re capturing in real-time.
For a versatile foundation, invest in two LED panels first. Look for bi-color options (adjustable between 3200K-5600K) with at least 95 CRI rating to ensure accurate color reproduction. A larger panel serves as your key light, while a smaller one handles fill duties. Position them at different intensities to create depth rather than flat, even illumination.
Don’t overlook practical lights—the lamps, candles, or fixtures visible in your frame. They add authenticity and dimension to indoor scenes. A simple desk lamp can become both a motivated light source and a compositional element that tells your story.
Reflectors remain photography’s most underrated tool in video work. A 5-in-1 reflector kit costs little but solves countless lighting challenges. White bounce softens harsh sunlight, silver adds punch when you need extra kick, and black flags control spill and create negative fill for dramatic contrast.
Start with this core trio—two LEDs, practicals, and reflectors—and you’ll handle most documentary-style shoots, interviews, and creative projects. As you grow, add diffusion materials, gels, and grip equipment, but master these basics first. Quality light matters more than quantity of gear.
Focus Techniques That Keep Subjects Sharp
Manual Focus Skills You Need to Develop
Manual focus in video requires a different skillset than photography because you’re tracking moving subjects through time rather than capturing single moments. The good news? Your camera likely has built-in tools to help you master this essential technique.
**Focus peaking** is your first ally—it highlights in-focus areas with colored edges on your LCD or viewfinder. Enable this feature and practice tracking subjects as they move toward and away from you. Start with slow, predictable movements before tackling faster action.
**Magnification** (or punch-in focus) lets you digitally zoom into your frame while setting up shots. Use this to nail critical focus on eyes or key details before you hit record. Many videographers check focus this way, then zoom back out to compose their shot.
The real secret? Practice pulling focus between two predetermined points—called focus marks. Place two objects at different distances, mark their focus ring positions with tape, and practice smoothly transitioning between them. This muscle memory becomes invaluable during actual shoots.
Finally, shoot at slightly narrower apertures (f/4-f/5.6) when learning. This gives you more margin for error while you develop the coordination to follow-focus smoothly. As your skills improve, you can confidently shoot wider open for that cinematic look.
Modern Autofocus Systems That Actually Help
Modern autofocus has become genuinely helpful for video work, especially continuous AF (AF-C) and eye-tracking features. When shooting interviews or run-and-gun documentary footage, eye-tracking can lock onto your subject’s face and maintain sharp focus even as they move—something that’s saved countless takes for solo videographers who can’t pull focus manually.
These systems work best in good lighting with clear subject separation from the background. In my experience, mirrorless cameras like Sony’s Real-time Tracking or Canon’s Dual Pixel AF II shine when your subject maintains a relatively consistent distance from the camera. They’re perfect for talking-head videos, vlogging, or tracking a subject moving laterally across the frame.
However, understand their limitations. Autofocus can hunt unpredictably in low light, with low-contrast subjects, or when objects cross between camera and subject—often at the worst possible moment. Fast pans or intentional focus transitions may look robotic compared to smooth manual pulls. For narrative work or anything requiring precise creative control over focus timing, manual focus with focus peaking remains essential. Think of autofocus as a reliable assistant, not a replacement for understanding focus fundamentals.
Audio Fundamentals That Photographers Often Miss
Your Camera’s Built-In Mic Isn’t Good Enough
Here’s a truth that catches many photographers off-guard when they start shooting video: your camera’s built-in microphone simply won’t deliver the audio quality your visuals deserve. These tiny omnidirectional mics pick up everything—camera handling noise, autofocus motors, and that annoying air conditioning hum you never noticed before. They’re also positioned too far from your subject, resulting in hollow, distant sound that screams “amateur.”
Professional videographers rely on dedicated audio solutions. **Lavalier mics** (also called lav mics or lapel mics) clip directly onto your subject’s clothing, capturing clear dialogue while remaining nearly invisible on camera. They’re perfect for interviews and talking-head content.
**Shotgun mics** mount on your camera’s hot shoe or boom pole, using a highly directional pickup pattern to isolate sound from where you’re pointing the camera. They’re versatile for run-and-gun shooting and documentary work.
For ultimate control, **handheld audio recorders** like the Zoom H5 capture broadcast-quality sound independently. You’ll sync audio in post-production, but the quality improvement is dramatic. Think of it this way: viewers will forgive slightly soft focus, but they’ll abandon videos with poor audio within seconds.
Simple Audio Recording Practices That Make a Difference
Good audio starts before you press record. Invest in headphones—what sounds acceptable through your camera’s tiny speaker often reveals unwanted noise when properly monitored. Always check your recording levels before capturing important moments; aim for peaks around -12dB to -6dB, which provides headroom and prevents distortion.
Background noise is your silent enemy. Turn off air conditioning, refrigerators, and fans when possible. Close windows to eliminate traffic sounds. Even small details like removing jingling keys from pockets matter. If you’re working outdoors, position subjects with wind at their backs and use windscreens on your microphones.
Here’s a practice many videographers overlook: capture 30-60 seconds of “room tone”—the ambient sound of your location with everyone silent and still. This seemingly empty audio becomes invaluable during editing when you need to smooth transitions between clips or fill gaps. Think of it as the audio equivalent of shooting reference frames for color grading.
Shooting for the Edit: Planning Your Coverage
The Essential Shot List Every Scene Needs
Every successful scene relies on capturing multiple shot types that work together in post-production. Start with **establishing wide shots** that show your full environment—think of these as the context your viewer needs to understand where the action happens. These are particularly crucial after location changes.
Next, capture **medium shots** that frame your subject from the waist up. These workhorses of visual storytelling balance context with intimacy, perfect for dialogue or demonstrations. **Close-ups** draw viewers into emotional moments or highlight important details—a hand gesture, facial expression, or product feature that deserves emphasis.
Don’t forget **cutaways**—those seemingly minor shots of related details that become editing gold. Filming a cooking tutorial? Capture those bubbling pots, chopping hands, and ingredient close-ups. These shots disguise jump cuts and add visual variety that maintains viewer engagement.
Finally, shoot **transition elements**: someone walking through a doorway, a pan across the landscape, or an object entering frame. These natural bridges between scenes create smooth, professional-looking sequences. As a practical rule, capture at least three different shot sizes for every key moment—your future editor (even if that’s you) will thank you for the flexibility.
B-Roll That Actually Enhances Your Story
B-roll is the supporting footage that transforms a basic video into a compelling story. While your main footage (A-roll) captures your primary subject—whether that’s an interview, product demonstration, or event—b-roll provides the visual context that keeps viewers engaged and helps illustrate your narrative.
Think of b-roll as the equivalent of detail shots in photography. If you’re documenting a potter at work, your A-roll might be a straight-on shot of them discussing their craft, but your b-roll would include close-ups of clay-covered hands, spinning wheels, glazes being applied, and finished pieces on shelves. These supporting shots add texture and dimension to your story.
The key to effective b-roll is intentionality. Before you shoot, ask yourself: what details help tell this story? Look for establishing shots that show location and context, close-ups that reveal texture and process, and transitional footage that connects scenes naturally. Capture varied focal lengths and angles—wide shots for context, medium shots for action, and tight shots for emotion and detail.
Always shoot more b-roll than you think you’ll need, holding each shot steady for at least 10 seconds to give yourself editing flexibility later.
Common Mistakes Photographers Make When Starting Video
Moving from still photography to video is an exciting transition, but I’ve seen countless talented photographers stumble over the same preventable mistakes. Understanding these pitfalls before you encounter them will save you hours of frustration and unusable footage.
The most common technical error? Using the wrong shutter speed. As a photographer, you’re accustomed to adjusting shutter speed freely for exposure. In video, however, the 180-degree shutter rule applies—your shutter speed should be double your frame rate. Shooting at 24fps means using 1/50th second (or 1/48th if available). Straying from this creates unnaturally stuttery or overly smooth motion that immediately signals amateur work. If you need to control exposure, reach for neutral density filters instead.
Panning movements present another challenge. That quick, decisive pan that works for composing a still image becomes a jarring mess in video. Smooth, deliberate movements require practice and often a fluid-head tripod or gimbal. Start your movements slowly, maintain consistent speed, and ease out gently at the end. Think of it as the difference between a quick glance and a purposeful gaze.
Perhaps the biggest oversight is treating audio as an afterthought. Your camera’s built-in microphone simply won’t cut it for professional results. Invest in an external microphone early—even an affordable shotgun mic dramatically improves production value. I learned this the hard way after capturing beautiful footage of an interview that was completely unusable due to echo and ambient noise.
Finally, many photographers shoot video without considering the editing workflow. Unlike selecting single images, video editing requires continuity, varied shot sizes, and extra footage for transitions. Shoot with your edit in mind, capturing establishing shots, close-ups, and b-roll. This forward-thinking approach transforms disconnected clips into compelling stories.
The beauty of videography is that you already have the foundation. Your understanding of composition, lighting, and exposure translates directly to motion capture—you’re simply adding time as another dimension to your visual storytelling. The camera settings that seemed intimidating at first? They’re just extensions of principles you already know. The difference lies in continuous application rather than capturing a single moment.
Start small and build your confidence gradually. Choose a simple project that excites you: document a weekend morning routine, capture your local farmer’s market, or film a friend making their signature dish. These straightforward scenarios let you practice camera movements, test different frame rates, and experiment with audio without the pressure of a major production. You’ll quickly discover which techniques feel natural and where you need more practice.
Remember that all the technical knowledge—proper shutter speeds, smooth gimbal moves, pristine audio levels—serves one ultimate purpose: telling compelling stories. The best videographers aren’t necessarily those with the fanciest gear or most complex techniques; they’re the ones who use their tools purposefully to evoke emotion and maintain viewer engagement.
Give yourself permission to make mistakes. Your first videos won’t be perfect, and that’s completely normal. Every professional videographer started exactly where you are now. Review your work critically but kindly, identify what worked and what didn’t, then apply those lessons to your next project. The learning curve is steep initially, but progress comes quickly once you start shooting regularly.