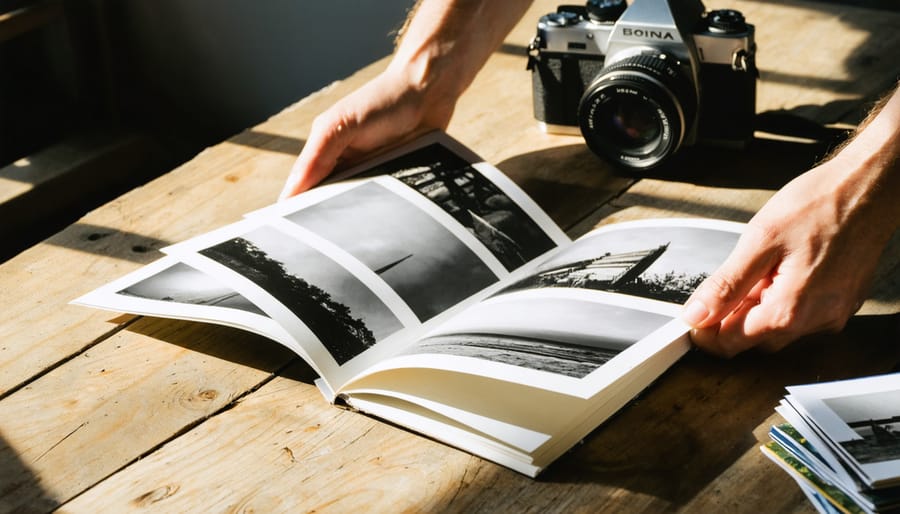
Gather your strongest 15-30 photographs around a single theme or visual narrative before you touch any design software. This focused curation forms the backbone of any compelling photo zine—whether you’re documenting your neighborhood, exploring abstract light studies, or sharing a personal photo essay. The editing process separates memorable zines from forgettable ones.
Design your layout using free tools like Canva or Adobe InDesign’s free trial, keeping spreads simple with generous white space. Most successful photo zines follow an 8.5×11-inch or 5.5×8.5-inch format because these dimensions print affordably and fit comfortably in readers’ hands. Plan for multiples of four pages (including covers) since standard printing requires this configuration.
Print your first edition in small batches of 25-50 copies through local print shops or online services like Blurb or Mixam, where costs typically range from $3-8 per copy depending on page count and paper quality. Small runs let you test your concept without financial risk and make adjustments for future editions based on real feedback.
Distribute through independent bookstores, coffee shops, or online platforms like Etsy and Big Cartel, pricing your zine between $8-15 to cover costs while remaining accessible. Many photographers also trade zines with other creators or mail them to zine libraries, building community connections that often matter more than profit. The physical object you create becomes a tangible portfolio piece that potential clients can hold, flip through, and remember long after scrolling past digital images.
What Makes a Photo Zine Different from a Photobook

The Raw, Unpolished Appeal
There’s something liberating about photo zines that you won’t find in glossy portfolio books or perfectly calibrated digital galleries. The beauty lies in their imperfections—slightly misaligned pages, visible staples, ink that varies in density from one copy to the next. These aren’t flaws; they’re features that make each zine feel genuinely handmade and personal.
For many photographers, this raw aesthetic offers an antidote to the endless pursuit of technical perfection that dominates digital photography. Your images don’t need to be shot on the latest camera or printed at the highest resolution. In fact, grainy film scans, experimental darkroom prints, and even photocopied images can look completely at home in a zine format.
This lo-fi quality also creates an intimate connection between creator and viewer. When someone holds your zine, they’re experiencing something tangible that you’ve physically assembled. The slightly rough-cut edges and hand-folded pages tell a story beyond the photographs themselves—they communicate authenticity and creative intent.
That’s why zines resonate particularly well with documentary photographers, street photographers, and artists exploring personal projects. The medium doesn’t demand perfection; it invites experimentation and rewards genuine expression over polished presentation.
When to Choose a Zine Over a Traditional Photobook
Zines shine brightest when your project prioritizes creative freedom and authentic connection over mass appeal. If you’re working on experimental photography that pushes boundaries—think abstract work, alternative processes, or conceptual series that might not fit traditional publishing molds—a zine gives you complete creative control without compromise. There’s no editor questioning your artistic choices or demanding changes to make your work more commercially viable.
Limited edition projects are natural fits for the zine format. Planning a series of only 50 or 100 copies? Zines make small print runs economically feasible, whereas traditional photobooks often require minimum orders that inflate costs. This approach works particularly well for documenting time-sensitive events, seasonal projects, or evolving bodies of work where you want to capture a specific moment before moving forward.
Niche topics that wouldn’t interest mainstream publishers find their perfect home in zines. Whether you’re photographing abandoned bowling alleys in the Midwest, documenting a local skateboarding community, or creating a visual study of brutalist architecture in your city, zines connect you directly with audiences who genuinely care about these specific subjects.
Community projects and collaborative efforts also thrive in zine format. When you’re gathering work from multiple photographers for a group show, fundraiser, or community documentation project, zines offer an affordable way to create something tangible that everyone involved can share and distribute. The DIY spirit of zines naturally complements grassroots initiatives where the process of creating together matters as much as the final product itself.
Designing Your Photo Zine: Where Creative Freedom Meets Intention

Layout and Image Sequencing That Tells Your Story
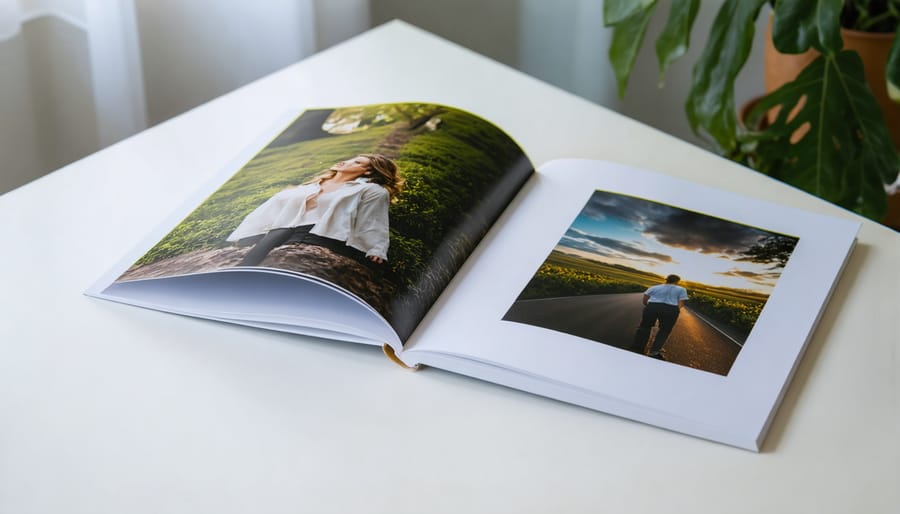
The way you arrange images in your photo zine can transform a collection of individual photographs into a cohesive visual narrative. Think of sequencing as the rhythm and pacing of your zine—just like chapters in a book, each spread should guide your viewer through an intentional journey.
Start by laying out all your photos physically or digitally. Look for natural connections: visual echoes like repeated colors, shapes, or subjects that create continuity. Photographer Alec Soth’s “Sleeping by the Mississippi” exemplifies masterful sequencing, using portraits and landscapes that build a meditative atmosphere through careful pacing and thematic repetition.
Consider the principles of juxtaposition. Placing contrasting images side by side—a quiet moment next to something chaotic, or a close-up followed by a wide shot—creates visual tension and keeps viewers engaged. Alternatively, gradual transitions where images subtly shift in tone or subject matter can create a dreamlike, flowing experience.
Pay attention to momentum. Strong opening and closing images act as bookends, while the middle pages control tempo. You might cluster several images on one spread for energy, then follow with a single powerful image on the next to let viewers pause and reflect.
Real-world tip: create a dummy version of your zine by printing low-resolution images and assembling them. This lets you physically experience the page turns and adjust sequencing before committing to final printing. Don’t be afraid to edit ruthlessly—sometimes removing an image, even a technically excellent one, strengthens the overall narrative. Your zine’s story matters more than including every favorite shot.
Working With Paper, Text, and Mixed Media
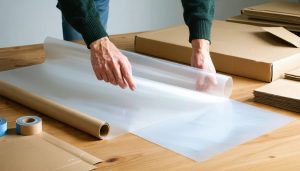
One of the most exciting aspects of creating a photo zine is the tactile experience you can craft through material choices. Unlike digital publications, zines invite you to consider how paper weight, texture, and finish interact with your photographs. A rough, uncoated newsprint can give your images a raw, immediate quality that feels authentic to zine culture’s DIY roots. Conversely, a smooth matte stock might lend elegance to quieter, more contemplative work. Many zinemakers mix paper stocks within a single publication, using translucent vellum as section dividers or switching to colored paper for emphasis.
Text plays a crucial role beyond simple captions. Consider how handwritten notes, typewriter text, or rubber stamp lettering can add personality and voice to your publication. Some photographers integrate journal entries alongside images, creating a more intimate narrative. Others use found text, newspaper clippings, or poetry to create unexpected connections with their photographs. The placement matters too—text doesn’t always need to sit politely below an image. Experiment with overlays, margins filled with notes, or text that bleeds across page spreads.
Mixed media approaches open even more creative possibilities. Collage elements can frame or interrupt photographic sequences, adding layers of meaning. Some zinemakers incorporate their own drawings, creating a dialogue between photography and illustration. You might try adding physical elements like stickers, stamps, or even small pockets that hold loose prints or ephemera.
Remember that traditional printmaking techniques like screen printing or risograph can be combined with photographic images for unique effects. The beauty of zines lies in their experimental nature—there’s no wrong approach. Start with one or two techniques that resonate with your vision, and let the work guide you toward what feels authentic to your creative voice.
Printing Options: From DIY to Professional Short Runs
Home Printing and Copy Shop Solutions
Printing your photo zine at home or through a local copy shop is often the most accessible and budget-friendly starting point, especially for your first edition or small runs under 50 copies. Let’s explore what you’ll need and what to expect from this approach.
For home printing, a decent inkjet printer can produce surprisingly professional results. Canon’s PIXMA Pro series or Epson’s EcoTank models work well for photo-heavy projects, though even standard consumer inkjets can handle simple designs. The key limitation is printing speed—expect to spend several hours on a 25-copy run of a 20-page zine. Laser printers excel at text-based zines and offer faster production, but they typically don’t reproduce photographic detail as smoothly as inkjets.
Paper selection dramatically impacts your final product’s look and feel. For most photo zines, 32-pound or 80 GSM paper strikes a good balance between quality and affordability, preventing ink bleed-through while keeping costs reasonable. You can find suitable paper at office supply stores for around $10-15 per ream. Heavier cardstock works beautifully for covers, giving your zine that satisfying tactile quality.
Local copy shops like FedEx Office or independent print centers offer another practical option. They provide access to professional-grade equipment without the investment, and staff can often help troubleshoot issues with color accuracy in printing. Expect to pay $0.10-0.50 per page depending on paper quality and color versus black-and-white printing.
Set realistic expectations: home and copy shop prints won’t match gallery-quality fine art prints, but they absolutely capture the authentic, handmade spirit that makes zines special. Many successful zine makers deliberately embrace the slight imperfections as part of their aesthetic.
Short-Run Digital Printing Services
Once you’ve finalized your zine design, it’s time to explore printing options. The good news? Short-run digital printing has revolutionized the zine-making landscape, making small print runs both affordable and accessible.
Print-on-demand services like Blurb, Mixam, and Lulu have become popular choices for photographers. These platforms typically require no minimum order—you can literally print one copy if you’d like. Prices vary based on page count, paper quality, and binding style, but expect to pay anywhere from $8 to $25 per copy for a 40-page zine with saddle-stitch binding. The convenience factor is significant: you upload your PDF, choose specifications, and receive finished zines at your doorstep. However, review samples first to align your print quality expectations with what these services deliver.
Local print shops offer another compelling option, especially if you’re printing larger quantities. Many commercial printers now offer digital services with minimums as low as 25 copies. The advantage here is relationship-building—you can physically inspect paper samples, discuss your vision face-to-face, and often negotiate better pricing on repeat orders. Cost per unit typically drops to $4-10 for runs of 50-100 copies.
Online specialists like Newspaper Club and Peecho cater specifically to independent publishers. These services often provide unique paper stocks and finishing options that give your zine a distinctive feel. Minimum quantities usually start around 25-50 copies, with per-unit costs ranging from $5-15 depending on specifications.
When comparing options, consider turnaround time, shipping costs, and customer support alongside the base price. Request sample packs from multiple vendors before committing to ensure the final product matches your creative vision.
Binding Methods That Match Your Vision and Budget
The binding method you choose does more than hold your pages together—it shapes how readers interact with your photo zine and influences the overall aesthetic. Let’s explore several binding techniques that work beautifully for photo zines, each offering different advantages depending on your vision and resources.
Saddle stitch binding remains the most popular choice for photo zines, and for good reason. This method involves folding sheets in half and stapling through the spine with a long-reach stapler. It’s cost-effective, allows your zine to lay relatively flat when opened, and works perfectly for zines up to about 60 pages. Most copy shops offer saddle stitch binding for just a few dollars per copy. The limitation? Your page count must be divisible by four, which requires some planning during layout.
Perfect binding gives your zine a more polished, book-like appearance with a flat spine where you can print your title. This method glues individual pages together at the spine and wraps them with a cover. While it looks professional, perfect binding requires a minimum page count (usually 28-32 pages) and won’t lay flat without specialized techniques. Print-on-demand services typically charge more for perfect binding, but the result feels substantial in readers’ hands.
For those seeking something more artisanal, Japanese stab binding creates a stunning visual element. This traditional technique uses thread sewn through holes along the spine’s edge, leaving decorative stitching visible on the cover. You can complete this by hand with minimal tools—just a drill or awl for punching holes, waxed thread, and a needle. It works with any page count and allows pages to turn freely, though it requires slightly wider margins on the binding edge.
Wire-o or spiral binding offers maximum functionality—pages can turn a full 360 degrees and lay completely flat, ideal for zines meant as references or workbooks. However, some photographers find the mechanical appearance detracts from the artistic feel.
Consider your zine’s purpose when choosing. A documentary photo essay might benefit from the understated simplicity of saddle stitch, while an experimental art project could embrace the handmade character of stab binding.
Getting Your Photo Zine Into Hands (Not Just Drawers)
Direct Sales and Zine Fairs
Selling your photo zine directly puts you in control of both pricing and profit margins. Start by setting up a simple online store through your website using platforms like Shopify, Big Cartel, or even PayPal buttons. Price your zines to cover printing costs, packaging materials, and your time, typically ranging from $8 to $25 depending on production quality and page count. Many zine makers find that pricing around $12 to $15 hits a sweet spot for handmade publications.
Physical zine fairs offer invaluable face-to-face connections with buyers who appreciate the tactile nature of photo zines. Research events like LA Zine Fest, Brooklyn Zine Fest, or smaller local gatherings where you can rent a table for $30 to $100. Bring at least 20 to 30 copies, business cards, and a sign displaying your pricing. These events attract your ideal audience and provide immediate feedback on your work.
Photography festivals, gallery openings, and art markets also welcome zine sellers. Contact local independent bookstores, coffee shops, and galleries about consignment arrangements, where they typically take 30 to 40 percent commission. This extends your reach without requiring your presence.
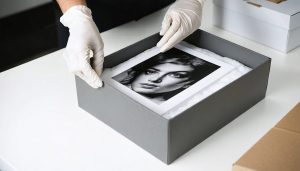
For online sales, factor in shipping your printed work carefully. Flat mailers protect zines better than envelopes, and offering combined shipping for multiple purchases encourages larger orders. Always communicate shipping timelines clearly, especially if you’re printing on demand. Building relationships through direct sales creates a dedicated audience for future zine releases.

Building a Community Around Your Zine
Building a community around your photo zine doesn’t require abandoning the DIY ethos that makes zine culture special. Start by sharing behind-the-scenes glimpses of your creative process on Instagram or your preferred platform. Show work-in-progress spreads, printing tests, or even the chaotic beauty of your workspace. This transparency invites people into your world without making it feel like traditional marketing.
Email lists remain surprisingly powerful for zine makers. A simple quarterly newsletter announcing new releases and sharing photography tips keeps your audience engaged without overwhelming them. Unlike social media algorithms, you own this direct connection to readers who genuinely want to hear from you. Consider offering subscribers early access to new editions or occasional digital-only bonus content.
Embrace zine trading culture by connecting with other photographers and makers. Reach out to creators whose work resonates with you and propose trades. Many cities host zine fairs or DIY publishing events where you can meet fellow makers face-to-face. These connections often lead to collaborative projects or cross-promotion opportunities that benefit everyone involved.
Remember that building community takes time. Focus on creating work that matters to you first, then share it authentically. The right audience will find you because they connect with your unique photographic vision. Tools that streamline your workflow can free up more time for these meaningful community-building activities, allowing you to focus on what matters most: making great zines and connecting with fellow enthusiasts.
Real Costs: What You’ll Actually Spend
Let’s talk real numbers, because understanding what you’ll actually spend is crucial for planning your first photo zine project.
For an ultra-budget approach—think DIY all the way—you can produce 25 copies for under $50. This means printing at home or using an office printer, then stapling or saddle-stitching by hand. If you’re printing on standard letter-size paper at a local print shop, expect to pay roughly $0.10-0.25 per page depending on whether you choose black-and-white or color. A 24-page zine (six sheets folded) runs about $1.50-3.50 per copy in materials alone. Add basic cardstock covers and you’re looking at $40-75 for 25 copies.
Moving up to short-run professional printing through services like Mixam, Blurb, or local print shops, costs increase but so does quality. For 50 copies of a standard 32-page zine with color interiors, expect $200-400 depending on paper weight and binding. Digital printing at this level offers better color consistency than home printers and gives your work a more polished feel.
The sweet spot for many photographers is the 100-copy range. At this quantity, per-unit costs drop significantly—often to $3-6 per copy for a professionally printed, saddle-stitched zine. That’s $300-600 total, which becomes manageable when you plan to sell or trade some copies.
Don’t forget shipping costs if you’re distributing your zine. Factor in mailers, protective packaging methods, and postage—typically $3-8 per domestic shipment. If you’re printing 100 zines and mailing half of them, add another $150-400 to your budget.
Start small, test your concept, then scale up as you find your audience.
If you’ve made it this far, you’re ready to stop overthinking and start creating. The beauty of photo zines lies in their imperfection—the slightly misaligned staples, the experimental layout that doesn’t quite work, the bold choice that breaks every design rule you’ve learned. These aren’t flaws; they’re signatures of something made by hand and heart.
Starting your first zine doesn’t require professional equipment, substantial funds, or even formal training. A home printer, some borrowed paper, and twenty photographs you’ve been sitting on are enough. The barrier to entry has never been lower, and the rewards extend far beyond digital sharing. Holding a physical object that contains your work creates a different relationship with your photography—it becomes tangible, shareable in intimate ways, and permanent in a manner that social media feeds can never replicate.
Your first zine won’t be perfect, and that’s precisely the point. Each project teaches you something about sequencing, storytelling, and what you truly want to communicate through your images. The photographers who inspire you didn’t start with flawless productions either. They started with curiosity and commitment to seeing their vision through to the final staple. Now it’s your turn.