Shoot in RAW format and disable your camera’s built-in HDR mode—the compressed files and baked-in processing limit your ability to recover shadow and highlight detail during post-processing. Your camera’s sensor already captures far more dynamic range than a standard JPEG reveals, and proper RAW development unlocks this hidden information without the artificial halos and oversaturated colors that plague automated HDR tools.
Select the right camera profile in your RAW converter before adjusting exposure sliders. Adobe Standard, Camera Standard, and manufacturer-specific profiles interpret your sensor data differently, with some prioritizing contrast while others preserve more tonal information in extreme ranges. Testing profiles with your high-contrast images reveals which foundation gives you the cleanest starting point for highlight recovery and shadow lifting.
Work your highlights and shadows sliders methodically, pulling down overexposed areas before lifting underexposed regions. This sequence prevents the muddy, flat appearance that occurs when you simultaneously crush both ends of the tonal range. Most RAW files contain 1-2 stops of recoverable highlight data and 2-3 stops in shadows—far exceeding what tone-mapping software typically manages without introducing noise and artifacts.
The frustration you feel when HDR images look fake stems from a simple misconception: dramatic dynamic range isn’t created through specialized processing modes, but rather through understanding how your camera profile and RAW adjustments interact with the data your sensor already captured. Master this relationship, and you’ll achieve natural-looking results that reveal every detail your scene contained.
What HDR Photography Really Means in the RAW Development World
Single-Shot HDR vs. Bracketed HDR: Which Approach Needs Better Profiles?
When it comes to HDR photography, you have two main paths: single-shot HDR (recovering shadows and highlights from one RAW file) or bracketed HDR (merging multiple exposures). Understanding how camera profiles affect each approach will transform your results.
Single-shot HDR relies entirely on your camera’s sensor dynamic range and how effectively your chosen profile interprets that data. Think of it like this: you’re asking one image to do all the heavy lifting. Your camera profile becomes crucial here because it determines how aggressively the software pulls detail from shadows and highlights. For instance, Adobe Standard profiles often clip highlights earlier than custom profiles designed for maximum dynamic range recovery. This approach works beautifully for scenes with moderate contrast, like overcast landscapes or evenly lit interiors, where you have roughly 10-12 stops of range to work with.
Bracketed HDR, on the other hand, captures multiple exposures at different brightness levels and merges them. Here’s where it gets interesting: the camera profile you apply during the merge process affects how those different exposures blend together. A profile with aggressive tone curves can create harsh transitions between merged exposures, producing that telltale artificial HDR look we’re trying to avoid.
Real-world example: photographing a sunset with foreground details. Single-shot HDR works if you expose for the midtones and have a profile optimized for shadow recovery. But if the sun is directly in frame, you’ll likely need bracketing to capture both the sun’s corona and deep shadow detail without clipping or excessive noise.
The verdict? Single-shot HDR needs better profiles because you’re maximizing one file’s potential. Bracketed HDR is more forgiving but still benefits from neutral, linear profiles during the merge process to maintain natural tonality.
How Camera Profiles Control Your HDR Starting Point
Adobe Standard vs. Camera Matching Profiles: The HDR Difference
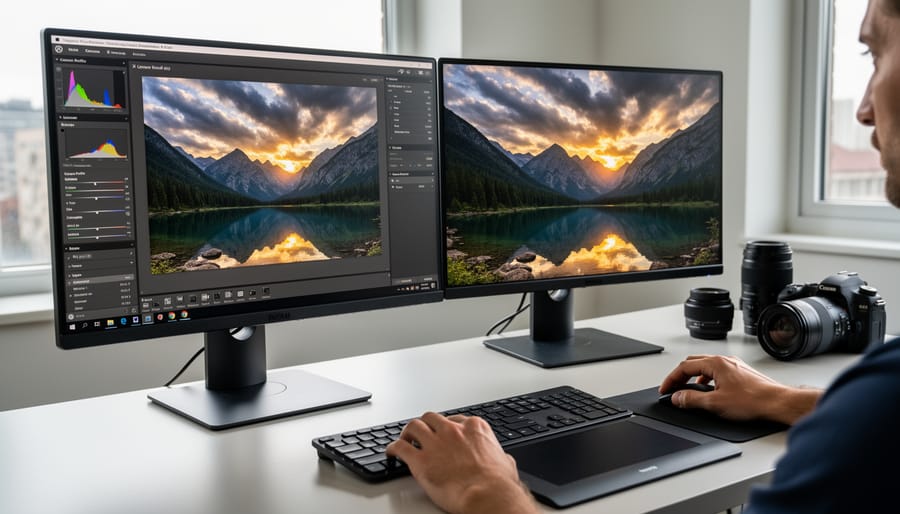
When you import a RAW file into Lightroom or Camera Raw, the software automatically applies a default profile to interpret your image data. Understanding how Adobe Standard differs from Camera Matching profiles is crucial for achieving natural-looking HDR results, especially when you’re recovering extreme highlights and shadows.
Adobe Standard is Adobe’s own interpretation of your camera’s sensor data. It’s designed to provide a neutral, flexible starting point that works well across various lighting conditions. This profile tends to render colors more conservatively and gives you maximum latitude for adjustments. When working with high dynamic range scenes, Adobe Standard typically preserves more detail in the highlight regions but may appear flatter initially.
Camera Matching profiles, on the other hand, are designed to mimic your camera manufacturer’s in-camera processing. You’ll see options like Camera Standard, Camera Landscape, or Camera Portrait. These profiles often apply more aggressive contrast and saturation curves right from the start, which can be both a blessing and a curse for HDR work.
Here’s the practical difference: imagine you’ve photographed a sunset scene with deep shadows in the foreground and a bright sky. With Adobe Standard, you’ll find pushing the Shadows slider to +100 and pulling Highlights to -100 produces a more balanced, natural-looking result. The transitions between tones remain smooth, and you’re less likely to see that telltale HDR glow or halos around objects.
Apply a Camera Landscape profile to that same image, and you’ll notice the aggressive contrast curve fights against your adjustments. Push those same sliders, and you might see blocked shadows that won’t open up cleanly, or highlights that take on an unnatural appearance because the profile has already compressed the tonal range.
The sweet spot? Start with Adobe Standard for maximum recovery flexibility, then consider switching to a Camera Matching profile after your adjustments if you want more punch. This approach gives you the technical control needed first, with creative interpretation second.
Why Your Camera’s Picture Style Doesn’t Matter (But Kind Of Does)
Here’s a common misconception that trips up photographers constantly: you carefully select your camera’s picture style before shooting RAW files, thinking you’re baking in those settings permanently. Then you wonder why your images look different when you open them in Lightroom or Capture One.
The reality is simpler than you think. When you shoot RAW, your camera’s picture style—whether that’s Standard, Landscape, Neutral, or any custom profile—doesn’t actually alter the RAW data itself. Think of it like this: the RAW file is the complete recipe with all the raw ingredients, while the picture style is just a suggestion note attached to it about how you might want to cook it.
What does get embedded is metadata that tells your RAW processor, “Hey, the photographer had Vivid mode selected.” Most RAW processors will read this and apply a similar starting point, but they’re using their own interpretation of what “Vivid” means. Adobe Camera Raw uses Adobe’s version, Capture One uses Phase One’s interpretation, and so on.
This is why the same RAW file can look noticeably different when you first open it in different software programs. The underlying data is identical—it’s just the initial rendering that varies.
Does this mean picture styles are completely irrelevant? Not quite. They affect your in-camera JPEG preview, which influences how you evaluate exposure and composition while shooting. If you’re chimping the LCD to check your shot, you’re seeing the picture style applied. For photographers who need accurate previews for critical color work, this matters more than you might expect.
The Essential RAW Development Workflow for Natural-Looking HDR
Setting Your Base Exposure: The Foundation That Makes or Breaks HDR
Before you touch a single shadow or highlight slider, you need to establish your exposure foundation. This is where many photographers trip up, and it’s a mistake that cascades through your entire edit.
Here’s the common workflow trap: you open your RAW file, immediately crank down the highlights slider to recover that blown sky, then start lifting shadows. The result? A flat, lifeless image that screams “overprocessed HDR.” You’ve essentially told your software to compress the tonal range before establishing what that range should be.
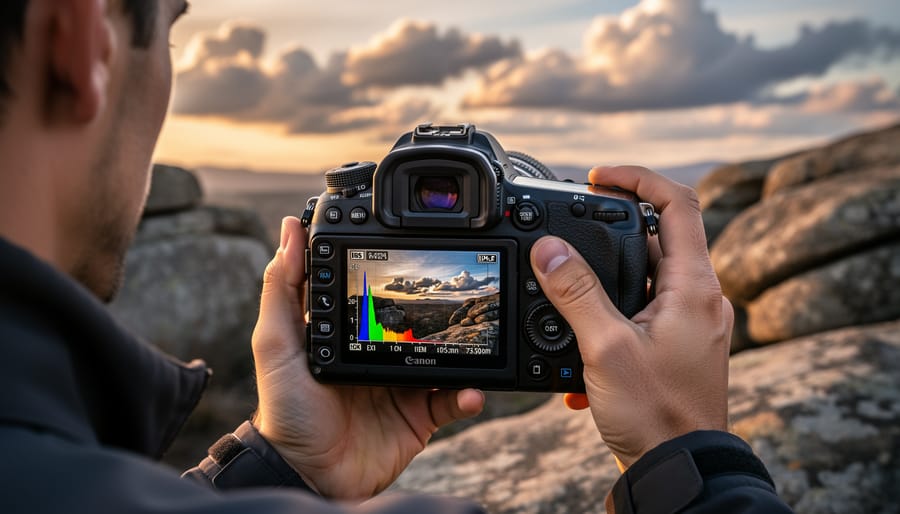
Instead, start with the exposure slider itself. Think of this as setting your midpoint, the anchor around which everything else pivots. Look at your histogram and identify where your midtones naturally fall. If your image is significantly underexposed, bring the exposure slider up first, typically between 0.5 to 1.5 stops. If it’s overexposed, pull it down accordingly.
The key insight here: the exposure slider affects your entire tonal range proportionally, while highlight and shadow sliders work in targeted zones. By establishing proper base exposure first, you’re giving those targeted adjustments breathing room to work naturally.
A practical example: shooting a landscape at golden hour, you might have exposed for the foreground, leaving the sky a bit hot. Rather than immediately hammering the highlights slider, first check if a modest exposure reduction of 0.3 to 0.5 stops brings everything into a more manageable range. Then apply your highlight recovery, which will now require less extreme adjustment.
This approach maintains tonal separation and preserves the micro-contrast that makes images feel dimensional rather than flat. You’re working with your camera’s captured data, not fighting against it.
Shadow and Highlight Recovery: How Far Can You Really Push?
Here’s the truth about shadow and highlight recovery: every camera sensor has limits, and knowing yours prevents that overdone HDR look we all want to avoid.
Modern full-frame sensors, particularly those from the past five years, typically allow you to push shadows up by +60 to +80 points before serious noise becomes objectionable. I’ve found that cameras like the Sony A7 IV or Canon R6 Mark II handle aggressive shadow lifting remarkably well at ISO 100-400. However, lift those same shadows at ISO 3200, and you’ll see color noise and banding appear around the +40 mark.
Highlights tell a different story. You can usually recover about +50 to +70 points in overexposed areas if you’ve shot in RAW and haven’t completely blown them to pure white. Once those pixels hit 255 across all channels, there’s simply no data to recover. This is why exposing to the right (ETTR) remains valuable—you’re preserving highlight information while accepting that shadow noise cleans up more easily than missing highlight detail.
Older crop-sensor cameras and anything pre-2015 show limitations faster. An older Canon Rebel or Nikon D3300 might only tolerate +40 in the shadows before banding appears, especially in smooth gradient areas like skies.
Watch for the telltale signs you’ve pushed too far: blocky patches in smooth tones (banding), unnatural color shifts in shadows that look muddy or greenish, and halos around high-contrast edges. If your image looks like a video game rendering rather than a photograph, you’ve crossed the line.
The practical approach? Start conservative. Push shadows to +40 and highlights to -40, then evaluate. Gradually increase if needed, but zoom to 100 percent and check areas like blue skies and dark clothing. These reveal problems first. Remember, subtlety wins—viewers should notice your subject, not your processing.
Creating and Managing Custom Camera Profiles for Consistent HDR Results
The 15-Minute Profile Tweak That Saves Hours of Editing
Before you process a single HDR image, spend fifteen minutes creating a custom camera profile preset that serves as your optimized starting point. This simple calibration tweak can eliminate hours of repetitive slider adjustments across multiple images.
Start by opening a representative RAW file from your HDR collection—ideally one with both shadow detail and bright highlights you want to preserve. Navigate to Lightroom’s Calibration panel at the bottom of the Develop module. This often-overlooked section is where the magic happens for HDR photographers.
Begin with the Profile dropdown menu. Switch from Adobe Standard to Adobe Landscape if you’re shooting nature or architectural subjects with expansive dynamic range. The Landscape profile naturally pulls more detail from highlights while maintaining shadow integrity, giving you a better foundation than the neutral Standard profile.
Next, adjust the Shadow Tint slider. Move it slightly toward green (typically -5 to -10) to counteract the magenta color cast that often appears in recovered shadows when you’re pulling significant detail from dark areas. This small adjustment prevents that telltale “HDR look” where shadows appear unnaturally tinted.
For the Primary color sliders, make subtle movements. Shift Red Primary toward orange (+5 to +8) to warm skies naturally, and move Blue Primary slightly toward cyan (+3 to +5) to prevent oversaturated blues in highlight areas. These micro-adjustments create a more balanced tonal response across your entire dynamic range.
Once satisfied, save these calibration settings as a preset by clicking the plus icon in the Presets panel. Name it something descriptive like “HDR Base – Landscape” so you’ll recognize it instantly. Now every HDR image you import can start from this optimized baseline, requiring only minor exposure and local adjustments rather than rebuilding your entire tonal foundation from scratch.
Software Showdown: How Different RAW Processors Handle HDR Development
Not all RAW processors handle HDR development equally, and understanding these differences can save you hours of frustration. Let’s break down how the major players approach this critical workflow.
Adobe Lightroom remains the most popular choice for good reason. Its tone-mapping algorithms excel at recovering shadow detail without introducing excessive noise, and the recent updates to Highlights and Shadows sliders provide impressive dynamic range recovery. The camera profiles (Adobe Standard, Adobe Landscape, etc.) offer a solid starting point, though they can sometimes feel a bit flat. Where Lightroom really shines is its masking tools, which let you selectively adjust exposure across complex areas. However, Lightroom tends to be more aggressive with noise reduction in shadow recovery, which can soften fine details if you’re not careful.
Capture One takes a different philosophy entirely. Its Base Characteristics (similar to camera profiles) are renowned for producing richer colors straight out of the gate, particularly with specific camera manufacturers like Sony and Phase One. The Highlight Recovery slider in Capture One uses a gentler algorithm that preserves color information better in blown highlights compared to Lightroom. The downside? Its shadow recovery can introduce a slight color cast in deep shadows that requires correction. Capture One’s layer-based workflow is exceptional for complex HDR photography software adjustments, but the learning curve is steeper.
DxO PhotoLab deserves serious consideration for HDR work. Its Smart Lighting tool is arguably the most sophisticated automatic HDR tone-mapping available in a RAW processor. DxO’s camera profiles (which they call DxO Rendering) are meticulously calibrated for each camera-lens combination, resulting in exceptional optical corrections. The ClearView Plus feature can recover detail in hazy highlights that other processors simply give up on. The trade-off is a less flexible masking system and slower processing speeds.
Darktable and RawTherapee offer powerful open-source alternatives with highly technical controls. RawTherapee’s Tone Mapping module provides granular control over local contrast that professionals appreciate, while Darktable’s filmic module offers cinema-grade tone-mapping. Both require significant investment to master but reward dedicated users with capabilities matching commercial software.
For practical HDR work, consider this: Lightroom offers the best balance of power and accessibility for most photographers. Capture One is ideal if color accuracy and file-specific rendering matter more than speed. DxO PhotoLab excels when you need automatic intelligence with minimal intervention. Understanding these digital editing software features helps you choose the right tool for your specific needs rather than defaulting to what everyone else uses.
Troubleshooting Common HDR-in-RAW Problems
Even with careful RAW processing, you’ll occasionally encounter issues that make your HDR-in-RAW results look unnatural. The good news is that most problems have straightforward solutions once you understand what’s causing them.
Color shifts in recovered shadows are probably the most common complaint. You lift those shadows to reveal detail, and suddenly everything looks greenish, magenta, or just oddly saturated. This typically happens because camera profiles apply different color science to various tonal ranges. The Standard profile, for example, often adds significant saturation to midtones but can create muddy or overly warm shadow tones when pushed. The fix is surprisingly simple: switch to a neutral or flat profile before making shadow adjustments, which provides more accurate color information in darker tones. If you’ve already processed the image, add a slight HSL adjustment targeting the specific color channel that’s shifted, usually greens or magentas in shadow areas.
Blown highlight halos appear as bright, glowing edges around high-contrast areas, especially when you’ve aggressively pulled down highlights. This artifact occurs because extreme highlight recovery can create unnatural transitions between bright and dark areas. The culprit is usually the Dehaze or Clarity slider combined with heavy highlight reduction. To fix this, reduce or eliminate Clarity adjustments near high-contrast edges, and consider using a graduated or radial filter to apply highlight recovery more selectively rather than globally.
Unnatural skin tones often emerge when you’re processing landscapes with people in them, or portraits shot in challenging light. When you optimize for sky detail and shadow recovery, skin can turn gray, orange, or lifeless. The solution involves using luminosity masks or selective adjustments to process skin tones separately from the rest of the image. Apply your aggressive highlight and shadow recovery to everything except skin areas, then use targeted adjustments with a slightly warmer profile like Camera Portrait on just the skin regions.
Excessive noise in shadow recovery is inevitable to some degree, but you can minimize it by lifting shadows more conservatively and using the Exposure slider rather than the Shadows slider for moderate adjustments. The Exposure slider affects the entire tonal range more evenly, producing cleaner results than extreme shadow-specific adjustments.
Mastering HDR photography ultimately comes down to understanding that the magic happens before you ever touch specialized software. Your camera profile selection and RAW development technique form the bedrock of natural-looking results that preserve the scene’s authentic atmosphere rather than creating that telltale artificial glow. Think of camera profiles as the interpretive lens through which your sensor data becomes an image—choosing the right one for your subject and lighting conditions makes the difference between recovering detail and manufacturing it.
The beauty of this approach is that there’s no single correct answer. A landscape might benefit from Adobe Landscape’s saturation boost, while architectural work often demands the neutral starting point of Camera Standard. The key is experimentation. Spend time with different profiles on similar subjects, take notes on what works, and gradually build your personal workflow preferences.
Here’s your actionable takeaway: establish a consistent baseline workflow that you can reliably repeat. Choose a default profile for each genre you shoot, learn its behavior in highlights and shadows, and develop muscle memory for your adjustment sequence. This consistency transforms HDR development from guesswork into a predictable, efficient process that produces professional results every time you sit down to edit.