Enable hardware acceleration in your NLE’s preferences before importing footage—this single toggle can slash render times by 50-80% when working with 4K clips from modern mirrorless cameras. Your computer’s GPU sits largely idle during video editing unless you specifically activate this feature, leaving your CPU to struggle alone with demanding codecs like H.264 and H.265.
Check your graphics card compatibility first. NVIDIA and AMD GPUs from the last five years generally support acceleration in Premiere Pro, DaVinci Resolve, and Final Cut Pro, but older cards may cause crashes or produce artifacts in your exported files. Run a test export with a short clip before committing to a full project—compare the accelerated version against CPU-only rendering to verify quality matches your standards.
Understand the codec limitations. Hardware acceleration excels with common camera formats like H.264, HEVC, and ProRes, but struggles with less common codecs or heavily compressed smartphone footage. You’ll notice the biggest performance gains during timeline playback and color grading, particularly when stacking multiple adjustment layers or applying effects like stabilization and noise reduction.
Monitor your system temperature after enabling acceleration. Some laptop GPUs throttle under sustained load, actually reducing performance compared to CPU rendering. If your machine runs uncomfortably hot or the fans become distractingly loud during exports, consider toggling acceleration off for longer projects or investing in better cooling solutions before your next demanding edit.
What Hardware Acceleration Actually Does for Your Video Workflow
CPU vs GPU: Understanding the Performance Split
Think of your CPU as a brilliant multitasker who can juggle many different tasks, but handles them one at a time. Your GPU, on the other hand, is like having thousands of workers who aren’t as individually clever, but can tackle massive, repetitive jobs simultaneously.
For photographers moving into video editing, this distinction matters tremendously. When you apply a simple exposure adjustment to a single photo in Lightroom, your CPU handles that efficiently. But when you need to render that same adjustment across 4K video—essentially processing 24 or 30 separate images every second—your CPU quickly becomes overwhelmed.
This is where GPU acceleration shines. Tasks like color grading, applying effects, scaling footage, and rendering previews involve performing the same operation across millions of pixels repeatedly. Your graphics card’s parallel processing architecture was designed specifically for this kind of workload.
A practical example: exporting a 10-minute 4K video with basic color correction might take 45 minutes using only your CPU. Enable GPU acceleration, and that same export could finish in under 10 minutes. The GPU doesn’t necessarily work faster on individual frames, but it processes dozens or hundreds of frames simultaneously, creating that dramatic time savings you’ll notice immediately in your video editing workflow.
The Tasks That Get the Biggest Speed Boost
Not all video editing tasks tap into your graphics card’s power equally. Understanding which operations benefit most from hardware acceleration helps you decide whether enabling it makes sense for your workflow.
Rendering and preview generation see the most dramatic improvements. When you’re scrubbing through your timeline or watching a quick preview of your edit, hardware acceleration can turn choppy, stuttering playback into smooth, real-time viewing. This is especially noticeable with 4K footage from modern mirrorless cameras like the Canon R5 or Sony A7S III.
Effects processing is another huge winner. Those beautiful transitions, sharpening filters, and stabilization adjustments that would normally bring your computer to its knees? With GPU acceleration enabled, they calculate almost instantly. You’ll notice this particularly with stacked effects—applying multiple adjustments to a single clip becomes far more manageable.
Color grading operations benefit significantly as well. When you’re adjusting exposure curves, tweaking color wheels, or applying LUTs, hardware acceleration lets you see changes in real-time rather than waiting for each adjustment to process. This immediate feedback transforms the grading experience from frustrating to fluid.
Finally, encoding and exporting get substantial speed boosts. Rendering out your final video can be two to five times faster with hardware acceleration, especially when working with H.264 or H.265 codecs. That hour-long export might shrink to just fifteen minutes.
The common thread? These are all computationally intensive, repetitive calculations—exactly what modern GPUs excel at handling.
The NLE Compatibility Puzzle: Why Your Software and Hardware Must Align
Popular NLEs and Their Hardware Acceleration Support
Not all editing software treats hardware acceleration the same way, and understanding these differences can save you hours of frustration when you’re working with your photo sequences or video clips.
Adobe Premiere Pro offers comprehensive GPU acceleration through three options: Mercury Playback Engine with software only, CUDA (for NVIDIA cards), and Metal (for Mac). Many photographers gravitate toward Premiere Pro because it integrates seamlessly with Lightroom and Photoshop. When you enable GPU acceleration here, you’ll notice faster rendering of transitions, color grading adjustments, and effects—similar to how you might experience quicker processing when applying batch edits to photos. Premiere Pro particularly excels with NVIDIA cards when using CUDA acceleration, though recent updates have improved performance on AMD hardware as well.
DaVinci Resolve takes a different approach, arguably offering the most robust hardware acceleration among NLEs. It’s designed from the ground up to leverage GPU power, especially for color grading—a feature that naturally appeals to photographers who already think in terms of color correction. Resolve supports both NVIDIA and AMD cards effectively, and the free version includes full GPU acceleration support. Real-world performance gains can be dramatic: timeline playback that stutters with software-only processing often becomes butter-smooth once GPU acceleration kicks in.
Final Cut Pro remains exclusive to Mac users and relies entirely on Metal for hardware acceleration. Apple’s tight integration between hardware and software means Final Cut Pro often delivers exceptional performance even on modest MacBook Pros, making it popular among photographers who shoot hybrid photo-video content on location.
For Windows users, programs like Sony Vegas Pro and Avid Media Composer also support various forms of hardware acceleration, though they’re less commonly used by photographers transitioning into video work.
Codec Compatibility: The Missing Link
Here’s the thing about hardware acceleration: it’s only as good as the relationship between your camera’s codec and your computer’s GPU. Think of it like a conversation—some formats speak the same language as your graphics card, while others need constant translation.
H.264 is the golden child here. Nearly every modern GPU has dedicated hardware to decode this codec, which is why footage from most mirrorless cameras and DSLRs plays so smoothly when hardware acceleration is enabled. Your Canon EOS R or Sony a7 series footage? Those H.264 files will fly through editing with GPU acceleration turned on.
H.265 (also called HEVC) is more complicated. While it offers better compression and smaller file sizes—great for your storage—not all GPUs handle it equally well. Newer graphics cards from NVIDIA (GTX 1060 and later) and AMD (RX 5000 series onward) have hardware HEVC decoders built in. Older cards might struggle, forcing your CPU to do the heavy lifting instead, which defeats the purpose of hardware acceleration entirely.
Then there’s ProRes, Apple’s professional codec. This is where codec compatibility gets interesting. ProRes files are less compressed and easier for processors to handle, but they rely more on CPU power than GPU acceleration. Enabling hardware acceleration with ProRes footage might not give you the performance boost you expect.
The key takeaway? Check what codec your camera records in, then verify whether your GPU actually supports hardware acceleration for that format before toggling the setting.
When to Enable Hardware Acceleration (And When to Skip It)
The Sweet Spot: High-Resolution Editing and Effects-Heavy Projects
Hardware acceleration truly earns its keep when you’re pushing serious pixels and layering complex edits. Let’s look at where it makes the biggest difference.
If you’re editing 4K or 8K video footage from modern mirrorless cameras like the Sony A7S III or Canon R5, hardware acceleration transforms the experience from frustrating to fluid. Scrubbing through 8K timelines without acceleration feels like dragging your mouse through molasses—you’ll see stuttering previews and wait several seconds for playback to catch up. Enable GPU acceleration, and that same timeline plays back smoothly in real-time, letting you focus on creative decisions rather than technical limitations.
Time-lapse sequences assembled from high-megapixel stills present another sweet spot. When you’re compiling hundreds of 45-megapixel Raw files from a Canon R5 into a 4K time-lapse, your processor needs to downscale and process massive amounts of data. Hardware acceleration offloads this computational heavy lifting to your GPU, cutting render times dramatically—often by 60-70 percent.
Multi-layer composites benefit enormously as well. Picture a project combining multiple video layers, color grading adjustments, stabilization, and motion graphics overlays. Each layer compounds the processing demand. Without acceleration, adding that fourth or fifth layer might drop your preview to an unwatchable slideshow. With it enabled, you maintain real-time playback even with complex layer stacks.
Color grading operations, particularly when working with LOG footage from cinema cameras, see substantial performance gains. GPU acceleration handles the mathematical calculations behind LUT applications and color space conversions far more efficiently than CPU-only processing.
When Software Rendering Wins
Hardware acceleration isn’t always the hero of the story. While it speeds up most workflows beautifully, there are specific situations where your CPU actually delivers better results.
If you’re working with 10-bit footage or HDR content, you might notice color banding or subtle quality degradation with GPU rendering enabled. This happens because some graphics cards prioritize speed over precision when processing these high-bit-depth files. When color accuracy matters more than rendering speed—say, for a client project or fine art video—switching to software rendering ensures you’re seeing exactly what you intended.
Older or budget-friendly graphics cards sometimes struggle with specific codecs, particularly proprietary formats from certain camera manufacturers. If you’re experiencing random crashes, artifacting, or corrupted exports that disappear when you disable hardware acceleration, your GPU might not fully support that codec. Think of it like asking a portrait lens to shoot landscapes—it’ll work, but it’s not the ideal tool.
Preview rendering is another edge case worth mentioning. When scrubbing through footage or making precise color corrections, software rendering occasionally provides smoother, more accurate previews. The difference is subtle, but noticeable when you’re pixel-peeping.
The practical advice? Test both ways on a short segment before committing to a long export. If you notice quality issues, crashes, or visual artifacts with hardware acceleration enabled, don’t hesitate to switch it off. A slower, stable render beats a fast, flawed one every time. Remember, these tools exist to serve your creative vision, not the other way around.
How to Enable and Optimize Hardware Acceleration in Your Setup
Checking Your Hardware Capabilities
Before enabling hardware acceleration, you’ll need to confirm your system is actually equipped to handle it. Think of this as checking whether your car has the engine you think it does before planning a cross-country road trip.
For Windows users, the quickest method is opening your Task Manager (Ctrl+Shift+Esc), clicking the Performance tab, and looking for a GPU listing. This shows your graphics card model and often indicates whether it supports specific technologies. NVIDIA cards support CUDA (their proprietary acceleration standard), while AMD cards use OpenCL. Intel’s integrated graphics offer QuickSync, which is surprisingly capable for basic video work.
Mac users have it simpler since Apple controls the hardware ecosystem. Any Mac with an M1 chip or newer uses Metal acceleration, while older Intel-based Macs with discrete graphics also support Metal. You can check your Mac’s specifications by clicking the Apple menu, selecting About This Mac, and reviewing the graphics information.
Once you know your GPU model, visit the manufacturer’s website to verify supported standards. For example, if you’re running an NVIDIA GeForce RTX 3060, you’ll find it supports CUDA, which pairs beautifully with Adobe Premiere Pro and DaVinci Resolve. This compatibility check matters because enabling acceleration with unsupported hardware can actually slow things down or cause crashes—defeating the entire purpose of the feature.
Platform-Specific Configuration
Let’s walk through enabling hardware acceleration in the most popular editing programs photographers use when they’re venturing into video work.
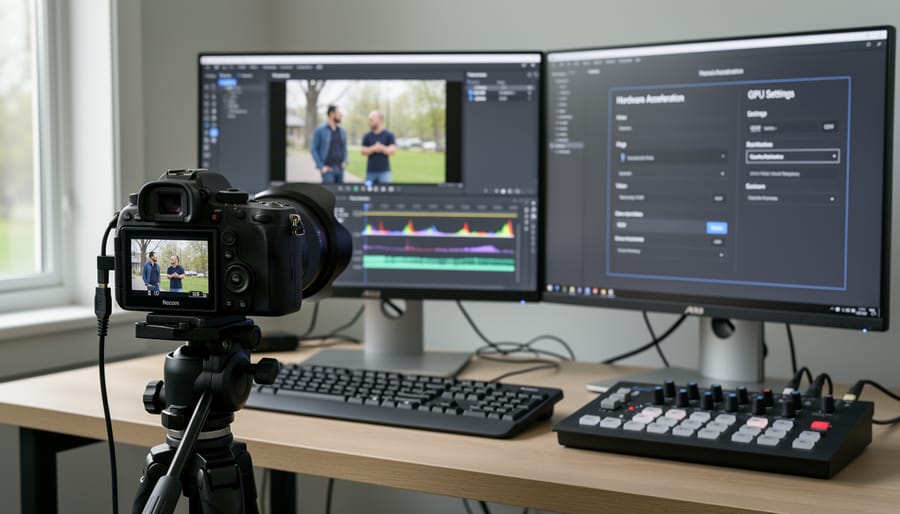
In Adobe Premiere Pro, head to File menu, then Preferences, and select Media. Here you’ll find the “Enable hardware accelerated encoding” checkbox—make sure it’s ticked. Next, go to Preferences and click Playback. Under the Video Rendering and Playback section, you’ll see a Renderer dropdown menu. If you’re on Windows with an NVIDIA card, select Mercury Playback Engine GPU Acceleration (CUDA). Mac users with newer machines should see Metal listed. AMD users will see OpenCL. This dropdown is essentially asking your computer which graphics processor to use for the heavy lifting. Don’t worry if you see “Software Only” as an option—that’s what you’re trying to avoid by being here.
DaVinci Resolve makes things slightly more straightforward. Open Preferences from the main menu, then navigate to the Memory and GPU section. You’ll see all available GPUs listed with checkboxes next to them. Enable the ones you want Resolve to use. If you have multiple graphics cards, you can actually select them all, and Resolve will distribute the workload. In the same preferences window, look for “GPU configuration” and ensure it’s set to Auto or CUDA/Metal/OpenCL depending on your system.
Final Cut Pro users have it easiest since Apple tightly integrates hardware acceleration by default. You’ll find minimal settings to adjust, but you can verify it’s working by opening Preferences, selecting Playback, and confirming “Background render” is enabled. The software handles most optimization automatically, taking full advantage of your Mac’s dedicated hardware.
One practical tip: after enabling these settings, create a short test sequence with your typical camera footage and notice the playback difference. This real-world verification confirms everything’s working correctly before you commit to editing a full project.
Troubleshooting Common Problems
Hardware acceleration isn’t always smooth sailing, and you’re not alone if you’ve encountered hiccups. If your editing software crashes immediately after enabling this feature, your graphics drivers are usually the culprit. Visit your GPU manufacturer’s website and download the latest drivers directly—don’t rely on automatic Windows updates, as they often lag behind. After updating, restart your computer before re-enabling hardware acceleration.
Seeing strange visual artifacts like blocky edges, color banding, or flickering during playback? This typically signals a codec compatibility issue. Try disabling hardware acceleration specifically for that clip or consider transcoding your footage to a more acceleration-friendly format like ProRes or DNxHD. Sometimes certain camera-generated codecs simply don’t play nicely with GPU processing.
If you’ve enabled hardware acceleration but notice zero performance improvement, check your task manager while editing. Your GPU usage should spike during rendering and playback. If it stays low, your NLE might be defaulting to CPU processing despite your settings. Look for additional GPU-specific options in your software’s preferences—some programs require you to select your specific graphics card from a dropdown menu. Also verify that your laptop isn’t using integrated graphics instead of your dedicated GPU, which is a common oversight that undermines performance entirely.
Real-World Performance: What Speed Gains to Actually Expect
Let’s talk numbers, because that’s what really matters when you’re deciding whether to dive into hardware acceleration settings.
If you’re working with 4K footage from your mirrorless camera on a system with integrated graphics, you might see timeline playback drop from a choppy 12-15 frames per second to a smooth 24-30 fps once hardware acceleration kicks in. That’s the difference between frustratingly clicking through frame by frame versus actually watching your edit flow naturally. For a photographer editing a two-minute wedding highlight reel, this transforms what might have been a three-hour slog into a manageable hour-long session.
Export times show even more dramatic improvements. A five-minute 4K sequence that previously took 45 minutes to export on CPU alone might drop to 15-20 minutes with a mid-range dedicated GPU handling the heavy lifting. If you’ve got a newer graphics card like an NVIDIA RTX 3060 or better, those same five minutes could export in under ten minutes. These aren’t manufacturer claims—these are the real-world gains photographers report when editing their first video projects.
However, manage your expectations based on your hardware tier. A basic laptop with integrated graphics might see modest 20-30 percent improvements in rendering speed, while a desktop workstation with a dedicated GPU could experience 60-80 percent reductions in export time. The sweet spot for most photographers expanding into video sits with mid-range dedicated graphics cards, where you’ll notice genuinely transformative speed improvements without breaking the bank.
One practical benchmark: if you’re currently making coffee during exports, hardware acceleration should reduce that to checking your phone. If you’re leaving the room entirely, you’ll cut that down to coffee-making time. The technology won’t make everything instantaneous, but it will absolutely reclaim hours of your week that you’d rather spend shooting or refining your craft.
Upgrading Your Hardware for Better Acceleration
If you’ve found yourself waiting longer than you’d like for those video timelines to render, it might be time to consider a hardware upgrade. The good news is that you don’t necessarily need to overhaul your entire system—strategic upgrades can make a substantial difference in your photo-to-video workflow.
When photographers ask me what component matters most for hardware acceleration, the answer is clear: prioritize your GPU. While CPU upgrades offer incremental improvements across all tasks, a dedicated graphics card specifically accelerates video encoding, decoding, and effects rendering. This is where you’ll see the most dramatic performance gains when working with 4K footage from modern mirrorless cameras. For budget-conscious upgraders, putting your money into a mid-range GPU will typically deliver better results than upgrading to a top-tier CPU.
For those working primarily with Adobe Premiere Pro or DaVinci Resolve, NVIDIA cards generally offer the broadest compatibility with hardware acceleration features. The RTX 3060 represents an excellent entry point for most photographers transitioning into video, offering 12GB of VRAM that handles multiple 4K timelines comfortably. If your budget allows, the RTX 4060 Ti or 4070 provide even better performance with newer encoding technology. AMD’s RX 6700 XT and 7700 XT cards also deliver strong value, though you’ll want to verify compatibility with your specific editing software first.
Don’t overlook RAM when planning upgrades. While 16GB might suffice for photography work, video editing with hardware acceleration benefits significantly from 32GB or more, particularly when you’re running effects-heavy projects or working with an external monitor setup for color grading.
Future-proofing considerations matter here. With 8K becoming more accessible and AI-powered video features gaining traction, investing in a GPU with at least 12GB of VRAM ensures your system remains capable for the next several years. Similarly, choosing hardware that supports AV1 encoding prepares you for emerging codec standards that many platforms are beginning to adopt.
Consider your actual shooting resolution when budgeting. If you’re primarily creating 1080p content for social media, mid-range hardware will serve you well. Regularly working with 4K60p or planning to shoot higher frame rates justifies premium components that can handle the increased data throughput without bottlenecking your creative process.
Hardware acceleration can transform your video editing experience from frustrating to fluid, but only when it’s properly configured and compatible with your entire workflow. As we’ve explored, the decision to enable this feature isn’t always straightforward—it depends on your specific NLE, the footage formats you’re working with, and the GPU in your system. The good news? Once you find the right combination, you’ll see tangible improvements in playback smoothness, rendering times, and overall responsiveness that make the troubleshooting worthwhile.
Before you rush out to purchase a new graphics card or switch editing software, take time to experiment with your current setup. Toggle hardware acceleration on and off in your NLE’s preferences, test it with different codec types, and actually measure the performance differences you’re seeing. Monitor your GPU usage during exports and playback to understand whether you’re truly benefiting from acceleration or if your bottleneck lies elsewhere—perhaps in storage speed or RAM.
Start with these practical next steps: update your graphics drivers, verify your NLE supports acceleration for your camera’s native codec, and run small test exports comparing hardware versus software rendering. Document what works best for your specific workflow, because these settings aren’t universal. What transforms editing for one photographer might cause instability for another, and that’s completely normal in the diverse ecosystem of video editing tools.